Happy Wednesday Ai Fans!!!
Watch video tutorial here!!!
I'm so thrilled to be showing you the brand-new Ai Birdie Betty (6080) stamp set today! This adorable golfing lady is just extra cute and special. I know so many golfers that would love to receive a card with this little lady!
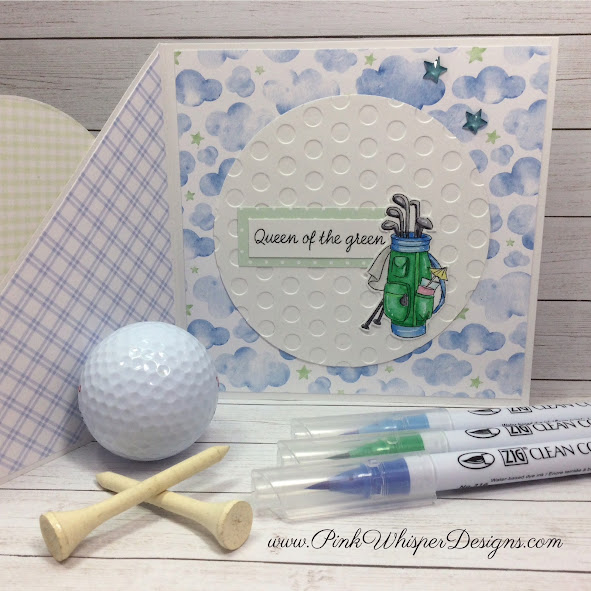
We will create a fun a triangle fun fold card using the Ai Baby Boy Paper Pack (6058). It's always fun to look through your papers and see if you can use them in a new and different way. We will use the pretty cloudy and starry sky and some fun polka dots and plaids.
Let's begin by creating the square card base and with some simple cutting we can create this triangle flap and coordinating layers. I'll show give you the exact measurements and instructions in today's video!
For the circle shapes, we will use the Ai Nested Circle Dies (5726) in a few different sizes. The larger one will be from some polka dot paper and the smaller one will be from some 100lb white cardstock ... but to make this really fun we will emboss this circle with the "Lots of Dots" embossing folder and this will look just like a golf ball! You will actually want to use the back side of the embossed circle ... those indented circles will perfectly mimic the texture of a real golf ball!
We will glue these two together and attach them to the front of the card. We will just be gluing one half of the circle to the triangle flap. What's really nice is that the double-sided paper will give us a pretty pattern on the inside of the card as well.
Next, we can stamp, color and die-cut the lady and golf bag! All of today's coloring was done using the Zig Clean Color Real Brush Pens in the following colors: Blender, Sugared Almond Pink, Pale Yellow, Flesh Colour, Beige, Ice Blue, Hyacinth Blue, Iris Blue, Emerald Green, Lt Gray, Gray.
We can grab a white gel pen and add some fun polka dots to her golf shirt and also add a few highlights!
Let's also add a sentiment from this same set that says, "Still got it." Simply cut this into a sentiment strip and add a bit of plaid paper to frame it nicely.
We can pop-up the little lady with some 3D Foam Squares for some added interest and dimension.
Going to the inside of the card we will die-cut another of the larger circle from that same die set and emboss that with the same dotted texture! I will show you a little trick for attaching this perfectly behind the circle on the front of the card.
Glue in another sentiment from that same set that says, "Queen of the Green" and frame that with some polka dotted paper. Now you can glue down the golf bag as well.
As a finishing touch, and to mimic the stars in the pattern paper, we will and some crystal stars in a pretty blue color!
This card design gives you a fun way to use your paper packs to create a unique card design! Do keep in mind that the square cards will require a bit more postage so be sure to ask your postal office about the difference in price. I usually just hand mine to the intended recipient when it is a square card so that I can avoid that all together!
Thank you so much for joining me today! Have a fun and crafty day!!!


2 comments:
Great job! Love the dotted golf ball design.
Love this Lynn! Thanks for the tip on getting the inside circle to match up with the outside circle!
Post a Comment