Well, can you believe it's already time for Fall and Watercolor Weekend? This year has certainly been a roller coaster. I am not quite ready for the cool weather yet, holding out for a few more nice days. I found this card in my stash and made it into a card. I love the “Dear Friends” sentiment. I hope you’ll be inspired to take some of your creations, make them into cards and share them.
The Painting
First I took a vase and inked it up with my 569 and stamped it off twice. I wanted it to be really light. I stamped it on my watercolor paper. Next I used water to soften the lines, making sure to keep close to the line with plenty of white space. To create the water in the vase, I took some blue from my palette and painted following the line of the vase. Make sure you put your color down where you want it to be the darkest and use water to lighten it towards the middle. The vase is round so you want your shadows to be on the outside.
Using the buds from the flower set 4, I inked them in green and pink/purple. I used my positioner so that I could get them in the right spot in the vase. I stamped it twice and then re-inked the stamp. I wanted them to be crisper. I added some water to the stems in the vase to blur them. I lightly touched each bloom with water.
Finally, I added some 569 to the bottom of the vase to ground it and used some water to soften it out. Lastly, I signed and dated my painting.
The Card
I placed the finished painting into my MISTI and lined up my circle sentiment from the WC Sentiment set around the vase. I inked it up with Gina K Designs Amalgam ink and stamped it twice. I ran it through my big shot machine using the Stitched Circle die. I also cut some Gina K Designs Plum Punch card stock using the next largest Circle. I cut the circle from the middle of my mat that I cut to 5.25x4 inches. Tip: This saves money on card stock.
To create the background, I used a piece of watercolor paper and the same marker that I used for the flowers. I added some to my palette and with a lot of water just started layering colors. I let some dry and left some wet, I like the blooms.
I adhered all the layers together, added some sequins and VOILA…a card for that dear friend who could use a smile
Thank you so much for stopping by and I hope you get to do something creative today!
Dot Freel - Instagram - Blog - Pinterest- YouTube
Hello and Happy Labor Day weekend!
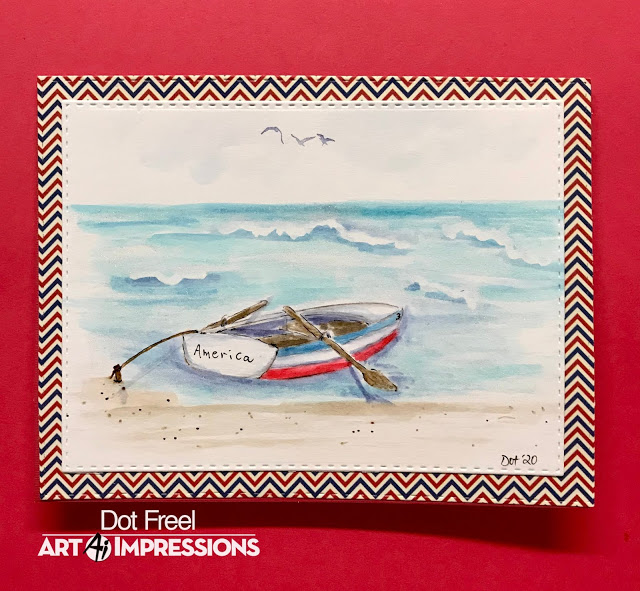
I made this card for the Art Impressions Watercolor Weekend. Be sure to check out their blog for lots of inspiration. Summer always finds me wishing I was at a lake or ocean. Since it's almost Labor Day, the end of summer, I made one last patriotic card.
I posted a video on YouTube and here is the link https://youtu.be/0s5MHcY5pL0

 Thank you, ladies, for your wonderful weekend additions to our blog!





No comments:
Post a Comment