Happy Wednesday Ai Fans!!!
Watch video tutorial here!!!
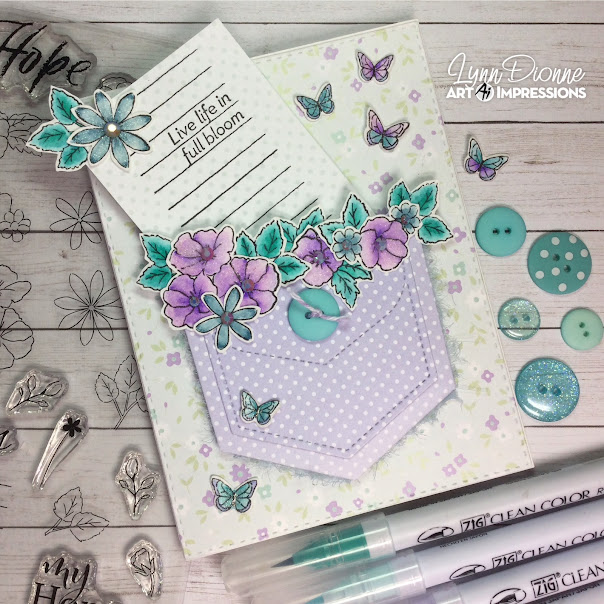
In today's video we are going to create a super fun Fringed Floral Gift Card Pocket! This card was inspired by the current Art Impressions "Not Just Paper" Blog Challenge which is to create a card or project that isn't just paper. So, let's add some fabric, a button, some gems and a bit of twine to today's card!
For our floral images and leaves we will be using the Ai My Hope Set (5936). This set also includes these really wonderful, stamped lines which we will be using on our pocket tag! The little butterflies are from the Ai Birds and Bugs Set (5561).
Let's go ahead and stamp and color all of our images using the Zig Clean Color Real Brush Pens in the following colors: Blender, Ice Blue, Aquamarine Blue, Sea Green, Turquoise Green, Smoky Teal, English Lavender, Violet.
Now we can create our pocket and background panel using the Ai Fairy Garden Paper Pack (5939). We can die cut the pieces for the pocket out of the lavender polka dot paper and the background from the pretty coordinating floral paper using the Ai Rectangle A2 Double Stitched Dies.
We will add some fabric fringe to the outside edges of the pocket...love this look! Let's also add a teal-colored button to the pocket with a bit of lavender and white twine tied in a knot.
Next, we can assemble the card base and pocket...and also add the florals, leaves and butterflies. To add a bit of sparkle we will add some Wink of Stella Clear Glitter to these items.
To create the tag for the pocket, let's cut some patterned paper a bit larger than the gift card. On one side of the tag, we will stamp those lines that I mentioned earlier and then we can also stamp a sentiment using the Ai Friend Sentiments Set (5734). I was so happy when this sentiment fit perfectly on these lines!
We can add a flower and leave to the tag and then add a pretty gem to the centers of each of our flowers!
All we need to do is attach the gift card to the tag or just simply place it in the pocket if you don't want to tape it down. This pocket would also be great for some money as well! You could also just simply write a sweet message on this tag and tuck it into the pocket if you prefer!
Thank you so much for joining me today! Have a fun and crafty day!!!
Rectangle A2 Double Stitched Dies (5063)
Fairy Garden Paper Pack (5939)


No comments:
Post a Comment