Happy Wednesday Ai Fans!!!
Watch video tutorial here!!!
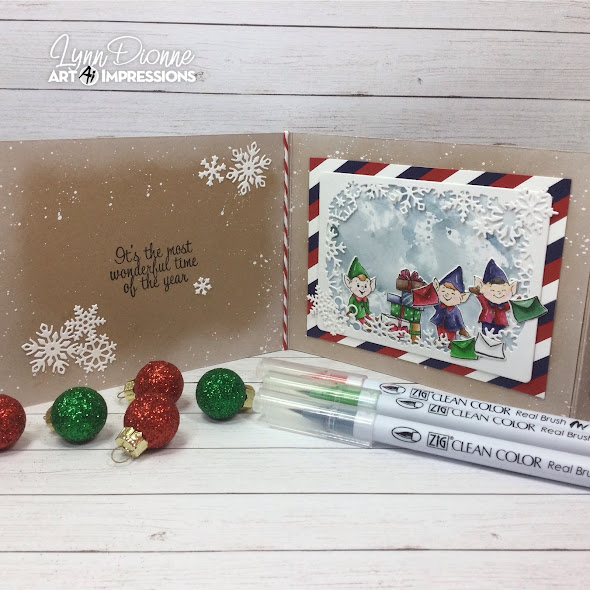
Today we will be playing with a wonderful new set from Art Impressions! It is the Ai Santa's Workshop Set (5930) and it includes several cute little elves, Santa, envelopes, packages, a cute little elf house and several fun sentiments! This set also includes the coordinating dies which is always a bonus!
I recently did a card and video using this fun set and turned the little Christmas Elves into Woodland Elves. This card mixes some Christmas, Fall & Halloween Stamp Sets together for a fun look! I will link that down below for you if you would like to check it out!
To get started we will create a red/white/blue striped background using some paper strips. This is a great way to use your paper scraps. I thought it would be fun to create a postal "Letters to Santa" theme and this striped background will complement the postal theme perfectly!
Next, we can create the card base using some Kraft cardstock. We will create two A2 top folding cards and glue them together to create the accordion design. We can also add some white ink and white spatters to this card base to give it a softer and snowier look!
Now we can die-cut 3 of the snowflake frames from the Ai Snowflake Frame Set (5782) and we can also cut out the additional snowflakes from this same set.
To create the pretty blue sky, we will be doing an ink smooshing technique that is so much fun and so easy to do! I will show you exactly how to do this in today's video!
Let's attach the sky background to the snowflake frames and attach this to the striped background that we created earlier. Now we can attach each of these three panels to the card base.
We will also stamp, color and die cut all of the images including some extra envelopes and packages. All of the coloring today will be done using the Zig Clean Color Real Brush Pens in the following colors: Blender, Flesh Colour Sugared Almond Pink, Deep Red, Geranium Red, Yellow, May Green, Deep Green, Blue Gray, Deep Blue, Beige, Sand, Lt Gray, Mid Brown, Gray, Warm Gray 6. Once this is done, we will layout and assemble the pieces onto the card panels. This is the fun part...just deciding where you want all of the little images to appear in your scene!
Using the snowflakes that we die-cut, we can add them to the snowflake frames and to the inside of the card. We will stamp a sentiment here as well from the Ai Joyful Snowman Set (5802) and it will say "It's the most wonderful time of the year". This will be a great place to write a little message and sign your card.
Finally, let's add a bit of red and white twine and tie a pretty bow!
Here is that video that I mentioned earlier:
Thank you so much for joining me today! Have a fun and crafty day!!!
Ai Santa's Workshop Set (5930)
Ai Watercolor Travel Box (4924)
Dr Ph Martin's Bleed Proof White Ink


1 comment:
Beautiful card and great inspiration!
Post a Comment