Showing posts with label Snowflake Dies. Show all posts

Thursday, December 7, 2023

Clean and Simple Snowflake cards by Reneé Matarese

Are you as busy as I am this time of year?
I still love to create though so a quick card is sometimes called for.

I created two simple cards for the Clean and Simple challenge going on right now,
here on the Art Impressions blog.


Including the planning, I had these two cards done in just over 30 minutes.  That's
probably a record for me.


I love rustic Christmas cards and in some cases I feel like Kraft paper looks a little like leather.
When you add the twine it gives a nice look.


After die cutting the snowflakes I simply left them in place and glued them
to the designer paper.


Metal also says rustic Christmas to me so I added a metal dot
on a smaller snowflake in the center.


All Ai products used are linked below.  Enjoy this holiday season!


Sunday, November 20, 2022

Penguin Cheer and FAB-YULE-OUS Girlfriends! by Reneé Matarese

 Hello Ai fans!

Today I'm sharing two cards with you.

My first card is a Christmas card that I made for the Diamonds and Pearls challenge going on right now and my second card was made using the current Simon Says Stamp Art Impressions Exclusive!


These oh so cute penguins are from 5192 – Penguin Cheer Set.


I used the 4804 – Snowflake Dies set to give this even more of a winter wonderland feeling.


Here's my second card using the soon to be gone forever exclusive.
Get yours NOW before they sell out!

Art Impressions Simon Says Stamp
EXCLUSIVE FAB-YULE-OUS FRIENDS Clear Stamps sse22c


The stars are from 5543 – Journal Template Die Set and the sentiment was stamped on 
5463 – Slimline Dies Set.

Sunday, September 11, 2022

Baby Boy Matchbook and Chubby Snowman by Reneé Matarese

 Hello Ai fans!

I'm sharing two cards today.

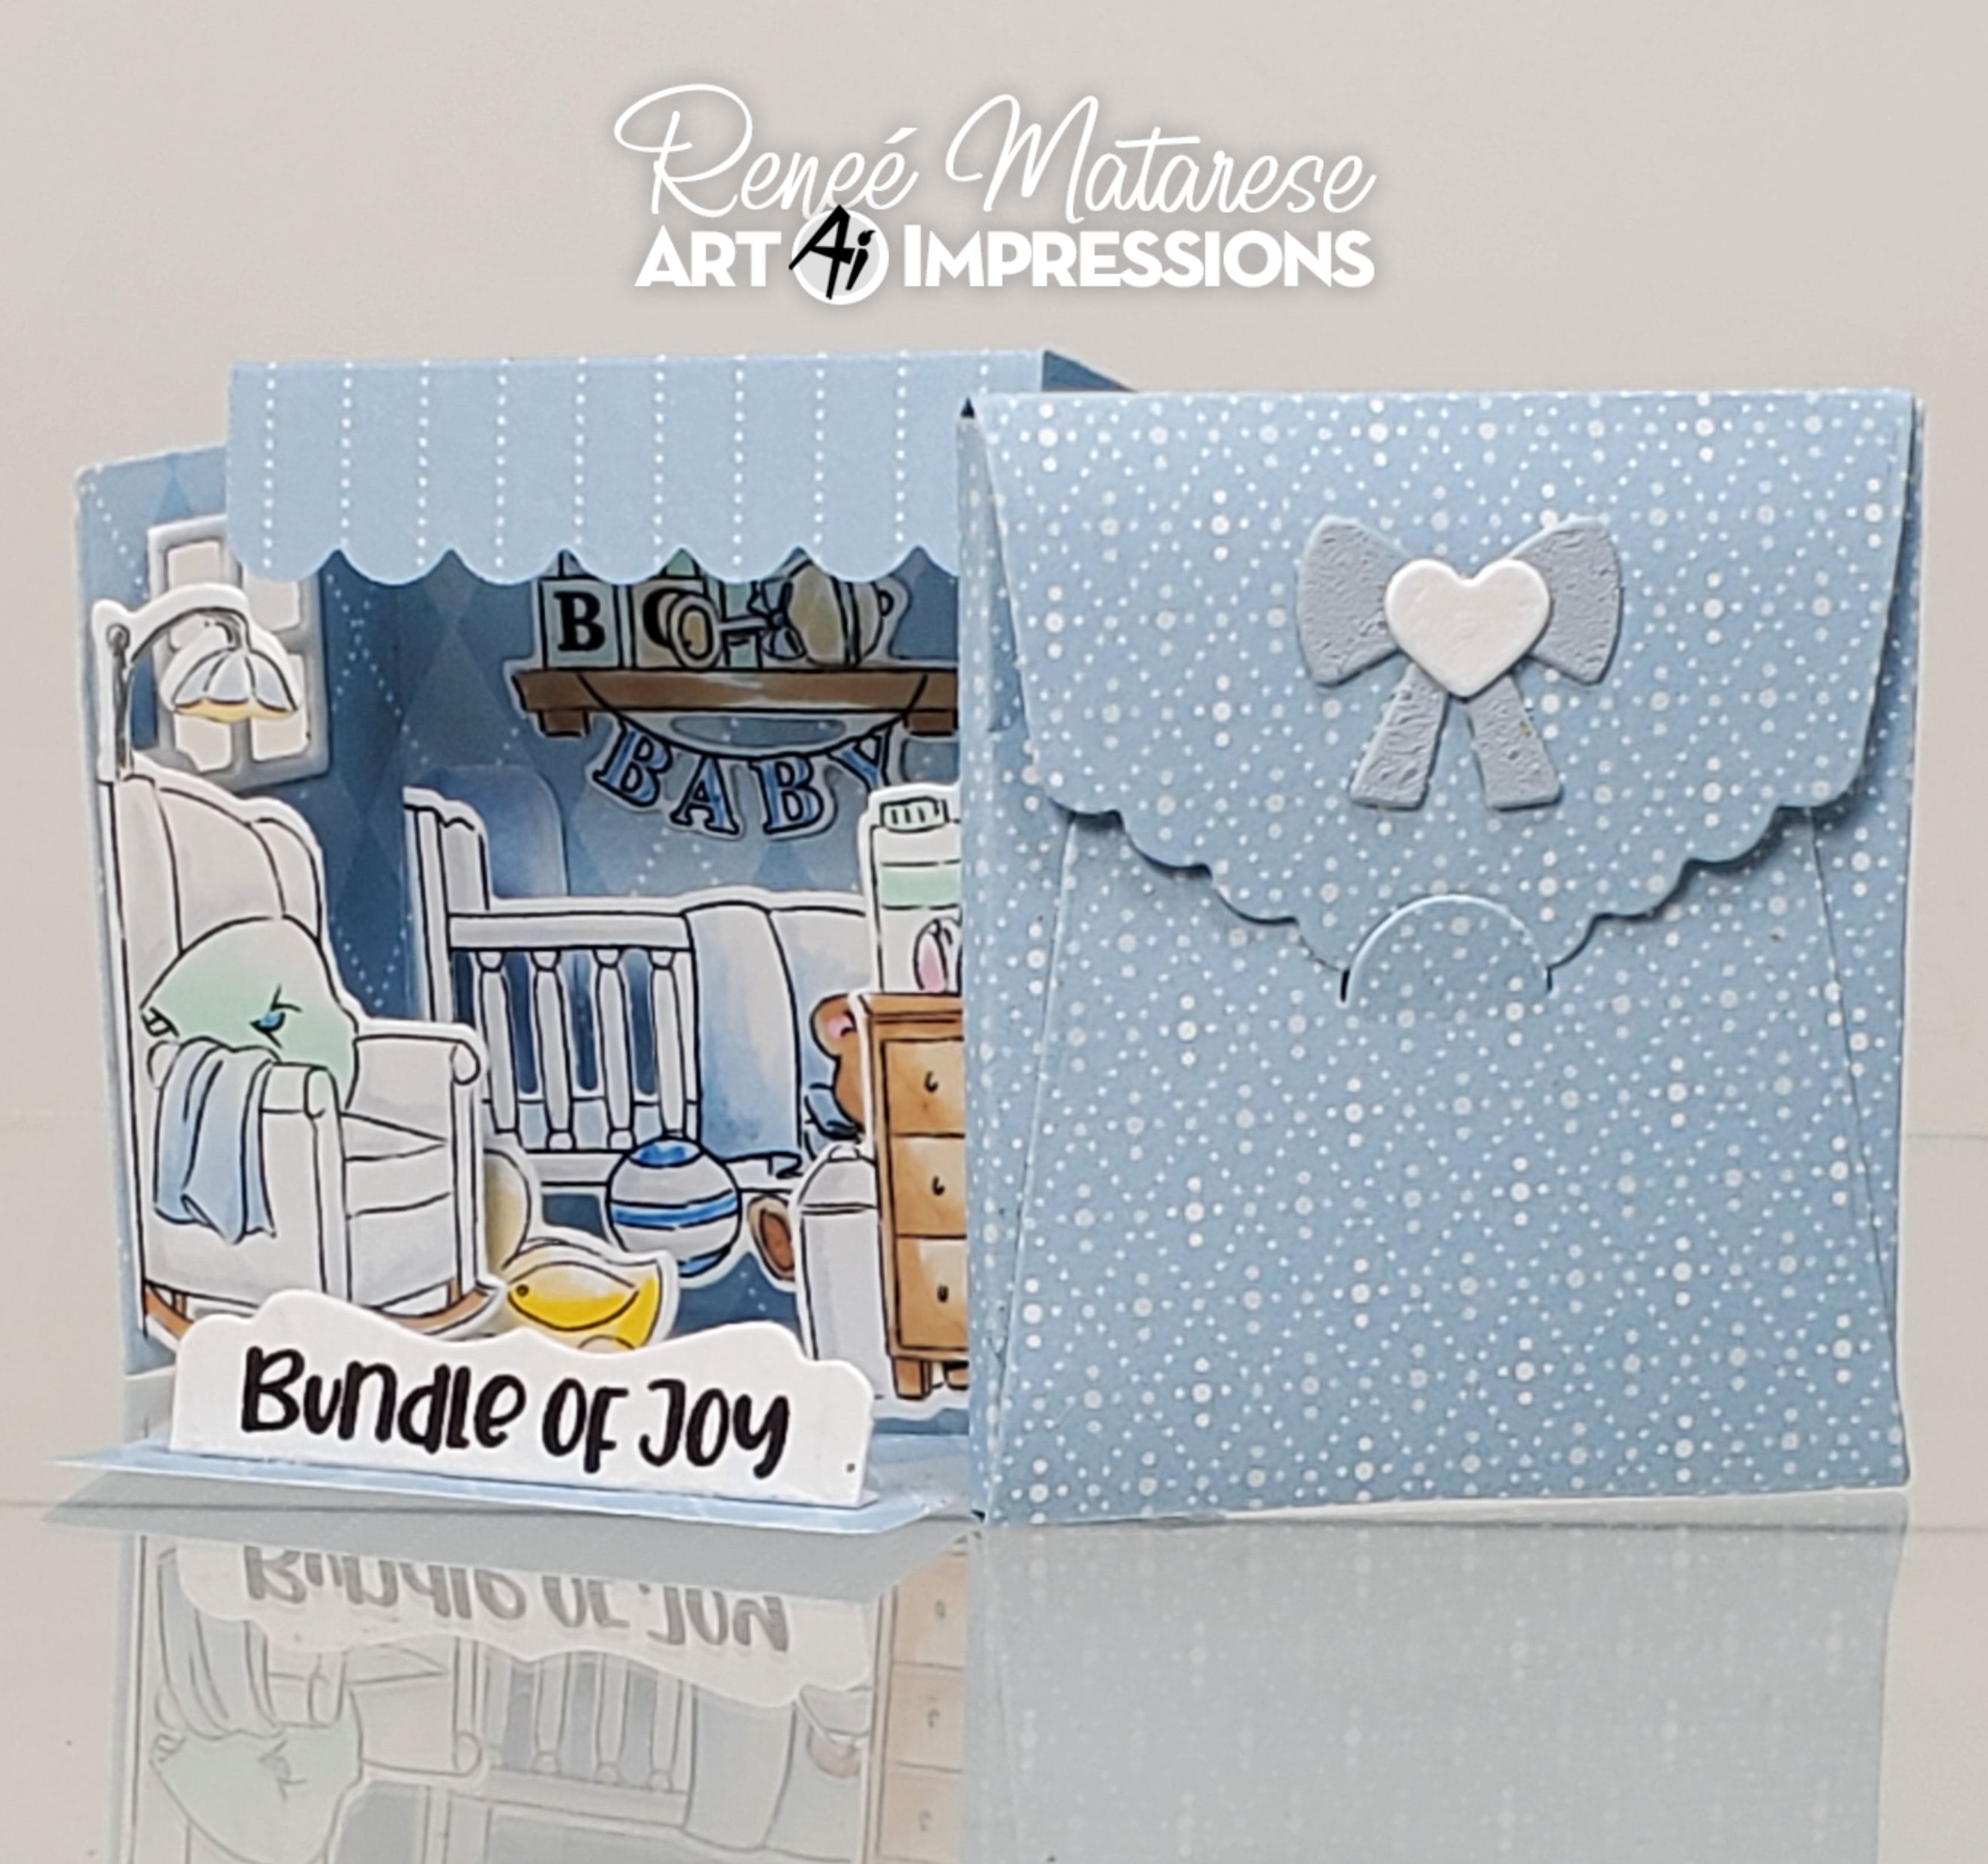
My first card is a Matchbook.

These little scenes are just the cutest thing EVER and SO much fun to make.
They may look difficult to assemble but thanks to the included dies that cut them out and create the little tabs to glue, they're very simple.


You'll need the 5317 – MB Template Dies to create your scene.  Once you have that, you can build any Matchbook you like.


You can also add the 5318 – MB Envelope Dies to your collection so you have a tiny, perfectly sized envelope to place you MB into.


The template comes with a little easel so that you MB will have no trouble standing up.
The little windows are also part of the template and will work with all of the different sets.


My next card isn't really a card.  This is a little scene that I created for the Woodn't it be Nice! challenge that's currently on the Art Impressions blog.


I used the little easel dies from 5543 – Journal Template Die Set to prop up my little scene.


I feel like this would be so cute on a window sill, mantle or even a co-workers desk!  It's so cute and is the perfect little touch at Christmas time.  Maybe on a table in your foyer to greet people??


All Art Impressions products are linked below. I hope you have a wonderful weekend full of craftiness!


Copics used on Baby Boy Matchbook:

B41, B93, Y19, Y23, Y32, R83, BG11, C1, C2, N4, E00, E23, E30, E3, E37
Tombow 526
Twin Tone Sax Blue
LePen 0.1

I apologize,  I can't find the paper where I recorded the colors used on my snowman.  They're probably very similar to the ones used on my baby boy MB because the markers were out because they were made at the same time.


Sunday, December 13, 2020

Snowflakes! by Reneé Matarese

 Hello Ai fans!

Today I'm sharing a pair of snowflake cards with you.
I've really been loving the new 5353 – Large Snowflake Dies.

They pair perfectly with the 4804 – Snowflake Dies set that I used on my pink card.

Let it snow is from 5041 – Snow Friend Set.


I've recently been really into the rustic look. I used this wood paper on a card that I'll be sharing in January and couldn't help but use the leftover paper for this card.


I think the center, silver flake is my favorite but it's pretty much impossible to choose!


On my pink card I combined the large snowflakes
with the small snowflakes set.


I really love pink for Christmas.  I love anything a little
non-traditional.


Friday, November 8, 2019

The Stamping Village Holiday Seals Spinners | By Jessica Shier

Hello Ai fans!

It's Jessica! I'm back today with some more inspiration using The Stamping Village Holiday Seals stamp set, there is also a card tutorial video below. This time I'm making some interactive spinner cards. These cards are super fun to receive!


For my spinners I'm using the Art Impressions penguin and the Pink and Main cocoa (or coffee) mug. I stamped both images on to a piece of Neenah 80lb card stock using Copic safe black ink. These images are quick to color, even though I doubled my work by stamping each image twice.

You can check out the video below to see the entire process and I'll also have the Copic Markers I used listed below.


You can find more information about The Stamping Village Holiday Seals stamp set and the first video I did using this set for a video hop on the Art Impressions Youtube channel here.  Please note that the giveaway has expired but there is still a ton of inspiration!


Using one of the smaller circles from the Art Impressions Circle Double Stitch die I cut out each colored Holiday Seal. Then used the next largest circle die on the blue Distress Oxide ink card stock and on the front of a A2 cardbase. For these cards I am using a side fold card base. 

I sandwiched a piece of clear thread between the two holiday seal circle images and centered those in the larger circle die cut on the front of the card. I add dry adhesive below and above the card front circle die cut so that the penguin and mug images would be suspended there. Then I layered the Distress Oxide ink blended piece over the top. 


I used a lovely piece of forest pattern paper and die cut the word "snow" twice from that and also twice from some white craft foam and adhered those together. Then I added those to the left side of the card front. For some added shimmer I die cut the six snowflakes from the Art Impressions Snowflake die set and adhered some to front of the card and a few to the inside of the card with a heat embossed sentiment from the Penguin Cheer set

To prepare your card to be received by your recipient of choice, just write your sentiment like normal being aware of the circle die cut on the front. Then twist the holiday seal image a dozen times or so, gently, close the card and place in a envelope. When the person receiving the card opens the card to read your message the image with twirl. Super cute right!?

Copic Markers Used:
W6, C5, W3, Y13
YG67, YG63, YG61
R29, R14
W1, W0

Thank you all so much for joining me today! Happy Stamping! 


Monday, December 10, 2018

Prancing Through the Snow by Carol Hintermeier

Hello Ai Fans!

Fifteen days until Christmas!  Are you ready?  I love making Christmas cards and these sweet reindeer from the Sleigh Bells set are so adorable!


I used my MISTI and stamped the reindeer pair twice with Memento Tuxedo Black ink.  I then blended some Salty Ocean Distress Oxide onto the background with a Ranger Distress Blending Brush.  I used alcohol markers (listed below) to color the reindeer.

Then I got really brave!  I penciled in a line for the ground and once I was satisfied I used my Micron .005 black pen to very lightly draw over the pencil line.  I used two Copic markers (N2 and BG000) to color in some shadows and make it appear more like snow.  I then added some Spectrum Noir Clear Sparkle.   For me, that drawing was pretty scary after having colored the reindeer!  I think it turned out pretty good!

Once the coloring was done, I used Ai's Rectangle Double Stitched Dies to cut the top panel.  I layered that onto some red paper from my stash and popped it up onto some pretty silver sparkly card stock.  I also stamped one of the sentiments from the set and used a tag die to cut it out.  I tied some bakers twine onto the tag and added snowflakes from Ai's Snowflake Dies that I cut out with glitter paper.

For the inside, I used another sentiment from the set and also the snowflake stamp.  The snowflakes are stamped in some pretty silver ink.


Here's a final angled shot that shows a bit of the sparkle and shine!


These sweet reindeer really make a fun Christmas card!  Thank you so much for stopping by and I hope you have a wonderful, crafty week!


Copic markers:
E79, E25, E53, E33, E23, E30, R27, R17, R14, YG06, YG09, BG000, N2
Spectrum Noir markers:
IG5, IG8, IG9, Blender

Monday, November 12, 2018

Joy to The World by Carol Hintermeier

Hello Ai Fans!

I'm back again using the adorable Snow Friend set!  This trio of snowmen are spelling out "Joy" and they certainly do look joyful!

I decided to make two cards with the same color scheme and just changed up where I used each color.  First I colored them with alcohol markers.  (I've listed the colors used at the end of this post.)  Then I used Ai's Rectangle Double Stitched dies and Rounded Rectangle Double Stitched dies to cut various layers for the cards.


I stamped one of the sentiments and then die cut it with the smallest Rectangle Double Stitched die and popped it up with a few foam squares.  I layered up some of the snowflakes I die cut for a few embellishments.


On my second card the stamped layer is popped up with foam tape.


I decorated the inside of the card by stamping the snowflake from the set across the bottom using Worn Lipstick Distress Oxide ink.  The sentiment is also included in this set.


Here's a closer look to see where I added the Nuvo Glitter Accents to the hats and ground.  I added Glossy Accents to the candy canes for some shine.  It doesn't show in the photos, but I added some sparkle to the snowmen's bodies with a Spectrum Noir clear sparkle pen.


Thank you so much for stopping by!  I hope you have a wonderful crafty week!


Copic markers used:
B02, B16, N2, N4, RV00, RV21, RV23, RV25, RV29, 
Y17, Y38, YG13, YG25, YG3, YG67

Spectrum Noir:
BGR4, Blender