Showing posts with label sewing. Show all posts

Tuesday, September 26, 2017

Tuesday Threads with Karen Day

Hello Ai sewing fans!
It's the September edition of Tuesday Threads with Karen.
When I first learned that Art Impressions had come out with the Shop Hop fabric line available through Henry Glass Co., I immediately thought of the Ai Girlfriends stamp set called Quilt Set (Sku #4544) and wanted to make something to coordinate with the quilt in the image.  I decided to make a quilted style project that I've put into an embroidery hoop that can be hung on the wall of my craft room.  I made a matching mug rug as well:
I'm using an 8" diameter hoop, so I decided that I would do a pattern of squares that are all 3 1/4" after being sewn together.  I cut all of my pieces, including squares of Therm-O-Web's medium weight fusible Tricot interfacing that I fused on the back of each square of fabric.  I traced a heart shape onto the pink print, and adhered it to the cream square using Therm-O-Web's Heat n Bond Lite iron-on adhesive.
Using some embroidery floss, I did a blanket stitch around the raw edge of the heart to finish it off:
After a good pressing, I placed my finished square into the embroidery hoop.  On the backside, I hand sewed a running stitch around the excess fabric that was not in the hoop, and cinched it up so that the fabric is hidden underneath.  Now it's ready to hang on a nail on the wall!
While I was cutting my fabrics, I decided that a mugrug was in order, so I cut out a front and back square ( 3 3/4") along with a square of Therm-O-Web's Hi-loft Fusible Fleece to sandwich in between:
I cut another pink fabric heart, adhered it in the same way, and stitched around the edges again with embroidery floss.  I also used my sewing machine to stitch through all the layers, about 1/4" around the heart.  I sewed on the bias tape, carefully mitering the corners (I'm getting better at this!) and handsewed it down on the backside:
And finally, I coloured up the gals in the quilt.  I used all the vibrant shades that are in the spool fabric to colour the image with Copic markers, and kept the rest of the card bright & fun.

Happy sewing, everyone!


Tuesday, August 22, 2017

Tuesday Threads with Karen Day

Hello Ai Sewing fans!
It's the August edition of Tuesday Threads with Karen.
 I've sewn a few larger projects for my sewing room over the last few months, so I decided that it was time for something quick & easy... and more of a personal item.  Here is my attempt of a quilted sunglasses case that I found on Pinterest (here):
 I started out by drawing out my pattern on a piece of paper, metric & standard measurements as shown:
 I cut the pattern out of two different fabrics from the Shop Hop collection designed by Ai owner/illustrator, Bonnie Krebs - available through Henry Glass Co.  I also cut a slightly larger piece of Therm O Web's Heat 'n Bond High Loft Fusible Fleece that I sandwiched between the two fabrics.
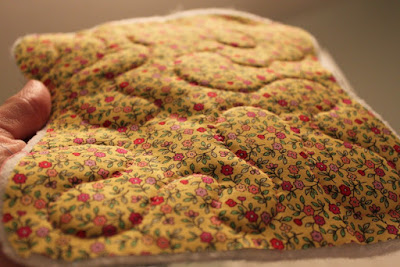
 I taught myself how to do a "stippling" pattern of free motion quilting with my sewing machine - which is an irregular squiggle pattern that you create by twisting and turning the piece to be quilted, as you sew.  I didn't have the right presser foot for my sewing machine, so I did the best that I could with my regular foot.  Here's a better shot so that you get the idea:
 I sewed a contrasting colour of bias tape around the perimeter of my shape, adding in a loop that will hold the case together when it's finished.  I flipped it over and hand sewed the bias tape on the underside for a clean finish.
 I folded the sides together as shown below, and stitched across them, about 2cm (3/4") in from each point.  When you turn the case right side out, these form little square bottom corners that give the case some shape, and allow it to sit upright.
I slip stitched the side edges of the bias tape together, and anchored the opening with a whip stitch to secure the ends - this will keep the glasses snug inside the case:

 And finally, I sewed a button on that will keep the case shut when the loop of bias tape is secured over it:
 This was so fun to sew!  It makes a great afternoon project, and would be a great gift for a Girlfriend.
Happy Sewing everyone!


Tuesday, May 23, 2017

Tuesday Threads with Karen Day

Hello Ai Sewing fans!
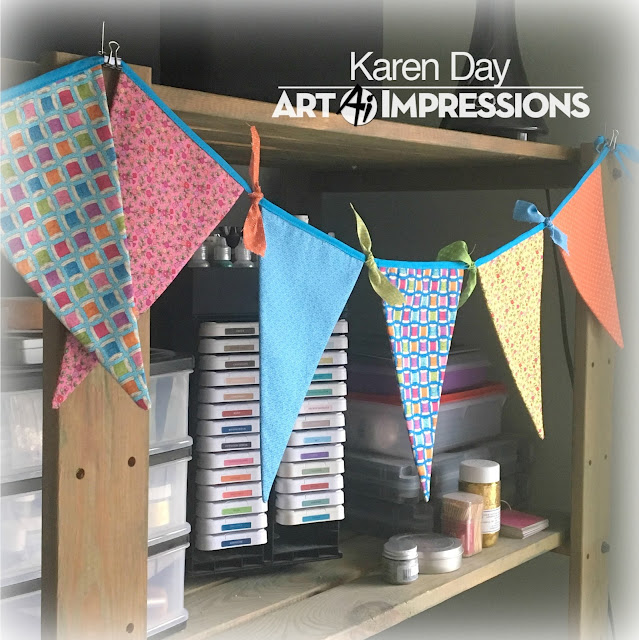
 I've had a creative long weekend, gardening, card making and sewing up several projects.  I have one of them to share with you today.  When I first saw the wonderful Shop Hop fabrics designed by Bonnie Krebs, I had the idea to make a fabric bunting to show off all of the different prints in the collection.  And while I've only used ten of the fabrics (there are 18 in the collection!), you get the idea of how pretty these are.
 I have a large shelving unit in my craft room that is right behind where I stand at my drafting table, with all of my supplies on it.  It was looking a little blah... so the bright Shop Hop fabrics will jazz it up a little.
 I drew my pennant shape on a piece of paper (each pennant is 6" x 9") and added a 1/4" seam allowance.  Then I cut two of them out of each fabric, and one of a medium weight fusible interfacing that I ironed onto the backside of one of each print.
I sewed a 1/4" seam on the two long sides of each pennant, turned them inside out and ironed them flat.  The Therm O Web medium weight fusible tricot interfacing gives them the perfect amount of body to hang nicely:
I kept an inch of space between each pennant, and sewed them all onto an 8 foot length of turquoise seam binding.  I cut a bunch of 1" x 6" strips of the different fabrics and tied them along the bunting between each pennant.
The Art Impressions Shop Hop fabrics are available through Henry Glass & Co. - happy sewing everyone!


Tuesday, February 14, 2017

Mason Jar Pin Cushions by Karen Day

Hello Ai sewing fans!
This is the February edition of Tuesday Threads with Karen!  Is it just me, or are the rest of you as obsessed with Mason jars as I am??  I have a quick & fun project to share with you today using the wonderful Art Impressions Shop Hop fabrics that are available through Henry Glass Co. - Mason jar pin cushions!
I love the idea of having a pin cushion that is both decorative, and a little storage container!


Once you have all your supplies assembled, this is about a 10 minute project.  I started with a 6" square of fabric, and rounded off the edges.  You need a needle & thread, plus a large handful of batting (it takes way more than I show in the photo!), and a mason jar of any size:
 Run a loose basting stitch around the outside of the fabric circle, and place the batting in the middle.
 Pull on the thread to gather the circle around the batting, as shown below - what I don't show in the photo, is that you slip the flat metal jar seal in on top of the batting before tightening the thread completely.  This is where you determine how much batting to put in, as you want the pin cushion to be full and tight:
 Now push the cushion into the screw top - it will force the soft batting through and out the top, and the metal lid remains underneath.  To hide the gathered fabric as shown below, use a hot glue gun to attach a circle of felt for a tidy finish:
 Voila!
Remember the cute little fabric boxes I showed you in this post back in January?  Just think how cute it would be to have a Mason jar pin cushion and a few little matching fabric boxes in your craft room...
 We would love to see what you create with the Ai Shop Hop fabrics - just leave us a note/photo on the Art Impressions facebook page.  Happy sewing!


Tuesday, January 17, 2017

Tuesday Threads with Karen

Hello Ai fabric fans!
I'm back with the January edition of Tuesday Threads with Karen... and this is the most fun that I've had sewing in a while!  I came across this idea on Pinterest, and knew that these little fabric boxes would be amazing in the Art Impressions Shop Hop fabrics that are available through Henry Glass Co.


I intended to make just one... and ended up with four!  Trust me, if time wasn't an issue, you'd be seeing about a dozen of these.  I started with the largest, and just kept making them smaller!

I'm not going to give you a full tutorial, just a bit of info - if you're interested in making some of your own, just do an internet search for "fabric boxes" and there are some very helpful, easy-to-follow tutorials out there.  But I've got lots of photos to share (they were just so cute... I kept snapping pictures!)
The largest box was made by cutting two 12" squares of fabric, and two of contrasting fabric for the lining.  I cut out 3"x 3" squares from the two bottom corners, and then ironed on Therm O Web's medium weight fusible tricot interfacing onto both lining pieces.  I sewed down the sides and across the bottom, then mitred the corners to form the box shape - on both the outer and lining pieces.  With right sides together, I sewed the top rim of the box to the lining, leaving a 2" opening to turn them inside out, which I then hand sewed shut.  Here's what it looks like:

 I rolled down the top edge to form a bit of a cuff, and to show off the contrast lining.
 Oh, the possibilites of what you could use these for in your sewing room!  Or your craft room... or the kitchen... or as gift packing...

 The largest started with 12" squares of fabric, and the others are 10", 8" and 6" squares of fabric respectively, with the corners getting smaller for each size.  Adding the Therm O Web interfacing to the lining worked really well, giving just the right amount of stiffness and support to the boxes.
I'll see you next month with another fun Ai fabric project.
Happy sewing!