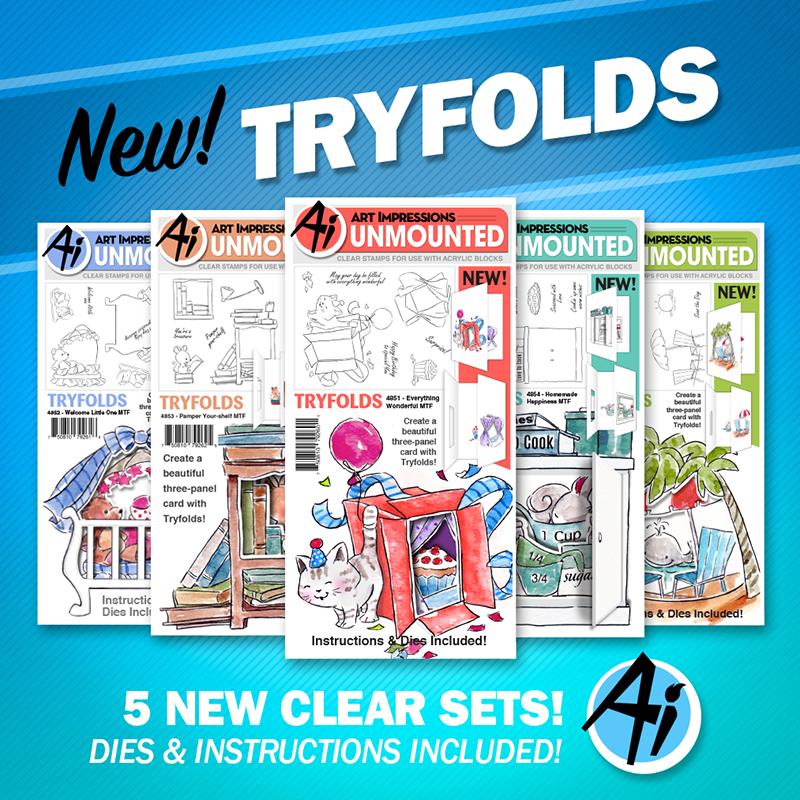
Ready for cuteness overload?! Welcome our FIVE new Mini TryFolds to the collection! Our new Mini TryFolds are clear stamp and die sets, which are easier than ever to align for a three layered card. The provided dies cut openings in the two larger images so you can peek inside at the smallest image. Meet our adorable critters in the Everything Wonderful and Pamper Your-Shelf sets, perfect for birthdays, well wishes, and just because! The die cuts and scores cabinet doors that open and close in our Homemade Happiness set! Welcome Little One sends sweet wishes to the new bundle of joy in the family. Add a touch of tropical with Seas the Day, which works great for retirement cards and other occasions. Be sure to see these sets in action from the Creativation trade show in our video!
Cheri is here with us today to share an awesome Mini TryFold tutorial. Take it away, Cheri!
Hi Ai Fans!
How fun are the Mini Try-Fold stamp sets!!! I got to play with the Everything Wonderful set (#4851)! I just love this little kitty who is helping to celebrate a special Birthday.
The nice thing with the Mini Try-fold sets are that you get everything you need in the package to create, stamp and cut your fun folded card. There are even instructions included so there is no excuse not to try them out LOL!
I like to use the Ai Tryfold card bases as they are already scored and folded in the size you need them to be! Makes it just that 1 step easier.
You can either stamp right onto your card base or as I am stamp onto some stamped marker friendly paper. I used my MISTI to help get a perfectly stamped image. I just used my dies to see where I had to place my image so I have room to cut them out.
Once I had the images stamped and cut out, I coloured them with my Copic Sketch Markers.
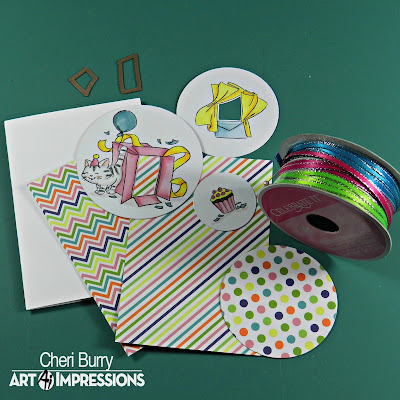
Using the 2 larger images and the included metal dies cut out the little "windows" in the middle of your images.
Now you are ready to assemble your card! I used Designer paper that I cut at 3 1/2" x 5 1/8". This leaves a small white border around the edges. You don't want too many layers of paper on the card base as it will be hard to cut out the "window".
My first step was to cut out the window of the largest image with my die cutting machine. Looking through the front window, I lined up the middle image and adhered that with some glue. Once that was dry I cut out the middle image window. Now you can add your cupcake to the inside and final layer.
All you need to do now is add your finishing details. I added sentiments from the set, some ribbon, bow and enamel dots to complete my card! It's really easy to use the Mini Tryfold sets and they make such cute and fun cards!
Copics Used:
Pinks: R81, R83, R85
Yellows: Y13, Y15, Y17
Blue Greens: BG000, BG70, BG72, BG75
E89, W0
Wink of Stella Clear Glitter Pen
I hope you will play along with our Challenge "Make It Mini"! Thanks for stopping by!
Happy Stamping!
Thanks, Cheri! What an adorable tutorial! Such a fun way to use the Everything Wonderful MTF, and would look great with other sets as well!
New Mini TryFolds, new tutorial, new challenge! This challenge, we want to see you make a mini creation! Go ahead, make it mini - you just might win big!
Here are the challenge rules …
✻ Please make a new card or creation. You can make any crafty item you wish; this is not limited to cards!
✻ Limit two submissions per person. You will receive extra votes if you use Art Impressions stamps!
✻ The Ai Challenge is open to everyone, international submissions are welcome!
✻ Include a link back to the Ai Blog or grab our button on the top right of our sidebar!
✻ Share the Ai love by clicking and commenting your fellow crafters.
✻ Make sure to get your link up by Wednesday, April 26 at 5:00 p.m. PST to enter your creations.
✻ Good luck and happy stamping!
Now it's time to recognize the winners of last week's Wish you FELT Better challenge!
Top Spot goes to...
Milene!
Congrats, Milene, we love how you painted on the felt for a watercolor effect with our Easter Blessings set! Very pretty! Email annelise@artimpressions.com with your address to claim your prize pack!
Honorable Mentions go to...
Reetta Heimonen
Dot J
Congrats, you two! Reetta, your green felt die cut is beautiful on your spring card with our Duck Stackers! And Dot, your felt "Hugs" is such a cute addition to your watercolor card! Be sure to email annelise@artimpressions.com with your address and select the stamp set of your choice for a prize!
Thank you to everyone who joined our challenge, we hope to see you again for our Make it Mini challenge!


3 comments:
How amazing is this! Thank you, Art Impressions!!! ❤ ^-^
So happy! So generous of you guys to have these challenges every 2 weeks!!! Thank you so much!
Fun Challenge. I love all of the new sets. I hope mine will arrive before the end of the challenge. It was so fun to make mini cards.
Post a Comment