Showing posts with label Challenge. Show all posts

Thursday, August 15, 2024

Keep Calm & Celebrate On! Challenge #385 Week #1

 Hello Ai fans!

Welcome to our newest challenge.

Keep Calm & Celebrate On!

We want to see your creations that celebrate something.
Birthdays, Anniversaries, new baby, new job, new car,
new home, retirement, holidays, graduation...
anything you would celebrate!

Before we see what our Featured Artist Janet created,
let's see who won our Never Have I Ever challenge.

For our Top Spot we selected 
She used the flowers, mushrooms and bees from 
and the houses from 5916 – Woodland Castle Set


Please contact Leah at Feedback@artimpressions.com
to claim a free stamp set of your choice!!
Also, be sure to grab our badge to display on your blog, Facebook or Instagram!

Our Lucky Random Winner was:


Please contact Leah at Feedback@artimpressions.com
to claim a free stamp set of your choice!
Also, be sure to grab our badge to display on your blog, Facebook or Instagram!

Congratulations!

Now we're on to our amazing feature from DT Member Janet.
I love this new boat so much and need to find time to use it!
Janet made such a cool, masculine card and she has a great picture
tutorial for her Gatefold Pop-Up Card so that you can try one of these yourself.
How fun!!

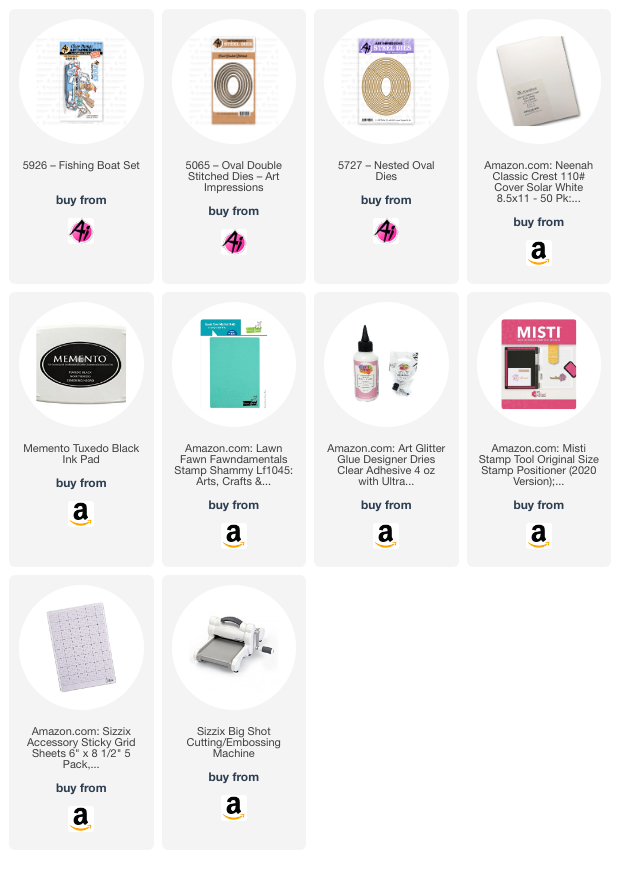
Hello everyone! I am excited to present my project for the newest challenge, Keep Calm & Celebrate On! The challenge is about all and any types of celebrations. Mine is a masculine birthday card. I'm a big fan of fancy folds and this is one I have not made before. It's called a Gatefold Pop-Up Card and it's so easy to make without having any special dies. The card features a gate-style front. I decorated the panels on both the outside and the inside. Also on the outside is a the focal image created with 5926 - Fishing Boat Set. This is a new set issued as part of the Ai Rides collection. It's so very perfect for the guys.

When the card is opened, the pop up feature is revealed. This is so simple but so effective! So let's get crafting!


To create this card, start by making the card base. Cut a piece of cardstock at 8 1/4" x 5 1/2". Score it at 2 1/8", 4 1/4", and 6 3/8".  Fold on the score lines to prepare it for decoration.

The second piece needed for the card base is the pop-up mechanism. This is a simple strip of cardstock sized at 1" x 5". Score each end 1/2" from edge then fold and fold on the lines. I chose to use vellum for this but cardstock works perfectly also. Set this piece aside for now.


Choose papers you would like to decorate your card with and cut 4 strips for the inside of the card. For this matted look, cut 4 pieces at 1 7/8" x 5 1/4". Glue them inside as shown.


Flip the card base over and apply two additional pieces of decorative paper. These are also 1 7/8" x 5 1/4". Only the sides need to be decorated since the center panels will be the back of the card.


I next created two nested ovals with dies from the 5065 - Oval Double Stitched Dies and 5727 - Nested Oval Dies. I combined wood and water patterned papers on the larger of the ovals at a horizontal orientation. This is for the front of the card. I used the wood paper on a second smaller nested oval at a vertical orientation. This will be used inside the card.   


Next comes the most fun part if you ask me! I stamped all the images in the Fishing Boat Set. I made a few doubles because I knew I would need two fishermen, fish buckets and anchors. You'll notice I didn't color the boots of one of the fisherman. I didn't need to do that because I would not need his lower half on the card front since he tucks into the boat window. I cut all the images out with the dies included in this set.


At this point, I arranged the fisherman in his boat with all the accessories. There are so many ways you could place the items in the boat. There are slits that make slipping these items in super easy. Once I had them where I liked best, I glued them to the boat. Then I glued it to the front of the card. Be sure to only adhere one side of the oval so that it will open.


Since this is a gate fold, it's best to hold it shut with a belly band or a tuck piece. A tuck piece is the best option for this one. I glued the boots and an anchor together and then I mounted it with a foam dot. The oval will tuck under this when shut and keep the card closed. In the photo I had placed it on the top of the oval but after I did that, I realized it would be better at the bottom of the oval so I moved it there instead. There's always options when you are card making! I also stamped the sentiment on the banner and glued that on one side as well.


In a similar manner, I arranged the fisherman and fish on the smaller oval. I also stamped it with one of the sentiments. Now it's time to bring back the pop-up mechanism. Apply glue to the folded ends and center it between the 1st and third fold. Then apply a strip of adhesive as shown and apply the pop-up image. When the card is opened, the middle card fold will bend and cause the pop-up mechanism to pop out away from the back of the card. I told you it was simple!


Let's take a look again at the finished card. First the front. I'll call your attention to the boot and anchor tuck piece. The front oval tucks under it and hold it shut.

And here is the pop-up feature inside. You can see how the oval piece stands out from the back of the card for dimensional interest.

 That'll wrap it up for me today. As always, thanks for stopping by. Don't forget to post your Keep Calm & Celebrate On card to our challenge. It's a great way to win free sets. Please visit the Ai store to see all the things you need for your card, journal, and tag making projects. Have a great weekend!
 Janet YouTube - Blog - Facebook - Instagram - Pinterest   


WOW Janet!
That's an amazing card. You know how much
I love masculine cards and this one did NOT disappoint.
So much detail to enjoy.  Thank you for the inspiration.

Now, let's see what YOU create for a celebration.
Be sure to link up your project below.
✻ Please make a new card or handmade crafty creation. You can make any item you wish; this is not limited to cards!

✻ Limit two submissions per person. You will receive extra votes if you use Art Impressions stamps!
 ✻Please include your first name and last initial on your submission.
✻We love to comment on your entries, but keep in mind if you use a private group or a platform that you need to sign up for, we probably won't be able to.
✻ The Ai Challenge is open to everyone, international submissions are welcome!
✻ Include a link back to the Ai Blog or grab our button on the top right of our sidebar!
✻ Share the Ai love if you can, by clicking and commenting on your fellow crafters.
✻ Make sure to get your link up by the deadline to enter your creations.
✻ Good luck and happy stamping! 

You are invited to the Inlinkz link party!

Click here to enter

Thursday, June 20, 2024

Stars & Stripes Forever Challenge #381

Welcome to our newest challenge!


Stars & Stripes Forever!

Now, we know that Art Impressions has a lot of international fans, so for this challenge your project does NOT need to be patriotic themed, though it certainly can be. You must use stars or stripes on your creation. 

Before we see what Dori created for her first ever Feature, let's see who won our Panda-Monium challenge. (Black & White or Pandas)

For our Top Spot we chose


Please contact Leah at Feedback@artimpressions.com
to claim a free stamp set of your choice!
Also, be sure to grab our badge to display on your blog, Facebook or Instagram!

Our Lucky Random Winner was:

#7 Becca Yahrling


Please contact Leah at Feedback@artimpressions.com
to claim a free stamp set of your choice!
Also, be sure to grab our badge to display on your blog, Facebook or Instagram!

Congratulations Lynn and Becca!

Enjoy your new stamps.

Be sure to check out the new Fairy series that just released yesterday as well as all the other new releases! So many fun, new sets!

See all the NEW 2024 releases HERE.

Now on to Dori's Stars & Stripes Forever card.
Though she chose to use a Patriotic theme for the challenge, remember, you only need
to use stars or stripes unless you want to use a red, white and blue theme for Independence Day.

Let's see and hear about what she's made to inspire you!
Be sure to check out her quick little video to see the pop-up surprise.

--------------------------------------------------------------------------------------------------------------------------


 Hello Art Impressions Fans!

I'm excited to share my feature post for the new blog challenge - Stars and Stripes Forever.   Any card or project with stars and stripes will work for this challenge so I hope you will play along.  I love all of the July 4th fanfare here in the good ole USA, from parades to barn dances to fireworks displays.     Such a great time for family fun and celebration!

So, with that, I decided to create an interactive card that is sure to get us all in the mood for the festivities.

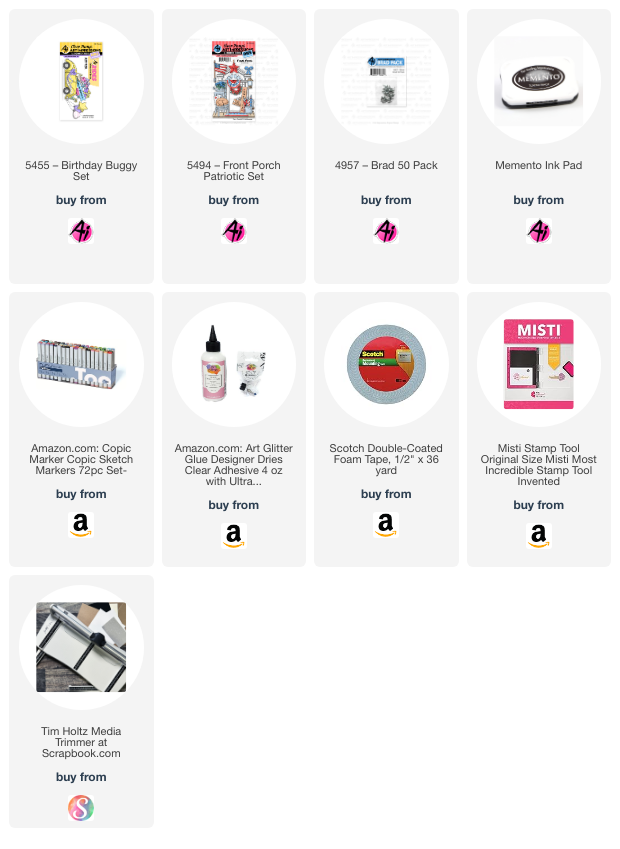
I began with the #5455 Birthday Buggy set and the #5494 Front Porch Patriotic set.  I stamped all of the images onto copic friendly paper and colored each with my copic markers (colors listed below).  If you look at the pictures below, you will notice there is a pull tab and when you pull it to the right, the flags pop up.  So much celebration going on in this little buggy.  LOL!  


This mechanism was inspired by the Lawn Fawn Swish n Pop die set.  The acetate piece (arm) was cut manually so that the flags were hidden behind the buggy when down.  Picture 1 shows the shape of the arm and the two small holes cut into the base of the arm.  As you can see, it doesn't have to be pretty or exact because it will be hidden.  There are also 4 small holes in the background paper.  Depending on which hole you use, will determine where your pop up displays.  I used the farthest one to the left.

Picture 1:

The pull tab is attached with a small brad (#4968 White Brad 50 pack) to the bottom hole of the arm and another brad attaches the arm to the background paper.  (See picture 2)  In order for the pull tab to not flap around, you will want to create a collar to minimize the movement of the pull tab.  Glue the collar to the background paper and slide the pull tab through it.  Test your mechanism to see where the flags will pop up.  Glue the flags to the acetate arm, making sure the buggy will cover them when down and they pop up where you want them to.  Place a small piece of foam tape as a stopper so the flags don't go over too far.  Place foam tape to the bottom of the background paper making sure not to hinder the mechanism from moving.

Picture 2:

Lastly, place your bottom panel over the foam tape and test the mechanism by pulling on the pull tab.  If all works well, adhere to the card base.  While the flags are down, mark the pull tab where it matches up to the side of the card.  (See Picture 3)  Pull the tab out and cut at your mark.  Stamp the tab end with the word "Pull" or cover with a piece of colored paper with an arrow so the recipient knows to pull the tab.

Picture 3:

Now you are ready to decorate the card.  I cut a piece of black cardstock (about an inch wide) and used a gold pen to create the yellow lines in the road.  Place the road on the bottom panel and glue down.  Glue the buggy onto the road, making sure that the flags pop up where you want and are hidden when down.  I choose to add a thin strip of silver glittered cardstock to the top of the gray polka dot paper to create a nice transition but also to hide any foam tape (oops).  LOL!  It also accentuates the glittered stars.  I die cut stars and the word "Celebrate" using dies from my stash.


Hope you enjoyed my card today and it inspires you to join the challenge for a chance to win a free stamp set of your choice!

Have a great day!

Copics used:  E21, E23
C00, C0, C02, C03, C05
B24, B26, B28
R35, R43, R46


Let's give Dori a big round of applause for her first time being the Art Impressions Featured Artist. 
What an amazing interactive card.

Thank you so much for your beautiful card Dori.


✻ Please make a new card or handmade crafty creation. You can make any item you wish; this is not limited to cards!

✻ Limit two submissions per person. You will receive extra votes if you use Art Impressions stamps!
 ✻Please include your first name and last initial on your submission.
✻We love to comment on your entries, but keep in mind if you use a private group or a platform that you need to sign up for, we probably won't be able to.
✻ The Ai Challenge is open to everyone, international submissions are welcome!
✻ Include a link back to the Ai Blog or grab our button on the top right of our sidebar!
✻ Share the Ai love if you can, by clicking and commenting on your fellow crafters.
✻ Make sure to get your link up by the deadline to enter your creations.
✻ Good luck and happy stamping! 


You are invited to the Inlinkz link party!

Click here to enter

Thursday, May 30, 2024

All That Glitters Challenge #379 Week #2

 Hello Ai fans!

Welcome to week #2 of our All That Glitters challenge.

We want to see your crafty creations using GLITTER.

Glitter, glitter glue, glittery paper, Wink of Stella etc.

I have a friend who has a shirt that says "Glitter is my favorite color!"

How cute, right?

Last week, Janet was our Featured Designer and she created this adorable
funky fold card.


I created  two sparkly pink cards.


Dori has some entertaining friends!


Lynn created a Cosmic Watercolor Card with a video tutorial.


Tasha's School Days card is a great finish to the 2023-2024 school year.


Thank you so much to our AMAZING Design Team for all of there beautiful creations.

Now for some exciting news.
In case you missed Bonnie's LIVE broadcast yesterday, there are some fun new sets on
the Art Impressions website.

There are 4 new Matchbook sets that can be purchased
 individually or as a bundle to save you money!


There is also a fun new 5927 – Father’s Day Die Set.
It's currently 50% off while supplies last!


Now, we want to see what you created for our All That Glitters challenge.
You will have the chance to win a free stamp set when you enter.

✻ Please make a new card or handmade crafty creation. You can make any item you wish; this is not limited to cards!

✻ Limit two submissions per person. You will receive extra votes if you use Art Impressions stamps!
 ✻Please include your first name and last initial on your submission.
✻We love to comment on your entries, but keep in mind if you use a private group or a platform that you need to sign up for, we probably won't be able to.
✻ The Ai Challenge is open to everyone, international submissions are welcome!
✻ Include a link back to the Ai Blog or grab our button on the top right of our sidebar!
✻ Share the Ai love if you can, by clicking and commenting on your fellow crafters.
✻ Make sure to get your link up by the deadline to enter your creations.
✻ Good luck and happy stamping! 

You are invited to the Inlinkz link party!

Click here to enter