Showing posts with label Seas the Day MTF. Show all posts

Tuesday, August 1, 2023

Sun and Paradise Vacation Card by Nina

 Hello Ai fans, Nina here with a cute vacation card that I created for  our current challenge V for Vacation. I am using the Seas The Day set.


I started by stamping my images using Memento Tuxedo Black Ink and my Mini Misti and colored them using my Copic markers. When I stamped the trees I tried to stamp them separately since I am going to place them apart from each other.

Copic Shades:

Greens: YG67 YG17 YG23 YG25

Browns: E99 E43 E42 E29 E19 

Greys: C0 C1 C2 

Reds: R21 R20 R29 R27

Blues: B34 B24 B32

Pinks: RV13 RV14 

Yellows: YR24 Y08 

Black: W10


I then cut the images and added white gel pen on the areas that I got rid of around the chairs that showed the connecting lines.

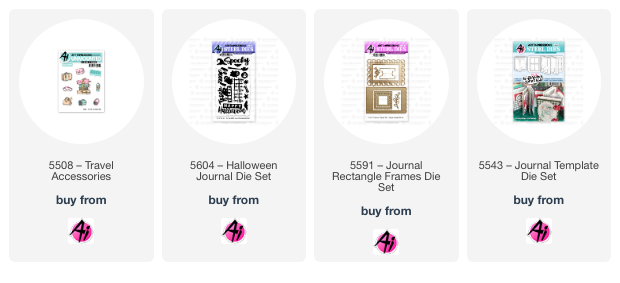
For the scene background I die cut a panel with irregular edges using a die from the Halloween add on for the Journal Template twice.

I used a masking tape on the background panel to ink blend sand area at the bottom of the card then sea in the middle and finished of with the sky on top.

I layered two panels of irregular edges on a card base and attached my images on the sand area and also added some travel bags in front of the trees to complete my scene.

I cut the word Paradise from pink card stock and glued it to the bottom of the card and decorated around it with a Copic markers and enamel dots. 


Tuesday, July 4, 2023

Seas The Day Journal by Nina

 Hello Ai fans, Nina here with a new project using the cute stamp set Seas the Day and Journal Template die set.


I cut the cover of the album and two insert pages using the journal dies and my die cutting machine.

I stamped  all the images on the journal pages using Versafine Onyx Black Ink and my Mini Misti on Bristol Smooth White paper.

I colored the images with Zig Brush Markers, I used these shades:

Reds: 021  022 024

Browns: 061 064 065 054 072

Grey: 097

Greens: 0040 041 042 033 004

Blues: 302 031 036


I cut the peek windows on all  the pages to show the underneath scene.


I had travel and take this project with me to finish it and I was able to keep it safe using Art Impressions journal storage box.


Thursday, April 20, 2017

Challenge 206 Make it Mini Week 2!

Hello, Ai Fans!

It's week 2 of our challenge over here at Art Impressions, and we are back with even MORE inspiration from our designers!

We are celebrating the release of FIVE new Mini TryFolds to our collection! Our new Mini TryFolds are clear stamp and die sets, which are easier than ever to align for a three layered card. The provided dies cut openings in the two larger images so you can peek inside at the smallest image. Cute, right?!

New Mini TryFolds
  Everything Wonderful Pamper Yourshelf Homemade Happiness
Welcome Little One Seas the Day

Last week Cheri gave an awesome Mini TryFold tutorial, perfect for those new and familiar with tri-fold cards! If you missed it, be sure to check it out! Our seven designers are here with their creations, so be sure to hop over to their blog (click the designer's name) for more details and to see photos of the inside! You can find these TryFolds at artimpressions.com!

Cheri with Everything Wonderful MTF

Dana with Everything Wonderful MTF

Diane with Pamper Your-Shelf MTF

Karen with Homemade Happiness MTF and Heart Clasp Die

Kerry with Seas the Day MTF

Renee with Seas the Day MTF

Sharon with Welcome Little One MTF

Aren't these cards so sweet? Be sure to leave some comment love for our designers!


It's the last week to join our Make It Mini challenge! This challenge, we want to see a card or creation that is smaller than an A2 card! If you make it mini, you just might win big!

Here are the challenge rules …
✻ Please make a new card or creation. You can make any crafty item you wish; this is not limited to cards!
✻ Limit two submissions per person. You will receive extra votes if you use Art Impressions stamps!
✻ The Ai Challenge is open to everyone, international submissions are welcome!
✻ Include a link back to the Ai Blog or grab our button on the top right of our sidebar!
✻ Share the Ai love by clicking and commenting your fellow crafters.
✻ Make sure to get your link up by Wednesday, April 26 at 5:00 p.m. PST to enter your creations.
✻ Good luck and happy stamping!

Thursday, April 13, 2017

5 NEW Mini TryFolds! Plus, New Challenge 206 Make it Mini!

Hello, Ai Fans!

Ready for cuteness overload?! Welcome our FIVE new Mini TryFolds to the collection! Our new Mini TryFolds are clear stamp and die sets, which are easier than ever to align for a three layered card. The provided dies cut openings in the two larger images so you can peek inside at the smallest image. Meet our adorable critters in the Everything Wonderful and Pamper Your-Shelf sets, perfect for birthdays, well wishes, and just because! The die cuts and scores cabinet doors that open and close in our Homemade Happiness set! Welcome Little One sends sweet wishes to the new bundle of joy in the family. Add a touch of tropical with Seas the Day, which works great for retirement cards and other occasions. Be sure to see these sets in action from the Creativation trade show in our video!

New Mini TryFolds
  Everything Wonderful Pamper Yourshelf Homemade Happiness
Welcome Little One Seas the Day


Cheri is here with us today to share an awesome Mini TryFold tutorial. Take it away, Cheri!

Hi Ai Fans!
How fun are the Mini Try-Fold stamp sets!!! I got to play with the Everything Wonderful set (#4851)! I just love this little kitty who is helping to celebrate a special Birthday.
The nice thing with the Mini Try-fold sets are that you get everything you need in the package to create, stamp and cut your fun folded card. There are even instructions included so there is no excuse not to try them out LOL!
I like to use the Ai Tryfold card bases as they are already scored and folded in the size you need them to be! Makes it just that 1 step easier.
You can either stamp right onto your card base or as I am stamp onto some stamped marker friendly paper. I used my MISTI to help get a perfectly stamped image. I just used my dies to see where I had to place my image so I have room to cut them out.
Once I had the images stamped and cut out, I coloured them with my Copic Sketch Markers.
Using the 2 larger images and the included metal dies cut out the little "windows" in the middle of your images.
Now you are ready to assemble your card! I used Designer paper that I cut at 3 1/2" x 5 1/8". This leaves a small white border around the edges. You don't want too many layers of paper on the card base as it will be hard to cut out the "window". 
My first step was to cut out the window of the largest image with my die cutting machine. Looking through the front window, I lined up the middle image and adhered that with some glue. Once that was dry I cut out the middle image window. Now you can add your cupcake to the inside and final layer.
All you need to do now is add your finishing details. I added sentiments from the set, some ribbon, bow and enamel dots to complete my card! It's really easy to use the Mini Tryfold sets and they make such cute and fun cards!

Copics Used:
Pinks: R81, R83, R85
Yellows: Y13, Y15, Y17
Blue Greens: BG000, BG70, BG72, BG75
E89, W0
Wink of Stella Clear Glitter Pen

I hope you will play along with our Challenge "Make It Mini"! Thanks for stopping by!
Happy Stamping!

Thanks, Cheri! What an adorable tutorial! Such a fun way to use the Everything Wonderful MTF, and would look great with other sets as well!


New Mini TryFolds, new tutorial, new challenge! This challenge, we want to see you make a mini creation! Go ahead, make it mini - you just might win big!

Here are the challenge rules …
✻ Please make a new card or creation. You can make any crafty item you wish; this is not limited to cards!
✻ Limit two submissions per person. You will receive extra votes if you use Art Impressions stamps!
✻ The Ai Challenge is open to everyone, international submissions are welcome!
✻ Include a link back to the Ai Blog or grab our button on the top right of our sidebar!
✻ Share the Ai love by clicking and commenting your fellow crafters.
✻ Make sure to get your link up by Wednesday, April 26 at 5:00 p.m. PST to enter your creations.
✻ Good luck and happy stamping!


Now it's time to recognize the winners of last week's Wish you FELT Better challenge

Top Spot goes to...

Milene!

Congrats, Milene, we love how you painted on the felt for a watercolor effect with our Easter Blessings set! Very pretty! Email annelise@artimpressions.com with your address to claim your prize pack!

Honorable Mentions go to...

Reetta Heimonen


Dot J


Congrats, you two! Reetta, your green felt die cut is beautiful on your spring card with our Duck Stackers! And Dot, your felt "Hugs" is such a cute addition to your watercolor card! Be sure to email annelise@artimpressions.com with your address and select the stamp set of your choice for a prize!

Thank you to everyone who joined our challenge, we hope to see you again for our Make it Mini challenge!