Showing posts with label Thank you card. Show all posts

Sunday, June 18, 2023

You brighten my day by ReneƩ Matarese

 Happy Father's Day Ai fans!

I don't have a Father's Day card for you this time.

I've been swamped lately and needed to create some thank you cards for end of year school gifts.

I kept them small and simple because time means EVERYTHING right now!


Some of the journal dies were just perfect for this compact little card.
I think it measured about 1 1/2" x 2 1/2."


One friend gave me this adorable hexagon bee plaque.


It proudly lives on my mantle now.


I also received some bee socks and a Dunkin' GC.


My friend Holly who owns Clay All Day made me these as a special gift.
She has a Facebook page if you're interested.  She does ship and has  "3 for" deal I believe.


All of these wonderful people brightened my day!


I used Y18 to color the bees.


Saturday, June 11, 2022

You Are Sew Nice! by Janet Axtman


Hello everyone! Today I have the pleasure of sharing one off my favorite Matchbook card sets. You guessed it! It's 5402 - Sewing Room. This one has all the typical cabinets and supplies you would find in a sewing room. I made this card as a thank you for someone who made a custom bag for a new outdoor rug my husband picked up for our travel trailer. Paired with a gift card from JoAnns, it was the perfect surprise for someone who shared her sewing skills with us. 

One thing that is so cool about the Matchbook series is how really small the finished cards are. You can see how teeny it is after folding and putting it into the optional envelope 5318 - MB Envelope Dies. On the front of this one, I attached the mini envelope that is included with the MB Envelope Dies. I tucked in a tiny extra little thank you note. It's totally precious!!


Thanks so much for stopping by today. I hope you agree that this is more than a card. It's so unique it's a gift all by itself! The recipient was entranced with it and it was as much fun to give as as it was to make. 

Wishing you a very crafty weekend!

Janet YouTube - Blog - Facebook - Instagram - Pinterest 

Saturday, March 26, 2022

Shabby Chic Gilded Floral by Janet Axtman


I really love the #5267 Floral Invites stamp set. This is a big set of gorgeous flowers and greenery. Although the set comes with invitation sentiments like You're Invited, Save the Date, RSVP etc., it also comes with a Thank You sentiment which I used for this card. 

The striped background was created with gilding flakes and extra fine glitter. I applied a double sided adhesive sheet to white cardstock and cut it out using the largest 5682 - Rounded Rectangle A2 Double Stitched die. After peeling the backer off, I applied a watercolor striped stencil to it. Then I rubbed in copper gilding flakes into the exposed adhesive not covered with the stencil. Once complete, I peeled off the stencil and applied green glitter to the remaining exposed adhesive. The glitter worked beautifully but not enough stuck to get the dark color I was hoping for. To compensate, I applied more wet glue on the stripes and reapplied the glitter. The result is a pretty shabby chic background that is perfect for the beautiful wreath stamp and Thank You sentiment. The gilding is such a great finish. The more you polish them with your fingers towel, the more it shines. It's kind of amazing actually!

After coloring the wreath, I added some Kendra Dots from the 5418 - Bible Foliage Set 2 and then fussy cut it out. I applied foam squares on the wreath and placed it on the card. I heat embossed the Thank You sentiment with green embossing powder and glued it to the wreath. I glued the finished panel on an A2 black and white polka dot card base. The final step was to add some matching blue half back pearls. Perfect!

COPIC COLORS USED:
B06. B04, B01
YG63, G24, G21
BG78, G28, BG72

Thanks for stopping by. I sincerely hope you have a great weekend.

Happy Creating!
Janet YouTube - Blog - Facebook - Instagram - Pinterest 


Saturday, November 20, 2021

Thankful For My Work Buddies & a Special New Christmas Set! by Janet

I love all the new matchbook releases but since I am an office dweller (or was one before Covid 19), this one speaks to me. It's called 
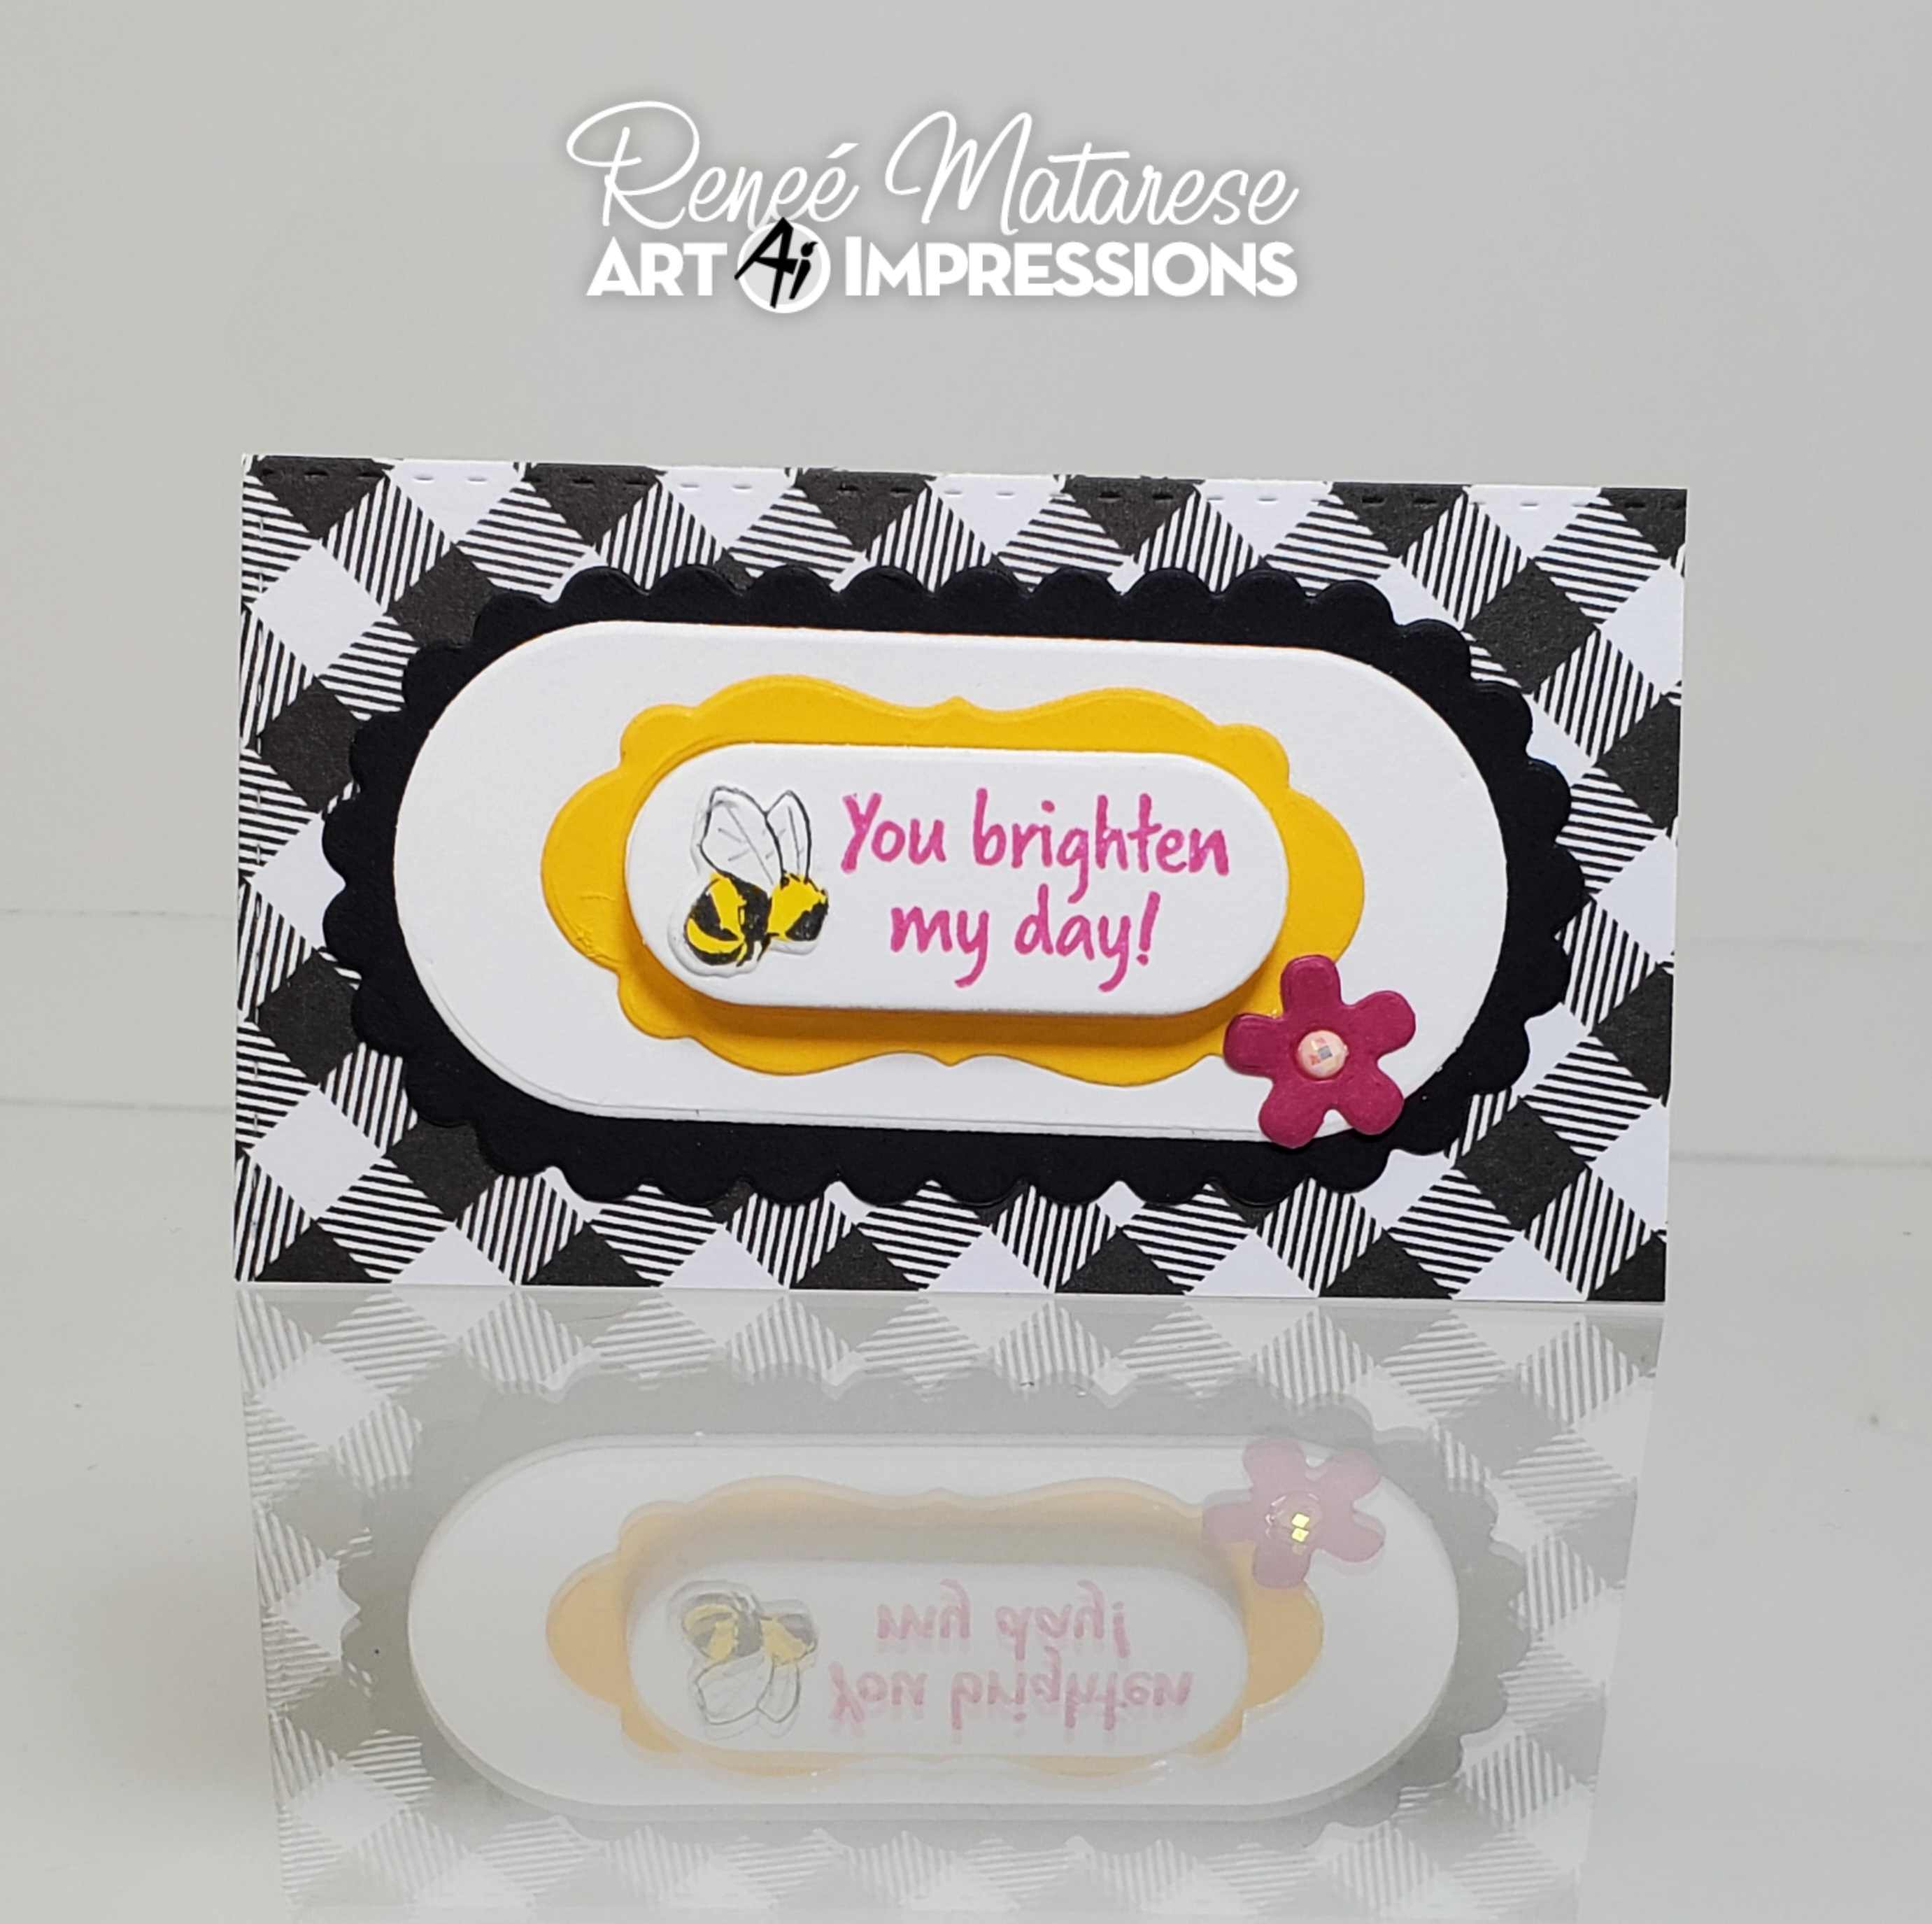
Office Matchbook. 

My card is for the Thankful challenge going on now at the blog. How perfect is this to thank a coworker? It's packed with all the standard things you find in an office. From the chair to the printer, the details are amazing! I also love that it's a little messy. There's a few notes that missed the garbage can and some papers on the floor by the plant. Isn't that just how it is? 

I colored this with Copic markers. I was able to make it mine by monograming the coffee cup with my initials. Yes, I'm a jar! Ha, ha! But seriously, look for ways to make cards your very own. Simple things like adding a monogram or name into the scene are really great touches. 

Don't forget that you need the Matchbook Template to make any Matchbook design. There's also an adorable matching Envelope Template available. Both templates work for all the current and future matchbook scenes so you only need to get these dies once. 

And now for some exciting news! Art Impressions and Simon Says Stamp has collaborated again to make this absolutely adorable Christmas Train Set. The cute little elves and train cars are so festive. Here is the card I made with it. This set is only available at Simon Says Stamp so head on over before this one is sold out. Once it's gone, it's gone. Don't miss it!


As we start Thanksgiving week, I would like to wish you a great holiday with family and friends.

Happy Creating!

Janet YouTube - Blog - Facebook - Instagram - Pinterest

Tuesday, August 24, 2021

Grinny Pig Thank you cards by ReneƩ Matarese

 Hello Ai fans!

Today I'm sharing a card that I mass produced. Well, maybe not MASS...
I made 4 of them.


I've needed a lot of thank you cards lately and made these with the
adorable 5003 – Guinea Pig Out Set.
Google photos is so great in these situations. I looked up Guinea Pigs and found a color
combination that I liked.


Copics used:
N1, C8, R83, E97, E99

Monday, May 25, 2020

Floral Thank You Card by Carol Hintermeier

Happy Monday Ai friends!  Today I have a sweet thank you card using the new Floral Invites set.  This beautiful set is perfect for invitations, but as you can see from my card, the images can be used for many different occasions!


I began by creating a top-folding A2 card base from 110# Neenah Solar White card stock.  I used the #110 card stock to reduce the warping from my heat embossing.  Next I used an anti-static bag on the card front, stamped the frames with Versamark, sprinkled on silver embossing powder and heat embossed it.

Then I stamped the floral image onto 80# Neenah in Copic safe ink (marker colors are listed below.)  When I finished the coloring, I fussy cut it out and added some foam tape to the back and adhered it on the card front.


I cut a strip of purple striped patterned paper to 4-¼" x 1-½" and adhered it to the card.  I added strips of silver mirror card to either side of the striped paper.  I stamped the sentiment in Versafine Onyx black ink and die cut it with the second smallest Hexagon Double Stitched Die.  Next add some foam tape to the back and adhere it to the front.

Finally, for a bit of embellishment I added some Nuvo Pale Periwinkle Jewel Drops to the berries and here and there around the frame.


Thanks so very much for stopping by today!  I hope you are staying safe, well, and of course--crafty!!


Copic markers:
G02, G07, G29, V000, V12, V15, V17,
YG03, YG25, YG67

Monday, March 16, 2020

Watercolor Daisies Thank You Card by Carol Hintermeier

Happy Monday Ai friends!

I'm back with the promised card using another image from the beautiful Art Impressions Exclusive Daisies set available only at Scrapbook.com.  This time I used the daisy wreath image from the set.


I stamped the wreath in Versa Fine Onyx Black ink onto watercolor paper.  I used my long neglected Zig Clean Color Real Brush Markers to watercolor it.  The colors are listed below.  I stamped the sentiment from the set in the same black ink.  Then I die cut it with a Circle Double Stitched die.


For the card layers, I began with a top-folding A2 card base.  I trimmed some blue gingham paper to 5-½" x 3-7/8" and adhered it to the card base.  Then I cut a strip of white card stock to 5-½" x 2" and used a stitched edger die (sorry, I didn't know until checking after I made the card, it is sadly retired) to add the stitching to the edges.  I think you could easily use a black pen and add stitching to the white strip for a very pretty effect.  I added foam tape to the back of the circle and added it to the card front.


I hope you've enjoyed seeing another idea using this awesome set!  You will probably see another card sometime in the future as there are many more sentiments and images I've yet to use!  Thanks for stopping by!  Have a fabulous, crafty week!


Zig Clean Color markers:
Light Green, Dull Blue, Bright Yellow,
Yellow, Fog Gray

Tuesday, January 7, 2020

Poinsettia Thank You cards by Jil Lebel

Hello Ai fans!

Art Impressions and Scrapbook.com have joined up to create exclusive watercolor flower stamp sets.  So far, they have put out two sets, but they will be coming out with more set in the future.  I used the Poinsettia set along with the thank you from the Hydrangea set to make my Christmas Thank You cards.  I just love how they came out. These beautiful floral sets are only available at Scrapbook.com.
I started by stamping the image from the Scrapbook.com Exclusive Poinsettia Set onto Spectrum Noir Ultra Smooth paper with Gina K Designs Black Amalgam Ink and colored them with my Copic markers.  The colors used are listed at the end of this post. I then cut the image with the second largest Hexagon Double Stitched Die.  I cut the largest die out of matte gold paper and attached both to the card base with foam tape.  I used the BoBunny Father Christmas 6x6 paper collection on the card front.  I stamped the Thank you sentiment from the Scrapbook.com Exclusive Hydrangeas Set onto small piece of white paper and attached it over the colored image. 
Copic Colors Used:
Poinsettia - YR21, R81, R83, R85
Leaves - YG61, YG63, YG65
Sprigs - BG72
Berries - R05, R37, YG17

Thanks for stopping by and Have a Great Day!

Sunday, September 15, 2019

Let's all Par-Tee!! by ReneƩ Matarese

Hello Ai fans!

Summer is basically over but I have one last "summer" themed card to share.  We have a local PGA Senior Golf Tourney here in my area and one of our family friends gave us corporate tent tickets.  I wanted to thank him so I used Art Impressions   4902 – Par-Tee Golfers Set


Ray may not be the ACTUAL King of the Club but he is to us.  He always makes a point to include my husband and myself and it's always such a fun time!


My brother-in-law played in the Pro-Am and had a lot of fun as well!
This is us at the surf and turf dinner that night.


I'm sharing this to show you how much a personalized handmade card means to people.  From the Ai People to teachers, nurses, watercolor stamps...Every Ai stamp would mean something when sent to the right person. I know our friend Ray and his wife will enjoy this card.


Copics used:
B0000, B000, B16, Y18, C00, C4, C6, C8
T1, YG11, YG13, YG63, YG93, YG99, E0000
E00, E23, E42, E47, E93


Friday, November 7, 2014

You're Incredi-Bowl {by Lesley Croghan}


Good morning, stampers! Today I am sharing a card I made with one of the new AI People stamps called "Inrcedi-bowl"! This stamp is so much fun and would make a great thank you card for that friend who does everything!


Once again, I am using a project life card as the background for my main image. I fussy cut the main image out and popped her up on dimensionals. Keeping the outfit "neutral", I tried to highlight the fun sentiment!

Supplies Used:
Project Life cards, Snips, Designer Paper from my scrap bin, Oval & Scallop Oval Punches

Thanks for stopping by today!

Saturday, April 26, 2014

Watercolor - Flowers

Hello Ai Fans!

For this card I decided to think outside of the box and to use the flowers stamps in a slightly different way.
Here's my card:


I just stamped a couple of flowers and drew a little lace to hold them together. I flicked a couple of droplets of pink ink that was left of my palette. I added lots of water so that it would drop from my brush.

I mounted my little piece of art on a green mat and adhered it on the card base with dimensional adhesive. I used a quill to write "thank you" with black india ink.


Hope you are inspired to try some watercolor the Art Impressions way yourself. It's really fun and the result is fabulous even when we can't draw!! :) That's really cool!