Showing posts with label front and back cards. Show all posts

Sunday, August 6, 2017

Baby Boy Congratulations! by ReneƩ Matarese

Hello Ai fans! 

Today I'm sharing a card that my friend requested. 
She has a brand new nephew and wanted to congratulate her brother and sister-in-law. Her brother is a big Yankee fan.  


The #2 has a double meaning...Mike's favorite player was Derek Jeter who was number 2.  Tony is also Mike's second child.


The verses on the inside came from these sets.


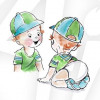
Here's his cute little behind. 
I added some pinstripes to his hat and jersey so he looked like a real Yankee.


Marvy No. 3 Blue
Copics: 
T1, C00, E02, E50, E51, E93


Tuesday, April 15, 2014

An Easter Front & Back card by Karen Day

Hello Ai fans!
Easter is just around the corner, so I've made up a little gift set to celebrate the occassion!  Warning - lots of photos ahead...  One stamp that is definitely a signature image for Art Impressions is "The Fence" (Sku#P1499), and I am using it to make a Front & Back card along with Bunny FB (Sku#K1566), F & B Peeking Rabbit (Sku#K1750), Egg Basket (Sku#G1755) and Got Eggs? (Sku#D4015):
There was a lot of stamping, colouring and fussy cutting for this project - and yes, it did take a little time!  Here's what I started with on my craft table:
 
I began by colouring and fussy cutting around each piece.  The outer fence is part of the card base, and I glued the second fence to the back side of it.  Then I glued on the die cut grass along the bottom edges.  I added the bunny butts to the outside of the card, and matched their fronts to them on the inside, along with the basket of eggs.  I created a little hillside of gingham paper and glued it to the inside base along with the clouds and sky, then stamped the sentiment, "Got Eggs?":


For the matching treat holder, I cut a 4" x 12" piece of cardstock, scored it at 5 1/4" and 6 3/4", and cut a 2" circle out of one end.  I used a Spellbinders Label die to cut a shape for the top, and a small strip of green cardstock folded over the top.  The bunny was fussy cut and glued over the circle:

I used just the backview image, because I wanted it to look like the bunny was peeking in at the eggs:


I filled a small cello bag with Easter grass and a few chocolate eggs, then sandwiched it between the topper that I stapled on.

 
Did you see the Mini Front & Back images that we launched here on the blog a few weeks ago?  Well they would all work just perfectly with both the fence and the treat bag idea - and not just for Easter, maybe for a birthday party?  Another occassion?  And be sure to check out the Front & Back section on the Ai website - there are several dozen images to use along with the Fence.
Copic Markers used:
Fence: W1, W3, W5
Bunnies: E51, E53, E55, C1, R20, R22
Basket: E53, E55, E57, Y21, Y23, R81, R83, G40, G43, B01, B00, B000, V20, V22
Happy stamping, & Happy Easter!


Saturday, March 22, 2014

Frog and crab mini Front and Back set by Marie-Pierre

Hello Ai Fans!!

Did you enjoy our blog hop this past Thursday? What did you think of the mini front and back stamps? Really cute, right?! :) Today, I'd like to share another card I made with my little crab. The sentiment cracks me up! :)


Enjoy your weekend!! Happy stamping!


Wednesday, November 28, 2012

Santa is coming down the Chimney!!!

Hello Ai fans !!
Today's card is a Front and Back Santa SKU# U1792, I made a chimney for him to slide down and leave gifts for the good girl in my house : )

I used the Tim Holtz brick embossing folder to create my chimney, cut 2 1 1/2" by 4 1/4" strips in cream color card stock, embossed and inked with Tim Holtz fired brick ink, added a chimney top in gray 3/4" by 4 1/2" cut two inside card and out side card, used MS drippy goo punch and white glitter paper to make icicles, then stamp and fussy cut your Santa image. I colored him with colored pencils and blended with gamsol. I used zig 2way glue and diamond glitter on fur trim for beard and hat pom. I used liquid applique and a heat gun to puff up. Then you glue the front and back together and glue to the front with Santa looking in. When you open card you will see other side of Santa.

Inside my card, I die cut pine branches and used a SU ornament stamps and fussy cut. I stamped them in SU real red ink and clear star glitter pen and fussy cut them out. I added sheer white bows to the ornaments. I used TH picket fence whir marker for snow on my branches and the zig glue and diamond glitter. The background is SU bashful blue, inked around edges. Then from my Winter Penguins set SKU # CS3217, I used snowflakes to stamp background and the sentiment is from the set too .I love how this turned out, it was so much fun trying something new.


SUPPLIES : Santa (F&B) SKU #U1792Winter Penguins SKU #CS3217, TH brick folder , TH fired brick ink, SU bashful blue ink, SU real red ink, prisma colored pencils and gamsol and paper stumps, MS drippy goo punch,  Pine branch die (www.mariannedesign.nt ), sheer ribbon, clear star glitter pen, TH picket fence marker, diamond ultra fine glitter, zig 2way glue pen

I have a tip to share today, when using dies with lots of cuts I used a sheet of wax paper between the die and card stock , this waxes the diecut to come right out. This works awesome, hope you try it!