Hello, Ai Fans!
Welcome to another Watercolor Roundup!
This weekend our Watercolor Design Team has some creative, inspiring creations for you!
Be sure to follow these lovely ladies on social media by clicking the link in pink next to their names!
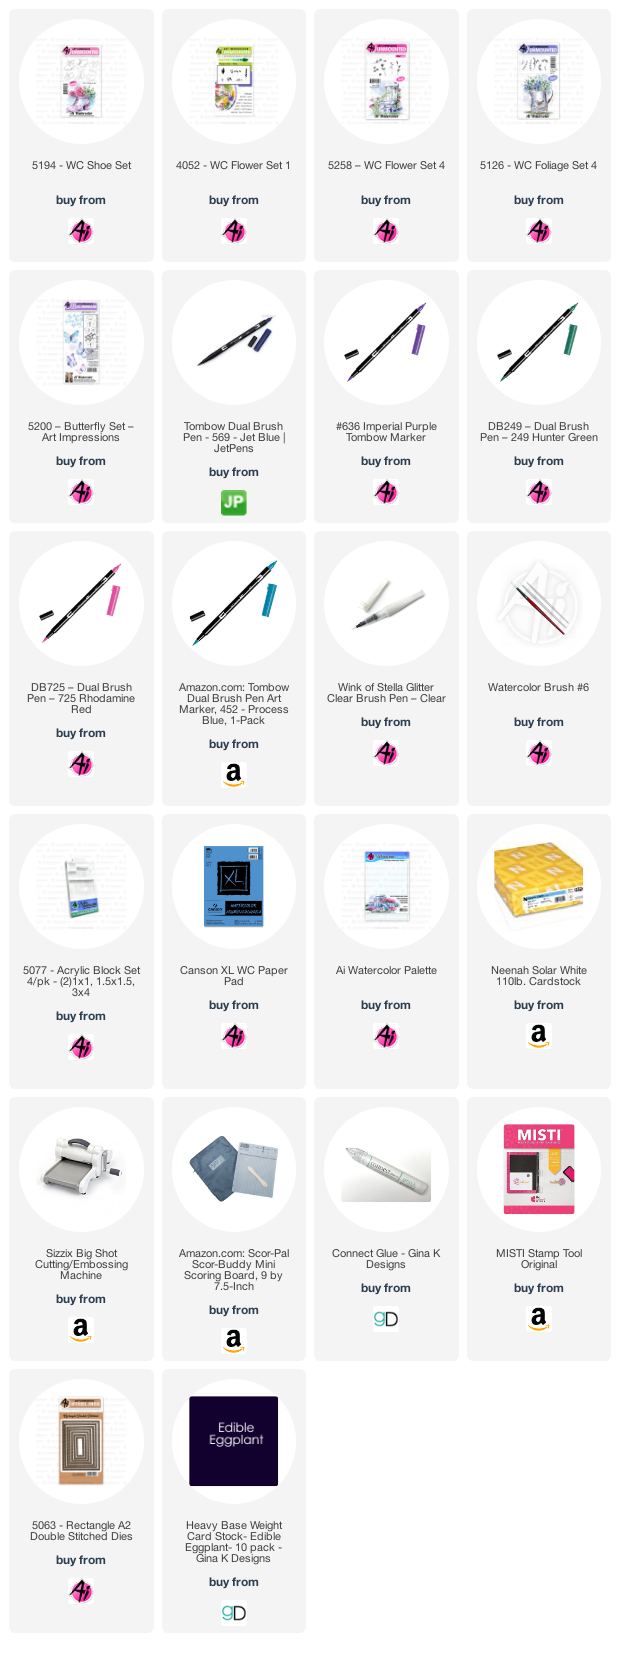
Thank you so much for joining us for another watercolor weekend! We are so excited you stopped by. This weekend I decided to create a simple flower arrangement. This is my Shoe Flowers projects. Let me tell you how I created this quick and easy project.

Project Details
I started off by inking up the worn shoe with 969. I stamped it off and then stamped it in the middle of my watercolor paper. I pulled the color out of the lines, using the artist drawn lines as a guide for my shadows. To create a gray color, I mixed my 969 and 569 on my palette and added it to the show along with some straight 969 to get some variations in color.
Next, I added some of the daisy bunches from the original flower set 1, inked with 636 and stamped several bunches on the top of the shoe. For the pink flower, I inked up the flower buds from Flower set 4 with 725 and stamped it a few times in the middle of the shoe opening. Before I add the foliage, I pulled some of the color out of the buds.
Once that was dry, I added some vines from the original foliage set 1 inked with 249. I tried to stamp the vine around the flower bunches to make it fuller. Then I added some water to the leaves. For a finishing touch, I added some of the left and right stems from foliage set 4 inked with 452. This just adds a little detail that creates interest. To ground the shoe, I lightly brushed some 569 along the bottom of the shoe.
I also used the side butterfly from the Butterfly set inked with 569. As you can see, the bottom of the butterfly wings aren’t really dark but I thought it added an interesting touch. I added some additional color from my palette (636 and 569) to pull the piece together. As always, nothing like a little sparkle to make me happy, so I added some Wink of Stella to the butterfly wings and the blooms. Lastly, I signed and dated.
Thank you so much for stopping by and I hope you will tag me and my teammates on Instagram so we can see what you are creating this weekend. I love all the inspiration I get from seeing all of your projects.
We will see you again in March for the next watercolor weekend! Have a crafty day!
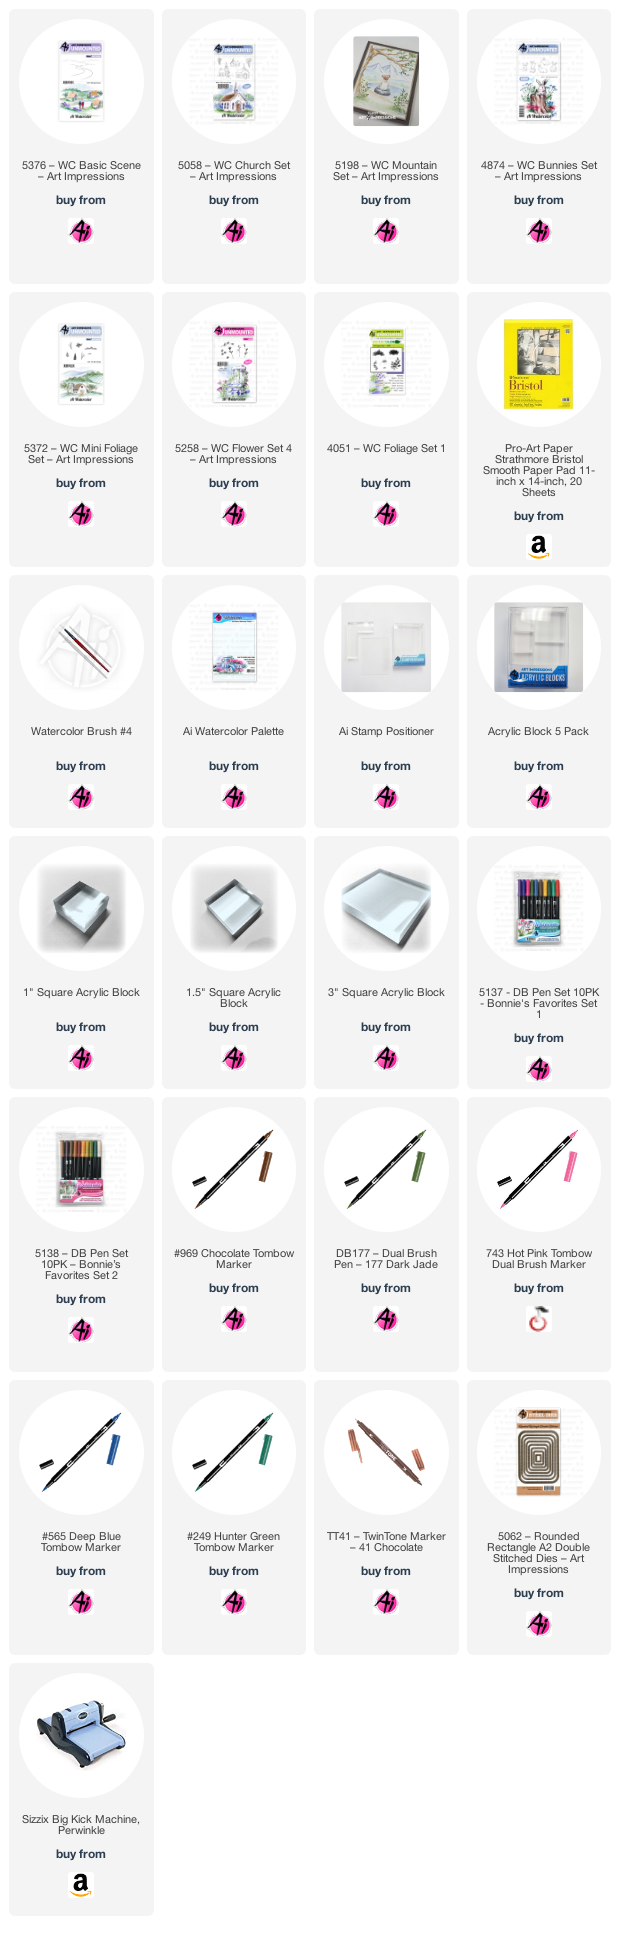
Hello,
I know it's a little early for Easter cards but I send a few out so I need to start early. The bunnies are so cute to use and the church reminds us of the true meaning of Easter. I am so in love with all of the Simple Scenes Sets because once you stamp one, it's so easy to build the scene around them.

I loved Art Impression's Bonnie Krebs' advice to stamp the main images and then you can fill in the rest with whatever stamps you want. If you would like to recreate a card like this, first stamp the 5376 Basic Scene inked in the brown Tombow 969 for the road but use a light color for the hills such as N89.
Use the smaller mountains in the 5198 Mountain set inked in both 969 and 565 but stamp it off on scratch paper first a couple of times or they can be too dark. I had to stamp it twice to go from one side to the other. Stamp the smallest church from the 5058 Church Set inked in both the 969 and the 565, then stamped off on scratch paper. Pencil in the front hill very lightly and stamp the bunnies from the 4874 Bunnies Set using the stamp positioner inked in 969.
Now you can start pulling the color out of the lines and use color off the palette to paint your scene. You can add the trees from the church set like I did in brown. You can stamp the leaves from the 5372 Mini Foliage Set in 743. Stamp the hedges from that same set inked in 177 along the hill line. Stamp the mini pine tree from that same set inked in 249 along the other hill line. Stamp the grass from that same set inked in 177. Stamp the flowers from the 5258 Flower Set 4 inked in both 249 and the 743 along the front hill. The grass on just the front hill is from the 4051 Foliage Set 1 inked in 177, the rest of the grass is from the mini set.
Add some sky and shadows with 565. I drew in eyebrows on one bunny to make him be the male and eyelashes on the other bunny to make her the female and I drew whiskers on both using a pencil. Don't forget to darken the bunnie's eyes and noses with the fine tip of the Tombow Twintone pen. I also drew the cross on the church with it. Use the Rounded Corner 5062 Rectangle Dies to cut it out and a background piece of paper. I found these scalloped edged card bases at Michael's.

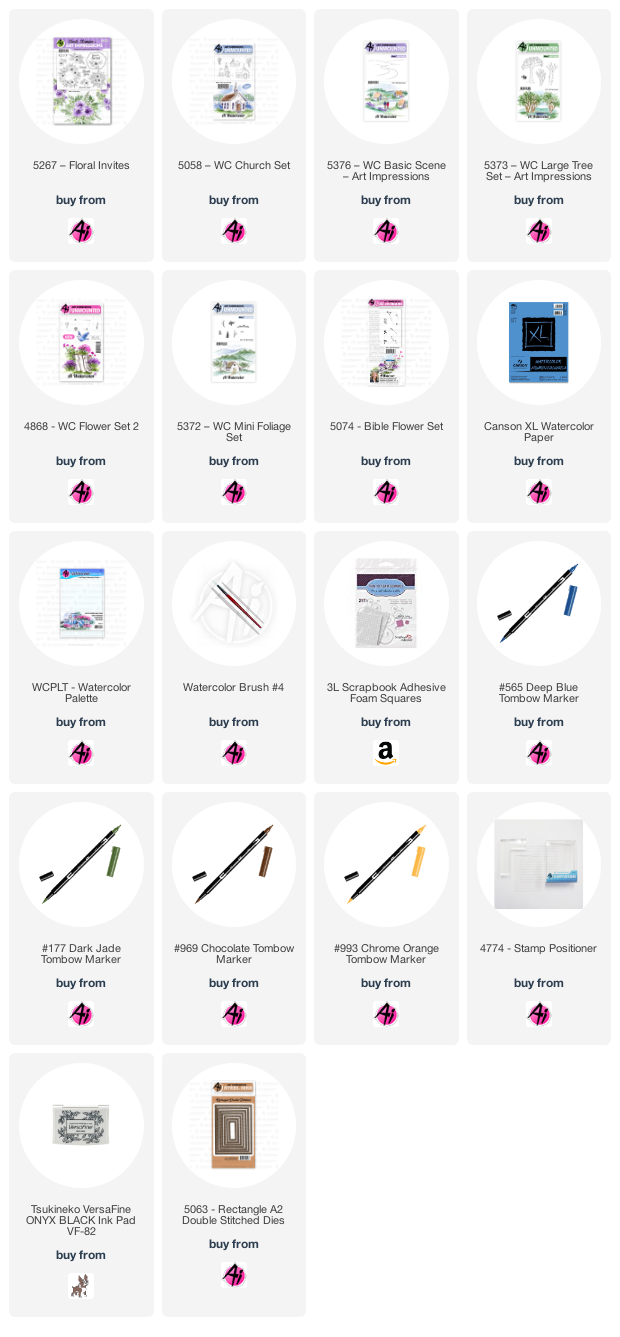
Hello Ai Watercolor fans!
I've pulled out a few older and a few newer stamps to create a Save the Date card this week:

I began by inking up the smallest church from the 5058 - WC Church Set in my Tombow Dual Brush Marker #565 Deep Blue, and then went over it with #969 Chocolate before stamping it onto my Canson XL Watercolor Paper. I covered it with a mask, and then coloured up 5376 - WC Basic Scene in two colours - the road in #969, and the hills in #177 Dark Olive. Because this stamp is clear, I was able to easily stamp it and position it perfectly to have the church perched on one of the hills. To the foreground, I added the smallest tree from 5373 - WC Lg Tree Set, colouring only 1/2 of it in #969 chocolate. I placed a small tree from 5372 WC Mini Foliage beside the church, and added the shrubbery to the hillside with #177. The scribbled foliage was used on both trees - I stamped one layer that I then added water to soften and paint out the detail, and then I stamped a second layer to created darker foliage with more detail. A damp brush was used to pull of the colour of the road and tree trunks and to add colour to the hills. I picked up #N45 Cool Grey 10 from my palette and added several layers of colour to the roof and steeple of the church, being sure to leave a few highlights and darken shadowed areas. I used #565 to add shading to the door and windows, and painted the suggestion of a walkway and the sky. For my flowers, I used the tiny dot flowers from 5074 - Bible Flower Set in #993 Chrome Orange, and the small greenery sprig from the set in #177 added the foliage. The single stems are from 4868 - WC Flower Set 2 in #565/177, and the tiny grass from the Mini Foliage set finished my scene off.
Hope you enjoyed this weekend's inspiration, and Happy Stamping!


3 comments:
Love each one of these designs. Makes me want to run down to my craft room and try each one, which I may do later today. So much talent and glad you share it with us. Thanks.
All three cards are beautiful! Thanks for the inspiration, ladies. I didn't even think of the bunnies for Easter, brilliant. That's going on my To Do List! Love that you made one with lashes!! LOL
Five weeks ago my boyfriend broke up with me. It all started when i went to summer camp i was trying to contact him but it was not going through. So when I came back from camp I saw him with a young lady kissing in his bed room, I was frustrated and it gave me a sleepless night. I thought he will come back to apologies but he didn't come for almost three week i was really hurt but i thank Dr.Azuka for all he did i met Dr.Azuka during my search at the internet i decided to contact him on his email dr.azukasolutionhome@gmail.com he brought my boyfriend back to me just within 48 hours i am really happy. What’s app contact : +44 7520 636249
Post a Comment