Hello Ai fans!
As you know, last week we announced a new monthly challenge venture.
We have two Guest Designer that will be taking turns inspiring you throughout 2025.
This month it's Sara Furr's turn and you're going to love what she's created.
Her first two cards are here and we'll be sharing more during February.
Add your creation using Art Impressions products below for your chance to win a free stamp set or a freebie from me. (US addresses only for my freebie...The free stamp set from Ai is open world wide)
Now, let's see Sara's beautiful artwork.
Hello crafty friends! I am so very excited and thankful to be here with you today as a guest designer for the month of February. My name is Sara, but my friends call me "The Crafty Farm Chick". I am a full-time dairy farmer, wife, and mother to 4 boys. Crafting is my stress relief!
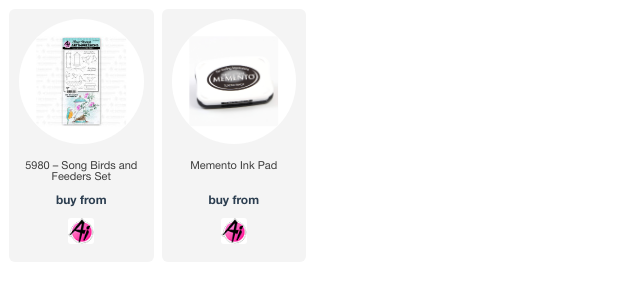
I have two cards for you today using the brand new "
Song Birds and Feeders" set by artist Kim Hein. I absolutely love birds and this set was so fun to work with. Now, I am not a watercolorist, so you will be seeing me color with alcohol markers.
I started out by stamping my images with Tuxedo Black Memento ink in my Misti stamping tool to make sure I was able to get a clean, crisp image. I colored the bird bath first with Copic B00 and B0000 for the water and I used Stampin' Blends L&D Soft Seafoam for the bath itself. I colored the birds with Stampin' Blends L Balmy Blue, M&D Pumpkin Pie, Copic B24 and N1 and a colorless blender. I also used the N1 for the shadow on the ground and around each image. The bird seed I colored with Stampin' Blends Dark Crumb Cake. I again used the B00 and B0000 to color in a very faint sky.
After everything was colored, I tore the top and bottom edges of my focal image and adhered that to a dark sage green cardstock. To the edges of that cardstock I added the Sizzix Crochet dies and then adhered that panel to a piece of plaid pattern paper from Memory Box that I frayed the edges with a scissors to give it a distressed look. This plaid has metallic gold foiling running through it, so i thought it would be fun to tie in some gold DMC metallic thread. I wrapped it around that whole panel 3x and then added a messy bow. I then adhered the whole panel to my my light sage green card base. *please note... the cardstock I am using is actually two-tone, so one side is light sage and the other side is a tiny bit darker sage.

On the inside I stamped some more birds and one of the feeders and a sentiment with the Black Momento ink. This time I added it to a piece of the light sage cardstock that I tore the top and bottom edges on and adhered to the inside of my card. I didn't bother coloring the ones on the inside, but you totally could if you wanted to, and that finishes my first card.
My second card also uses the same "Song Birds and Feeders" set. This time I used one of the feeders and the tree branch. I started out by stamping my tree branch, feeder, and bird with my Misti and then I added the little leaf sets with an acrylic block stamping the lightest leaves at each end of the branches with Pinkfresh Studios Mint ink cube. I imagined my light source to be coming in from the left side, so i then stamped the leaves behind the lightest ones in a shade darker, for that I used Meadow, and the farthest ones back in Aquamarine. I then added shading with a Copic N1 marker to give the illusion of depth.
I colored the feeder with Stampin' Blends in L&D Crumb Cake, Copic E11 and E00 and Prisma Color PM199. The bird I colored with Stampin' Blend D Cajun Craze, Copic YR68, B00, B0000, and BG15. I added shadows to the right side of each image with N1. Once everything was colored I used a corner rounder punch to round opposite corners and then applied Pinkfresh Studio's Warm Buff ink to the edges to give an aged look to the cardstock.
I then created my background panel from a notebook page pattern paper and some strips of coordinating paper. I roughed up the edges of all the pieces with a scissors before adhering them down. I added fun foam behind my focal panel and popped that up on the right side of my pattern paper panel. I then added some linen thread and a junk bow of some scraps of ribbon I had laying around and added an old button. I added a tiny paper clip to the thread and onto the bottom left side of my focal panel. I then adhered the whole panel to my vanilla card base.
For the inside I used another piece of that notebook pattern paper and stamped the birdbath and birds directly onto it with the Pinkfresh Studios Warm Buff ink. The sentiment I stamped with Memento. And that completes my second card.I hope that you enjoyed looking at my cards and maybe got inspired to create something shabby chic. I am so very thankful to Renee and Bonnie for giving me this incredible opportunity to show you some of my creations. I hope you have a wonderful day and that you get time to craft something lovely.
Here is the fine print...
✻ Please make a new card or handmade crafty creation.
✻You can make any item you wish; this is not limited to cards and it can be any theme you like.
✻ Limit two submissions per person.
✻You MUST use Art Impressions stamps or dies! You may use other companies products but the main focus should be on Ai items.
✻If you win, you will receive one free stamp set of your choice.
This will be a random drawing so all levels of ability are encouraged to enter!
✻Please include your first name and last initial on your submission.
✻We love to comment on your entries, but keep in mind if you use a private group or a platform that you need to sign up for, we probably won't be able to.
✻ The Ai Challenge is open to everyone, international submissions are welcome!
✻ Good luck and happy crafting!


4 comments:
Beautiful cards, Sara!! So excited to see all your gorgeous creations this year!!
Love these Sara! Looking forward to what you create!
Very nice work DT
Gorgeous cards!!!
Post a Comment