Showing posts with label Monthly Challenge. Show all posts

Wednesday, July 1, 2026

July 2026 Monthly Challenge with Guest Designer Debbie Hedges

Hello everyone and happy July!!
Welcome to our Monthly Challenge with Debbie Hedges. 

As always, this challenge has no theme, so anything you want to create is fine as long as you use something from Art Impressions on it. You might be the next winner of a free stamp set from Art Impressions. Winner is chosen randomly so all skill levels have a fair chance of winning. Two lucky winners will also receive a freebie from me.  (Renee) After viewing Debbie's beautiful card, scroll down to see the winners from last month.

Now let's see what Debbie created to inspire you.

Happy July everyone! July 4th is just around the corner and this will be a
special celebration in the USA for our 250th anniversary!


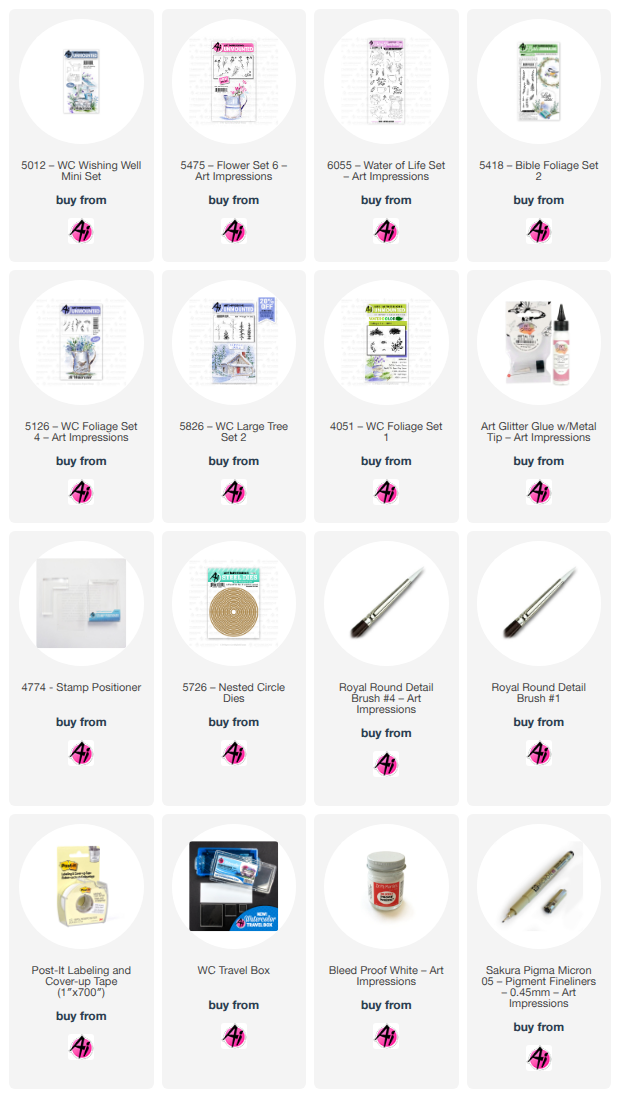
For my July project, I created a red, white and blue-theme watering can for 4th of July. I stamped the watering can (#5012) with Pumice Stone Distress Ink, stamping off once on scrap WC paper and then onto my project. I then added the shading using a variety of grey tones. I then painted the center band in cherry (#65) and added the blue (#3) dots below it with the fine tip of my marker. I added my sky next with sky blue (#75), making sure that the areas where I planned to add flowers were very light.

Using Post-It Tape, I masked off the top of the watering can and added some ivy (#5418) on the left side. I used my stamp positioner for placement and stamped three times in olive green (#15). I then used my small vine (#5126) and added more foliage to fill the top of the watering can. I then removed the tape and stamped the vine a couple times so it was hanging over the front of the watering can.

I re-applied the Post-It Tape and added the red flowers (#6055 and #5475) next using my stamp positioner. The flowers in these sets are very similar, but one curves (L&R) and one is straight. So, I wanted the flowers to curve to the right over the handle and then I wanted taller flowers in the middle. Next, I added the blue flowers using the dot flower (#5009). I stamped in repeat so I had light and dark and made sure I filled empty areas around the foliage. I then touched my paint brush to the foliage, then the blue flowers, then the red flowers to soften the color – cleaning my brush between each color (especially the red). With the fine tip of my blue marker, I added a few more random blue dots where I wanted more contrast for my blue dot flowers.

I added grass next by applying the Post-It Tape to one side of the watering can and stamping the grass (#5826) in repeat to the edge of the project in olive green (#15), creating a slight incline. I then moved the tape to the other side and stamped the grass in repeat to the opposite edge of my project. I then used the teeny tiny grass (#4015) to fill in any areas that I felt needed it by inking and stamping off once before adding it to my project. I then added a green wash
for the foreground making sure there were light and dark areas.

The wildflowers are a mixture of small daisies using Dr PH Martin’s Bleed Proof White and blue flowers by adding dots with the fine tip on my blue marker. Once the white paint dries, I add a yellow dot (#43) in the center of each daisy. I then added more white dots with Dr PH Martin’s Bleed Proof white for the foliage in the watering can and a few extra dots in the grass at the base. To finish up, I added a few accents to the watering can with the fine tip of my
grey marker (#40) for anything that needed some extra definition.

I still use Marvy Le Plume markers for my projects.  Most of these can be converted to Tombow colors, but choose colors that work for you. These just happen to be some of my go-to
colors for any project I work on. (Here is the link for the Tombow conversion chart: https://www.artimpressions.com/shop/art-impressions-most-loved-color-conversion-chart/)


Happy Stamping! I would love it if you’d give this project a try. Also, don’t forget to
enter the Monthly Challenge for a chance to win a free stamp set! Wishing you and
your family a fun and safe holiday celebration if you have one planned!

Accessories:

Pumice Stone Distress Ink

Marvy Markers
Now let's see who our lucky winners were from June.

Okay folks!

This has never happened...lol.

Our winner was #5, but there is no 5 entered, so by default, #6 Pat S. becomes the winner
of the free stamp set from Art Impressions.


Please contact Leah at Feedback@artimpressions.com

to claim a free stamp set of your choice!!

#4 Mary S. wins a freebie stamp from me,


 and because I'm giving away two freebies, I drew again.

#15 Barb E. also wins a freebie.


Please email me at Renee@artimpressions.com
with your full name and address and I'll send you a photo of the freebies I have available for you to choose from.

Now for our new monthly challenge, here are the rules.


 ✻ Please make a new card or handmade crafty creation using either stamps, dies and or designer paper from Art Impressions. You can make any item you wish; this is not limited to cards! (unless specified)

✻ Limit two submissions per person.
One random winner will receive a free stamp set from Art Impressions and one random winner will receive a freebie stamp from me.
 ✻Please include your first name and last initial on your submission. You may include your entire last name, but it's not necessary.
✻We love to comment on your entries, but keep in mind if you use a private group or a platform that you need to sign up for, we probably won't be able to.
✻ The Ai Challenge is open to everyone, international submissions are welcome!
✻ Include a link back to the Ai Blog or grab our button on the top right of our sidebar!
✻ Share the Ai love if you can, by clicking and commenting on your fellow crafters.
✻ Make sure to get your link up by the deadline to enter your creations.
✻ Good luck and happy stamping!


You are invited to the Inlinkz link party!

Click here to enter

Monday, June 1, 2026

June 2026 Monthly Challenge with Guest Designer Debbie Hedges

Happy June everyone and welcome to our Monthly Challenge!

As always, this challenge has no theme, so anything you want to create is fine as long as you use something from Art Impressions on it. You might be the next winner of a free stamp set from Art Impressions. Winner is chosen randomly so all skill levels have a fair chance of winning. Two lucky winners will also receive a freebie from me.  (Renee)

Now let's see what Debbie created to inspire you.

Father’s Day is only a couple weeks away and then it will officially be summer! 


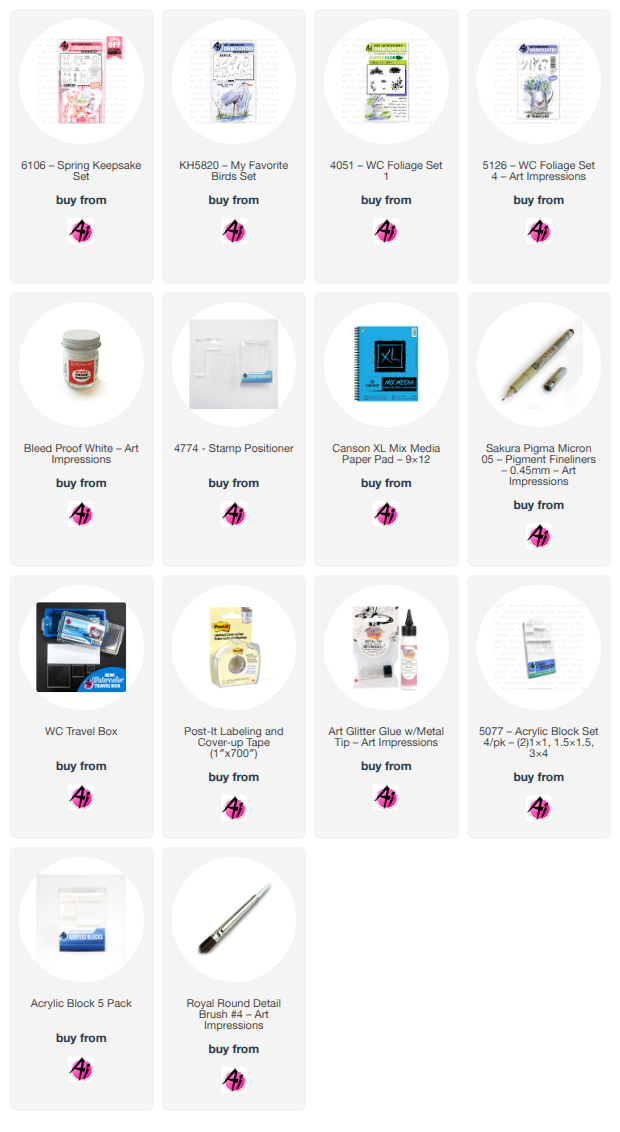
 For my June project, I created a tag with the adorable frog from the Spring Keepsake Set (#6106). I inked the little frog with Pumice Stone Distress ink, stamped off once on watercolor paper and then stamped him on Canson Mixed Media paper. I painted him mainly with lt. green (#11) and then olive green (#15) for the shading. Using the fine-tip, I added dots in olive green (#15) and then touched my brush to them to soften the color. Using a black Micron pen, I darkened his eyes, leaving a white spot for a highlight. I then cut out the frog on a scrap piece of paper and used that as a template to line up the die over my painted frog. Once I had it in position, I secured it with Post-it tape and ran it thru my Cuttlebug. My next step was to cut a stitched tag with Canson Mixed Media paper. I wanted the little frog to be sitting on a river bank, so I sketched a line for the water and then sketched another line for the bank. Using steel blue (#17) from my palette, I added water on the bottom portion of the tag, starting with a darker line where my pencil line was and then making sure I had light and dark areas. I then used sepia (#45) to do the same with my bank. I added my sky next, leaving light and dark areas with sky blue (#75). With my teeny tiny grass (#4051), I stamped grass in a repeat on the left side of the bank to almost the middle of the tag. I wanted wild grass along the bank in more than one height, so I used a tall cattail from Kim’s bird set (KH5820) and a tall grass from Foliage Set 4 (#5126). With the fine tip of my violet marker (#8), I added some dots to the tops of the grass stems for a few wildflowers. Then with Dr PH Martin’s white, I added daisies and some dots for wildflowers. I also added some white lines in my water to look like ripples. Once the daisies were dry, I added centers with the fine tip in brilliant yellow (#43). In the left upper corner of the tag, I stamped leaves to give the impression of a tree using Foliage Set 4 (#5126). I used an embossing folder to emboss the blue paper for the top of my tag. I then used the same tag die to cut the top of the tag and then a border die to cut the decorative edge. I used Art Glitter glue and glued the tag to my card base and then positioned the frog so he was just off the right edge of the tag, giving him a 3-D look. I glued him to the tag and also glued the heart button. I still use Marvy Le Plume markers for my projects.  Most of these can be converted to Tombow colors, but choose colors that work for you. These just happen to be 
some of my go-to colors for any project I work on. 

Here is the link for the Tombow conversion chart:

 https://www.artimpressions.com/shop/art-impressions-most-loved-color-conversion-chart/


 I hope you’ll give this project a try and please be sure to post your project so we can all enjoy it! I adore this little frog! Also, don’t forget to enter the Monthly Challenge for a chance to win a free stamp set! Enjoy the beginning of summer and happy stamping! 


Now let's see who won our May Challenge!


Our Lucky Random Winner was: #4 Diane Z.


Please contact Leah at Feedback@artimpressions.com
to claim a free stamp set of your choice!!

The first winner of a freebie from me is #17 Licia B.

The second winner of a freebie from me is #9 Pat S.


Please email me at Renee@artimpressions.com
with your full name and address and I'll send you a photo of the freebies I have available for you to choose from.

Now for our new monthly challenge, here are the rules.

 ✻ Please make a new card or handmade crafty creation using either stamps, dies and or designer paper from Art Impressions. You can make any item you wish; this is not limited to cards! (unless specified)

✻ Limit two submissions per person.
One random winner will receive a free stamp set from Art Impressions and one random winner will receive a freebie stamp from me.
 ✻Please include your first name and last initial on your submission. You may include your entire last name, but it's not necessary.
✻We love to comment on your entries, but keep in mind if you use a private group or a platform that you need to sign up for, we probably won't be able to.
✻ The Ai Challenge is open to everyone, international submissions are welcome!
✻ Include a link back to the Ai Blog or grab our button on the top right of our sidebar!
✻ Share the Ai love if you can, by clicking and commenting on your fellow crafters.
✻ Make sure to get your link up by the deadline to enter your creations.
✻ Good luck and happy stamping!

You are invited to the Inlinkz link party!

Click here to enter

Friday, May 1, 2026

May 2026 Monthly Challenge: Girl Enchanted by Butterfly by Debbie Hedges

 Hello Ai fans and welcome to our May Challenge featuring Debbie Hedges.


Happy May everyone! Mother’s Day is coming up and summer is just around the corner!


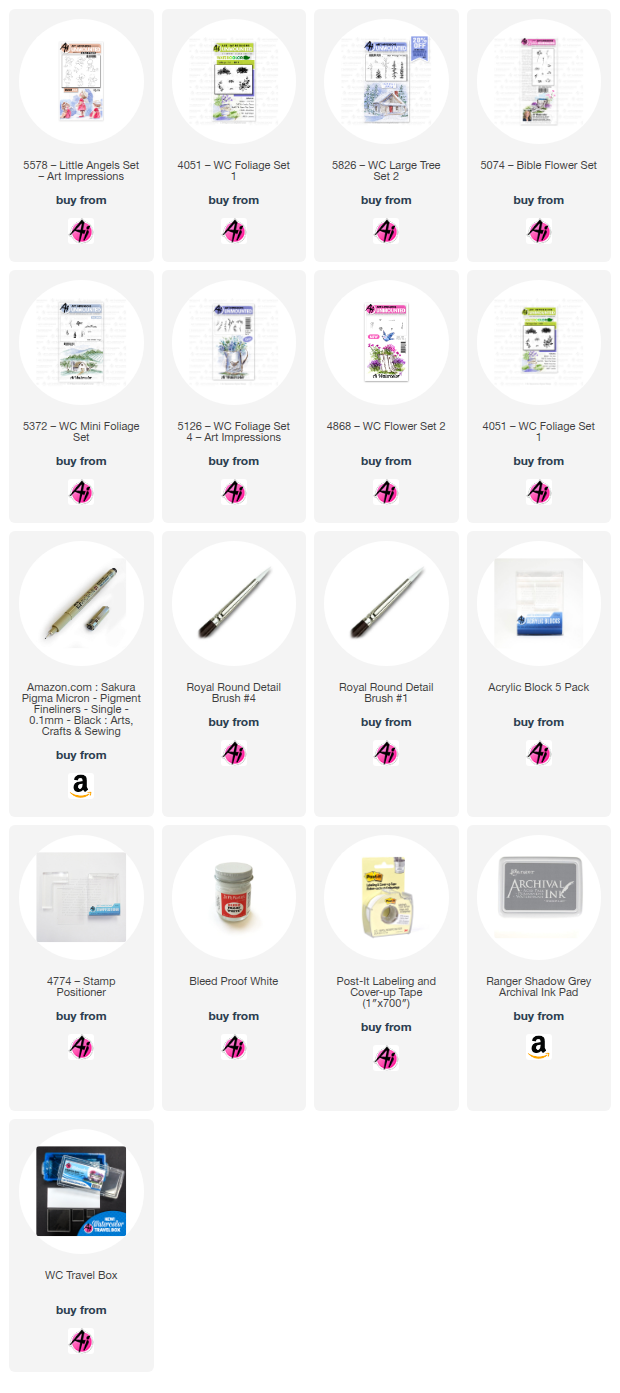
For my May project, I created a small scene with a little girl in a meadow. I inked the little angel (#5578) without her wings (Shadow Grey Archival Ink) and stamped her slightly to the right of center. I painted her with a violet dress (#8) with a pink sash (#67). For her hair , I used sepia (#45), her skin in pale pink (#47), added a little bit of extra pink on her cheeks and added her eyelash with my Micron. I also used the fine tip of my sepia pen to add a few accent lines in her hair.

I added a hill in the background in pencil. I then painted the line in green (#15) and added a green wash, keeping it lighter at the bottom where I will stamp grass and flowers. Using the mini foliage set, I stamped bushes along my hill line, leaving some blank area near the little girl. I stamped the bushes twice on each side before re-inking to have some light and dark areas.

Using post-it- tape to protect her shoes and I stamped a grass line on either side of the little girl to create the foreground. I used the teeny tiny grass, but also randomly stamped a few of the grass from #5826 to use for wildflowers. The wildflowers are a mixture of daisies using Dr. PH Martin’s Bleed Proof White and also a flower from Bible Journal Flower Set. I used my stamp positioner and only inked one flower in aubergine (#93) to add to the top of a few of the longer grass blades. For the daisies, I dabbed white paint to make the daisies in different sizes. Once the paint dried, I added yellow (#43) centers. Then I added a green wash below the grass, leaving light and dark areas.

Sky was added next, leaving light and dark areas with sky blue (#75). In the left upper corner, I stamped leaves to give the impression of a tree near the little girl. The last step was to add the butterfly. It is simple to create by stamping a single heart flower (#4868) in the color you want your butterfly. Then with my Micron, I added the butterfly body in black.

I still use Marvy Le Plume markers for my projects.  Most of these can be converted to Tombow colors, but choose colors that work for you. These just happen to be some of my go-to colors for any project I work on. (Here is the link for the Tombow conversion chart: https://www.artimpressions.com/shop/art-impressions-most-loved-color-conversion-chart/)


I hope you’ll give this project a try and please be sure to post your project so we can all enjoy it! Also, don’t forget to enter the Monthly Challenge for a chance to win a free stamp set! Happy Mother’s Day and happy stamping!


Now let's see who won our April Challenge!
Can I just say...It was a good day to be named Bev....lol!
We had 2 Bevs win this month.

Our Lucky Random Winner was: #9
Bev.O.


Please contact Leah at Feedback@artimpressions.com
to claim a free stamp set of your choice!!


This month I decided to give away 2 freebies.

The winners of a freebie from me are #6
Bev. S.
and #4 Cindy P.


Please email me at Renee@artimpressions.com
with your full name and address and I'll send you a photo of the freebies I have available for you to choose from.

Now for our new monthly challenge, here are the rules.

 ✻ Please make a new card or handmade crafty creation using either stamps, dies and or designer paper from Art Impressions. You can make any item you wish; this is not limited to cards! (unless specified)

✻ Limit two submissions per person.
One random winner will receive a free stamp set from Art Impressions and one random winner will receive a freebie stamp from me.
 ✻Please include your first name and last initial on your submission. You may include your entire last name, but it's not necessary.
✻We love to comment on your entries, but keep in mind if you use a private group or a platform that you need to sign up for, we probably won't be able to.
✻ The Ai Challenge is open to everyone, international submissions are welcome!
✻ Include a link back to the Ai Blog or grab our button on the top right of our sidebar!
✻ Share the Ai love if you can, by clicking and commenting on your fellow crafters.
✻ Make sure to get your link up by the deadline to enter your creations.
✻ Good luck and happy stamping!

You are invited to the Inlinkz link party!

Click here to enter

Wednesday, April 1, 2026

April 2026 Monthly Challenge: Springtime Bunny by Debbie Hedges

 Hello Ai fans and welcome to our April Monthly Guest Designer Challenge!
This time Debbie has the sweetest little bunny for you.
After you read through her post and admire her card, be sure to
scroll down to see who our March winners were.

Happy April everyone! It’s almost Easter and I am enjoying spring flowers in bloom!


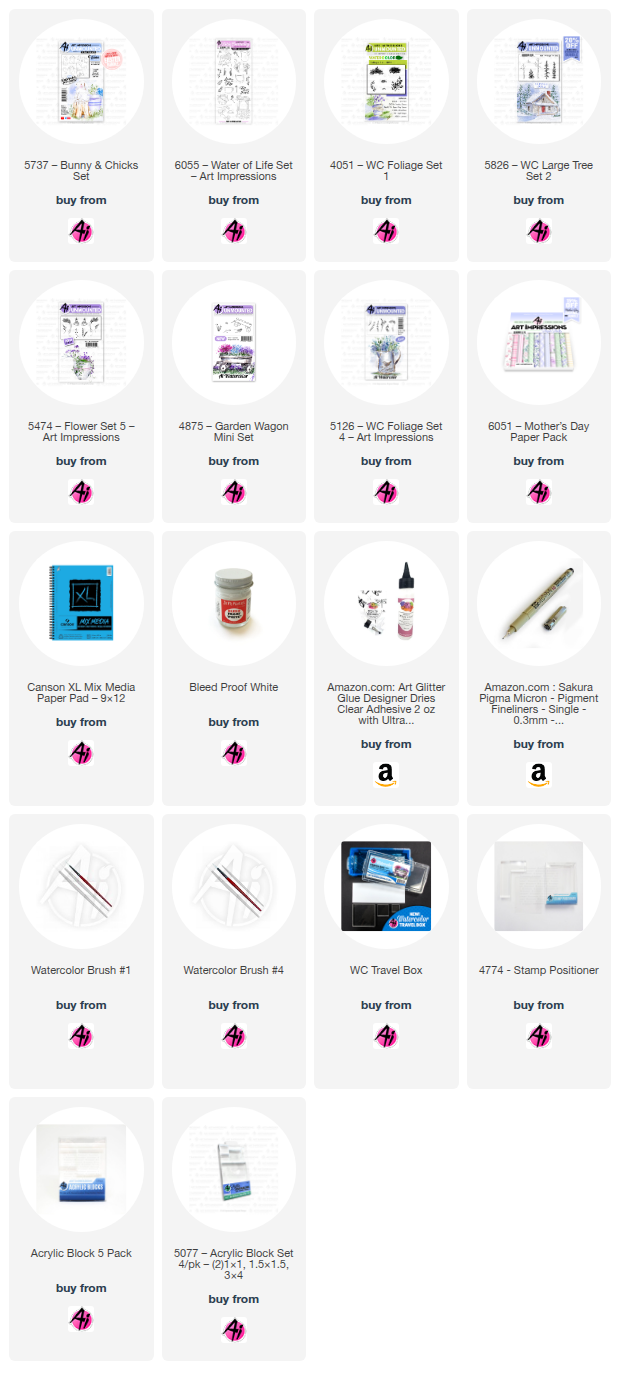
or my April project, I wanted a simple scene with a bunny in a meadow with some rocks and flowers surrounding him. I used the left facing bunny #5870 Peeking Bunny and stamped him on the right side in Pumice Stone Distress Ink. Then I inked a few of the rocks from #5378 WC Stone Creek Scene in Pumice Stone Distress Ink and stamped them to the left of the bunny.

Using #75 sky blue, I added sky, adding color so there were light and dark areas and also some white space to show clouds. I usually add sky first so I don’t have to work around the flowers later. I then painted the bunny in #84 taupe. I used #67 bubblegum pink for his ears and once he was dry, used my black Micron to darken his eyes. I colored the rocks next, leaving a highlight on the top and using a variety of grey and brown tones (#40 brownish grey, #21 dark grey, #45 sepia, #15 olive green, and #84 taupe).

Next, I made a mask of the bunny and stamped grass on both sides of him in #15 olive green, using the teeny tiny grass (#4051) and the grass from #5826 WC Large Tree Set 2. I also added some grass along the bottom right of my project. I pulled the color out of the lines and then used a single flower from #6055 Water of Life Set to stamp the flowers on the right in #79 grape.

For the flowers on the left, I started by inking the small vine stamp from #5126 Foliage Set 4 and stamped it several times for light and dark to create the base of the plant (I made a mask of the rocks to protect them for this step). I used #15 olive green for the foliage. The long stem is also from set #6055 and I inked it in #93 aubergine and used my stamp positioner to stamp it 3 times and then touched each bloom with my brush to soften the color. The tall grass is from #4875 Garden Wagon Mini set. I inked it in #15 olive green and inked the ends in #8 violet. Using my positioner, I stamped it twice. I then used the fine tip and added a few more flower bud dots in violet. I added the hint of a tree by inking leaves from #5126 and stamping them twice in the left corner of my project.

To finish up, I used #15 olive green to anchor the rocks and bunny by adding some “ground” as grass along the base of the rocks, bunny and grass. With Dr Ph Martin’s Bleed Proof White, I added dots to the bunny tail so it would look fluffy – but left the shading at the base. I also added a few dots along the ground and in the grass I added at the bottom right. I also used the fine point of my taupe marker to darken areas on the bunny and rocks for shading.

I still use Marvy Le Plume markers for my projects.  Most of these can be converted to Tombow colors, but choose colors that work for you. These just happen to be some of my go-to colors for any project I work on. (Here is the link for the Tombow conversion chart: https://www.artimpressions.com/shop/art-impressions-most-loved-color-conversion-chart/)


I hope you’ll give this project a try and please be sure to post your version so we can all enjoy it! Also, don’t forget to enter the Monthly Challenge for a chance to win a free stamp set! Happy stamping!


Now let's see who won our March Challenge!

Our Lucky Random Winner was: #3


Please contact Leah at Feedback@artimpressions.com
to claim a free stamp set of your choice!!

The winner of a freebie from me is #18


Please email me at Renee@artimpressions.com
with your full name and address and I'll send you a photo of the freebies I have available for you to choose from.

Now for our new monthly challenge, here are the rules.

 ✻ Please make a new card or handmade crafty creation using either stamps, dies and or designer paper from Art Impressions. You can make any item you wish; this is not limited to cards! (unless specified)

✻ Limit two submissions per person.
One random winner will receive a free stamp set from Art Impressions and one random winner will receive a freebie stamp from me.
 ✻Please include your first name and last initial on your submission. You may include your entire last name, but it's not necessary.
✻We love to comment on your entries, but keep in mind if you use a private group or a platform that you need to sign up for, we probably won't be able to.
✻ The Ai Challenge is open to everyone, international submissions are welcome!
✻ Include a link back to the Ai Blog or grab our button on the top right of our sidebar!
✻ Share the Ai love if you can, by clicking and commenting on your fellow crafters.
✻ Make sure to get your link up by the deadline to enter your creations.
✻ Good luck and happy stamping!

You are invited to the Inlinkz link party!

Click here to enter

Sunday, March 1, 2026

March 2026 Monthly Guest Designer Challenge with Debbie Hedges

Hello Ai fans and welcome to our March Monthly Guest Designer Challenge!

As you may have heard...Simone Carr has become our newest Watercolor Design Team Member.

That left an opening for our Monthly Guest Designer Challenge.

We were THRILLED when Debbie Hedges agreed to accept that position!

For her first card, she created a BEAUTIFUL beach themed card,
because, aren't we all ready for a little sunshine?


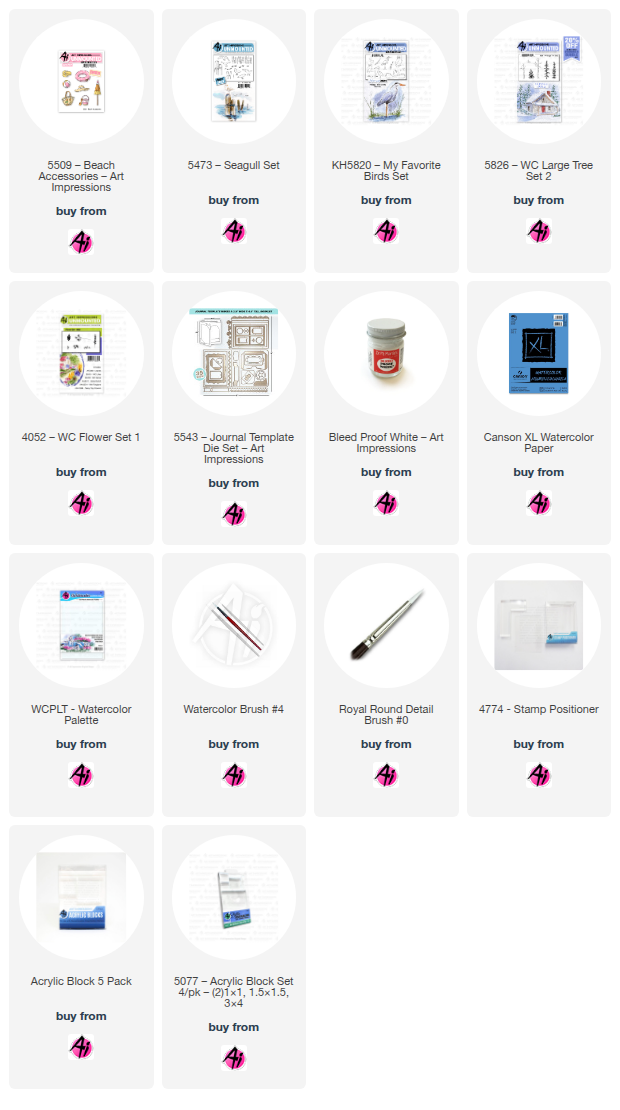
 I feel so honored that Renee offered me the opportunity to be guest designer throughout the year now that Simone has moved to the Design Team. Simone does such an amazing job with her projects! I am a huge fan of Art Impressions and have been for years! I hope I can provide inspiration for you to use these amazing products. For this project, I cut out my rectangle with the die from the #5543 Journal Die set (2.75”x4”). I normally cut the project at the end, but I wanted this project to have a border. I then used my ruler to add a horizon line for the ocean approximately 1.25” from the top of the rectangle. I had stamped and cut masks for the beach ball and the tote bag from #5509 Beach Accessories, so I used them to determine where they should be stamped in the foreground. It helps to figure out placement before you start stamping. Once I had the masks in place, I added the dunes in pencil in the middle and then also drew the shoreline in pencil as a guide. My next step was to stamp the tote bag and beach ball. I started with the tote bag by inking it in #40 Brownish Grey so that I could avoid inking the tropical scene on bag. I then applied the mask and used my positioner to stamp the beach ball in Shadow Grey Archival ink so it looks like it is slightly behind the bag. With my positioner, I then added the seagull – also stamped in Shadow Grey Archival Ink. I still use Marvy Le Plume markers for my projects. Most of these can be converted to Tombow colors, but choose colors that work for you. These just happen to be some of my go-to colors for any project I work on. 

 Here is the link for the Tombow conversion chart.

  https://www.artimpressions.com/shop/art-impressions-most-loved-color-conversion-chart/


 I started with the tote bag by pulling out the color along the edges. Then added color using #17 Steel Blue, letting layers dry in between. I added more color along the edges, leaving the center of the tote bag lighter. I then used a mix of #45 Sepia and #86 African Violet to apply color to the handle and the accents on the bag. Marvy Markers have a fine tip, and I used #40 Brownish Grey to add some darker areas on the handle, stitching accents and the buttons. For the beach ball, I used #65 Cherry and #3 Blue. For the white area, I carefully added shadows with the same grey mixture I used for the tote bag. My next step was the ocean. I mixed #14 Turquoise with #17 Steel Blue to soften the color. I started with the horizon line and then filled in the area with horizontal strokes making sure to have light and dark areas for interest. I let layers dry in between. For the sand, I used #30 Rosewood for the area near the shore and #45 Sepia for the dunes and foreground. I added layers along the top of the dunes to define them and the other areas used more of a wash to just show the “idea” of sand. For the grass, I used the grass from #5826 WC Large Tree Set 2, starting at the edge of the project and stamping a couple times down the hill I created. I also placed my mask on the tote bag and stamped the grass along the edge of the project to show the foreground. With Post-it tape, I covered the “sand” and stamped the teeny t iny grass stamp from #4051 WC Foliage Set 1 to add some smaller grass to taper off down the dunes. I wanted some tall grass as well, so I used my positioner and stamped tall grass from #KH5820 My Favorite Birds Set a couple times on each side. All of the grass was stamped with #17 Olive Green. I then used the fine tip on the marker to add some “tufts” on top of some of the tall stems. Using #75 Sky Blue, I added sky. I made sure to apply the color so there were light and dark areas and also some white space to show clouds. With seagulls being white on the underside, I mainly just added grey shadows at the bottom edges of his wings and his tail feathers, along with shadows on his body. I darkened his eye with a Micron pen. I used the fine tip of #43 Brilliant Yellow to add color to his beak. With Dr Ph Martin’s Bleed Proof White, I added waves to my ocean. I also added some dots along the water’s edge to show how the waves can froth as they reach the shoreline. Next to the tote bag, I added some larger white dots for daisies along with some smaller dots as well. When they were dry, I added yellow centers with the fine tip of #43 Brilliant Yellow. With #45 Sepia, I painted an uneven line under the grass, tote bag and beach ball to anchor them in the foreground. I also used the fine tip to add some dots for sand and then signed and dated my project. I hope you’ll give this project a try. The monthly challenge does not have a theme, so please be sure to enter your projects using Art Impressions products for a chance to win! Who doesn’t love a chance to win free stamps??


Now let's see who won our February Challenge!

Our Lucky Random Winner was:

#14 Gabriella B.


Please contact Leah at Feedback@artimpressions.com
to claim a free stamp set of your choice!!

The winner of a freebie from be is #11 Lynn C.


Lynn, please email me at Renee@artimpressions.com
with your full name and address and I'll send you a photo of the freebies I have available for you to choose from.

Now for our new monthly challenge, here are the rules.

 ✻ Please make a new card or handmade crafty creation using either stamps, dies and or designer paper from Art Impressions. You can make any item you wish; this is not limited to cards! (unless specified)

✻ Limit two submissions per person.
One random winner will receive a free stamp set from Art Impressions and one random winner will receive a freebie stamp from me.
 ✻Please include your first name and last initial on your submission. You may include your entire last name, but it's not necessary.
✻We love to comment on your entries, but keep in mind if you use a private group or a platform that you need to sign up for, we probably won't be able to.
✻ The Ai Challenge is open to everyone, international submissions are welcome!
✻ Include a link back to the Ai Blog or grab our button on the top right of our sidebar!
✻ Share the Ai love if you can, by clicking and commenting on your fellow crafters.
✻ Make sure to get your link up by the deadline to enter your creations.
✻ Good luck and happy stamping! 

You are invited to the Inlinkz link party!

Sunday, February 1, 2026

February 2026 Monthly Challenge with Simone

 Hello Ai fans!

Welcome to our February Monthly Challenge.
We have a gorgeous LOVE themed card from Guest Designer Simone to inspire you.

As always, this challenge has no theme so anything you want to create is fine as long as you use something from Art Impressions on it. You might be the next winner of a free stamp set from Art Impressions. Winner is chosen randomly so all skill levels have a fair chance of winning. One lucky winner will also receive a freebie from me.

After admiring Simone's beautiful work, be sure to scroll down to see the winners of our last challenge.

Then, be sure to read our very special announcement.


Hello Friends,

February is the perfect time to celebrate love, warmth, and a little creative joy, and I’m excited to share today’s card with you. I began on Canson Watercolor Paper by tracing the 4th largest heart-shaped die, then lightly penciling in the bow and stem to guide my layout.


I stamped both the sitting gnome and the standing gnome using Archival Ink Shadow Grey. The sitting gnome was first stamped onto masking paper and fussy cut, then placed over the stamped image. Using a stamp positioner, I inked the flower pot with Tombow 565 + 969 directly onto the acrylic plate, then stamping it off twice for a softer look. Once I had the placement just right, I removed the acrylic plate and stamped the pot onto the paper.

After removing the mask from the sitting gnome, I began coloring. I colored the bow first, then covered it with masking tape before stamping foliage inside the heart. With a #4 brush and a touch of water, I gently dabbed the foliage to soften the look. Once the mask was removed from the bow, I stamped a few additional foliage pieces so they slightly overlapped the bow for added depth.
After painting the pot and gnomes, I placed the mask back over the sitting gnome to stamp flowers and grass inside the pot. I also stamped grass around the pot and near the standing gnome to ground the scene. To finish, I used Dr. Ph. Martin’s Bleed Proof White to paint delicate white flowers within the heart and grass, and added tiny white hearts to the bow for a sweet final touch.


I hope you give this project a try and have fun creating your own cozy, love-filled scene.
Materials Used
Stamps
Dies
Paper
Inks & Coloring Mediums
Archival Ink – Shadow Grey (for stamping gnomes)
Tombow Markers:
933 – Gnome shirt, flowers
856 – Bow, pot, flower centers
245 – Gnome hat
555 – Gnome pants
942, 912 – Gnome nose and hands
027 – Pot
947 – Gnome shoes, shirt
N55 – Gnome beard
177 – Grass, heart
526 – Sky
969 + 565 – Stamped pot

Other

Lovely Simone. Thank you so much for your inspiration.
Now, let's see who won our January 2026 challenge.

The winner of a free stamp set from Art Impressions is:
#10 Ellen M and the winner of the free stamp set from me is #8 Julie W.


Ellen, 
Please contact Leah at Feedback@artimpressions.com
to claim a free stamp set of your choice!!

Julie,
Please email me at Renee@artimpressions.com with your full name and address and I'll send you a photo of the freebies I have available for you to choose from.


Congratulations to both of our January winners. We LOVED all of the entries and we hope you'll continue to enter. We can't wait to see your beautiful art each month.

Now for our special announcement.
Though we've loved having Simone as a special Guest Designer, it's time for her to move on.

Don't be too sad though...

She's moving on to become a full time Watercolor Design Team member!!

You'll now get to see her on a more regular basis!
She'll have her own Watercolor Weekend posts as well as participating in one of our Bi-Weekly challenges each month. Are you as excited as we are??


We're very excited for all of the new changes coming soon and of course, all of the new releases!
See the rules below and then be sure to come back and enter your crafty creation. You might just win a free stamp set!

 ✻ Please make a new card or handmade crafty creation using either stamps, dies and or designer paper from Art Impressions. You can make any item you wish; this is not limited to cards! (unless specified)

✻ Limit two submissions per person.
 ✻Please include your first name and last initial on your submission. You may include your entire last name, but it's not necessary.
✻We love to comment on your entries, but keep in mind if you use a private group or a platform that you need to sign up for, we probably won't be able to.
✻ The Ai Challenge is open to everyone, international submissions are welcome!
✻ Include a link back to the Ai Blog or grab our button on the top right of our sidebar!
✻ Share the Ai love if you can, by clicking and commenting on your fellow crafters.
✻ Make sure to get your link up by the deadline to enter your creations.
✻ Good luck and happy stamping! 

You are invited to the Inlinkz link party!

Click here to enter