

Hello, Ai Fans! Happy Watercolor Weekend!
We this winter season finds you happy and healthy. It has been a pretty busy season, and we are now getting into that time of year where we can slow down and take a breather. Our ladies have made some super cute cards this week that have us dreaming of all the spring flowers!

Hello,
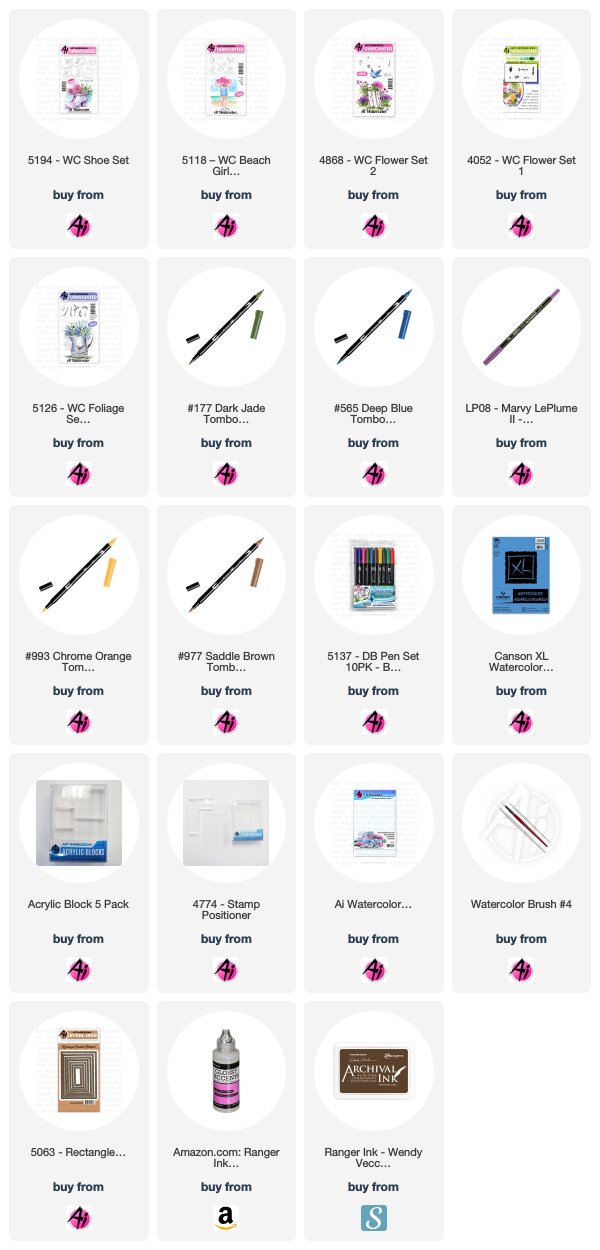
The weather has been wonderful in Las Vegas so I made this Spring-like card for the Art Impression's Watercolor Weekend. I actually used Ranger Archival Ink in Coffee to stamp the boots from the 5194 - WC Shoe Set and the umbrella from the 5118 - WC Beach Girls Set. I knew I was going to put glossy accents on them and I didn't want the lines to blur. The glossy accents really make the boots and umbrella look like they are made of vinyl or rubber. Next, I watercolored them in 993 and 977. To add the shadows, I used 565. I masked off the boots, then stamped in the flowers from 4868 in 177 and No. 6 violet. Then I stamped the flower from the Flower Set 4052 in 177 and 755. The foliage is from 5126 - WC Foliage Set 4 inked in 177. Then, I dabbed at the flowers and foliage with a wet brush. I used 565 to paint the ground shadows and the sky. I used the 5063 - Double Stitched Rectangle A2 dies to cut out my scene and the background pieces. I put it all together and then added the glossy accents. Set it aside, in a safe place for a few hours, so it can dry. I accidentally dropped mine and ruined my first one.
Supplies used listed below:


I began using the largest hanging swing image from the 5195 - WC Swing Set, colouring it first in my Tombow Dual Brush Marker #565 Deep Blue, stamping it off on scrap paper, and then colouring it again with #879 Brown. I stamped it onto my Canson XL Watercolour paper. *Instead of masking, when I coloured the swing, I left an open area in the corner where I intended my bunny to sit. I've used the bunny from 5016 - WC Mini Critters Set, coloured him up in #N45, and used my stamp positioner to place him where I wanted him. With my damp #4 brush, I softened the lines of the swing, pulling out the colour to fill in the shaded areas on the wood frames, and between the cushions.
To create my floral vine, I started with one of the smaller twig images from 4964 - WC Branches Set, and colouring it with #879, I stamped it numerous times, in different directions, creating the flow of the vine. Using the trailing foliage stamps from 5126 - WC Foliage Set 4 coloured in #177 Dark Jade, I stamped the greenery along the same path, winding it around the swing frame in first & second generation. Before stamping the flowers, I softened the images with my damp brush. Using the Daisy Bunch from Flower Set - 4052, I coloured a few of the blooms in #993 Chrome Orange, and created the yellow floral sprays around the base of the swing, stamping them in a cluster. I filled in any open areas with the tiny dot flowers from 5009 - WC Mini Flower Set coloured in #533 Peacock Blue, and then I added clusters of them along the twisting vine - then touched all the flowers with a damp brush. I used the fine point end of my #993 marker to draw in the stripes on the seat cushions. The bunny got a touch of #850 Blush in his ear, and I used a fine tip black marker to define & darken his eyes & nose.
On my palette, I scribbled #992 Sand and picked it up with a wet brush to add colour to the wood frames, keeping it streaky to suggest a wood grain pattern. I did the same with #565 Deep Blue and used this to add shadows where needed to the swing, bunny, cushions and under the swing. Using the smaller mountain stamp in 5198 - WC Mountain Set, I selectively coloured it in #533, omitting the largest peak, and used my stamp positioner to place it in the background. Then using my brush and picking up colour from the palette, I used #565 to paint in the mountains and sky, and #177 to add a grassy hillside. Since some of my twigs were 2nd generation, they were a little too light, so I went in directly with my fine Twintone Chocolate marker to darken them up. I die cut my scene with a stitched square die and mounted it on dark brown cardstock. The sentiment is from 5136 - WC Sentiment Set 2, stamped in Versafine Onyx Black ink, and die cut with a small stitched tag from 5132 - Tag Stitched Dies, and it got a small yellow Baker's Twine bow. I did some zigzag stitching with my sewing machine on my background papers and mounted it all onto a 5 1/2" square card. 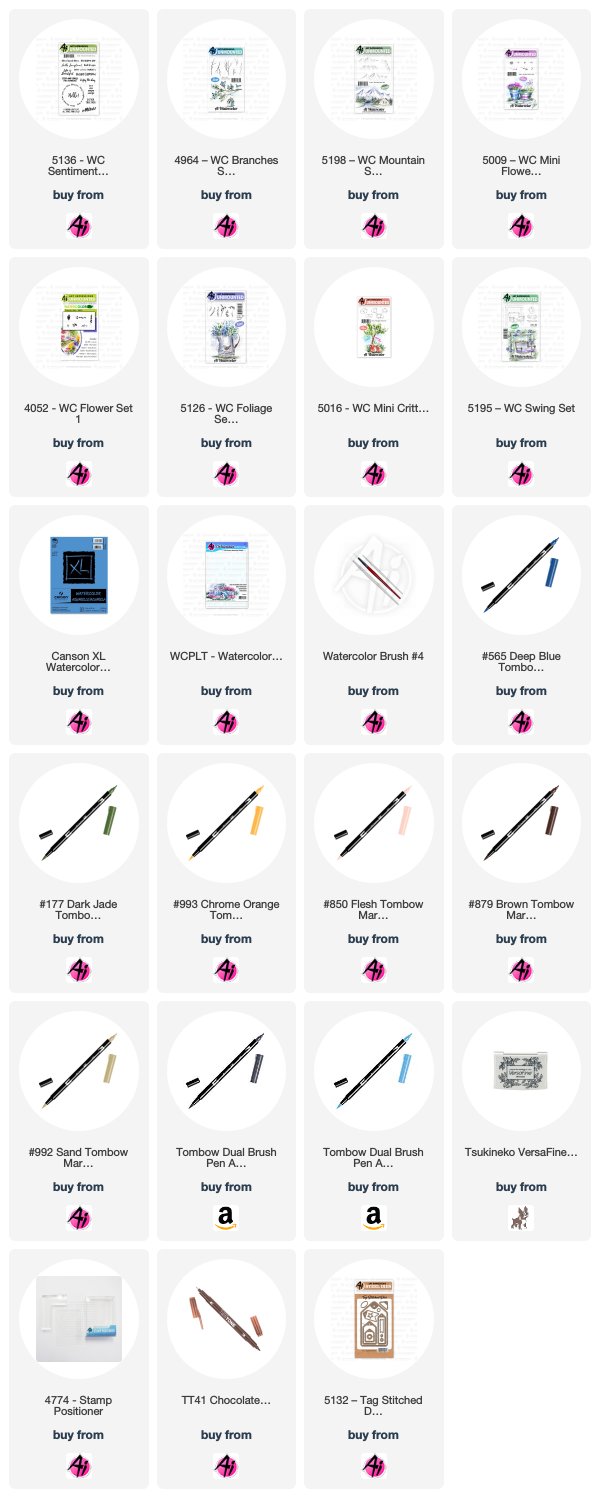

Welcome to watercolor weekend AI Fans! This weekend felt like spring so I thought I would do a quick little spring vase to bring a little color to my life. This project is so quick and easy and, like most of the projects I do, it is really versatile.
Project Details:
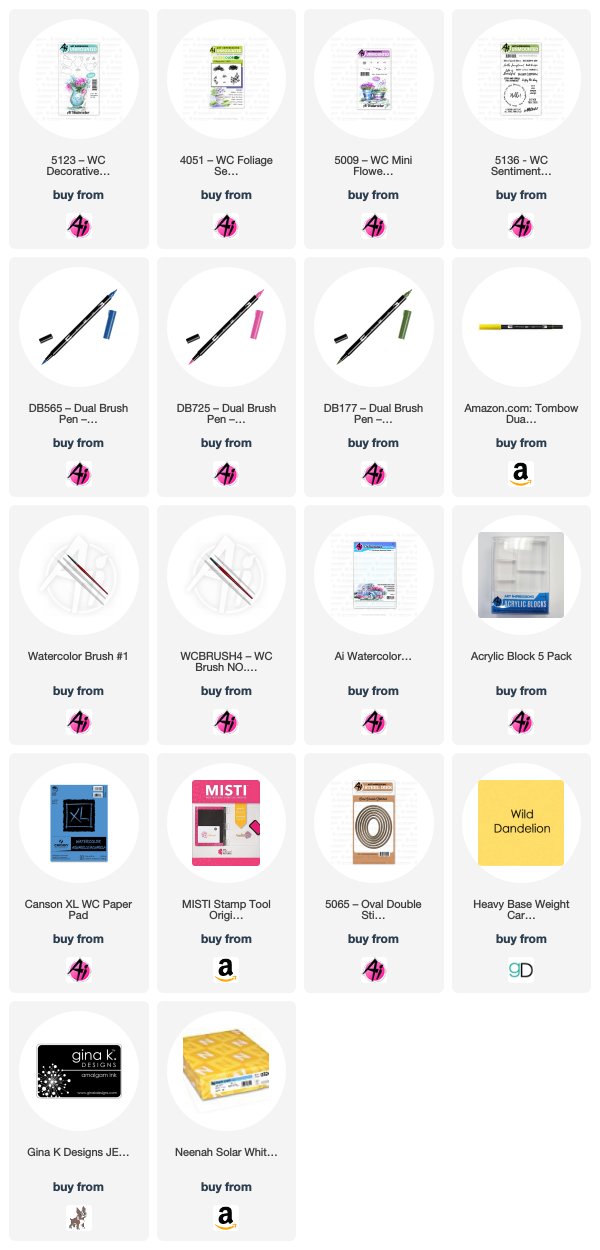
First, I inked the vase from the Decorative Jar set in 565. I stamped it off so that it would be really light. I added water to the vase and using my palette added some additional 565 to the left side and bottom of the vase to make it really dark. I added some 569 to the bottom of the vase to create a shadow and to anchor the vase.
Next, I inked the top of the vine, from the original foliage set, with 177 and stamped it along the top of the vase. I re-inked it and stamped it several times above the vase. I added water to the leaves to soften them. I did this first so that when I added water to the blooms they wouldn’t blend together (and make brown).
For the flowers, I used the dots from the mini flower set inked in 725 and stamped it several times in a circle inside the vase and around the foliage. I added water to all the blooms to soften them.
From my palette, I added some 055 to the right and left of the bottom of the vase to create a background that gives the vase depth. I signed and dated my project.
Card Details:
I cut my watercolor piece out with my oval stitched die. I also cut a mat out of Wild Dandelion with the next side up of the nested oval stitched dies. I cut it from the middle of a 4x5.25 piece of Wild Dandelion card stock that I attached to a Neenah card base with Connect Glue. I then attached a matching piece of patterned paper cut to 3.75x5. I attached the watercolor piece to the mat with Connect Glue and added some foam tape to the back of the mat and attached it to the card.
I placed the piece into my MISTI and stamped the Hello Sunshine sentiment from the WC Sentiments set using black Amalgam Ink.
And that’s it…easy peasy. I love the versatility of all of the Art Impressions watercolor line. I hope you will give this project a try. We hope we inspired you to create something special this weekend.
Happy Crafting!
Thank you, ladies, for your continued inspiration! We absolutely love seeing everyone's personal style show through on each card!
Happy Stamping!
2 comments:
These are all such beautiful cards this week! What amazing talent!
Look at the way my acquaintance Wesley Virgin's story launches with this SHOCKING AND CONTROVERSIAL video.
You see, Wesley was in the army-and soon after leaving-he found hidden, "self mind control" tactics that the CIA and others used to obtain whatever they want.
THESE are the exact same methods many famous people (especially those who "come out of nowhere") and the greatest business people used to become wealthy and famous.
You've heard that you use less than 10% of your brain.
Really, that's because the majority of your brain's power is UNCONSCIOUS.
Perhaps that conversation has even occurred IN YOUR own mind... as it did in my good friend Wesley Virgin's mind 7 years ago, while riding an unlicensed, beat-up garbage bucket of a car without a license and on his bank card.
"I'm so frustrated with going through life payroll to payroll! Why can't I become successful?"
You took part in those types of conversations, isn't it right?
Your own success story is going to be written. All you have to do is in YOURSELF.
CLICK HERE TO LEARN WESLEY'S SECRETS
Post a Comment