

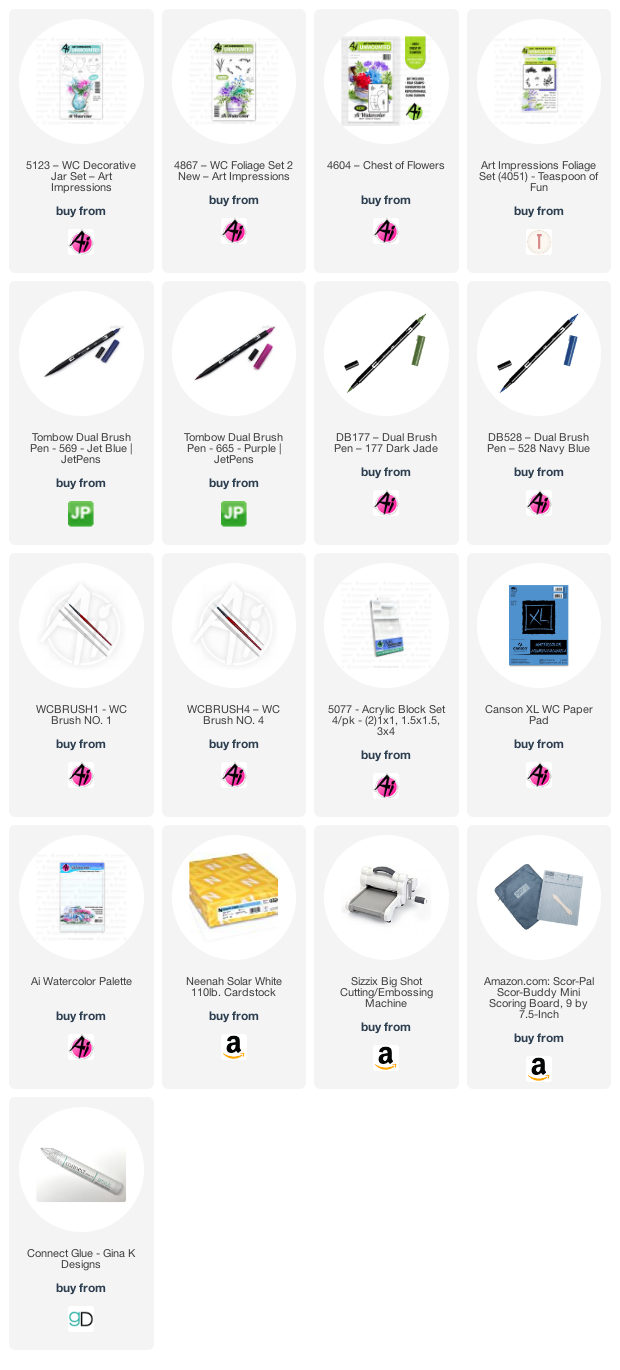
Hey watercolor fans, are you ready for a fabulous weekend of inspiration? Well, you are in the right place! I decided to do a vase of flowers with a cool pattern that reminded me of blue china. Let me tell you how I created my Spring Vase of Flowers.

First I started out by stamping my vase inked with 569. Before I add the vines, I pulled the color out of the lines and added darker shadows using my palette. Next, I fussy cut a mask and used the negative space so I could stamp the small vine on the vase without worrying about stamping into my background (make sure you put the mask in the middle of the handle). I inked the small vine with the 569 and stamped it around my vase. I practiced this on several (and when I say several I mean like 10 times) to see what type of pattern I wanted. I tried to make sure the lighter leaves were in the center of the pot to maintain the highlight. I added a small amount of water to them. To create a little depth, I pulled some color to the outside.
I added some 528 to the bottom of the vase to ground it. I wanted it to look like a shaggy type of placemat. To protect the vase while I added my foliage and flowers, I took the mask that I cut and laid it over the vase. I inked my flowers with 665 and stamped them in a fanlike shape to make them look full. Once I added the water to them, I came back in and stamped in some additional color to give them a little more depth.
For the foliage, I inked up the vine with 177 and added them around the flowers and over the sides of the vase. I added water to the vines. Finally, I took a little of the 528 from my palette and created a very light sky. Lastly, I signed and dated my painting (I didn’t forget this time, phew…).
I created a watercolor background using the same markers to create a really cool effect, head on over to my blog and I’ll tell you how I did it. I love this technique because I don’t have to try to find a background that won’t take away from my painting but will bring it all together.
I cut out the painting with my stitched rectangle die and back it and my watercolor background with black cardstock. I added it all to a Neenah white cardstock base.
That’s it, this came together really quick and easy and I think the pattern on the vase creates such a cool look. I hope you will give this a try and I can’t wait to see your Creative Containers! Check out the other inspirational projects that my team mates have created. Tag us on Instagram so we can see your beautiful creations.
Have a crafty day! See you next time!

Hello All!
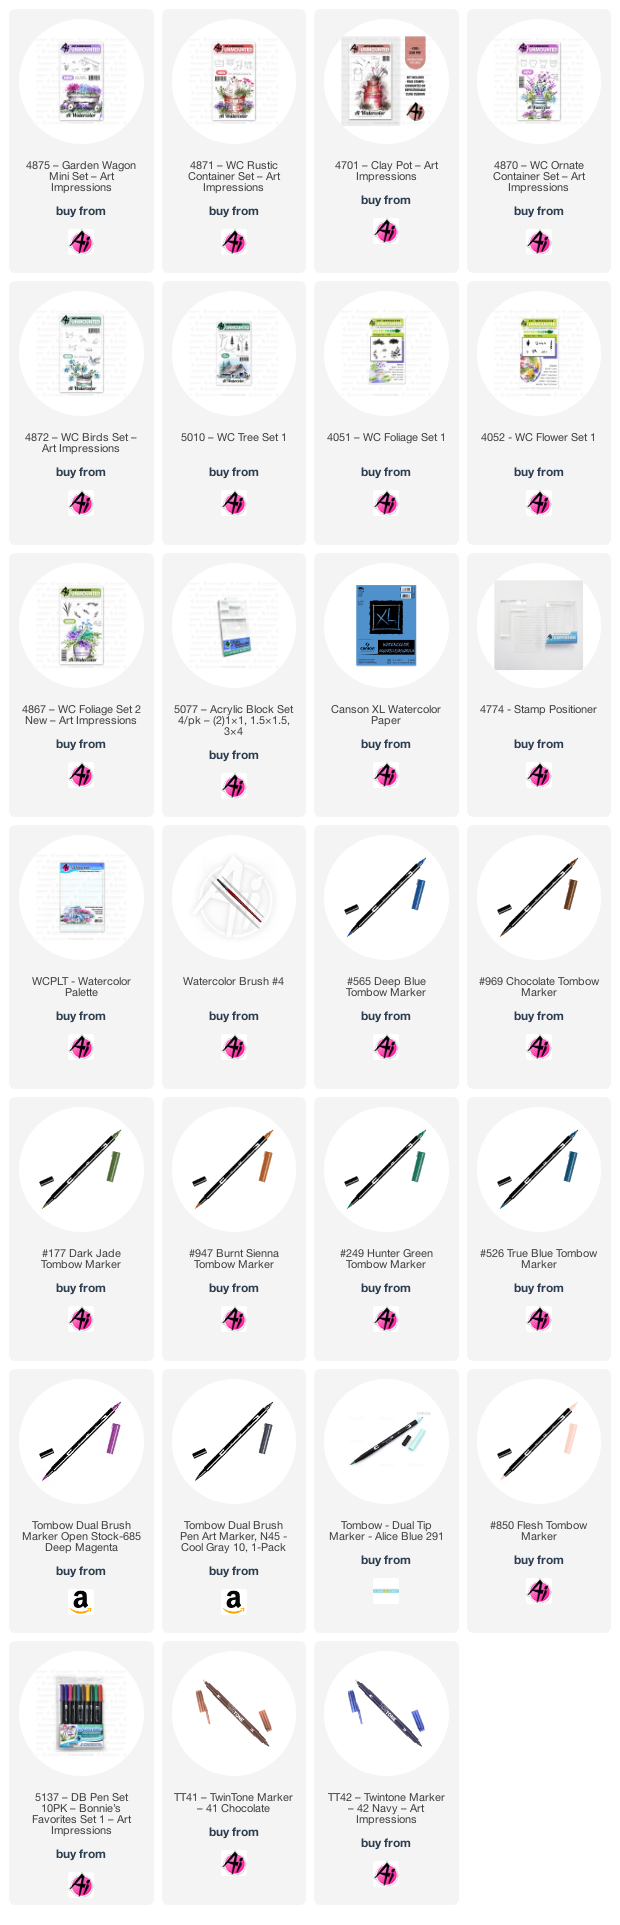
The theme for this Art Impression's Watercolor Weekend is to use containers. My three sons and three grandsons are all climbers so I had the idea of a little boy climbing up containers to see a nest.
I took Bonnie Krebs', Ai's wonderful Owner/Creator's advice to stamp my containers on scratch paper, cut them out and use them to decide what scene I would like to make. This is what I came up with and let me tell you, it's probably the fastest I've ever come up with a scene! Give it a try.

If you would like to make this, first stamp the 4875 Garden Wagon inked in the Tombow brown 969 then the blue 565, stamped off first on scratch paper, onto your slimline base piece of watercolor paper. I used Canson.
Put some masking tape over the top of the wagon, ink the box from the 4871 Rustic Containers in the 969 then 565 and using your stamp positioner, stamp it in the wagon. Continue in the same way for the 4701 Clay Pot and the 4870 Ornate Container.
Ink up the little boy in 969 and using the stamp positioner, place him in the pot. Ink up the nest from the 4872 Birds Set in the 969 and the 565 then using the stamp positioner, stamp it at eye level for your little boy. Using the branch from the 5010 Tree Set 1 inked in 969 and using the stamp positioner, stamp it around the nest. Pull the color out of the lines of the branch and then stamp in the leaves using the 4051 Foliage inked in 177. Color the eggs in 291. Use the Tombow TwinTone in brown and blue to add some darker lines around the eggs and in the nest. Next pull the color out of the lines of all of the containers and the little boy. Color the little boys hair in with 947. His face and arm and foot is colored with 850. His overalls are colored in 291. I added his eyelash with the brown Tombow TwinTone pen. His cuff, pockets and label is colored in 565
The pot under him is colored in 685 and the lines and shading is in 565. The flowers are from the 4052 Flower Set 1 inked in 565. The leaves are 177. The clay pot is colored in N45. The box is colored in 969 with the sides and opening darkened with 565. The wagon was colored in 177 and then 249 on just the outer sides. The tires are colored in N45. Use 565 for the shade on the wagon and under it. Stamp the tall greenery from the 4867 Foliage Set 2 inked in 177 for the tall purple flowers. The flowers are from the 4052 Flower Set 1 inked in the 685. Use the grass from the wagon set inked in 177 on the stems and 565 on the tops on either side of the wagon. Use some green on the palette for the ground cover. The sky is watercolored in with 526.
I hope some of you give this a try and tag me in it!

Hello Ai Watercolor fans!
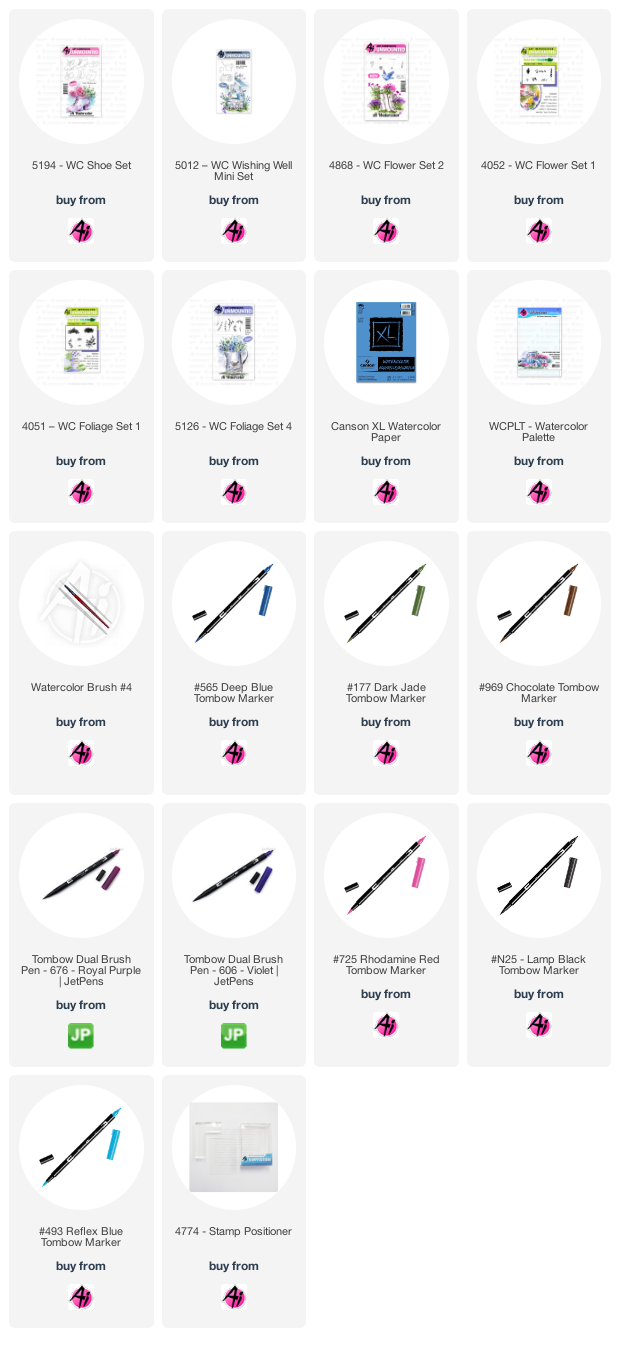
Spring is just starting in my neck of the woods, so I was inspired to paint something springy this week!


I picked up #476 Cyan from my palette and painted several layers onto the boots, concentrating the colour in the darker areas, and leaving the shiny highlite as white. I used #N25 Lamp Black watered down to add a grey shade to the watering can, then used touches of the colours from my bouquet and boots as some colourful reflections on it. I added #565 in shadowy areas for a bit of depth. With the larger grass from Foliage Set - 4051, I added grass to either side of my scene using #177, and painted #493 Relfex Blue onto the sky. To finish it off, I spattered the black paint lightly over everything. I cut my piece to a 4 1/2" square, then used the 5061- Square Double Stitched Dies to cut out a blue frame - 4 times, and layered them on top of each other to make it more substantial.

1 comment:
Five weeks ago my boyfriend broke up with me. It all started when i went to summer camp i was trying to contact him but it was not going through. So when I came back from camp I saw him with a young lady kissing in his bed room, I was frustrated and it gave me a sleepless night. I thought he will come back to apologies but he didn't come for almost three week i was really hurt but i thank Dr.Azuka for all he did i met Dr.Azuka during my search at the internet i decided to contact him on his email dr.azukasolutionhome@gmail.com he brought my boyfriend back to me just within 48 hours i am really happy. What’s app contact : +44 7520 636249
Post a Comment