

Happy Watercolor Weekend! Are you ready for your spring inspiration?
I know you are as ready as I am, so let’s go!

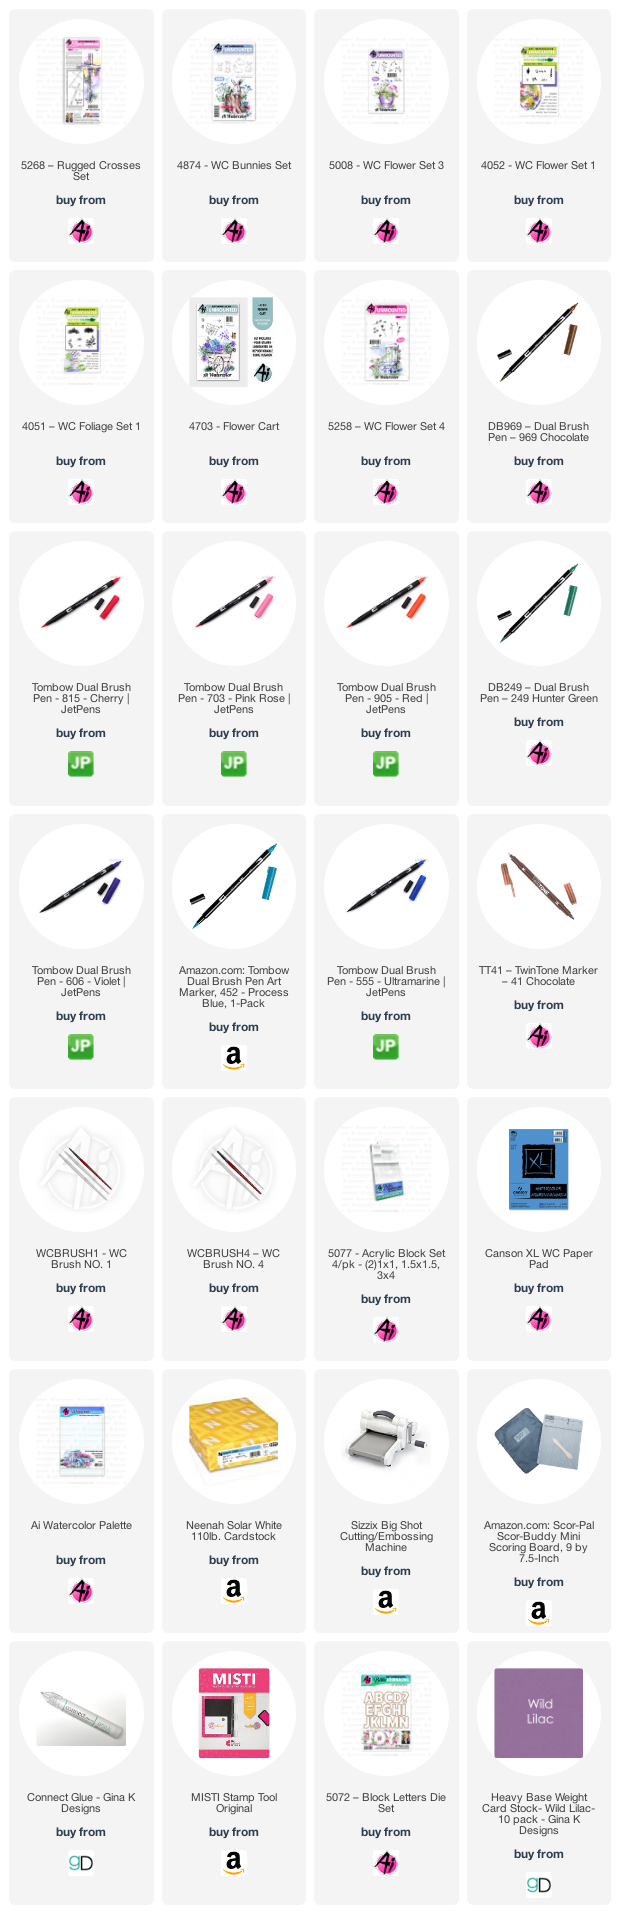
To start off I cut my watercolor card down to 2 7/8 x 7 7/8. I wanted to make sure I wasn't going to have to cut it down after I was done. Next, I lined up my alphabet dies spelling out Spring onto my glass mat, added purple tape across the letters to hold them together, lined them up and ran them through my die cutting machine. I am going to leave the letters in the piece for now.
The Water Coloring
I used my Rugged Cross stamp, inked up with 969 and stamped it in between the "I" and "N" in Spring. I used water and pulled the color slowly out of the sides and bottom of the cross, this creates a really nice dark shadow. Using brush strokes I added additional color to the cross to create a wood effect with lighter and darker areas. Make sure you are leaving white space to create a more realistic three dimensional look.
Once the cross was completed, I added some vines using the vine from the Original Foliage set inked with 249. You don't have to use a lot of greenery on the cross to get your point across, sometimes less is more. I used the small dots flower inked with 815 and stamped it several times around the foliage. I added water to the leaves and flowers.
On the right side, I stamped the sitting bunny inked with 969, pulled the color out of the lines and added a small amount of 815 to the bunny's ear. Next, I inked the standing bunny and stamped him on the left side of the card. I placed the bunnies this way so they were facing towards the middle of the card.
In order to ground the bunnies, I inked the small grass and inked it up with 249. I pulled the color up and out of the lines. Using the same grass, I added it in several areas beneath the "P" and "R". Again, I pulled the color up and out. Next, I inked up the left and right flowers (not sure what they are called, they look like tulips to me) with 249 and 606. I didn't ink the entire stamp, just about halfway (I'm lazy and didn't want to mask it off, LOL). I added water to just the blooms (sometimes I like to add a little more color from my palette to the bottom of the blooms for more dimension).
It looked a little off balance, so I added some more grass to the right side under the "N". I inked up the lilies with 815 and 249 (again, not all the way down). I added some blue to my palette with a lot of water and painted in the sky around the letters and cross. Make sure to leave enough white space for your butterfly and bird if you want to include them in your design.
I inked the bird up with 969 and stamped it off 3 times so that it would be really light. I added some additional blue to the bird, layering to get some darker values. I inked up the butterfly with 3 different colors. The body with 969, and then added 815 to the wings and layered 606 on the edges. I stamped it and using my #1 Paintbrush to pull some of the color out of the lines. So, as you can see I forgot to sign and date my work (I have subsequent to typing this blog post.) So, don't forget to sign your original artwork!
Want to know how I put the card together? Head on over to my blog for all the deets!


Hello Ai Watercolor fans!
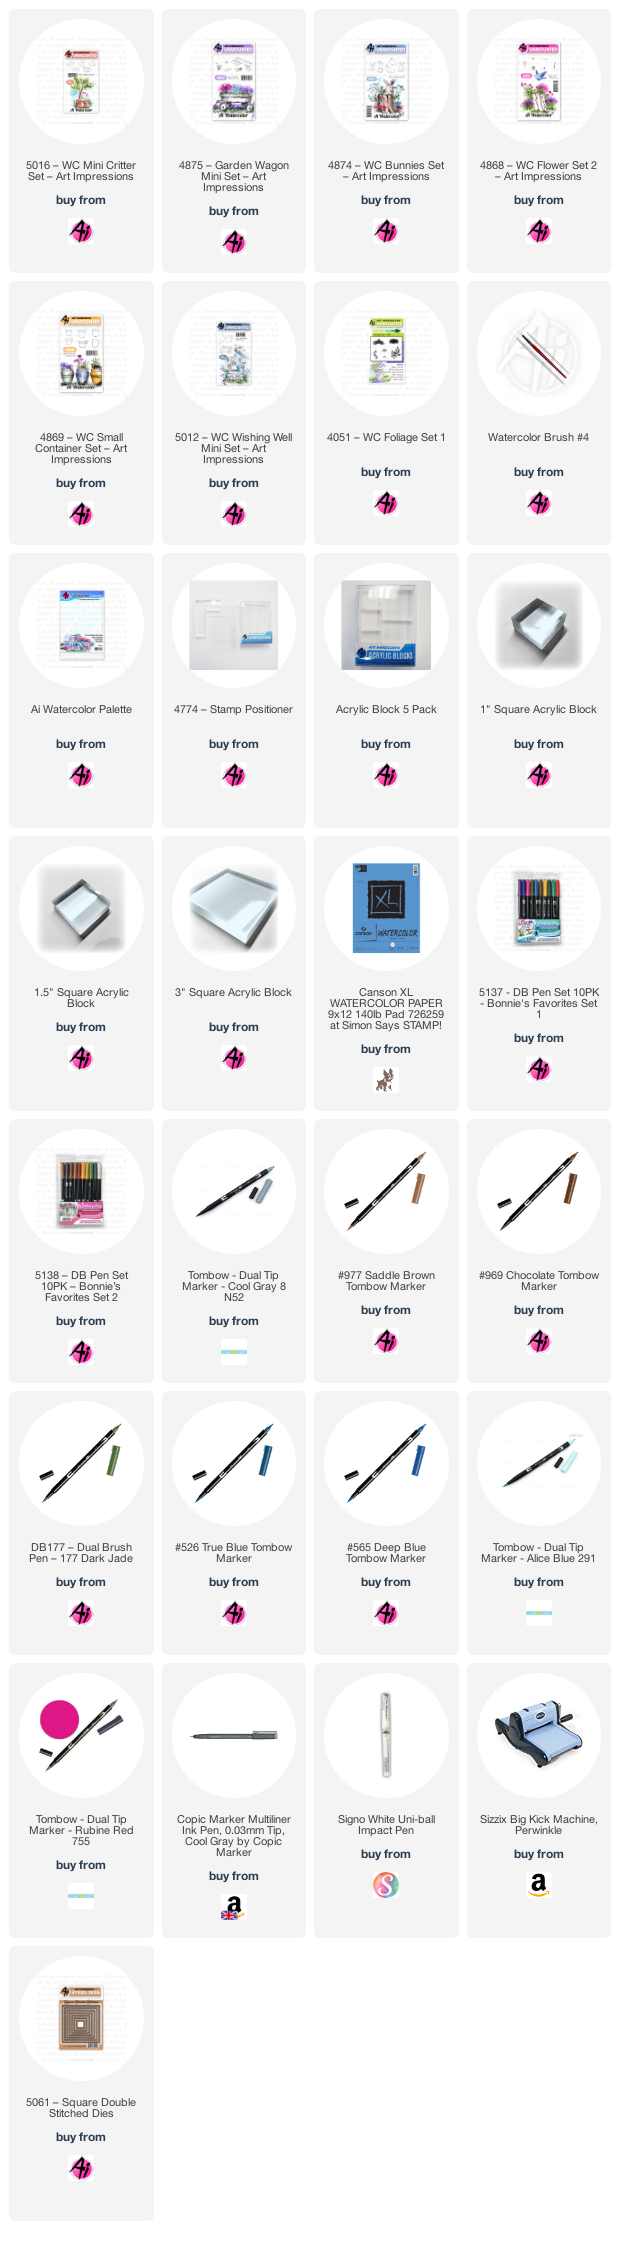
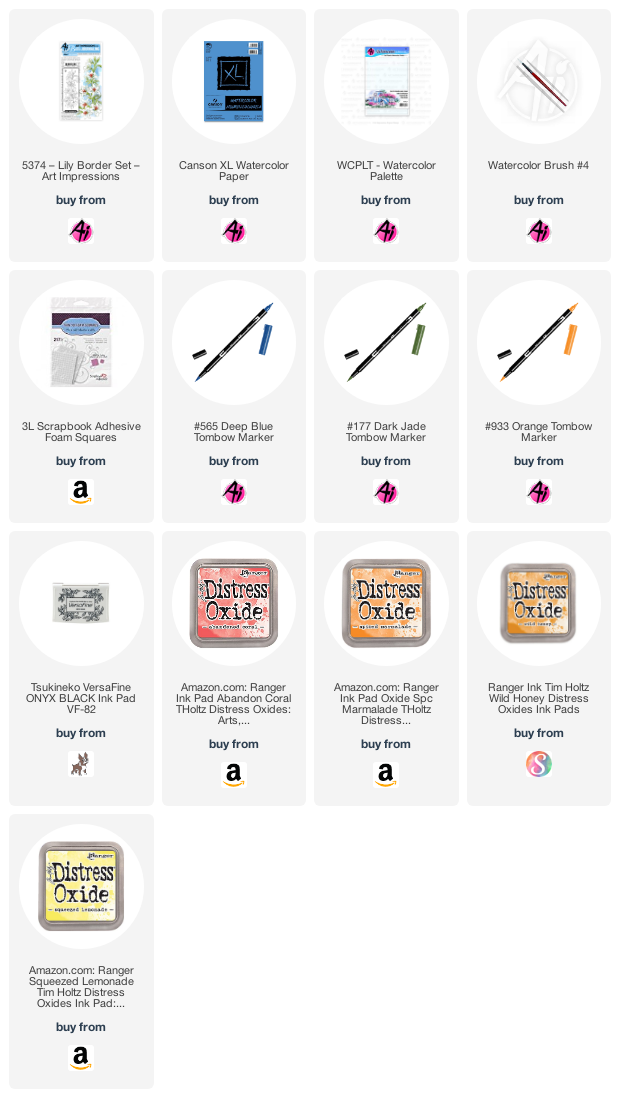
I have an Easter slimline card to share today! Many of the Ai Bible Journaling sets work beautifully on long slim cards, so I began by pulling out 5374 - Lily Border Set, and placed it in my Misti.

I coloured the entire image in Tombow Dual Brush Marker #N65 Cool Grey 5, as I wanted a fairly soft outline of the lilies - and stamped it onto a piece of Canson XL Watercolor Paper. With a damp brush, I pulled out the colour, mainly from the middle of each bloom, to add a bit of shading. I avoided the outer edges, as I didn't want to blurr the shape of each flower. I picked up #076 Green Ochre and #177 Dark Jade from my palette, and painted in the stems and leaves, concentrating the darker colour where the shadows are. I added a watered down bit of #991 Light Ochre to parts of the petals to add a bit of warmth, and then stamped the stamens in #933 Orange inside each flower. I went in directly with my #947 Burnt Sienna marker to darken the centers. #533 Peacock Blue was painted as the background, with a little #565 Deep Blue in some spots, as well as on the leaves and flowers for a bit of extra shading.

For my card base, I blended 5 colours of Distress Oxide inks, from a deep red/orange fading down to white, and then I splattered it with some gold metallic paint and water. I wrapped a piece of green cardstock with some fine gold thread, then the image was diecut with a slimline die, and adhered with 3D foam adhesive to the green mat. The sentiment is from the Exclusive Daisy Set available at Scrapbook.com.


3 comments:
Having problems with your salary during the COVID-19 Virus Pandemic? Let us help you, just as always. We are proud to do the job here, bringing help to those who needs it.
They sell the following Fresh good Dumps+ pin, Different Countries CVV, Fullz,, SSN DOB, Social Media Profiles Boost, Banks logins, Paypal with G-talk verified, Ebay, Amazon accounts logins, bestbuy, all kinds of shops account available, RDP, Mailers PHP,Best Leads. EMV Software Reader Writer all are available, etc CC Format we selling are:|Card #|Exp. Date|CVV/CVV2|First Name|Last Name|Street|City|State|Zip Code|Country|Phone|Type Of Card|Bank Name|
They are among the best, legit left in the world they gave me my biggest cash out in cc and dumps till date, i advise you to get your tools ready and have a good setup if you want to get success in your transaction
you can reach them on below contacts
Email: jdenterprises@qualityservice.com
gary.jones00222@gmail.com
hark212@hotmail.com
Telegram: https://t.me/validvendors
icq: chat- 711343039
Your financial solutions, stop stressing in silence
Thank me later
Five weeks ago my boyfriend broke up with me. It all started when i went to summer camp i was trying to contact him but it was not going through. So when I came back from camp I saw him with a young lady kissing in his bed room, I was frustrated and it gave me a sleepless night. I thought he will come back to apologies but he didn't come for almost three week i was really hurt but i thank Dr.Azuka for all he did i met Dr.Azuka during my search at the internet i decided to contact him on his email dr.azukasolutionhome@gmail.com he brought my boyfriend back to me just within 48 hours i am really happy. What’s app contact : +44 7520 636249
Post a Comment