Showing posts with label Cat Lady TryFold. Show all posts

Tuesday, May 1, 2018

Cat Crazy by Jil Lebel

Hello Ai fans!

It's no big secret that I love cats.  I have a few cats, but there are still days that I feel like this lady.  There are days when my cats all want of my attention.  No matter how many times I look at this image, I still laugh at it! Today, I used Cat Lady TF 4340.  It's part of the TryFold collection, but I kept it as a one layer card.  I like to use the TryFold images in many different ways than they were first intended.  It stretches out the life and value of your stamps.


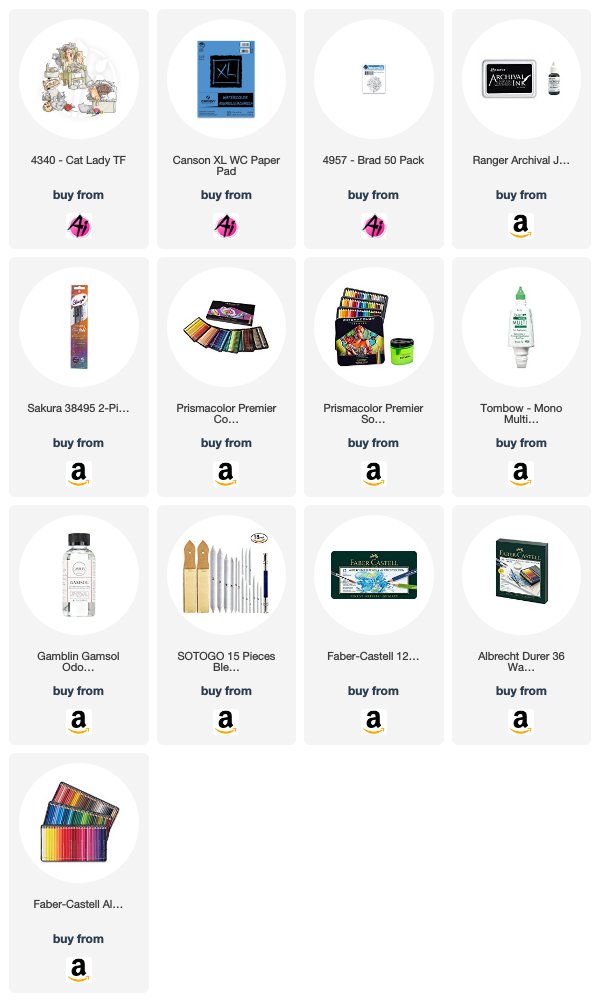
I started by stamping all three parts of the stamp set onto Canson XL Watercolor paper with Jet Black Archival ink. I used my Faber Castell Albrecht Durer watercolor pencils and the fine tip Tim Holtz water brush to add color to my images.  I pulled color directly from the tip of my pencil with the tip of my water brush.  I added it to my image starting in the darker areas and spreading the colors out.  I added two layers of color.  Once everything was dry, I can in and added in shadows with my Prismacolor colored pencils.  I used Gamsol and a blending stump to spread out the pencils. I used a black glaze pen on all of the open eyes to add shine. The background of the card is patterned paper for the from American Crafts Cedar Lane 6x6 paper pack. I fussy cut out all three of the images and added them to the background with different heights of foam tape.  I added the greeting onto a string and "hung" it on a brad to make it look like a picture.


Watercolor Pencils Used:
Face - Burnt Ochre, Burnt Carmine for blush
Cats - Cool IV, Black, Burnt Ochre, Burnt Umber
Brown furniture - Walnut Black
Blue- Prussian Blue
Red - Madder

Prismacolor colors used:
Sienna Brown, 945, French Grey 70% 1074, Yellow Ochre 942

Thanks for stopping by and Have a Great Day!

Thursday, January 12, 2017

WEEK 2: Challenge 199: Card Resolutions

Hello, Ai Fans!

Ready for our first challenge of the year? Stretch yourself to try a new card technique with us on our blog! Last week, Dana showed a cool masking technique she used to protect her image to make a cool background! Now, our designers are here to show some new techniques they wanted to try for the New Year! To learn about their card, click the designer's name to visit their personal blog with more info. Find the stamp sets they used at artimpressions.com!


Karen with Boy Cupid Set

Kerry with At The Movies Set


Renee with Tweetheart Set

Sharon with Birthday Whoot Set 

Love the diversity in these cards! Everyone has something new to try! Did a technique catch your eye? We'd love to have you play along with our challenge!

Did you know we offer a prize pack to the top spot winner and a free stamp set selected by the honorable mentions?! For this challenge, we want to see you practice a new-to-you technique. This technique can be about cardmaking, stamping, coloring, or more! Go ahead and try something new!

Here are the challenge rules …
✻ Please make a new card or creation. You can make any crafty item you wish; this is not limited to cards!
✻ Limit two submissions per person. You will receive extra votes if you use Art Impressions stamps!
✻ The Ai Challenge is open to everyone, international submissions are welcome!
✻ Include a link back to the Ai Blog or grab our button on the top right of our sidebar!
✻ Share the Ai love by clicking and commenting your fellow crafters.
✻ Make sure to get your link up by Wednesday, January 18th at 5:00 p.m. PST to enter your creations.
✻ Good luck and happy stamping!


Thursday, January 5, 2017

Happy New Year! NEW Challenge 199: Card Resolutions

Happy New Year, Ai Fans!

We're back from our winter break hiatus and ready for a new year of FUN! Dana is here to kick off our new "Card Resolution" challenge, where we are challenging you to practice a new technique for 2017! Take it away, Dana!

Hello AI fans!!!

I hope everyone had a fabulous holiday season!!! Maybe you received some new AI goodies?!?! Well, new or old goodies the new challenge is a great way to get creative!! The challenge is to try a new technique, so I went with Masking with Rubber Cement! I have never done this, but have wanted to give it a try for awhile now!!


To make the Cat Lady Try Fold card I followed the instructions that come on the back of the stamp packaging. I used water color card stock and trimmed it to 5.5 x 11 inches and then scored it at 3 5/8 inches from both sides. Next I stamped the main image on the middle section 1/2 inches from the top.


Then I flipped the card over and stamped each side image about 2 inches from the top.


I also went ahead and stamped the sentiment under the center image.


Then I used my Distress Markers to color the images. I used: Tea Dye, Forest Moss, Hickory Smoke, Black Soot, Carved Pumpkin, Vintage Photo, Wilted Violet, Rusty Hinge, Tattered Rose, Gathered Twigs, Blueprint Sketch, Ground Espresso, Festive Berries.


Next, I applied Rubber Cement to each image. To make sure the images were covered I did two coats. I did notice later that I got some off the edges and those areas remained white, so make sure you don't go outside the lines!


Once the rubber cement was dry I used scissors to trim around the two side images. 


I used some Post It note tape to mask around the center main image. 


Then I used an ink applicator and Fired Brick Distress Ink and inked the center panel. The rubber cement protects the image from the ink.


Next, I placed a stencil over the image and then used Barn Door Distress Ink. When you remove the stencil the background looks like wall paper!


I flipped over the card, added the masks and inked up the two side images with Fired Brick and then added the stencil and added ink with Barn Door.


Before removing the rubber cement I used a damp (almost dry) baby wipe to remove any red ink from the rubber cement. If you don't the ink can get smeared on your image.


With a adhesive eraser I removed the rubber cement or you can just rub your finger over it to peel away the rubber cement. Do this to each image.


To make the Try-fold card stay closed I marked were the top panel lays flat with a pencil. 


With a small craft knife I cut a line between the two marks.


I pressed the paper down with my finger, this makes it easier for the corner to slip in the slit.


Slip in the corner and now you Try Fold card with stay shut!


I hope this tutorial inspires you to try out Masking with Rubber Cement!! You can give this a try or another new to you technique and play along with us in the challenge!!!


Awesome job, Dana! Love this masking technique and the boldness you are bringing into the New Year!

Do your New Years Resolutions involve more cardmaking? Join our challenges in 2017! We offer a prize pack to the top spot winner and a free stamp set selected by the honorable mentions! For this challenge, we want to see you practice a new technique. This technique can be about cardmaking, stamping, coloring, or more! Go ahead and try something new!

Here are the challenge rules …
✻ Please make a new card or creation. You can make any crafty item you wish; this is not limited to cards!
✻ Limit two submissions per person. You will receive extra votes if you use Art Impressions stamps!
✻ The Ai Challenge is open to everyone, international submissions are welcome!
✻ Include a link back to the Ai Blog or grab our button on the top right of our sidebar!
✻ Share the Ai love by clicking and commenting your fellow crafters.
✻ Make sure to get your link up by Wednesday, January 18th at 5:00 p.m. PST to enter your creations.
✻ Good luck and happy stamping!


Tuesday, April 19, 2016

Cat Lady Try-Fold by Karen Day

Hello Ai fans!
I haven't made a try-fold card in a while, and have been dying to use the Cat Lady TF (Sku #4340), so I had fun doing some colouring this weekend:
 Here is the finished card, tied and ready to send... I tied a length of white organdy ribbon around the lower third of the card to hold it closed, and when it's untied, here is what it looks like:


 Since the Copic markers bled through the white cardstock a little, I backed the inside with some fun polka dot paper, and fussy cut around the edges before mounting it all on some coloured cardstock.  There are quite a few Try-Fold sets to choose from in the Art Impressions store, you can find them all here.
Copics used: Skin/hair - E11, E00, E000, R20, R27, E57, E55, E53
Greens - G46, G43, G41, BG78, BG75, BG72, BG70
Greys - C9, C7, C5, C3, C1, C00, W7, W3, W1, W00
Rusts - E09, E08, E07, E02, E50
Browns - E57, E55, E53, E51, E50, E77, R74, E72, E71
Yellow - Y26, Y23, Y21