Hello Ai fans!
It's a Watercolor Weekend at Art Impressions and as always, our Watercolor Design Team has some fabulous work to share with you!

First up we have Dot with an adorable Easter creation!
-----------------------------------------------------------------------------------------------------------
Hello,
I wanted to make a whimsical bunny couple on their way to Easter services for this last Art Impressions Watercolor Weekend post before Easter. I penciled in the glasses and bow on him (then used a fine tip black pen) and gave her a flower necklace.

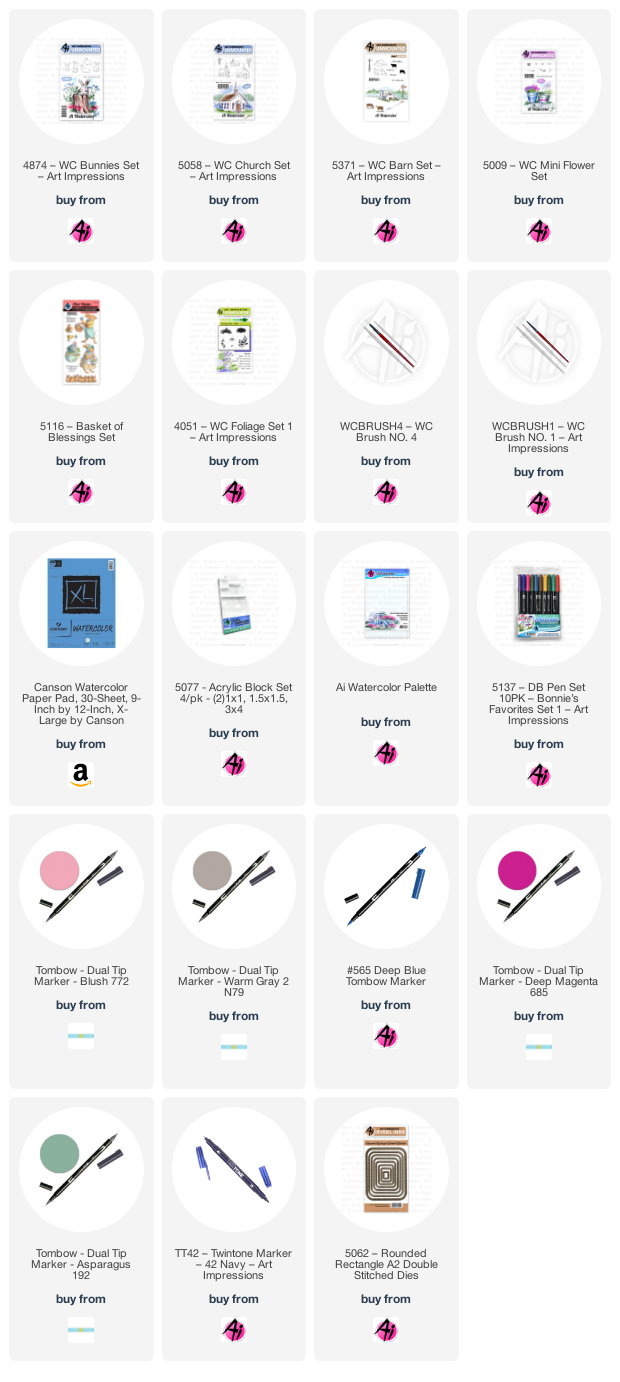
To make this, stamp the bunnies from the 4874 Bunnies Set inked in Tombow N79 which is such a great color for animals. Their ears and her cheeks are colored in 772. The flowers around her neck are just the mini dots from the 5009 Mini Flower set inked in 685 and the foliage is also from that same set inked in 192. The little basket is from the 5116 bunny holding the basket but I only inked the basket in the N79. The eggs are colored in with the 192, 685, 772 and 565. I stamped the small grass from 4051 Foliage Set 1 inked in 192 and then used the same colors as the eggs for the small dots to make the flowers. Stamp the small church from the 5058 Church Set inked in N79. Color the roof and door in 192 and use the fine tip of the Tombow TwinTone blue pen to darken the windows. The trees are inked in N79 and are also from the church set. Their leaves are from the 5372 Mini Foliage Set inked in 685. Stamp the fence from the 5371 Barn Set inked in N79. Use the small grass from the Mini Foliage set inked in 192 along the fence and church. Use 192 on the palette to color in the ground. The sentiment is also from the 5116 set. Use the 5062 Rounded Rectangle Die Set to cut out your paper. Hope you all have a wonderful Easter!

To make this, stamp the bunnies from the 4874 Bunnies Set inked in Tombow N79 which is such a great color for animals. Their ears and her cheeks are colored in 772. The flowers around her neck are just the mini dots from the 5009 Mini Flower set inked in 685 and the foliage is also from that same set inked in 192. The little basket is from the 5116 bunny holding the basket but I only inked the basket in the N79. The eggs are colored in with the 192, 685, 772 and 565. I stamped the small grass from 4051 Foliage Set 1 inked in 192 and then used the same colors as the eggs for the small dots to make the flowers. Stamp the small church from the 5058 Church Set inked in N79. Color the roof and door in 192 and use the fine tip of the Tombow TwinTone blue pen to darken the windows. The trees are inked in N79 and are also from the church set. Their leaves are from the 5372 Mini Foliage Set inked in 685. Stamp the fence from the 5371 Barn Set inked in N79. Use the small grass from the Mini Foliage set inked in 192 along the fence and church. Use 192 on the palette to color in the ground. The sentiment is also from the 5116 set. Use the 5062 Rounded Rectangle Die Set to cut out your paper. Hope you all have a wonderful Easter!

Next up is Karen with her spectacular foundations scene!
----------------------------------------------------------------------------------------------------------
I am excited to finally be using 5470 - WC Foundations Rocker for the first time!
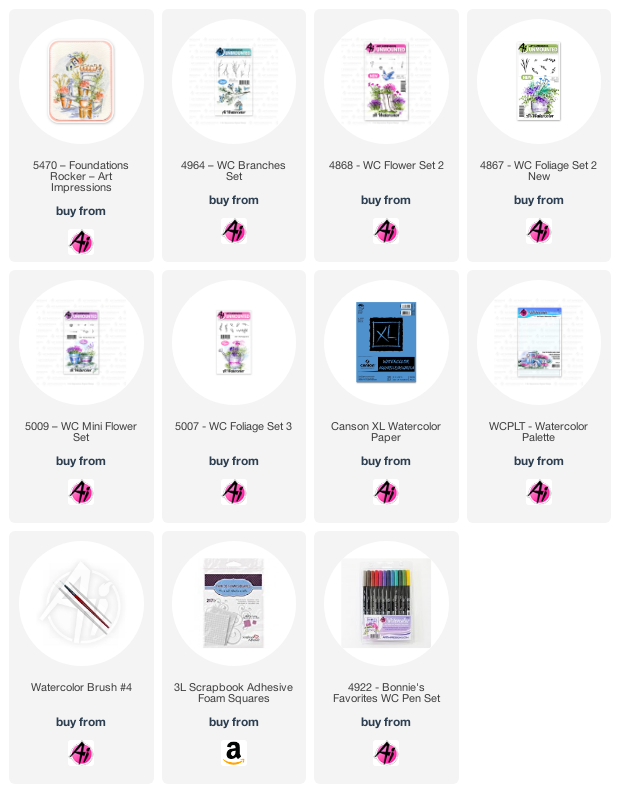
When I use a larger image like this, I like to pick out a limited colour palette ahead of time - and I stick to it. It ties the scene together, and keeps it from becoming too busy. For my scene I used these Tombow Dual Brush Markers: 027/N65/126/177/606/493/676. I do the same thing with the flowers and foliage, repeating the same images in different areas. Here are the stamp sets that I used: 4867 - WC Foliage Set 2 New/4868 - WC Flower Set 2/5009 - WC Mini Flower Set/5007 - WC Foliage Set 3/4964 - WC Branches Set.
I placed my Foundations stamp into my Misti, coloured it with #027 and stamped it onto some Canson XL Watercolour Paper. I started with light washes of colour, and gradually built up the layers to achieve the tones that I wanted. I painted the pots, chair and birdhouses first, and then began filling the pots. I start with one stamp, and place the image in several pots in the same colour, then move onto the next - making sure to balance out where the colours are, while building my pots. I added a few branches and dots, and added shadows with 565.

Lastly, we have Tricia's beautiful lighthouse scene in such pretty, nautical colors.
-------------------------------------------------------------------------------------------------------------
Welcome back watercolor fans! How excited are you for Spring or better yet, Summer 😊 Today I created a quick Lighthouse card for you. I love the lighthouses because they are great for masculine cards. Never can have enough ideas for those men in our lives.
Step 1: The Lighthouse
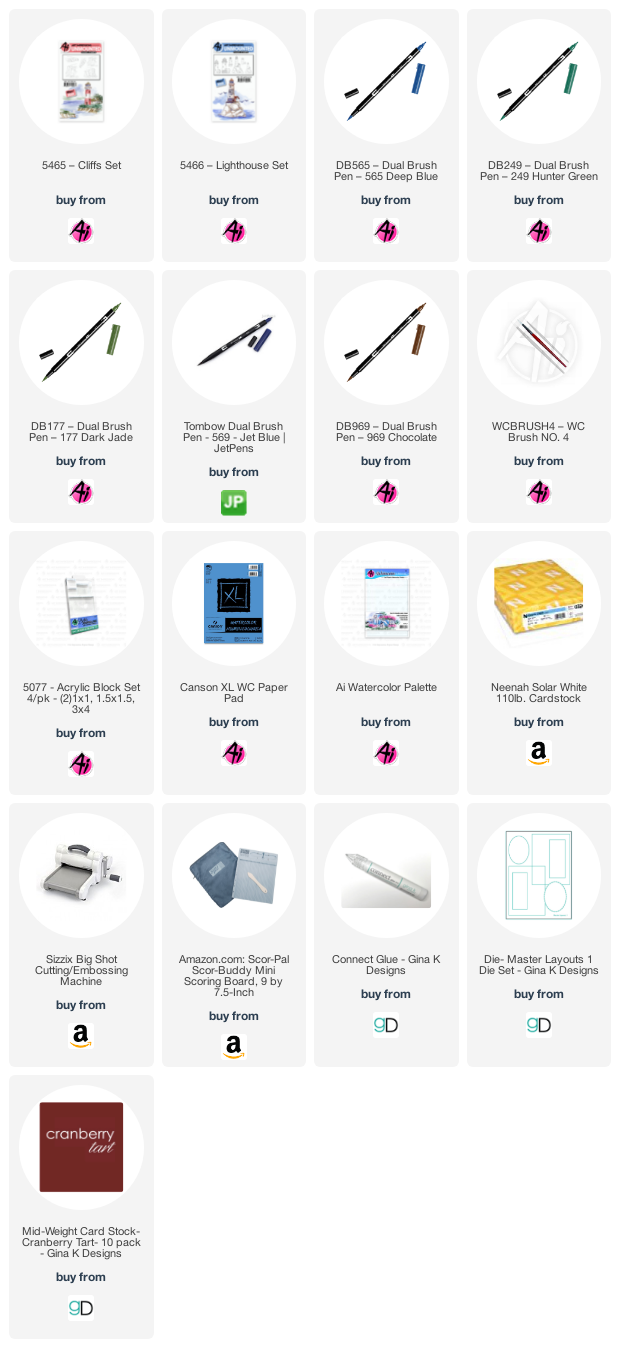
I started out by inking one of the lighthouses from the set with 969. You can stamp it off if you want a lighter look, but me, I like it dark, so I didn’t stamp it off. Instead, I pulled some color in from the sides and added some additional color from my palette. Make sure the right side of all of your objects is darker as the objects are facing the light source. I added some color to the windows and the house including a bit of red on the roof.
I stamped it again on a piece of post-it tape to create a mask for when I add the foliage.
Step 2: The Cliffs
For the cliffs, I used one of the bigger cliffs. First, I inked the entire stamp with 969. Then I took 569 and added it just to the rocks. I wanted them to be distinguished from the cliff background. The stamp I used is clear, so it was really easy to line it up where I wanted it.
I added water to the rocks and sand using my small brush so I could keep it very controlled. Pull the color out from the lines and add some additional color from your palette where you want things really dark. These cliffs are so much fun to paint. By placing dark color under the grass, it gives the cliff a little more definition.
Step 3: The Foliage and grass
I kept this part simple, I started out by laying a small amount of color from my palette to the ground next to the lighthouse keeping the front a bit lighter. Using the tree line stamp, I inked it with 177 and stamped it several times behind the lighthouse and house to give the look of a forest of trees and then a couple of times in front and to the right of the house. I added water to the lighter treetops first and then to the darker ones.
Step 4: The Water and Sky
The water is the best part. I used a larger brush and lots of water and paint from my palette. There is no wrong way to do water and clouds. The areas around the rocks should be darker. To do the sky, you can approach it a couple of ways, you can lay down water and drop in color from your palette or you can add color directly from your palette and then add water to soften. Paper towels are great for sopping up color and creating cool cloud-like shapes.
Don’t forget to sign and date!
Again, an easy card for any occasion and gender. Who doesn’t love a lighthouse? I hope you will give this project a try and I thank you for spending some of your time with me. Have a crafty day!

There are lots of exciting things happening at Art Impressions right now. Live classes and the warehouse sale are back, there are new releases and there are new Spring 2022 freebies!


May you all have a wonderful weekend


.jpg)
.jpg)


1 comment:
Beautiful pics ladies so inspiring ❤️
Post a Comment