Showing posts with label Watercolor Weekend Roundup. Show all posts

Saturday, September 16, 2023

Watercolor Weekend 9-16-2023

 Hello and welcome to Art Impressions' Watercolor Weekend!


Today we have three very unique and amazing cards from our Watercolor Design Team.
This week it's Diane's turn to share first.  Let's see what she made!

*******************************************************

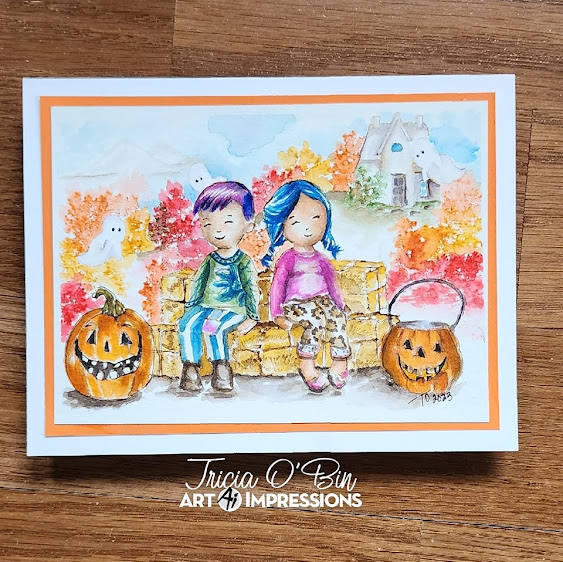
Hello Ai Watercolor Fans! Who is ready for fall? I’m looking forward to cooler temperatures, the leaves changing colors, sweater weather, apple cider, and pumpkin spice! One of our favorite things to do in the fall is to visit our local pumpkin patch for an afternoon of fun and food. When our son and daughter were little, we always made sure to get a photo of them sitting on straw bales, surrounded by pumpkins and other fall decorations. Today’s card is inspired by those memories. I’ll be using Art Impressions 5776 – FB Sitting Girl, 5777 – FB Sitting Boy, 5594 – Harvest Scarecrow Set, 5598 – Harvest Set, and 5507 – Harvest Together Set to create this adorable fall scene.


For this card, some masking is required – but nothing too complicated. When I have a scene that uses multiple image stamps, I will create a “blueprint” of sorts to follow. This way I’ll know what order to stamp each image to create the scene. When it comes time to stamp the images onto your Canson XL watercolor paper, you can place your blueprint into a Misti Stamp Platform and align your stamps in the proper positions. Or you can use a clear block and stamp positioner where necessary.


I started off by making masks of the girl and boy from 5776 and 5777, making sure to cut all around them and between their feet. All images where stamped in 969 (you could use 565/969 instead). Remember to stamp off before adding to your watercolor paper! I used the blueprint to guide where to stamp the girl and boy. I covered the kids with the masks and then stamped the straw bales from 5598, aligning so as to make it appear they are sitting on the bales. Next, I used a small piece of Post-It tape to mask the straw bales. With the masks still in place, I stamped the basket of pumpkins, gourds, and apples between the girl and boy, just back a bit, so it will appear to be behind them. Next I stamped in the sunflowers from 5594. And finally, I stamped the scarecrow into the basket of fall produce and removed the masks. With a damp brush, I pulled out some color from the stamped images to add contours and shadows.


I used the following colors to paint each image:

Girl – skin (850, 910), cheeks (touch of 856), hair (969), shirt, shoes and hair ties (856), overalls (565)

Boy – skin (850, 910), cheeks (touch of 856), hair (025, 026), shirt (158), overalls (990, 969), patch (933, 993) and boots (969)

Straw bales – straw (026), twine (969)

Sunflowers – flowers (025, 026), leaves and stems (249)

Produce Basket – basket (990, 969), red band (856, 847), green band (249), orange pumpkins (933, 993), blue pumpkin (312), yellow orange pumpkin (993), red apple (856, 026), green apple (173­­­, 177), stems (969), and gourd (850, 910)

Scarecrow – face (850, 910, 969), nose (933), straw hair and hands (026), shoes (969), shirt (933), overalls (947), hat (158, 177), patches (856, 933, 565), pole (969) and robins (969, 856)

I used 969 for the ground, and I added more layers of 969 to darken the shadowed areas. I brushed in a watery sky with 526. Next I stamped the “Hay Friend” sentiment from 5507, in the upper left area. As a final touch, I added back any details where necessary with a brown TwinTone. To finish the card, I die cut the painting with a rectangle from 5724 – Nested Rectangle Dies and mounted to an A2 card base.


I hope you’ve enjoyed this little taste of the coming season! Thank you for joining us for another Watercolor Weekend and until next time – Happy Painting!


Now let's see what Karen made.  She has a different type of card than you're used to seeing from her and we know you're going to love it!

*******************************************************

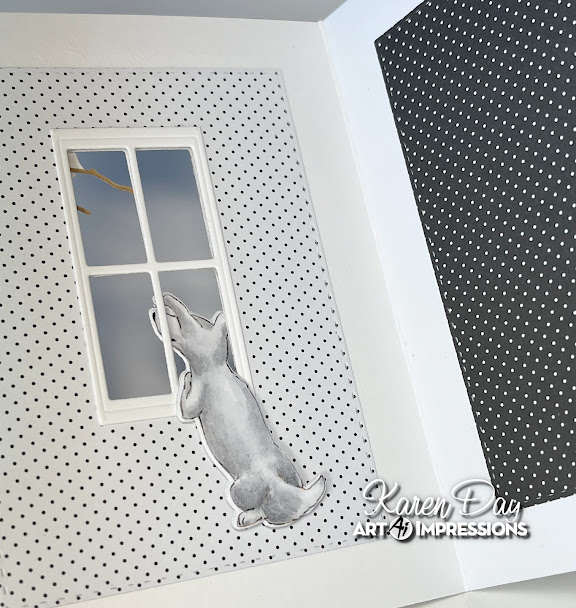
I stamped the little 5780 - FB Sitting Dog onto some Bristol Smooth Cardstock using Tombows 565 & 969, and painted him with N55, adding layers where he needed to be darker.  I went over his features with my Black Twintone marker, then cut both the front and back out with the matching dies.  I did the same with the bird from 5261 - WC Large Birdhouse Set, painting him with 533 and fussy cutting him out.


To create the window, I cut the window frame from 5770 - FB Farm Fence Die Set in white cardstock - twice, and cut the shutters out in black.  It's a little hard to see in the photos, but I cut 1/2" strips of pale blue cardstock, and glued them all together to mimic the wood siding on a house.  I ran this panel through my machine with the 5063 A2 Rectangle Double Stitched Die, then cut out two black & white polka dot rectangles as well.  The black one was glued inside my card to be the 'inside' of the house, and the white polka dot piece was glued to the inside of the window.  Once I had created my layers for the front of my card, I used the rectangle die that cuts out the window, then glued the two window frames on the inside and outside of my card.

The pup was glued together and placed with his head sticking out the window to look up at the bird.  The dies that cut him out also cut out under his paws, which allowed me to let them perch on the windowsill.  I cut out my Memory Box Twig die in some kraft cardstock and glued it to my card so that there would be a good spot to have the bird standing on one of the branches.  The sentiment from 5734 - Friend Sentiments Set was stamped in Versafine Onyx Black ink.


Even though this is an easy card - it required a lot of planning!  You have to think before you glue things together, making sure you're not missing a step.  It's also important with a Front & Back card to have the inside look nicely finished - so I made sure to have some patterned paper on the reverse of the front panel to not have the dog sitting there on his own.


Tricia did something a little different this week too in the form of how she is presenting her card.  She created a step by step slideshow to help you recreate her card.  You can pause this slideshow to follow along with her.

*******************************************************


(Hey there!  This is ReneĆ© chiming in on Tricia's card.  Do you know I was so fascinated by the two children and how incredible they are that I didn't even notice the ghosts haunting them until the third or fourth time I looked at this?? lol! What a focal point.  The details around them are just a huge bonus)


Thank you amazing DT!!  You always have such gorgeous art to share with us.

Remember, if you create something using Art Impressions products be sure to tag us on IG or FB. @ArtImpressions

We'll see you back here on October 7th.
WOW!! Can you believe it's almost October??


Saturday, September 2, 2023

Watercolor Weekend 9-2-2023

  Hello everyone and welcome to Watercolor Weekend!


It's always such a fun surprise to see what the Watercolor Design Team will come up with.
They're not given themes to work with so we never know what they'll create.  Maybe something floral, whimsical, maybe a still life or something with little critters?  Sometimes they play along with our challenges and SOMETIMES they ALL create something with the spectacular new GNOMES set!  Who can resist these adorable little fellas?
No matter what they make, it's always beautiful.

This week our first designer up is Karen.

Hello Ai Watercolour fans!

I created a little harvest gnome scene this week, combining some new and older sets.


I stamped the sitting gnome from 5785 - Gnomes Set, inking up only the gnome, and not the pot he's leaning against - in Tombows #969/565.  I masked him off, and stamped the basket of produce from 5598 Harvest Set that was released last fall - positioning it as though he is leaning up against it, and also added one of the squirrels from 5599 Mini Mice & Squirrel set.  Creating the scene is the hardest part!

I painted the orange pumpkins in tones of #933/905/947, and the blue ones in #228/493/249, painting the large one on the ground in a mottled pattern.  The red apple and his hat are done in layers of #856, and the green one is #126/249.  The spaghetti squash on the ground is painted with #990/991.  For all of the produce, I kept the lightest layers on the top of each piece, as that is closest to the light source, and kept the undersides as the darkest, where the shadows are.  Darkening the crevices also makes each piece seem more 3 dimensional.  His nose and hand were painted in #850/903, his coat is in #993, and his shoes in shades of #977/969.  The basket and squirrel both have light, warm tones of #947, with darker brown shades of #977 & 969 painted where the darker areas are under the squirrel's tummy, and in between the slats of wood.  I used the small grass from 4051 Foliage Set in #126, and painted in out as a wash of grass, then added in darker shades of #177.  #493 was painted on his trousers, and as a wash for the sky.  I made all of the stumps to be tones of brown, and used #565 to add shadows around and under my images.


I added a few dots with my Navy Twintone marker, and cut out the scene with a decorative oval die.


Hello Ai Watercolor Fans! Aren’t you just loving the new releases? The Gnome Set seems to be loved by all – even those who didn’t know they loved gnomes! That would be me, but now I think they are just the cutest! For today’s card I’m using 5785 – Gnomes Set, 5794 – Whimsical Flowers, 5795 – Berries, 5009 – WC Mini Flower Set, 5792 – WC Mini Journal Containers, and 5372 – WC Mini Foliage Set. To set the stage for my painting, I used a die to cut my Canson XL watercolor paper. It was introduced to me by my talented friend from the Netherlands, watercolor artist and card maker Irm Fondse. This die creates little sections that look like postage stamps! However, it’s not necessary to have this die to create this card. With a pencil and ruler, you could draw sections for your individual gnome paintings to get a similar look.
 

I kept my color palette fairly simple, incorporating colors that pair well with the new Gnome Paper Pack: Tombow 565, 969, 947, 177, 249, 856, 526, 636, 910, 912, N25, N52, and N79.

Instead of inking the stamps with 565/969, this time I inked all the stamped images with Versafine Onyx Black ink. To help with the stamping, I used a Misti stamp platform. I was able to ink and stamp all the main images at once, and if anything didn’t stamp well, could easily stamp again. Versafine Onyx Black ink is waterproof once dry. If you are in a hurry, you can speed up the drying process by using a craft heat tool. It is also easy to remove the ink from your stamps, unlike Stazon. For the flower vines in the center section, I stamped the right facing vine from 5794 and then the left facing vine above to create a longer wavy vine. I masked the top of the bucket and gnome hat before stamping the flower vines in the bucket. For the leaves in the bottom section, I used the three-leaved stamp from 5795 and then added the drooping flowers from 5794 behind the leaves.


I began by painting the gnomes’ noses and hands in 910 and 912 for the shadows. For the metal parts of the bucket I used N79. I mixed a little 565 with N79 to add shadows and contours to the bucket and 969 for the wooden handle. For the gnome hats I used 856, 526 and 177. For the jackets I used 565, 177 and 947. For the pants I used 947, 526 and 856. For the shoes I used N79, 947 and N25. For the gnomes’ beards, I added details with a small brush using N52. For the flower cart from 5792, I used 856 for the canopy and 565 to add shadows to the white selections. The wooden posts are 969 and the flower pots are 526. For the greenery in the pots I inked the tiny leaves from 5009 in 177. For the flowers I used the tiny dotted flowers from 5009 and inked in 636 and 526. For the grass in each of the sections, I used the tiny grass from 5372 and inked in 177.  For the remaining floral images I used 856, 636 and 526. I brushed in a watery sky with 526 in each section. As a final touch, I added spokes to the wheel of the flower cart using a pencil. To finish the card, I matted my painting with a layer of vellum before mounting onto my blue A2 card base.
    

I just love how this little gnome painting turned out and I hope you will give it a try! Thank you for joining us for another Watercolor Weekend. Until next time – Happy Painting!


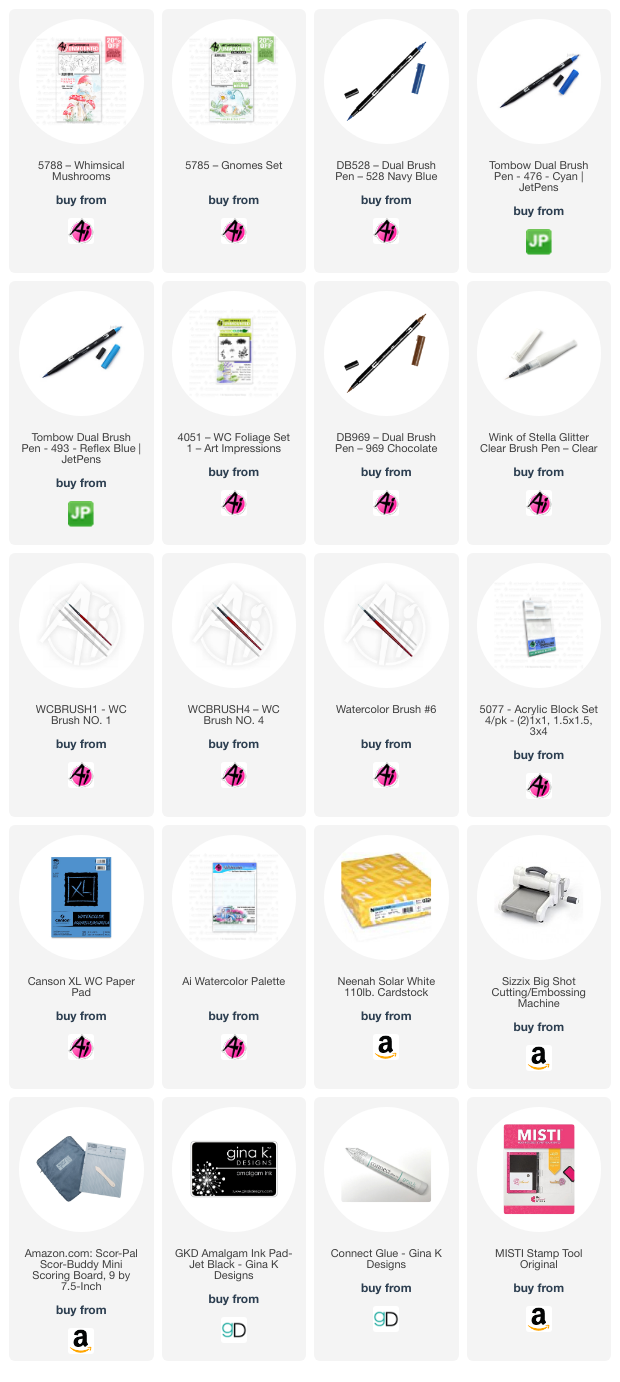
Hello Watercolor Fans, welcome back to the world of gnomes!! No one can resist these adorable little creatures and I am no exception.  I decided to do a monochromatic take on these cute little gnomes and I was able to work in the new Challenge on the Blog, Feeling Blue. Head over there to win a free stamp set of your choice. Let me share with you how I made these Friendly Gnomes.


There’s gnome-one like you

 In order to get the gnome to appear as though he is sitting on the mushroom, you need to stamp him first and mask him off.  I inked him up using 969 and stamped him off onto a piece of post it masking tape.  I cut it out and set it aside.  

Next, I stamped him onto the watercolor paper.  Make sure you leave enough room for the mushroom in the bottom left.  It is more pleasing to place your images using the rule of thirds.  I placed him in the bottom right third of the paper.  Brown is the only other color other than blue that I used. 

 The other paintings I did not use brown first.  Adding the brown changes the color slightly.

 I masked him off and inked up the mushroom with my first blue color (528) is one of my favorites.  Because the stamp is clear, it was really easy to position it where I wanted it.  I used some small foliage to stamp in the grasses below the mushroom.  Once this was all stamped it, I added water to pull the color out of the lines.  As it dried, I continued to add layers of color to deepen the shadows.  Using a lot of water I added some color to the background.  Make sure to come back in and darken up those shadows and fine details.

 As soon as the entire painting was completely dry, I used my MISTI and one of the sentiments from the set inked with the same marker as I used on the piece.  You will need to keep going over it until it is as dark as you want.

 Lastly, I signed and dated.  The process was the same for the other 2 paintings.  Have fun, be creative!  Show us your work by tagging us on Instagram!  Hope you have a crafty day!  Thanks for stopping by.


We hope you enjoyed all of this "gnomie" inspiration!
What sweet and fun cards these are!

Thank you WCDT!
We appreciate you so much!

Saturday, August 19, 2023

Watercolor Weekend 8-19-2023

 Hello Ai fans!

Welcome to Art Impressions Watercolor Weekend!

Over the last two weeks there have been some FABULOUS new releases.

This weekend, our Watercolor Design Team is featuring some of those sets.

If you haven't seen them yet, head on over to the website and check out all the new goodies!
These can be purchased individually HERE or you can go for the bundle and save a little money.


Tricia is our first artist up today.

Welcome Back Watercolor Fans! I am loving the New Releases so far and the new whimsical flowers is no exception.  These are great to use with the new Gnomes set but they are also great on their own.  Here’s how I created this project.


 I started by taping off the edges of my project.  This allows for a crisp white border.  The first stamp I grabbed was the leaves.  I love that just because it looks like a leaf stamp it doesn’t mean it can’t be a flower stamp.  First I inked them up with 177 and stamped them in the middle of the card then stamped a second and third generation to the right and left of that.  I re-inked it and added it over to the right and a little to the top left. This keeps the painting balanced.  I know I want to stamp more flowers in front of the ones on the left so I stamped them higher than the others. You want everything to be random, nature is random and therefore there are no mistakes.  Just have fun with it, play is the key to innovation.

I cleaned the stamp off and inked it again to use it as flowers.  First, I inked just the veins in the middle with green.  Next, I inked up the “leaves” with pinks and purples.  Notice that I haven’t added any water, don’t worry it’s coming, we have to make a big mess first. I stamped the pink ones to the right and left and then some purple ones.  To create the daisy flowers, I inked them up with browns (stamped off to create white flowers), pinks and purples. 

Using yellow and brown I created a side view flower as well as a red tulip.  I inked those up with brown, stamped them off and then watercolored them using my palette.  The little blue bells (that’s what I call them) are awesome.  They could also be snow drops done in white…woo hoo…maybe for Christmas cards.  I inked those with green and blue.  I didn’t stamp them off because I wanted the bright colors.  I used the vines from the Foliage set 5 set on the upper sides.  You can fill in any areas that are open with any foliage.  Don’t overdue it, you can always go back in. 

Add water to all flowers and foliage.  I tend to use a little more water to get a more loose feeling.  Once everything is dry, I go back in and add darker shadows to the middle of the flowers and to anywhere I feel needs details.  For the sky, I used a wet in wet technique.  I love blooms so I don’t mind wet and dry areas, darker and lighter colors. I just let watercolor do it’s thing.  After that was dry, I removed the tape, cut it down and placed it in my MISTI.  I used black ink and one of the new sayings from little things sentiments set. AND sign and date (missed it again but I have done it now!).  This is a therapeutic, let it go kinda painting, give it a try if you need some you time or if you lost your mojo.

We are all enjoying this new release (and every other release lol) and I know you guys are too.  I enjoy seeing all of your awesome inspiring work.  Thanks so much for stopping by.  Til next time, have a crafty day!


SUPPLIES:


Next up we have Karen.

Hello Ai Watercolour Fans!

I have a whimsical scene for you this week:


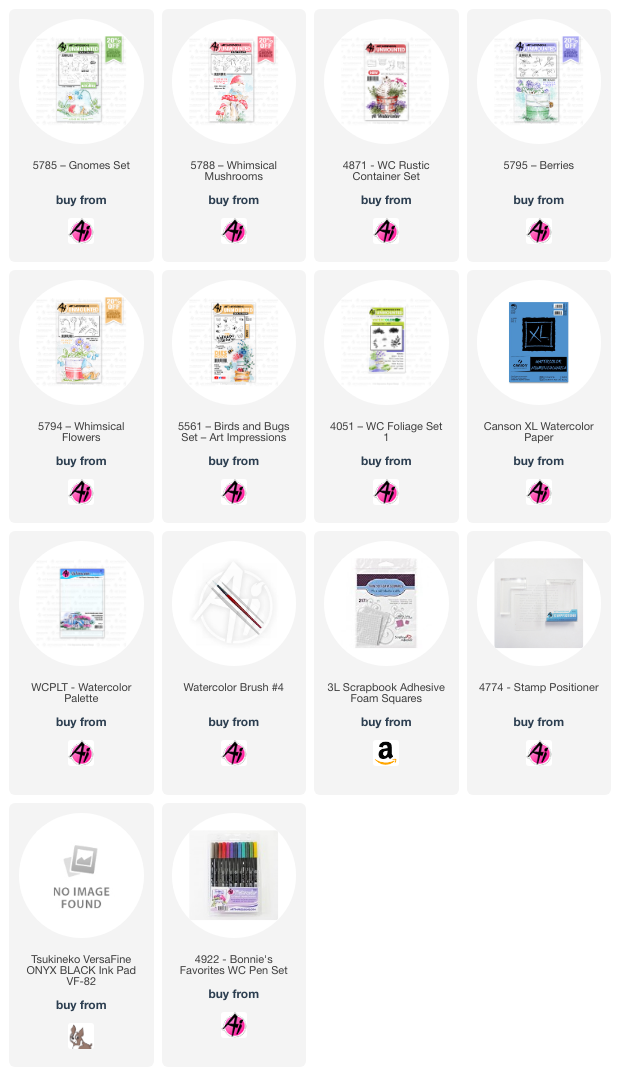
I stamped my sleeping gnome from 5785 Gnomes Set onto my Canson XL Watercolour Paper, masked him off, and stamped the stump from 4871 WC Rustic Container Set behind him.  I positioned the mushrooms from 5788 Whimsical Mushrooms on either side, and added the leaves from 5795 Berries in various spots.  Three different flowers from 5794 Whimsical Flowers were tucked in behind, and finally my little bee from 5561 - Birds and Bugs Set.  For all of my elements, I used Tombow Dual Brush Markers #969/565.


From my palette, I painted tones of brown (#947/969/899) onto the stump - the image shows you where the crevices are, so those areas are the darkest, while the more rounded areas catch more of the light, so they are the lightest.  For the toadstools and his hat, I started with #856, layering it to get darker tones, leaving the upper areas as the lightest shades.  The yellow toadstools and his shirt were painted with #991/993.  I wanted the leaves to be bright, so I started with #126, then mixed #249/493 to get a teal green shade for the darker areas.  #533/565 were painted on all the flowers - just as shadows on the white ones.  #526 was painted on his trousers, and #N55 on his shoes.  The bee was done with #N55/993 and a touch of blue on his wings.  The small grass from 4051 - Foliage Set 1 was stamped in #177, and painted out as a wash.  Finally a wash of #493 was painted in as the sky.  I added the sentiment from the Gnomes Set in Versafine Onyx Black ink, and added a few dots to my scene with my navy Twintone marker.  I cut out the scene with 5061 Square Double Stitched Dies, and mounted it onto my background paper.


Our final designer this week is Diane.

Hello Ai Watercolor Fans and welcome to another Watercolor Weekend! Today I am sharing a card using the newly released 5785 – Gnomes Set, 5788 – Whimsical Mushrooms, 5797 – Little Things Sentiment Set, and 5832 – Gnome Paper Pack. Wow – I am so in love with these new sets and the coordinating paper pack! With all the different sizes of gnomes included in the set, the possibilities are endless. The gnomes coordinate so well with most watercolor sets. Here I have used a stamp from Summer 2022 Journal Set (5576 – Little Trucks Set).
 

I kept my color palette fairly simple, incorporating colors from the awesome new Gnome Paper Pack: Tombow 565, 969, 249, 856, 526, 912, N25, and N79.
I inked the truck from 5576 – Little Trucks Set in 969/565, leaving off a space to place the gnome on the truck bed ledge and stamped off before stamping onto my Canson XL watercolor paper. Using my positioner, I stamped the gnome onto the back of the truck, sitting on the ledge. I then made a mask of the gnome and stamped the mushrooms into the truck bed, behind the gnome. For the driver, I masked the window opening with Post-It Tape. I inked just the head of the small, upward looking gnome and stamped into the window area using my stamp positioner. Once the masks were removed, I used a damp brush to pull out some color from the lines of the stamped images and brushed in some shadows and contours. With a pencil, I drew in a small rectangle to create a sign for the door. 


 I mixed 526 with a small amount of 249 to create a vintage aqua blue for the truck. In some places, I brushed in more layers to darken the shaded areas. For the gnomes’ noses and hands, I used 912. For the metal parts of the truck I used N79. To lightly darken some areas on the metal, I used a touch of N25. The tires were painted with N25 and darkened with added layers to create shadows and contours. For the driver gnome’s hat and the mushroom caps I used 856. The undersides of the mushrooms were shaded with N79. For the mushroom stems I used 969 and darkened just a bit where the stem meets the cap with 565 to create a shadow. The passenger gnome’s hat was painted with 526. His jacket was painted in 249, his shoes with 969, and N79 for the soles. Stripes were added to the hats using the bullet tip from 856 and 526. For the gnomes’ beards, I added details with a small brush using N79. For the door sign, I shaded the edges in 969 and used a gray TwinTone to write in Gnome Farms. I brushed in a watery sky with 526 and added a shadow under the truck with 565. Small were dots were added to the mushroom caps using Bleed Proof White. Details were added back where needed with the fine point of a brown or gray TwinTone. 


If you’ve been following my work for awhile now, you know I love to add a little something to the inside of my card. Here I inked a little mushroom house and small mushrooms from 5788 in 856.
    

I can’t wait to see how you incorporate these adorable little gnomes into your scenes. Be sure to tag us on social media, we love to see your work! Thank you for joining us for another Watercolor Weekend. Until next time – Happy Painting!