
Hello Ai fans!
Welcome to 2023 and another fun year of challenges!
We always award a Top Spot and a Lucky Random Winner.
That means approximately 50 people win a free stamp set each year!
Maybe this year you'll be one of them!
Our first challenge of the year is...
LET'S CELEBRATE!!
Before we get to the details let's take a look at our first Featured Designer of 2023.
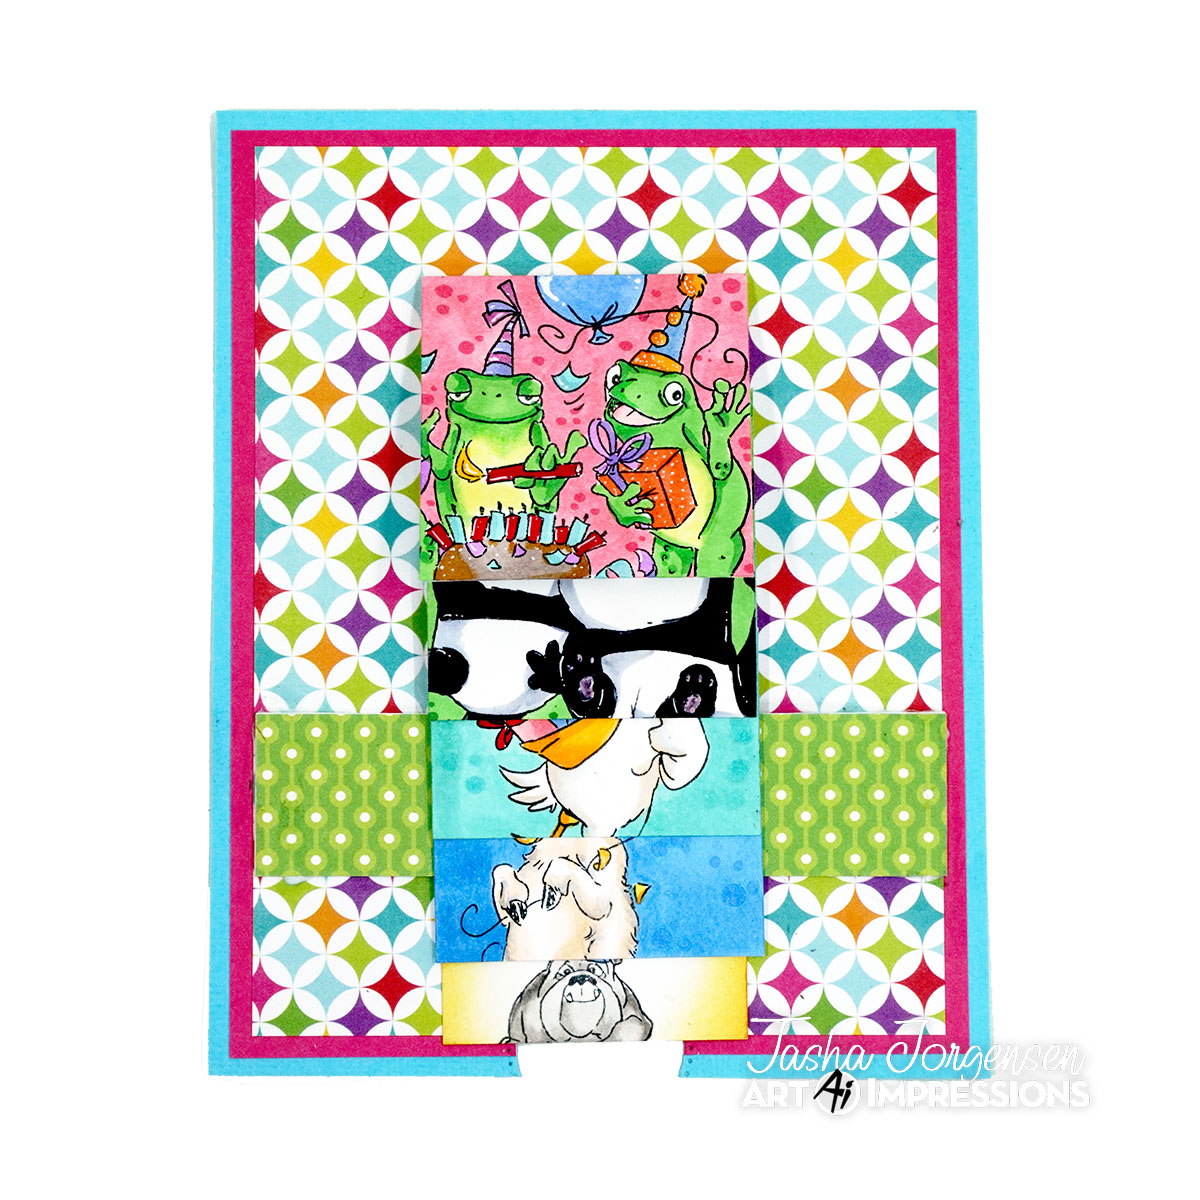
Tasha created an adorable waterfall card for you and has the most incredible picture tutorial to go along with it. We think you're going to love it!
Hi Ai Fans!
Tasha here sharing a colorful Waterfall Celebration Card created for the Ai "Let's Celebrate" Challenge!

This challenge theme is perfect to start the new year and I wanted to have a card that looked like a birthday party. Instead of just using one set, I mixed and matched sets to look like party photos. This type of card would also work great for seasonal designs!
Instructions
Measurements:
Completed card is 4-3/4" x 6"
Step 1: Cut your base and paper layers.
- Card Base: 4-3/4" x 6"
- Layer 1 (Light Blue): 4-3/4" x 6"
- Layer 2 (Pink): 4-1/2" x 5-3/4"
- Center card (Pattern): 4-1/4" x 5-1/2"
- Center Strip Panel: 1" x 4-1/2"
- x4 Squares: 2" x 2"
- Waterfall Base: 1-7/8" x 9"
- *Score at 2", 2-3/4", 3-1/2", and 4-1/2"

Step 2: Attach your center card and card stock layers.
Optional: If you want to create an opening to help pull down the waterfall, use a circle punch or die to cut the bottom.
Step 3: Add liquid glue to the Center Strip Panel as shown below.
Note: I found that liquid glue works best for this step.


Step 5: Stamp your images on the four (4) square panels.
Step 6: Using a bone folder, crease all the score lines on the Waterfall Base.
Step 7: Add adhesive to the top of each score line on the Front of the Waterfall Base.
Step 8: Flip the Waterfall Base over and add adhesive to the middle of the bottom scored area.
Note: I found that a strong tape works best for this step.

Step 9: Fold the Waterfall Base Card in half.
Step 10: Stamp a greeting on the Back side of the Waterfall Base on the opposite side of the score lines.

Step 11: Add your Square Panels to the Waterfall Base starting with the bottom layer.
Step 12: Slide the Waterfall Base through the Center Strip Panel, so the squares are on top of the Center Strip and the Stamped Greeting is under the Center Strip Panel.
Step 13: Position the Waterfall Base in the center of the card and gently remove the back tape. The tape should hold the Waterfall Panel on to the Center Strip Panel.
Step 14: Pull the bottom of the Waterfall Card to flip through the colored squares.

I hope you enjoyed today's project and will join in the Art Impressions "Let's Celebrate" Challenge!

Thank you Tasha for teaching us how to make one of these fun cards!
Your directions were so clear and concise. We can't wait to try one!
Now for our new challenge.
Now for our new challenge.
Let's Celebrate!!
This challenge is open to so many themes.
Anything you celebrate.
New Years, new baby, new house, retirement, birthday, new job, weddings, showers, graduations...anything your heart desires if it's something you celebrate.
If you'd like to join in our challenge be sure to link your project below...
✻ Please make a new card or handmade crafty creation. You can make any item you wish; this is not limited to cards!
✻ Limit two submissions per person. You will receive extra votes if you use Art Impressions stamps!
✻Please include your first name and last initial on your submission.
✻We love to comment on your entries, but keep in mind if you use a private group or a platform that you need to sign up for, we probably won't be able to.
✻ The Ai Challenge is open to everyone, international submissions are welcome!
✻ Include a link back to the Ai Blog or grab our button on the top right of our sidebar!
✻ Share the Ai love if you can, by clicking and commenting on your fellow crafters.
✻ Make sure to get your link up by the deadline to enter your creations.
✻ Good luck and happy stamping!
1 comment:
Very nice work DT
Post a Comment