Showing posts with label tutorial. Show all posts

Thursday, September 25, 2025

In the Navy! Challenge #413 Week #1

 Hello Ai fans and welcome to the Art Impressions

In the Navy challenge!

We want to see your projects using navy blue.

This week, I'm the Featured Designer, and I put together a matching Halloween
card and goodie box with a photo tutorial for you.

After you check out my feature, be sure to scroll down to see 
if you were one of our winners from the last challenge.

For my feature I created a matching card and treat box.
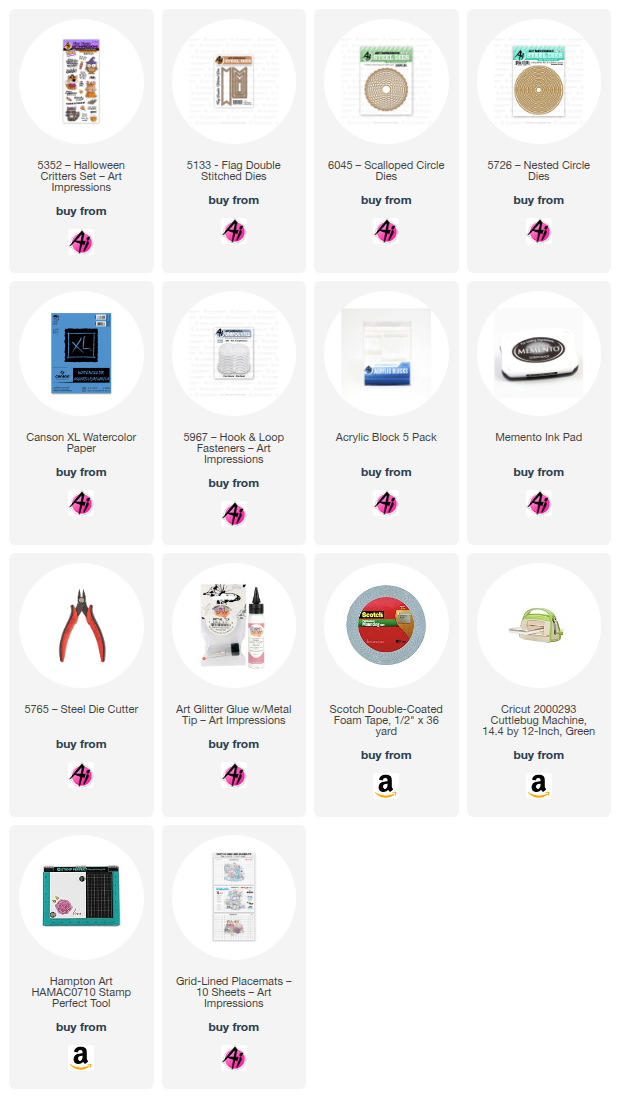
My images and sentiments are from 5352 – Halloween Critters Set.


I've put together a photo tutorial for the treat box.
Here's how I created it.

Start with a 6"x6" piece of heavier weight cardstock.

Score it at 1 1/2" and 4 1/2".
Rotate the paper 90 degrees and score at those measurements again.

On opposite sides, cut a little "V" to form the flaps that will fold up.


Bend on all of the score lines to prepare it to become the base of the box.
Glue the tabs to the inside for a neater look.


Now begin to create the panels that will act as the lid for the box.
Cut 2 pieces of cardstock that measure 3"x5".
Score both of the panels at 1/2" and 2".
I embossed one of the panels (see photo) to use as the inside flap
 and I cut a navy blue piece that 
measured 2 7/8" x 2 7/8" and I embossed that as well.


Now we're ready to adhere the box top panels to the base.
Be sure to only apply glue to the piece scored at 1/2".
You many glue the other part to the side but I felt it opened
neater if only the bottom was glued.


Next, you'll see that you can close these panels over the box base.

 
I added a Velcro tab to keep it closed using 
5967 – Hook & Loop Fasteners.

 
I closed it up and added a circle cut from 6045 – Scalloped Circle Dies.
Now I'm ready to decorate it.


After coloring and die-cutting the little bunny and bat I mounted the bunny
to a circle from 5726 – Nested Circle Dies.


Open it up to find a sweet treat.


Here's the card that goes with the treat box.
The sentiment was cut using 5133 – Flag Double Stitched Dies.


I don't normally think of navy blue as a Halloween color but it goes so well with orange
that I decided I wanted to make a Halloween themed project for my feature.


I love all wildlife but red foxes are one of my favorites. We are lucky enough to see them
in our yard once in a while.


I colored my images using...

TT Turquoise Blue
Copic Markers: T1, T2, C4, YR00, YR14, YR24, YR27

I hope you enjoyed my projects today and will join in our In the Navy challenge.


Now let's see who won our Wild About You challenge.

For our Top Spot we chose:

Please contact Leah at Feedback@artimpressions.com

to claim a free stamp set of your choice!!
Be sure to grab our badge to display on your social media too!

Our Lucky Random Winner was:
Debbie H.

Please contact Leah at Feedback@artimpressions.com
to claim a free stamp set of your choice!!
Be sure to grab our badge to display on your social media too!

Congratulations to our winners!

We hope you had fun with that last challenge and that you enjoy this one. We always LOVE seeing what you create and treating a couple of people to a shiny new stamp set!

Be sure to enter your creation for the chance to win a free stamp set from Art Impressions. 
We award one Top Spot and one Lucky Random Winner, and each will win a free stamp set from Art Impressions.

✻ Please make a new card or handmade crafty creation. You can make any item you wish; this is not limited to cards! (unless specified)

✻ Limit two submissions per person.
 ✻Please include your first name and last initial on your submission. You may include your entire last name, but it's not necessary.
✻We love to comment on your entries, but keep in mind if you use a private group or a platform that you need to sign up for, we probably won't be able to.
✻ The Ai Challenge is open to everyone, international submissions are welcome!
✻ Include a link back to the Ai Blog or grab our button on the top right of our sidebar!
✻ Share the Ai love if you can, by clicking and commenting on your fellow crafters.
✻ Make sure to get your link up by the deadline to enter your creations.
✻ Good luck and happy stamping! 

You are invited to the Inlinkz link party!

Click here to enter

Thursday, August 1, 2024

Never Have I Ever Challenge #384 Week #1

  Hello Ai fans and welcome to our new challenge.

Never Have I Ever!


We want you to use a stamp or die that you've never used before.
You know you have some. We all buy things because we "NEED" them,
only to find them sitting unused. Get them out and USE them!

Before we see what our Featured Artist Tasha used for the first time,
let's see who won our All A-Buzz challenge.

#13 Linda N.
She used 5925 – Honey Bee Set
along with some WC flowers and foliage.


Please contact Leah at Feedback@artimpressions.com
to claim a free stamp set of your choice!!Also, be sure to grab our badge to display on your blog, Facebook or Instagram!

Our Lucky Random Winner was:
#17 Andrea W.
and some WC flowers and foliage.


Please contact Leah at Feedback@artimpressions.com
to claim a free stamp set of your choice!
Also, be sure to grab our badge to display on your blog, Facebook or Instagram!

Congratulations!

Now, onto our beautiful card and tutorial from Tasha.

-------------------------------------------------------------------------------------------------------------------------------------------------------

Hi Ai Friends!

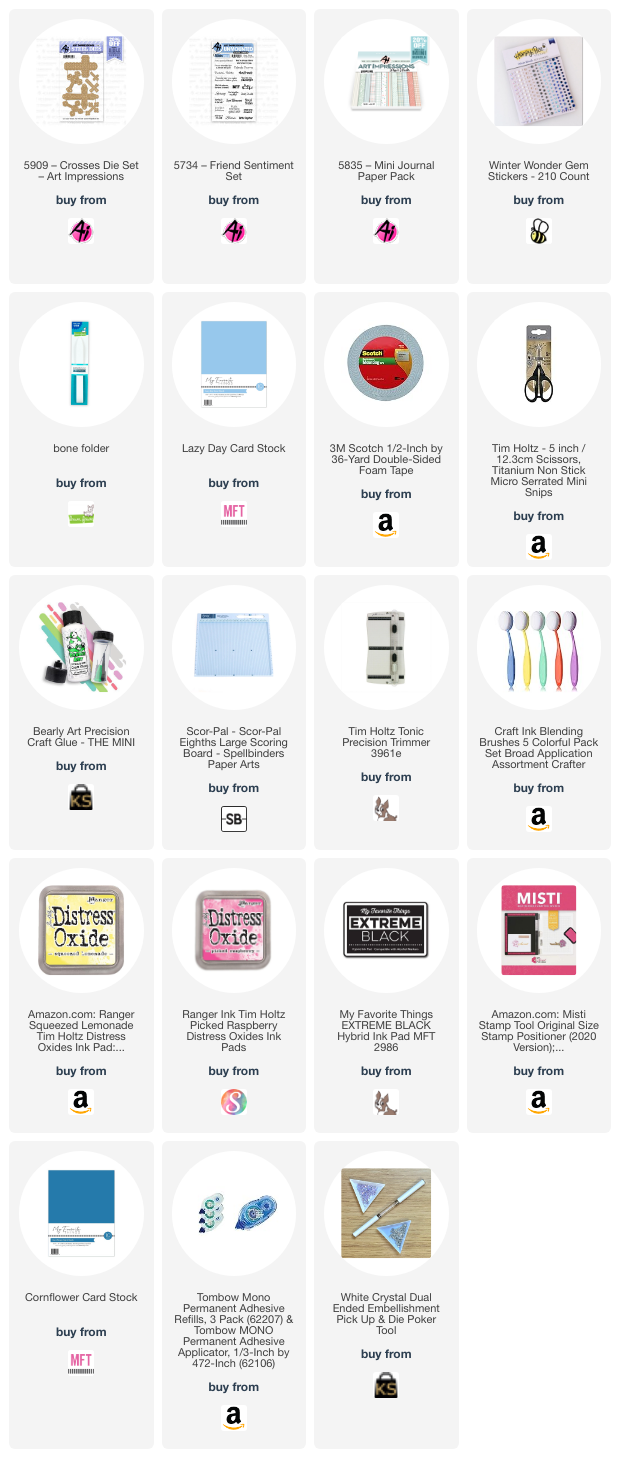
Tasha here sharing a step-fold card featuring the new 5909-Crosses Die Set. This month's challenge is to use a product you have not used before and I have wanted to use this cross die set since I first seen it. I decided to create a fancy fold card and this one is the perfect size for the large decorative cross, it also folds flat to a standard A2 sized card base making it great for easy mailing. 

To create this card, I started by cutting and scoring the card base. I used a thicker blue card stock to make sure the base was strong and could stand up easily.

Step 1) Cut a piece of card stock to 9" x 4-1/4" and score at 3-1/4", 6-1/2", and 7-3/4".


Step 2) Fold each score line following the guide below.

Step 3) Cut the second piece of card stock to 2-1/2" x 8-1/2" and score at 3".

Step 4) Fold the one score line (Mountain Fold) as shown below.


Step 5) Cut a piece of pattern paper to 3" x 4" and attach it to the center of the large card base. Having the larger piece of pattern paper will allow you to view the print when the card is standing.


Step 6) After the large piece of pattern paper is attached, add glue to the Bottom of the back side of the smaller base and the top of the back side of the smaller base, see below. 


Step 7) Attach the smaller base to the front of the large base as shown below.
Step 8) Fold the large base and glue the small base to the back of the top of the large base.
Step 9) Cut a white center card measuring 2-1/4" x 4-1/4" for the cloud background.

Step 10) Using a cloud stencil and Destress Oxide Ink, I ink blended clouds. I started with pink and layered in yellow to add tons of color. 


Step 11) Using the Crosses Die Set, cut the decorative cross out of white card stock. 
Note: I used a craft pick tool to pop out all the little sections.

Step 12) Glue the white cross on to a darker piece of paper and cut around the cross using scissors. Having the darker color allows you to really see all the details in the cross, it's so pretty!

Step 13) Using liquid glue or glue runner, attach the cloud background to the smaller card base.

Step 14) Using foam tape, attach the cross to the center of the cloud background.

Optional: I added little blue gems to the cross to give it more detail and a little sparkle.


Step 15) Cut the following to create the layered sentiment.
1. Pattern paper: 1" x 4"
2. Silver paper: 3/4" x 3-3/4"
3. White paper: 1/2" x 3-1/2"

Step 16) Stamp the greeting on to the white paper strip cut in Step 15.

Step 17) Glue the paper layers together.

Step 18) Attach the layered sentiment strip to the lower step of the base covering where the small base is attached.


Step 19) Cut two pieces of paper to cover the back panel.
1. Silver paper: 3-1/4" x 4-1/4"
2. White paper: 3" x 4"

Step 20) Stamp another greeting on the white paper or add a handwritten message.

Step 21) Glue the white paper cut in Step 19 to the silver paper.

Step 22) Attach the layered card to the back of the card base.
Step 23) Fold the card flat to mail. The completed card is 4-1/2" x 5-1/2" (A2).


I hope you enjoyed today's card tutorial and will join in the "Never Have I Ever" Challenge!


Thank you Tasha for that fabulous tutorial and for the inspiration.

Now, we can't wait to see what YOU make!!

✻ Please make a new card or handmade crafty creation. You can make any item you wish; this is not limited to cards!

✻ Limit two submissions per person. You will receive extra votes if you use Art Impressions stamps!
 ✻Please include your first name and last initial on your submission.
✻We love to comment on your entries, but keep in mind if you use a private group or a platform that you need to sign up for, we probably won't be able to.
✻ The Ai Challenge is open to everyone, international submissions are welcome!
✻ Include a link back to the Ai Blog or grab our button on the top right of our sidebar!
✻ Share the Ai love if you can, by clicking and commenting on your fellow crafters.
✻ Make sure to get your link up by the deadline to enter your creations.
✻ Good luck and happy stamping! 

You are invited to the Inlinkz link party!

Click here to enter