Showing posts with label Challenge Winner. Show all posts

Tuesday, September 1, 2026

September 2026 Monthly Challenge

 Happy September, everyone! Summer is drawing to a close and it is almost fall! It feels like summer was just starting.


For my September project, I am using my favorite puppy that I haven’t used in quite a while. He’s sitting in a flower garden enjoying the beautiful end-of-summer day.


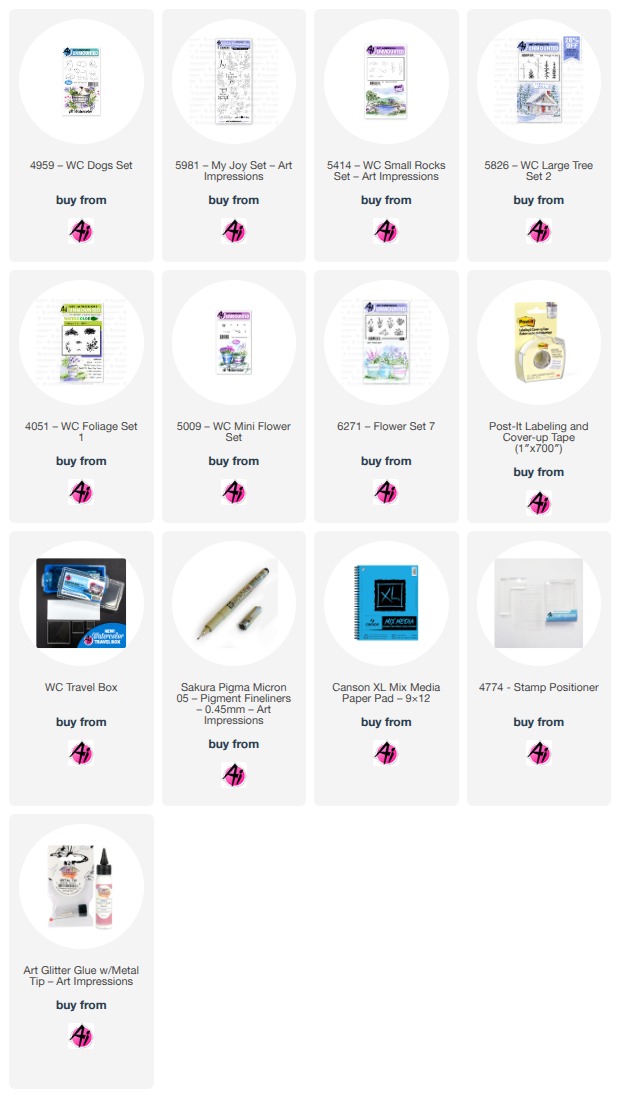
To begin my project, I inked the puppy in Pumice Stone Distress Ink, stamped off once onto watercolor paper, and then stamped in the middle of my watercolor paper. I then inked the rocks in Pumice stone, stamped off on watercolor paper, and stamped the rocks to the left. Next, I added a grass line using #15 olive green to set up my scene. I painted the puppy first, using mainly #54 burnt umber and shading with #45 sepia. I left areas of his face lighter and once he was dry, I used my Micron to color his eyes and nose – leaving a highlight on each. I then painted the rocks, starting with #40 brownish grey to add shadows toward the lower portion of the rocks. I then added shading with #21 dark grey, #45 sepia and #15 olive green. Rocks are multiple shades of color, so a variety of colors helps. Using the fine tip on my #40 brownish grey, I added some accents where the rocks meet to add darker shading.

I put the sky in next using #75 sky blue, keeping it lighter where I had flowers planned. I find it easier than trying to work around the flowers once they are stamped. Once the sky was in place, I stamped grass in repeat along my grass line next to the puppy and rocks, mainly using the teeny tiny grass from Foliage Set 1 and also stamped the grass stamp from WC Tree Set 2 a couple times to the right of the puppy. I masked off the rocks and used a positioner to place the tall flowers from Foliage Set 7 to the left of the rocks. I inked the foliage with #15 olive green and the flower buds with #79 grape and then added a little #8 violet at the base for shading. Once the flower was stamped, I carefully dabbed at the flower buds with my paintbrush. I also carefully touched my brush to the leaves of the foliage, but avoided the stems.

I stamped the tall blue flowers from Foliage Set 7 on the right side of my project – also using a stamp positioner for placement. I inked the foliage in #15 olive green and the flowers in #29 Prussian Blue. I then carefully touched my brush to each flower bud and leaf. I then stamped the flower bunch from Foliage Set 7, inking the foliage with #15 olive green and the flowers with #96 auburgine. I used the stamp positioner for placement and again, touched my brush to each flower and a few of the leaves.

I then used the small dot flower from the WC Mini Flower Set and inked it in #43 brilliant yellow. I stamped it in repeat above the grass line on the left and right edge of my project. There was a small gap between the grass line and the puppy, so I used the fine tip on my #15 olive green and added a few blades of grass. I then used my fine tip on my #8 violet and added a few dots to the top of the grass stems for random wildflowers.

I then added a wash of #15 olive green for the foreground, making sure to have light and dark areas, especially under the dog to create a shadow. It needed a little more, so then I used #45 sepia to also add a wash of brown, leaving light and dark areas. I felt that something was needed above the rocks, so I added a small butterfly from My Joy Set. I stamped it in Pumice Stone and used #8 violet, #79 grape and #3 blue to paint the wings. Once it was dry, I used my Micron to add the body and very small antennae. I also used Dr PH Martin’s Bleed Proof White to add some dots to the grass and the yellow dot flowers. I cut a simple frame from black cardstock to mount my project and then used single sheet of background paper to cover my card front.

I still use Marvy Le Plume markers for my projects.  Most of these can be converted to Tombow colors, but choose colors that work for you. These just happen to be some of my go-to colors for any project I work on. (Here is the link for the Tombow conversion chart: https://www.artimpressions.com/shop/art-impressions-most-loved-color-conversion-chart/)


Happy Stamping! As always, I hope you will give this project a try! Don’t forget to
enter the Monthly Challenge for a chance to win a free stamp set of your choice!

Accessories:

Pumice Stone Distress Ink

#1 Connoisseur Brush

#4 Connoisseur Brush

Marvy Markers


What a sweet and beautiful card from Debbie.
Now let's see who our August winners were.

#10 came up first so Kathy R. wins a free stamp set from Art Impressions.
Please contact Leah at
Feedback@artimpressions.com


#1 Bev Sizemore and #8 Patty S. have won a freebie from me.
Please email me with your full name and address at Renee@artimpressions.com
and I'll send you photos of the freebies I currently have available.

Congratulations to all of our winners and thank you Debbie for you hard work and inspiration!

What will you guys create for September?
We can't wait to see.

Here are the rules...

✻ Please make a new card or handmade crafty creation using either stamps, dies and or designer paper from Art Impressions. You can make any item you wish; this is not limited to cards! (unless specified)

✻ Limit two submissions per person.
✻Lucky Random Winner will receive a free 
stamp set from Art Impressions
 ✻Please include your first name and last initial on your submission. You may include your entire last name, but it's not necessary.
✻We love to comment on your entries, but keep in mind if you use a private group or a platform that you need to sign up for, we probably won't be able to.
✻ The Ai Challenge is open to everyone, international submissions are welcome!
✻ Include a link back to the Ai Blog or grab our button on the top right of our sidebar!
✻ Share the Ai love if you can, by clicking and commenting on your fellow crafters.
✻ Make sure to get your link up by the deadline to enter your creations.
✻ Good luck and happy stamping! 

You are invited to the Inlinkz link party!

Click here to enter

Thursday, August 27, 2026

Furry Friends Challenge #435 Week #1

Hello and welcome to our new challenge,


Furry Friends

We want to see your handmade creations using animals.

Pretty much anything goes as long as you have an animal and something from Art Impressions on your project. (Stamps, paper or dies)

Our Featured Artist for this challenge is Dori and she created the most darling
Triple Tunnel card.

After looking through her photos and reading her tutorial, be sure to scroll down
to see who won our Boy oh Boy! challenge.

Take it away Dori!

-----------------------------------------------------------

 Hello AI Friends!

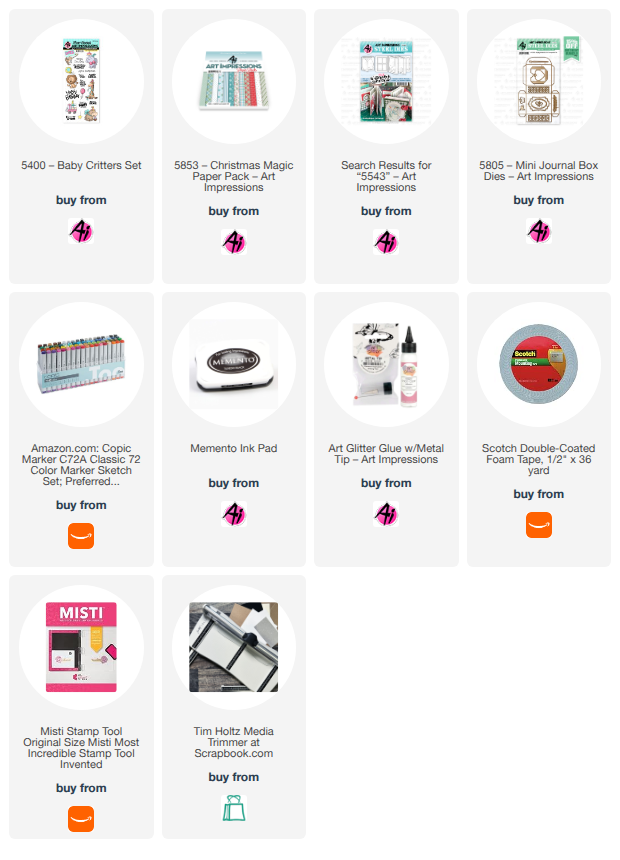
Welcome to our new challenge #435 called "Furry Friends".  I chose the #5400 - Baby Critters set to feature for this challenge.  I used every one of the images since they are all SO cute.  I couldn't pick so why not use them all!  I also decided to make it a triple tunnel card so the animals could sit on display in each panel.


First, I stamped all of the images onto copic friendly paper with Memento black ink and colored with my copic markers listed below.  Using the corresponding dies, I die cut each of the colored images out. 
With plain cardstock, I also die cut a second one of each image.  I like to layer the plain die cut behind the colored one for stability and extra dimension.


Now that the images are colored, it's time to create the tunnel card.

Using heavy cardstock, I cut one panel at 5" x 10" and scored in half along long side (5" mark).  I also cut another panel at 5" x 5 1/2" and scored at the 5" mark along the longer side leaving a 1/2" tab.  I layered a piece of pattern paper (cut at 4 7/8" square) over the top of the smaller panel leaving the 1/2" blank (see Pic 1).  I cut the same size of a second piece of pattern paper and adhered to the right of the fold on the double panel (see Pic 2).
Any shape die will work but I took a partial circle die (from my stash) and placed it in the center of the smaller panel (Pic 1) and ran it through my die cut machine.  I then lined this page up with the second panel and die cut the partial circle out of that panel. 

             Pic 1

               Pic 2

Now we can adhere the two panels together by gluing the 1/2" tab inside the double panel to create the triple panel card.


To finish up this card, I placed another piece of pattern paper to the inside of the back panel and also created frames around the partial circle openings.  I then adhered the animals on the panels making sure that they don't overlap each other when looking thru the windows.


And here is the final card again.


I hope you enjoy my card and it gives you inspiration to join in on the challenge.  Any animal will work for the challenge so grab a stamp set and play along for a chance to win a free stamp set.  Look forward to seeing your creations!  
Have a Happy Day!

Copics used:  N0, N1, N3, N5
E21, E23, E50, E51, E53, E55, E57
Y13, Y15, Y17, Y21
G40, G43, G46
R20, R22, R24, R27
B0000, B00, B12, B14


--------------------------------------------------------------
Don't you just LOVE that sweet card?
She packed so many fun animals on there using the tunnel technique.

Now, let's see who won our previous challenge.

To our winners, Leah is on vacation until August 31st so there may be a delay in her
answering your email and filling your order. Please be patient with her when she returns
to the office.

For our Top Spot we selected #4
Marcia H.
She did a fabulous job painting the Cozy Bear making this the 
perfect thank you card for a boy or man.


Please contact Leah at Feedback@artimpressions.com
to claim your free stamp set.

Our Lucky Random Winner was #17
Heather M.


Please contact Leah at Feedback@artimpressions.com
to claim your free stamp set.


Congratulations to our winners!
Enjoy your new stamps.

Now, onto the details of our new challenge.


Please make a new project featuring animals using
stamps, dies or paper from Art Impressions.
We can't wait to see your creations.

Here are the rules...

✻ Please make a new card or handmade crafty creation using either stamps, dies and or designer paper from Art Impressions. You can make any item you wish; this is not limited to cards! (unless specified)

✻ Limit two submissions per person.
✻Top Spot Winner and Lucky Random Winner each receive a free 
stamp set from Art Impressions
 ✻Please include your first name and last initial on your submission. You may include your entire last name, but it's not necessary.
✻We love to comment on your entries, but keep in mind if you use a private group or a platform that you need to sign up for, we probably won't be able to.
✻ The Ai Challenge is open to everyone, international submissions are welcome!
✻ Include a link back to the Ai Blog or grab our button on the top right of our sidebar!
✻ Share the Ai love if you can, by clicking and commenting on your fellow crafters.
✻ Make sure to get your link up by the deadline to enter your creations.
✻ Good luck and happy stamping! 


You are invited to the Inlinkz link party!

Click here to enter

Thursday, August 13, 2026

Boy oh Boy! Challenge #434 Week #1

 Hello Ai fans!

Welcome to our new challenge,

Boy oh Boy!

Let's see your masculine creations.
Remember, they don't have to be cards. You can create anything you like as long as you use something from Art Impressions. We'd love to see your gift card holders, gift tags, boxes and bags, bookmarks, place cards, cake picks, party decorations, designer paper, framed art and more. Anything with a masculine flair.

Hello everyone! InLinkz/Linkdeli have been glitching on and off since last week. If you'd like to enter the challenge and you can't get your photo to upload, scroll down to the comments section. Paste a link to your project there. I'll count it just like as if you had uploaded your photo. When the random winner is selected I'll begin counting the comments in order received continuing on from the ones entered with photos through InLinkz. For example, right now, 2 people managed to get their photos uploaded. The first person to leave their link in the comments would be #3 and so forth. So sorry for the inconvenience. I hope they work things out soon.

This week Sharon is our Featured Artist and she made such a fun guy card!
After you browse through her photos and picture tutorial,
be sure to see who the winners from our last challenge were.

--------------------------------------------------------------

 Hello AI Fans!

It's my turn to get to feature our new Challenge #434 Boy oh Boy! and we are looking for anything that is masculine themed. I really had fun making this one!!  If you've ever seen the show Nailed It!, you'll  know exactly what I was going for here. He needed to build a fence and he definitely nailed it, HAHA! 


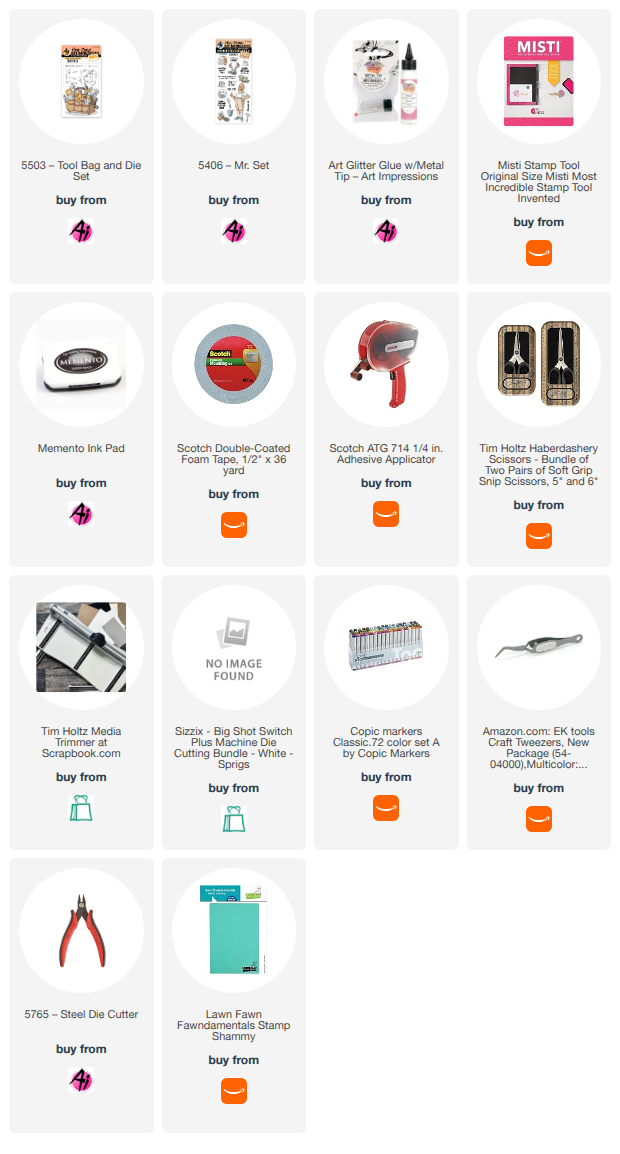
 I started out stamping and coloring the images from #5406 Mr Set and #5503 Tool Bag & Die Set onto a Copic friendly paper. The Copic colors I used are listed below. I love that the dies are included with these sets as it makes it SO easy to create with them! 


I wanted to make a funky fence, so I actually grabbed a sign post die from my stash and cut them out of kraft colored cardstock and then inked the edges with some chalk ink. That gave me different shapes and sizes for the fence planks as well as the cross posts. 


I inked some clouds onto a piece of white cardstock, then die cut the grass and glued it to the base. 


That gives me everything I need to create my card, now I just need to place everything. 


To fit the tool bag onto the card without overwhelming it, I cut a piece off the bottom and left side. Here's one more look at the finished card. 


I hope I inspired you to pull out your masculine stamps and join our challenge! Thanks so much for stopping by for a visit today and I can't wait to see what you create!!


Copic colors used:
E000, 00, 11, 30, 31, 33, 35, 37, and 39
C1, 2, and 4
YR61, 65, and 68
YG91 and 93
Y32, 35, and 38
B91, 93, and 95
R20, 22, and 24


Okay, can I just say how CUTE that orange shirt is!
I knew Sharon was perfect for this challenge.
I hope you love her card as much as I do.

Now, let's see who won our Floral Frenzy challenge.

For our Top Spot we selected:


Please contact Leah at Feedback@artimpressions.com
to claim your free stamp set.

--------------------------------------------------------------

Our Lucky Random Winner was #8

Michelle H.


Please contact Leah at Feedback@artimpressions.com
to claim your free stamp set.

Congratulations to our winners!
Enjoy your new stamps.

Now, onto the details of our new challenge.

Please make a new project featuring any masculine themed
stamps, dies or paper from Art Impressions.
We can't wait to see your creations.

Here are the rules...

✻ Please make a new card or handmade crafty creation using either stamps, dies and or designer paper from Art Impressions. You can make any item you wish; this is not limited to cards! (unless specified)

✻ Limit two submissions per person.
✻Top Spot Winner and Lucky Random Winner each receive a free 
stamp set from Art Impressions
 ✻Please include your first name and last initial on your submission. You may include your entire last name, but it's not necessary.
✻We love to comment on your entries, but keep in mind if you use a private group or a platform that you need to sign up for, we probably won't be able to.
✻ The Ai Challenge is open to everyone, international submissions are welcome!
✻ Include a link back to the Ai Blog or grab our button on the top right of our sidebar!
✻ Share the Ai love if you can, by clicking and commenting on your fellow crafters.
✻ Make sure to get your link up by the deadline to enter your creations.
✻ Good luck and happy stamping! 


You are invited to the Inlinkz link party!

Click here to enter

Saturday, August 1, 2026

August 2026 Monthly Challenge


Hello everyone! InLinkz/Linkdeli have been glitching on and off since last week. If you'd like to enter the challenge and you can't get your photo to upload, scroll down to the comments section. Paste a link to your project there. I'll count it just like as if you had uploaded your photo. When the random winner is selected I'll begin counting the comments in order received continuing on from the ones entered with photos through InLinkz. For example, right now, 2 people managed to get their photos uploaded. The first person to leave their link in the comments would be #3 and so forth. So sorry for the inconvenience. I hope they work things out soon.

Happy August everyone! August is one of those months where everything is
blooming in Oregon and the flowers are loving the warm weather.


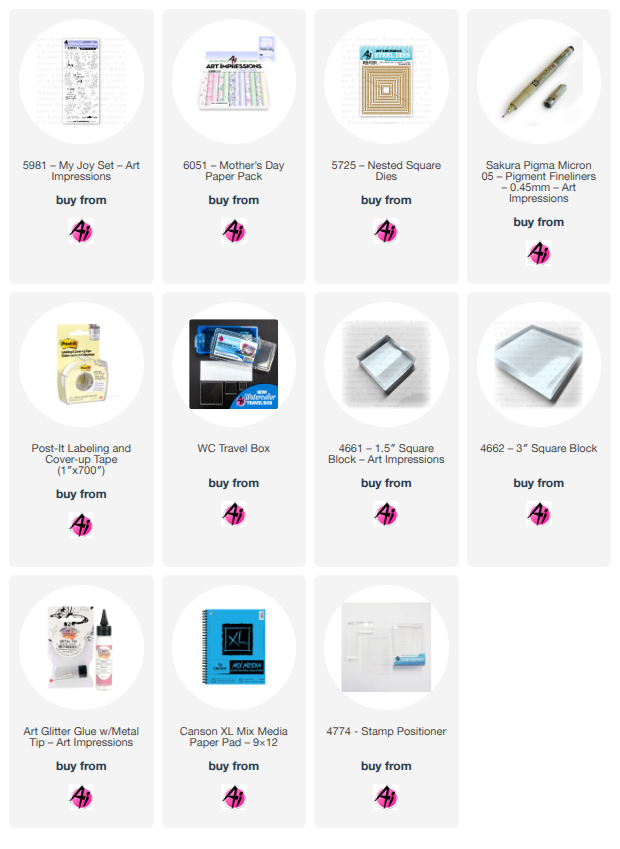
For my August project, I wanted something simple with flowers. This project could be used for multiple themes and it would be easy to add a sentiment as well as the hummingbird. I started by inking the daisy flower corner in Pumice Stone ink. I stamped if off once on WC paper and then stamped it in the bottom right of my watercolor paper. Once that was in place, I lined up the border die and cut that out so I would have my square to plan the rest of the flower placement. I cut a mask for the flower with Post-It Note tape and then used my stamp positioner to line up the flower bud along the bottom right edge. With my stamp positioner, I also carefully added a few extra leaves here and there to fill in areas with more foliage.


For the upper left corner, I used Post-I Note tape to cover up the square cut-outs. I used my stamp positioner to stamp the first flower bud and leaves, then covered that with a mask and stamped the second bud. Once those were in place, I then used the positioner for placement of the hummingbird. I painted the daisies first in shades of purple. I started with a deep lilac (#61) wash and then added layers of color in violet (#8) – keeping the darker areas closer to the center and staying within each petal. For the flower centers, I started with a wash of brilliant yellow (#43) and then added shading with pumpkin (#87). For the buds, I followed the same process with purple and kept the darker area closest to the stem. Leaves were next and I used three colors. I started with a brilliant yellow (#43) wash, then added light green (#11) where I wanted to show the light hitting the leaf. Then I added more than one layer of olive green (#15) for the darker accents, making sure to let the layers dry in between.


My next step was to add a wash of sky blue (#75) around the flowers and foliage, leaving light and dark areas. I mainly use a #1 brush when I paint, but once I get to the larger areas, I switch to my #4 brush. I left the area around the hummingbird lighter. My last step was the hummingbird. I started with an olive green (#15) wash on the wings and the upper part of the body. I added aubergine (#93) on the body and a little blue (#3) to the wings for added color. Hummingbirds can have so many color combinations! I then carefully kept layering color, making sure to keep the area around the eyes lighter. I used my Micron to darken the eye and even with it so small, left a highlight. I also added the feet and a little black on the beak with

my Micron for definition. Then I signed and dated the project!


I still use Marvy Le Plume markers for my projects.  Most of these can be converted to Tombow colors, but choose colors that work for you. These just happen to be some of my go-to
colors for any project I work on. (Here is the link for the Tombow conversion chart: https://www.artimpressions.com/shop/art-impressions-most-loved-color-conversion-chart/)

Happy Stamping! As always, I hope you will give this project a try! Don’t forget to
enter the Monthly Challenge for a chance to win a free stamp set of your choice!


Other supplies:

Pumice Stone Distress Ink

#1 Connoisseur Brush

#4 Connoisseur Brush

Marvy Markers


Here are our July 2026 winners.


#9 came up first so 
Lynn C. wins an Ai Stamp Set: 
Please contact Leah at Feedback@artimpressions.com
to claim a free stamp set of your choice!!

#1 and #13 came up next.

Freebie: Michelle H.
Freebie: Andrea W.

Please email me at Renee@artimpressions.com
with your full name and address and I'll send you a photo of the freebies I have available for you to choose from.


Here are the rules...

✻ Please make a new card or handmade crafty creation using either stamps, dies and or designer paper from Art Impressions. You can make any item you wish; this is not limited to cards! (unless specified)

✻ Limit two submissions per person.
✻Lucky Random Winner will receive a free 
stamp set from Art Impressions
 ✻Please include your first name and last initial on your submission. You may include your entire last name, but it's not necessary.
✻We love to comment on your entries, but keep in mind if you use a private group or a platform that you need to sign up for, we probably won't be able to.
✻ The Ai Challenge is open to everyone, international submissions are welcome!
✻ Include a link back to the Ai Blog or grab our button on the top right of our sidebar!
✻ Share the Ai love if you can, by clicking and commenting on your fellow crafters.
✻ Make sure to get your link up by the deadline to enter your creations.
✻ Good luck and happy stamping! 


You are invited to the Inlinkz link party!

Click here to enter

You are invited to the Inlinkz link party!

Click here to enter

Thursday, July 30, 2026

Floral Frenzy Challenge #433

Hello Ai fans!
Welcome to our new challenge.

FLORAL FRENZY

Let's see your floral creations.
Remember, they don't have to be cards. You can create anything you like as long as you use something from Art Impressions. We'd love to see your gift card holders, gift tags, boxes and bags, bookmarks, place cards, cake picks, designer paper, framed art and more. Anything with flowers.

This week Janet is our Featured Artist and she took the theme to heart,
creating the most amazing floral card.
After you browse through her photos and picture tutorial,
be sure to see who the winners from our last challenge are.


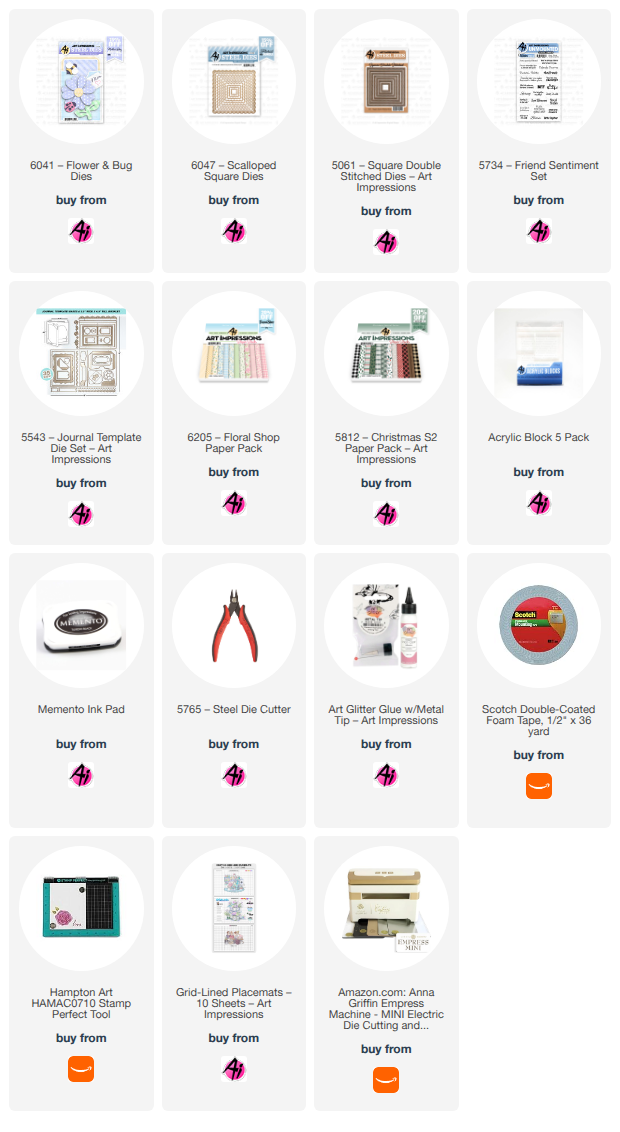
Hi everyone! It's time for the newest Ai Challenge - Floral Frenzy. With so many floral stamps and dies to work with, this one is super easy to participate in. For inspiration I've created a card made almost entirely with dies. The only stampingare the two sentiments. Sometimes it's nice to take a break from coloring and with all the great die sets in the store, it's not hard to make something awesome out of imagination and cardstock! For my challenge project, I used 6041 - Flower and Bug Dies with a little help from some other Ai sets.

This card starts with a unique fancy fold. I learned about it from Tarabeth Stamps' blog. It folds flat for mailing but when open, the right front flap tucks under something, in my case buttons. When tucked, the card pops forward thanks to the scored folds in the front panel. When the card is open, there is lots of room to stamp a message and a strip of cardstock plus the buttons just makes it even more charming to open.

Here you can see the dimension of this card when it's opened for display. The center portions of the card front pop out to move the focal point of the card out. It's a little bit surprising as you don't necessarily expect that at first. Tuck the right edges of the card under the buttons and the magic happens!

Start with a 4 1/4" x 11" of cardstock and score 6 lines moving from right to left: 3/4", 2", 3 1/2", 4 3/4", and 5 1'2" as shown here.

Fold the scores so that you create a flat mountain shape in the center of the card front.


Then glue the last scored section and close the card. This creates a flat left edge to the card base.


Next come the mats. Since it's a floral challenge I naturally chose 6205 - Floral Shop Paper Pack. Pick three patterns that coordinate and cut them all at 4 1/8" high. Cut the strips in these widths in the order shown: 5/8", 1 1/8", 1 3/8", 1 1/8", 5/8", and 3/4". This is the same order the strips go on your folds moving from left to right.


Here are the first five strips. The sixth strip is used on the inside but will peak through when the card is tucked and displayed.


Next I created the mats where the flower and bugs will rest. For this I used a die from 6047 - Scalloped Square Dies and another square from 5061 -Square Double Stitched Dies which nests on top of the scallop square.


I cut all the cardstock shapes from the 6041 - Flower and Bug Dies set. I cut two of the flower pieces and once of everything else. I cut the gold cardstock circle for the flower but decided to use a brad instead at the last minute. For the bee's wings, I used vellum so they would be translucent.


I assembled the flower, the bee and the ladybug. I secured the two flowers together with a clear jewel brad and placed the pieces on the matted square. You might think my buttons are real but they're just cardstock! I used woodgrain paper from the 5812 - Christmas S2 Paper Pack. For this, I used a button die found in the 5543 - Journal Template Die Set. I cut two more buttons which I glued under the woodgrain button. One layer was brown to give the buttons a little more rigidity and I cut a round circle in blue cardstock which peaks through the button holes. For this I used the flower center in the Flower and Bugs set. I also cut the tag from a die in this set and matted it on green cardstock. I cut out the interior white piece 4 9/16" x 4 1/8" and glued the sixth paper strip on the right side. I stamped BFF and the inside sentiment using stamps from 5734 - Friend Sentiment Set.


To finish the card, I glued the finished focal point at a slight angle only to the striped center panel. Don't let your glue go beyond this because if you do, it'll stop the pop-out feature from working. Then I glued the inside sentiment piece. Just the right edges of each button on the inside strip of patterned cardstock are glued. Do not adhere the entire button down because you need room to slip the right front edge of the card under the buttons. Here's another look at the card in case you've forgotten after all the instructions!


This is a simple but unique fancy fold that I think is a fun presentation to someone. You can use anything for the tuck pieces. I used buttons but you could use hearts, stars, flower shapes - basically whatever your heart desires or will work with your theme.

I hope you enjoyed my creation for the Floral Frenzy challenge! I invite you to join in and enter your floral creation in this challenge. Just link it this post in the next two weeks to participate. Easy peasy! 

Thanks for stopping by and spending time with me and Art Impressions today. Please visit the Ai store to pick up your favorite stamps, dies, papers, accessories, and supplies. 

Happy Crafting!


This is such a pretty card and the fun fold just enhances its beauty.
Thank you Janet!

Now, let's see who won our Christmas in July challenge.

For our Top Spot we selected #5
Marianne H.
for her amazing spooky scene.


Please contact Leah at Feedback@artimpressions.com
to claim your free stamp set.


Our Lucky Random Winner was #13 Lynn C.
(which proves the #13 isn't always unlucky...lol!)


Please contact Leah at Feedback@artimpressions.com
to claim your free stamp set.

Congratulations to our winners!
Enjoy your new stamps.

Now, onto the details of our new challenge.

Please make a new project featuring any floral themed
stamps, dies or paper from Art Impressions.
We can't wait to see what your beautiful creations.

Here are the rules...

✻ Please make a new card or handmade crafty creation using either stamps, dies and or designer paper from Art Impressions. You can make any item you wish; this is not limited to cards! (unless specified)

✻ Limit two submissions per person.
✻Top Spot Winner and Lucky Random Winner each receive a free 
stamp set from Art Impressions
 ✻Please include your first name and last initial on your submission. You may include your entire last name, but it's not necessary.
✻We love to comment on your entries, but keep in mind if you use a private group or a platform that you need to sign up for, we probably won't be able to.
✻ The Ai Challenge is open to everyone, international submissions are welcome!
✻ Include a link back to the Ai Blog or grab our button on the top right of our sidebar!
✻ Share the Ai love if you can, by clicking and commenting on your fellow crafters.
✻ Make sure to get your link up by the deadline to enter your creations.
✻ Good luck and happy stamping! 


You are invited to the Inlinkz link party!

Click here to enter