Showing posts with label Spooky Window Set. Show all posts

Monday, November 1, 2021

Full Moon Window Card by Bri Firth

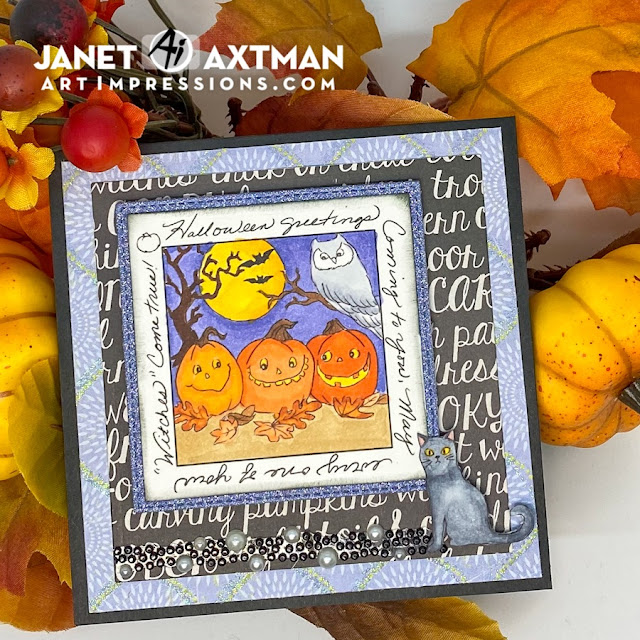
Hello Ai Fans - Bri Firth here! Even though Halloween was yesterday, I wanted to share one more card featuring the new Spooky Window set. This project is also purrfect Ai's current challenge theme, Feline Crazy. For more details on this week's challenge click here


I colored the Spooky Window scene with my Copic markers. I wanted to incorporate as many Fall colors as I could with this frightful scene. I think my favorite part of this scene is the yellow full moon. 

I used the ShadowBox Window die set to create the black window frame on the card front. This die set also includes the "Hello" word die that I attached to the front of this card. To finish decorating the card front, I used coordinating Halloween papers to create the matted layers. 


Check back next week for more Ai inspiration made by me!

Tuesday, October 12, 2021

Spooky Shadowbox Halloween Card by Jil Lebel


Hello Ai fans!

Are you all as excited about the new release as I am?  I used the Spooky Window stamp and die set to make an interactive Halloween card. 
I started by stamping the images onto Spectrum Noir Ultra Smooth card stock with Gina K Black Amalgam ink and colored them with Copic markers.  The colors I used will be listed at the end of this post.  I then cut the  images out with the matching dies that come in the set.
I used the Shadowbox Window Die to cut a window frame and ledge from Kraft card stock. I also cut the backing piece from black card stock. I used the Watercolor Fence Die and the Cat Mini Dies to cut from black card stock.  I also cut a square of silver glitter card stock to go behind the image.  I added a layer of patterned paper to a black A2 card front and cut the window opening out using the square die from the Shadowbox Window Die.  I attached the square image to the glitter paper and added it to the backing piece and added it behind the square opening.  I added the cat image over it with foam tape..  I attached the craft window over the opening.  The window ledge is attached with foam tape. I added the fence and cat die cuts to the front of the card. 
Copic Colors Used:
Yellow - Y15, Y13, Y11
Orange - YR18, YR14, Y15
Brown - E74, E71, E70
Green - YG61, YG07, YG01
Red - R37, R27
Owl - W5, W3, W1
Sky - V04, blender


Thanks for stopping by and Have a Great Day!

Saturday, October 2, 2021

New Release! May Your "Witches" Come True by Janet


It's new release time everyone! Woohoo! There are several new Window to the World sets that will get announced over the next few weeks. This one is sure to become a fan fall favorite. It's called Spooky Window Set and it's available NOW at the store. This set also is sized to coordinate perfectly with the Shadow Box Window Die which allows a 3D look. 

The sentiment surrounding this image was too good to hide so I cut the window and created a stitched frame in purple glitter paper with the Square Double Stitched Rectangle Set to make it visible. I colored the images with various orange, purple, yellow and brown Copic colors. The cat is its own image and the set includes the die for it. I had to make this one black using cool gray Copic Colors. To add some magical sparkle to the card, I used a strip of pearl and black gem bling and purple cardstock with a hint of glitter in the pattern. 

One of my favorite things about the Windows to the World series is that the images are small and it doesn't take long to color them up in your favorite medium of choice. From pencils, to markers, to watercolor, it all works wonderfully and quickly! 

Happy Creating!

Janet YouTube - Blog - Facebook - Instagram - Pinterest