Showing posts with label 6041 Flower and Bug. Show all posts

Thursday, July 30, 2026

Floral Frenzy Challenge #433

Hello Ai fans!
Welcome to our new challenge.

FLORAL FRENZY

Let's see your floral creations.
Remember, they don't have to be cards. You can create anything you like as long as you use something from Art Impressions. We'd love to see your gift card holders, gift tags, boxes and bags, bookmarks, place cards, cake picks, designer paper, framed art and more. Anything with flowers.

This week Janet is our Featured Artist and she took the theme to heart,
creating the most amazing floral card.
After you browse through her photos and picture tutorial,
be sure to see who the winners from our last challenge are.


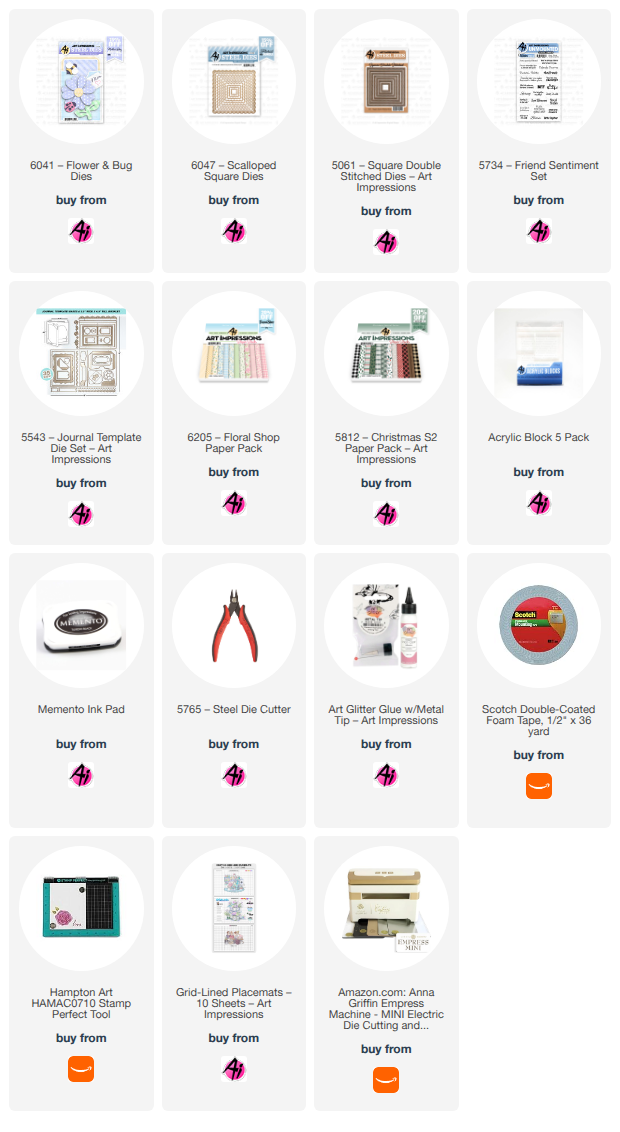
Hi everyone! It's time for the newest Ai Challenge - Floral Frenzy. With so many floral stamps and dies to work with, this one is super easy to participate in. For inspiration I've created a card made almost entirely with dies. The only stampingare the two sentiments. Sometimes it's nice to take a break from coloring and with all the great die sets in the store, it's not hard to make something awesome out of imagination and cardstock! For my challenge project, I used 6041 - Flower and Bug Dies with a little help from some other Ai sets.

This card starts with a unique fancy fold. I learned about it from Tarabeth Stamps' blog. It folds flat for mailing but when open, the right front flap tucks under something, in my case buttons. When tucked, the card pops forward thanks to the scored folds in the front panel. When the card is open, there is lots of room to stamp a message and a strip of cardstock plus the buttons just makes it even more charming to open.

Here you can see the dimension of this card when it's opened for display. The center portions of the card front pop out to move the focal point of the card out. It's a little bit surprising as you don't necessarily expect that at first. Tuck the right edges of the card under the buttons and the magic happens!

Start with a 4 1/4" x 11" of cardstock and score 6 lines moving from right to left: 3/4", 2", 3 1/2", 4 3/4", and 5 1'2" as shown here.

Fold the scores so that you create a flat mountain shape in the center of the card front.


Then glue the last scored section and close the card. This creates a flat left edge to the card base.


Next come the mats. Since it's a floral challenge I naturally chose 6205 - Floral Shop Paper Pack. Pick three patterns that coordinate and cut them all at 4 1/8" high. Cut the strips in these widths in the order shown: 5/8", 1 1/8", 1 3/8", 1 1/8", 5/8", and 3/4". This is the same order the strips go on your folds moving from left to right.


Here are the first five strips. The sixth strip is used on the inside but will peak through when the card is tucked and displayed.


Next I created the mats where the flower and bugs will rest. For this I used a die from 6047 - Scalloped Square Dies and another square from 5061 -Square Double Stitched Dies which nests on top of the scallop square.


I cut all the cardstock shapes from the 6041 - Flower and Bug Dies set. I cut two of the flower pieces and once of everything else. I cut the gold cardstock circle for the flower but decided to use a brad instead at the last minute. For the bee's wings, I used vellum so they would be translucent.


I assembled the flower, the bee and the ladybug. I secured the two flowers together with a clear jewel brad and placed the pieces on the matted square. You might think my buttons are real but they're just cardstock! I used woodgrain paper from the 5812 - Christmas S2 Paper Pack. For this, I used a button die found in the 5543 - Journal Template Die Set. I cut two more buttons which I glued under the woodgrain button. One layer was brown to give the buttons a little more rigidity and I cut a round circle in blue cardstock which peaks through the button holes. For this I used the flower center in the Flower and Bugs set. I also cut the tag from a die in this set and matted it on green cardstock. I cut out the interior white piece 4 9/16" x 4 1/8" and glued the sixth paper strip on the right side. I stamped BFF and the inside sentiment using stamps from 5734 - Friend Sentiment Set.


To finish the card, I glued the finished focal point at a slight angle only to the striped center panel. Don't let your glue go beyond this because if you do, it'll stop the pop-out feature from working. Then I glued the inside sentiment piece. Just the right edges of each button on the inside strip of patterned cardstock are glued. Do not adhere the entire button down because you need room to slip the right front edge of the card under the buttons. Here's another look at the card in case you've forgotten after all the instructions!


This is a simple but unique fancy fold that I think is a fun presentation to someone. You can use anything for the tuck pieces. I used buttons but you could use hearts, stars, flower shapes - basically whatever your heart desires or will work with your theme.

I hope you enjoyed my creation for the Floral Frenzy challenge! I invite you to join in and enter your floral creation in this challenge. Just link it this post in the next two weeks to participate. Easy peasy! 

Thanks for stopping by and spending time with me and Art Impressions today. Please visit the Ai store to pick up your favorite stamps, dies, papers, accessories, and supplies. 

Happy Crafting!


This is such a pretty card and the fun fold just enhances its beauty.
Thank you Janet!

Now, let's see who won our Christmas in July challenge.

For our Top Spot we selected #5
Marianne H.
for her amazing spooky scene.


Please contact Leah at Feedback@artimpressions.com
to claim your free stamp set.


Our Lucky Random Winner was #13 Lynn C.
(which proves the #13 isn't always unlucky...lol!)


Please contact Leah at Feedback@artimpressions.com
to claim your free stamp set.

Congratulations to our winners!
Enjoy your new stamps.

Now, onto the details of our new challenge.

Please make a new project featuring any floral themed
stamps, dies or paper from Art Impressions.
We can't wait to see what your beautiful creations.

Here are the rules...

✻ Please make a new card or handmade crafty creation using either stamps, dies and or designer paper from Art Impressions. You can make any item you wish; this is not limited to cards! (unless specified)

✻ Limit two submissions per person.
✻Top Spot Winner and Lucky Random Winner each receive a free 
stamp set from Art Impressions
 ✻Please include your first name and last initial on your submission. You may include your entire last name, but it's not necessary.
✻We love to comment on your entries, but keep in mind if you use a private group or a platform that you need to sign up for, we probably won't be able to.
✻ The Ai Challenge is open to everyone, international submissions are welcome!
✻ Include a link back to the Ai Blog or grab our button on the top right of our sidebar!
✻ Share the Ai love if you can, by clicking and commenting on your fellow crafters.
✻ Make sure to get your link up by the deadline to enter your creations.
✻ Good luck and happy stamping! 


You are invited to the Inlinkz link party!

Click here to enter

Saturday, July 12, 2025

I'm Your Love Bug by Janet

Hello everyone! I hope your weekend is off to a great start. This week, I dove headfirst into the "Spritz, Splatter AND PAINT!" challenge on the Ai Blog, and let me tell you, I was thrilled! There's nothing I love more than making a creative mess, especially when it's for a good cause – like winning free stamps!

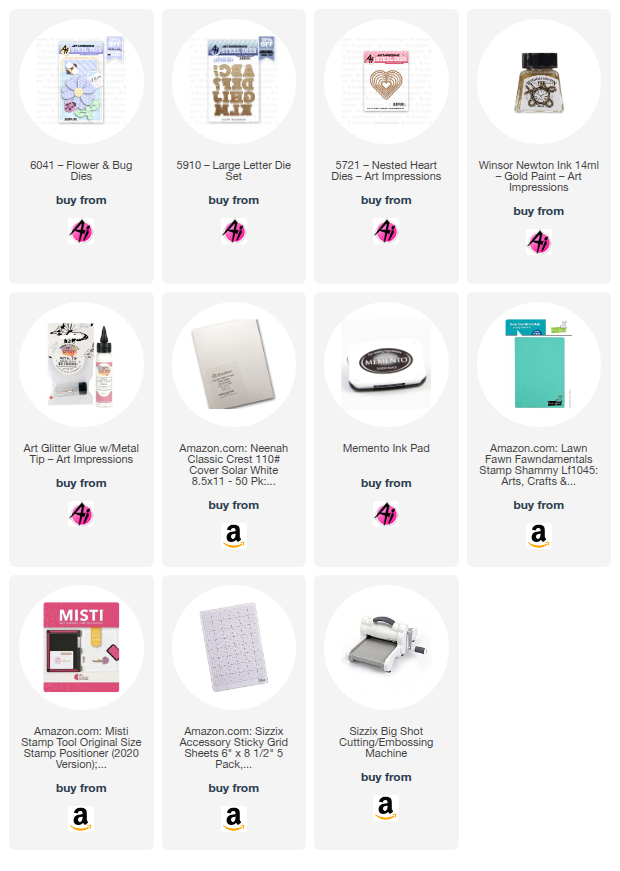
My card is a vibrant message of love, centered around an adorable ladybug from the 6041 - Flower and Bug set. She's perched on a beautifully stacked and layered heart, crafted from seven layers of pink and navy cardstock using the 5721 - Nested Heart Dies. Building it up with foam tape really makes this heart pop right off the card, creating a bold statement. In the four corners, I spelled out "LOVE" using gold cardstock letters from the 5910 - Large Letter Die Set, placing them strategically above and below the prominent heart.

Before adding these elements, I had some serious fun creating the background. The colorful mat started with a three-layer stencil, blending cheerful blue and pink Oxide inks. For the dazzling third layer, I painted it with Winsor Newton Gold paint from Art Impressions – pure metallic magic! Once that was done, I watered down some blue watercolor paint and generously splattered it across the panel. Then, I followed up with simple water droplets. Because the bright pink and blue inks are water-reactive, these drops created a fantastic bleached-out, textured effect where they landed. To push the texture even further, I ran the whole panel through an embossing folder.

After arranging and gluing all the pieces, I felt it needed one final touch. A sweet pink and white polka dot bow, complete with a heart gem in the middle, was the perfect complement to the main heart and ladybug.

I truly hope you'll join in on the "Spritz, Splatter AND PAINT!" challenge! It's a fantastic excuse to play and create, and you'll get a chance to win free stamps just by uploading your creation to the challenge post on the blog. I can't wait to see what amazing things you create!

Thanks so much for stopping by today! Don't forget to find your favorite stamps, dies, and accessories at the Ai Store! Make a visit today.

Happy crafting!

Janet YouTube - Blog - Facebook - Instagram - Pinterest 

Monday, June 30, 2025

Hello by Sharon Caudle

 Hello AI Fans!! 


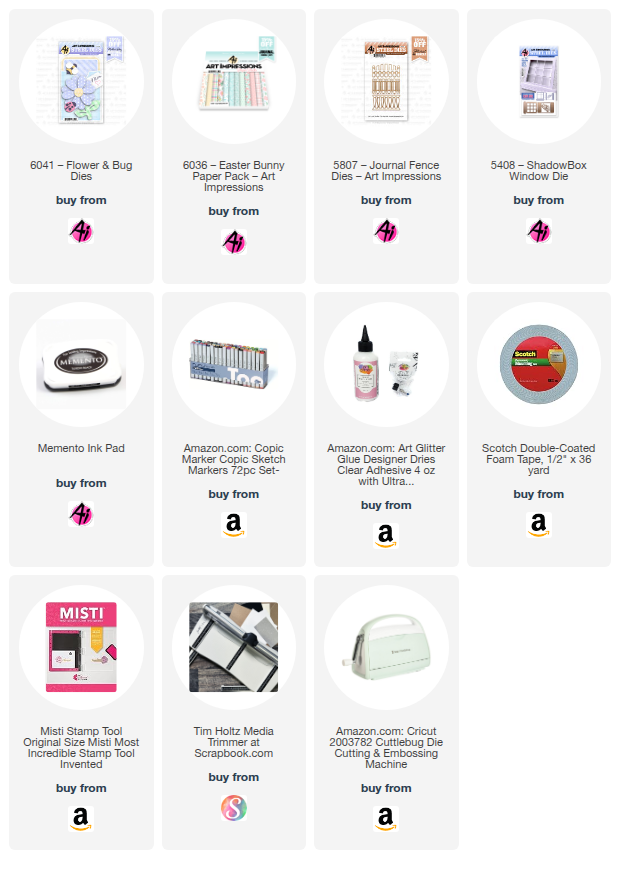
Today I have a card to show you where I didn't touch a single Copic marker! A highly unusual circumstance for me LOL!! I created it using several die sets from Art Impressions and some of their beautiful paper. There are no stamped images, but there is lots of dimension. For the flowers, bee, and ladybug, I used #6041 Flower and Bug Dies. I just cut the flower out of two different complimentary papers for each individual flower and offset them. The fence is from using #5807 Journal Fence Dies. I cut three of them since two didn't quite fit all the way across my paper. So I cut the center plank out of the third die cut leaving the cross planks attached to it and glued it in between the other two fences, right in the center of the card. The "Hello" die cut is from #5408 Shadowbox Window Die. This die works perfectly with all the Windows to the World stamp sets! 


So that's it for me today! Thanks so much for stopping by for a visit and until next time - stay crafty!!


Saturday, June 14, 2025

I Pick You! by Janet

Hello crafty friends! I'm so excited to share my latest creation for the Blossoms & Blooms Challenge! This challenge was the perfect excuse to dive into my Art Impressions stash and combine some of my favorite floral sets to create a truly special handmade card.

This card brings together several Art Impressions goodies:

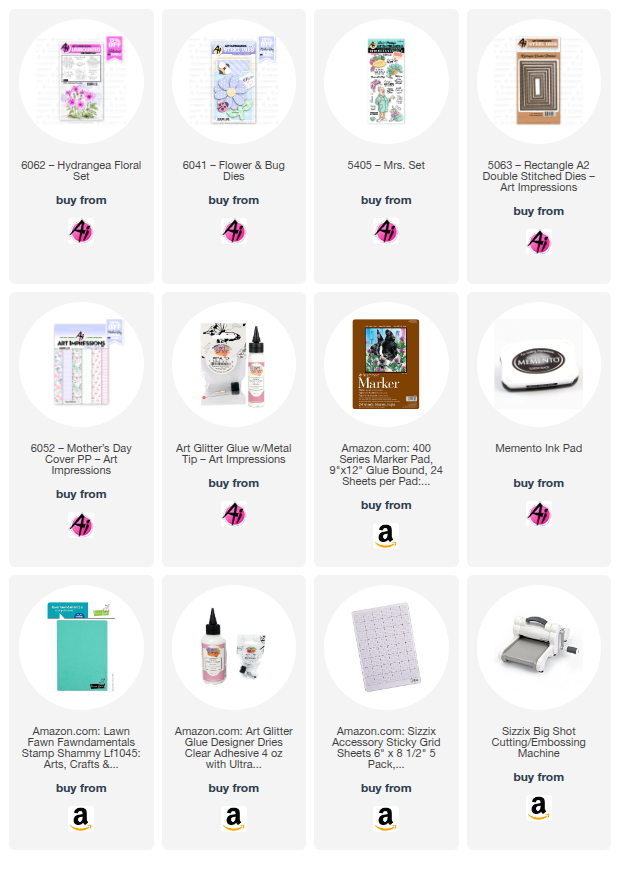
  • 5405-Mrs. Set: For the perfect floral sentiment that compliments my floral friendship card.
  • 6041-Flower & Bug Dies: I used this set to create the charming daisy, adding a touch of cheerful simplicity to the design. The versatile bee is also part of this set.
  • 6062-Hydrangea Floral Set: You'll spot delightful pansies from this versatile set, adding layers of beautiful blooms.
  • 5721-Nested Heart Dies: This set helped me create the lovely heart shape that serves as a focal point, symbolizing love and warmth.
  • 5063-Rectangle A2 Double Stitched Dies: Two nested rectangle dies were used to create the stitched frame that helps to draw the eye into the pansy flowers. I used another die to cut the paper used inside my card.
  • 6052-Mother's Day Cover Paper Pack: The beautiful patterns from this pack provided the ideal backdrop, adding a touch of elegance and cohesion to the whole design

I began by using the 5063-Rectangle A2 Double Stitched Dies to cut my card base layers from coordinating cardstock and the lovely patterns from the 6052-Mother's Day Cover Paper Pack. The patterned layers always add such a nice touch!

Next, I focused on the florals. The daisy and bee from the 6041-Flower & Bug Dies anchor the card. Pansies were stamped on a layered heart made with the 5721-Nested Heart Dies. The pansies come from the 6062-Hydrangea Floral Set. I colored the daisies with Copic markers. I love how these sets work together to build a full, lush floral theme to the card.

The sentiment, chosen from the versatile 5405-Mrs. Set, was stamped on a tag that is part of the 6041-Flower & Bug Dies.  

Layering all these elements with a mix of adhesive and foam tape created depth and dimension, making the flowers and sentiment really pop against the patterned background. I also used Nuovo Crystal Drops on the daisy center. While it was still wet, I sprinkled clear glitter on top to add a little more shine.

This is a top fold A2 card. Inside I cut a piece of patterned paper from the 6052-Mother's Day Cover Paper Pack with another die from the 5063-Rectangle A2 Double Stitched Dies. I stamped the inside sentiment from the 6062-Hydrangea Floral Set. I really love the script that these sentiments are in. Quite lovely!

I truly enjoyed participating in the Blossoms & Blooms Challenge and bringing this floral vision to life. It's amazing how many beautiful combinations you can create with Art Impressions' diverse product line! Be sure to enter your own floral card in our challenge. You might be rewarded with a free stamp set for your efforts!

Please stop by the Ai Store for all your card making needs. Until next time, happy creating!

Janet YouTube - Blog - Facebook - Instagram - Pinterest    

Thursday, June 12, 2025

Blossoms & Blooms Challenge #405 Week #2

Hello Ai fans and welcome to week #2 of our 
Blossoms & Blooms challenge!

Our Featured Designer was Dori and she created this incredible flower pot!


Sharon "planted" her girlfriends in front of a gazebo for this amazing card.


Lynn has a video tutorial for her beautiful floral banner card.


I created a card for a friend going through a difficult time.


Tasha's birds are enjoying the blossoms on her tree branches on this lovely card.
Dori also created a "blooming awesome" window card!

Gennette joined in this week with one of my favorite's...Black-eyed susans and of course, a bee!


The next two cards are from our fabulous Guest Designers, Sara and Simone.


Simone used a no longer available 5875 Throwback Iris for her card, but we share because we know some of you have it and will love the inspiration. Check out Gennette's card below Simone's for a wonderful, current set, that is a great substitute.


Here's Gennette's pretty card that uses Irises similar to Simone's.
6061 – Tulip Floral Set.


We hope you're enjoying all of the Blossoms & Blooms going on wherever you live.
Thank you to our AMAZING Design Team members for all of your hard work and creativity.

Be sure to enter your handmade floral project for the chance to win a free stamp set from Art Impressions.

✻ Please make a new card or handmade crafty creation. You can make any item you wish; this is not limited to cards! (unless specified)

✻ Limit two submissions per person.
 ✻Please include your first name and last initial on your submission. You may include your entire last name, but it's not necessary.
✻We love to comment on your entries, but keep in mind if you use a private group or a platform that you need to sign up for, we probably won't be able to.
✻ The Ai Challenge is open to everyone, international submissions are welcome!
✻ Include a link back to the Ai Blog or grab our button on the top right of our sidebar!
✻ Share the Ai love if you can, by clicking and commenting on your fellow crafters.
✻ Make sure to get your link up by the deadline to enter your creations.
✻ Good luck and happy stamping! 

You are invited to the Inlinkz link party!

Click here to enter

Thursday, June 5, 2025

Blossoms & Blooms Challenge #405 Week #1

Hello Ai fans and welcome to the latest challenge
on the Art Impressions Challenge Blog!

Our new challenge is Blossoms & Blooms!


Let's see ALL of your flowers for Spring!
Flower stamps, flower dies, floral paper, floral embellishments...
whatever you can think of that's floral.

Before we see the most incredible floral creation ever, from our Featured Designer Dori, let's see who won our We 💚 Dads! challenge.

For our Top Spot we selected Barb E.


Please contact Leah at Feedback@artimpressions.com
to claim a free stamp set of your choice!!
Be sure to grab our badge to display on your social media too!

Our Lucky Random Winner was Debby V.


Please contact Leah at Feedback@artimpressions.com
to claim a free stamp set of your choice!!
Be sure to grab our badge to display on your social media too!

Congratulations to both of these talented ladies!


Next up...you won't believe your eyes! Just look at what Dori has created for our Blossoms and Blooms challenge!

-----------------------------------------------------------------------------------------------------------------------------


 Hello AI Friends!

I am so excited to feature our newest blog challenge - "Blossoms and Blooms".  I definitely drew the lucky straw on this challenge.  Who doesn't love florals?  Especially with all the beautiful pattern papers and floral stamps/dies from Art Impressions.  I have to say it was pretty hard to decide which ones to use but, man, it was fun playing and I have lots left over for future projects.  

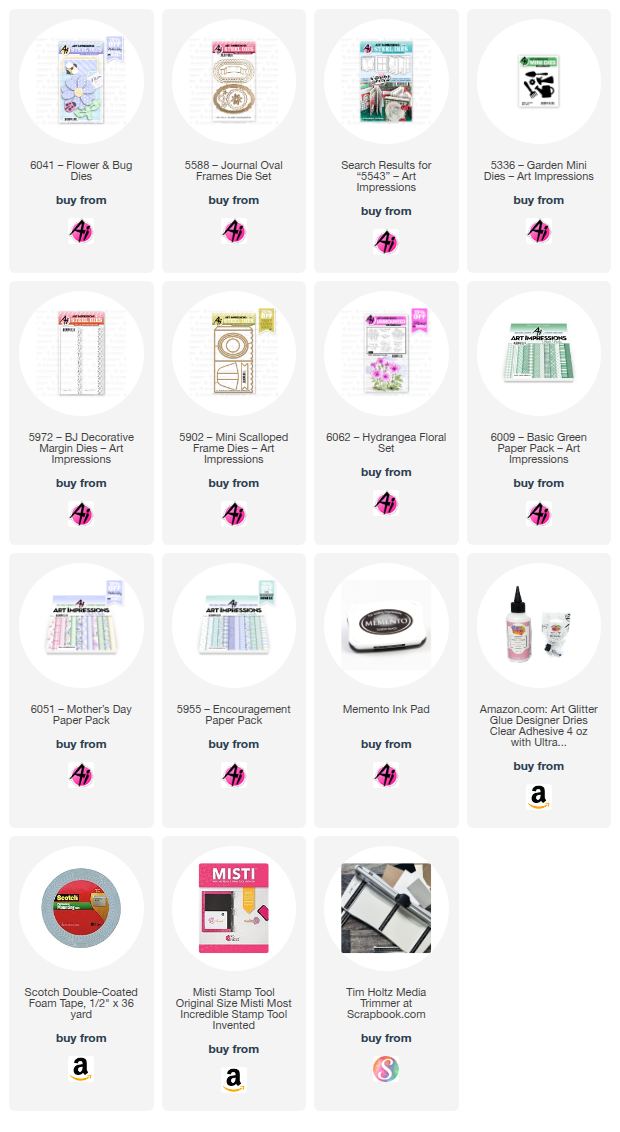
 I ended up using the #6041 - Flower & Bug die set as well as the scallop circle dies from the #5588 - Journal Oval Frames and the #5543 - Journal Template die set.  


I started off by die cutting a bunch of floral pieces from an assortment of AI pattern papers #6051 - Mother's Day PP and #5955 - Encouragement PP using the scallop dies and the flower die mentioned above.  Don't forget to die cut the small floral centers too.  These papers all coordinate so nicely so it was fun putting the flowers together. 
 I added a lot of dimension to my flowers by layering with a shift, curling and crimping.  If you don't prefer the dimension, you can layer flat, curl under vs. upward or ink the edges. 

Flowers using the #6041 - Flower & Bug die set
      Curl the petals upwards using a rounded tip of a paint brush, skewer, etc.  (see striped petal below)
      Crimp the petals using the paint brush by placing the brush in the middle of the petal and pinch the sides up. (see floral petal below).    
      After curling and crimping all petals, place some glue to the back center of the floral petal and adhere to striped petal at a shift to the right so that the striped petal shows through the floral petal.  Adhere the flower center with a pop dot (or glue if no dimension preferred).  For the finished flower, see the top center of the final project above.


Flowers using the scallop circles from the #5588 - Journal Oval frames and the #5543 - Journal Template die set.
      These are prepared the same as above except it has an extra layer and includes a first step to perform on all of the scallop pieces.
       Take the scallop circle and cut towards the center every other scallop (see striped piece below).  Be careful not to cut too far so that it doesn't cut into another slit.  This does not have to be perfect as it will be covered by the next petal.  
       Do this for each petal and then curl and crimp each petal as above.  See picture below - step 1, 2, 3.  Do each step for each petal.  Glue each petal together or pop up for added dimension.  Adhere small circle to the center.   Finished scallop flower should resemble the bottom left of the project.


Now, for the flower pot.  
      Cut two 4 x 4 inch pieces of kraft cardstock.  Mark, with a pencil, at 1/4" from the left and right of one 4" side.  Line up the pencil mark on your trimmer and shift the cardstock so that it cuts at an angle to the opposite corner tip.  Do the same for the other side.  This will create the angle of the flower pot. 
      Using the #6009 - Basic Green PP, I cut a piece of green striped paper for the front of the pot, in the same way as the base of the pot, just leaving a slight edge of the base showing.  If you want to place a ribbon on the front (like I did), make sure to adhere to this piece before gluing the pattern paper to the flower pot.  Tuck the edges of the ribbon around the pattern paper.
      Cut two strips of 4 3/8" x 2" using the #5972 - Decorative Margin die.  Try to line up the scallop edge to be even on both sides.  Determine how much of this you want to be your pot top.  I cut mine down to 1 1/4" vs. the 2", but this is up to you.  I also rounded the top edges with a corner rounder before adhering with foam tape to the pot.  Now that you have a front and back of the pot, let's create the sides to make it stand and hold the card insert.
       Sides - Cut two strips of 3 3/4 x 1" and score and fold (M, V, M) at 1/4, 1/2 and 3/4" down the long edge.  Glue the mountain sides to the front and back of the pot, just inside the edge so it doesn't show from the front or back.  (See picture below.)
       I also cut an easel piece from kraft cardstock using #5902 - Mini Scallop Frame die.  Adhere it to the back side of the pot.  This is to assure that your flower pot will stand firmly.


For the card insert, I cut a 3 1/2" by 5 1/4" piece of kraft cardstock for the mat and a 3 1/4" by 5" piece of white cardstock for the sentiment.  Using one of the newest release sets #6062 - Hydrangea Floral set, I stamped the sentiment onto the card insert and another one of the sentiments onto a piece of green striped paper left over from the pot front.  I picked up some plastic plant picks from the dollar tree and adhered the sentiment onto it. 

Now, for the funnest part, arranging the flowers into the pot.  This is your preference and might depend on how tall you want your card to be.  My card measures just under 5 x 7.  After arranging my flowers, I added some leaf sprigs die cut from a piece of the Green Basic PP, using a die from my stash, and placed them sporadically within the flowers.  I then adhered the plant pick to the inside of the flower box with strong glue.  Lastly, I added a few extra touches to the front of my flower pot.  I tied a piece of twine and added the garden tool charms to a jump ring and knotted onto the twine.  I added a pink ribbon bow and a die cut heart to the sentiment and the watering can.  

That's it for me today!  Have fun creating your flower blossoms and blooms.  Make sure to join in on the challenge for a chance to win a free stamp set.  
We love to see what you create!!

Be sure to enter your creation for the chance to win a free stamp set from Art Impressions. 
We award one Top Spot and one Lucky Random Winner and each will win a free stamp set from Art Impressions.

✻ Please make a new card or handmade crafty creation. You can make any item you wish; this is not limited to cards! (unless specified)

✻ Limit two submissions per person.
 ✻Please include your first name and last initial on your submission. You may include your entire last name, but it's not necessary.
✻We love to comment on your entries, but keep in mind if you use a private group or a platform that you need to sign up for, we probably won't be able to.
✻ The Ai Challenge is open to everyone, international submissions are welcome!
✻ Include a link back to the Ai Blog or grab our button on the top right of our sidebar!
✻ Share the Ai love if you can, by clicking and commenting on your fellow crafters.
✻ Make sure to get your link up by the deadline to enter your creations.
✻ Good luck and happy stamping! 
You are invited to the Inlinkz link party!

Click here to enter