Showing posts with label 6090 -Patriotic Paper Pack. Show all posts

Friday, July 3, 2026

Let Freedom Ring! Card by Tasha

 Happy Friday Art Impressions Friends!

Tasha here sharing a patriotic card to kick off the big Fourth of July weekend. This card features the fun 6077-Loungin' Linda Set and paper from the 6090-Patriotic Paper Pack. I love all the fireworks!

To begin this card, I stamped Linda and used the included die to cut her out before coloring. I used Copic Markers to color her and added details with a white gel pen; I think she looks awesome in her Red, White & Blue outfit.

To add to the Americana theme, I added the flag from the 5494-Front Porch Patriotic Set and used a piece of firework pattern paper for the sky. Linda looks like she is enjoying all the 4th of July festivities!

Lastly, I attached a "Let Freedom Ring" sentiment and layers of Red and Blue cardstock and silver glitter paper for sparkle.  I think this card is fun and perfect to send to someone this Summer. 

Happy 4th of July!


Thursday, July 2, 2026

4th of July Granny card by Dori Mendiola

 Happy Thursday AI Friends!

In celebration of our freedom and this wonderful country we call home, I had to create one more card for this fabulous U.S. holiday. Thank you to all the brave service men and women who have fought for our country.  Your courage and sacrifice mean everything.  

Happy Independence Day to All!

This Granny is excited to be celebrating!  She's a rockin in her chair!
I placed her on a round card base, so she literally rocks.  LOL!

I stamped the images onto copic friendly paper with Memento black ink and colored with my copic markers, listed below.  The accessories were die cut with the corresponding dies from the #5494 - Front Porch Patriotic set but the Granny was fussy cut.  I also paper pieced her outfit using the #6090 - Patriotic PP.  This paper pack is SO full of beautiful papers in the Red, White and Blue. 

 I placed the flag into her hand and curled her fingers around the pole so that she looked like she was waving it.  Just make sure to color the backside of her hand.  šŸ˜€  I popped her up onto a white circle,
 cut with the #5064 - Double Stitched Circle dies.  I also popped up several of the accessories.
I die cut the numbers out of red cardstock using the #5911 - Large Numbers dies.  The sentiment is from the same set as the Granny (#5422 - Rock on Laugh Lines).

That's it for me today!  Hope you all have a safe and fun 4th of July weekend!

Keep creating!
Copics used:  E000, E00, E01, E11
E31, E33, E35, E51, E53
R20, R24, R27, R29
N0, N1, N2    B34    Y15, Y17

Thursday, June 11, 2026

Motorcycle Manny & Sidecar Sally card by Dori Mendiola

 Happy Thursday AI Friends!

I realize that I am a little early to celebrate the 4th of July here in the USA, but I was inspired by the current blog challenge "Enjoy the Ride".  I decided to use the stamp set #5044 - Born to Ride and if you look at the packaging, he is wearing a flag bandana.  Screamed patriotic and therefore, inspired the 4th of July theme for my card.  I've always loved this cute little couple and I've never created with them yet so here goes:


I wanted to display fireworks and stars so I thought a pop-up card would be ideal.  I made a "tuxedo-style" card.  This is a box card with four sides but the front two panels are diagonally cut to create the tuxedo look.


Cut a 6 x 10 1/2" card base.  Score and burnish along the 10 1/2" side at 2 1/2", 5", 7 1/2" and 10".  Make a pencil mark at 2 1/2" along the 6" ends.  Place into your paper trimmer and make a diagonal cut from the 2 1/2" mark to the top score line (see top pic left side).  On the tab end (see pic right side), cut across that 1/2" at the pencil mark, tuck that tab under and cut from the mark to the score line on that side.  Your diagonal cuts should match up when folded in half.  At this point, I adhered two pieces of pattern paper (using the #6090 - Patriotic PP) to the two full size panels (measures 2 3/8 x 5 7/8").  I then cut two more pieces of pattern paper (same measurements).  To get the same diagonal shape, hold the pattern paper piece to one of the diagonal edges and cut to match.  Then trim off the bottom of the pattern paper to create a nice border of card base.  Do the same for the other side.  Adhere to the card base.  Place glue on the back side of the tab and join to the other diagonal panel to create a four sided tube.  See below.


For the inside and outside pop-ups, cut a piece of acetate and a piece of cardstock that measure 1/2" x 4 1/2".  Score and burnish both pieces along the 4 1/2" side at 1/2", 1" and 1 1/2".   Turn and repeat for the other end.  


Adhere the inside pop up die cuts to the non-scored strip of the acetate.  Place glue on the tabs of the acetate and glue down to the back panels, one tab to each panel.

I stamped the images onto copic friendly paper with Memento black ink and colored with my copic markers listed below.  I paper pieced his vest and her shirt to match.  I put stickles onto her glasses and the headlight of the motorcycle so they coordinated with the yellow glitter paper.  Very slight detail, but it was going to bug me if it didn't blend together.  LOL!

I fussy cut both characters and adhered her directly onto the diamond shape die cut (from my stash) and I popped him up with foam dots.  I backed the white diamond panel with yellow glitter cardstock and added a few glitter die cut stars.

.

Thanks for joining me today!  I hope you enter our blog challenge so that we get to see your wonderful creations and you get a chance to win a free stamp set of your choice.

Have a great day and keep creating!

Copics used:  E00, E01, E11
N0, N1, N2, N3, N4, N7
R20, R24, R27
B21, B23, B24
Y11, Y15, Y17

Tuesday, July 29, 2025

Let Them Eat Cake! by ReneƩ Matarese

Hello Ai fans!

You have about 24 hours left to enter into the Let Them Eat Cake challenge for your chance to win a free stamp set from Art Impression.

For my card, I went with a patriotic color scheme since it's July.


I used the new gold paint to add little dots to the inside of the flowers, flames, the two frames and the cake stand. I also spattered some Dr. Ph Martin's on the embossed panel as well.


Saturday, July 5, 2025

Summer Blooms by Janet

I hope you had a wonderful time celebrating with picnics, BBQs, and good company. Since our family lives far away, we spent the day with some dear friends—friends with benefits. (No, not those kinds of benefits!) The perk? They have an amazing pool and generously invited us over to enjoy it. It was such a fun, refreshing way to spend the holiday!

While the 4th may be behind us, it always feels like the official start of summer to me. So I kicked things off creatively by making a card in classic red, white, and blue. Nothing says summer quite like that bold trio of colors!

I was especially excited to dive into the new and vibrant 6090 - Patriotic Paper Pack. Unlike most of Art Impressions' soft and pastel collections, this one is rich, bright, and full of striking patterns. While I love Ai's paper packs, I really hope we see more paper packs like this one in the future!

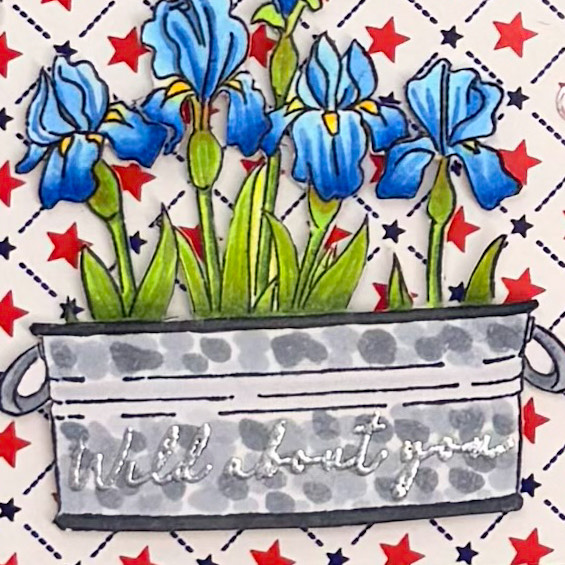
I started by creating the iris planter focal point. For the base, I stamped the long, narrow planter from the 5923 - Farmhouse Container Set. To keep things clean, I masked off the top of the planter using Post-It Labeling & Cover-Up Tape (available in the Ai Store). This technique allows the flowers to be added into the planter without any unwanted overlap.

Next, I stamped the row of irises from the 6061 - Tulip Floral Set. Yes, it’s labeled as a tulip set—but there are other blooms in there, including the beautiful irises I used for this card. After stamping, I removed the masking tape to reveal a seamless composition of the planter filled with irises.

For the planter, I wanted a galvanized metal effect, so I used chunky strokes of grey Copic markers to give it a textured, industrial look. The irises were colored using one of my favorite blue Copic combos, and I added greens to the stems for contrast.

To tie in the metallic theme, I heat-embossed a silver sentiment directly onto the planter. It’s a subtle touch that really shines in person—even if the camera doesn’t quite capture it! This close-up shows it off a bit better.

Once colored, I carefully fussy-cut the entire piece—scissors for the edges and a craft knife for the intricate inner cuts. It took some time, but the result was totally worth it. I added foam tape to the back of both the planter and the blooms for dimension and set it aside.

For the background, I selected three coordinating patterns from the Patriotic Paper Pack and layered them with red and blue cardstock. I popped up the center square with foam tape and added the sentiment-embellished piece right on top.

To finish, I scattered a few iridescent flat sequins around the flowers for a touch of shine and sparkle. The final result is cheerful, polished, and full of personality—just the way I like it!

Thanks so much for stopping by today! Don't forget to find your favorite stamps, dies, and accessories at the Ai Store! Make a visit today.

Happy crafting!

Janet YouTube - Blog - Facebook - Instagram - Pinterest     

Thursday, July 3, 2025

Hello 4th by Dori Mendiola

 Happy Independence Day AI Friends!

WOW!  Have you seen the newest release of papers at Art Impressions?  Holy cow!  I couldn't stand it, I had to put a card together using the new #6090 - Patriotic paper pack.  Although a lot of the papers are 4th of July themed, there are many that can be used for any occasion.  The patterns are incredible and the colors are vibrant and fantastic.  Make sure to check them out!  I can't wait to design with the rest of the pack!!!

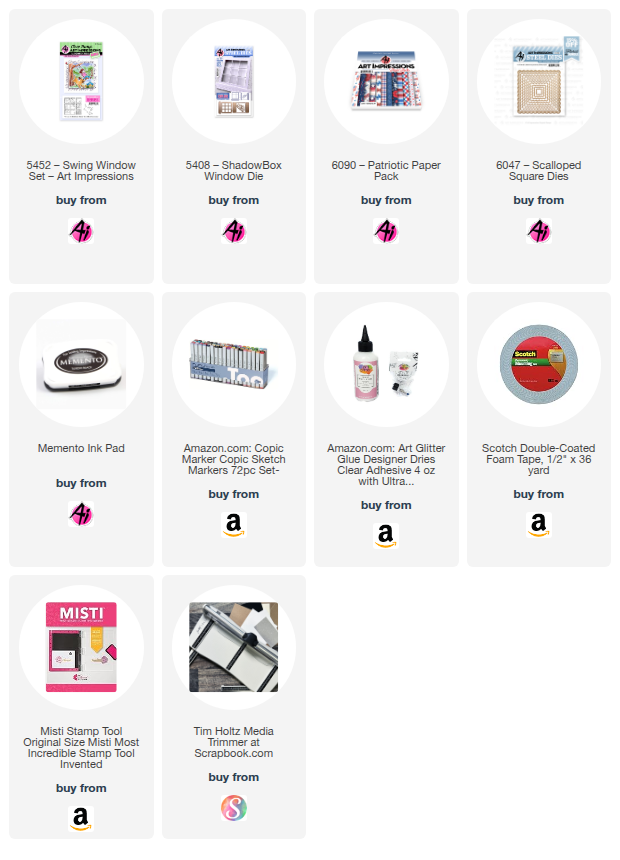
I started out by stamping the images from the #5452 - Swing Window set onto copic friendly paper and coloring them with my copic markers, listed below.  The little puppy has a coordinating die that comes with the set so you can pop him up, if you choose.  


I used the #5408 - Shadowbox Window Die to display the image and then I created an interactive venetian blind which was inspired by a Technique Tuesday die tutorial that I found on YouTube.

To create without the die:  Cut a piece of pattern paper 2 3/4" by 4 7/8".  Score every 3/4" along the longest side.  Before folding, punch a small hole, approx. 1/8" in, between each score line on both sides for the strings.  Try to center punch each of the holes, but it does not have to be perfect.  Fold each of the score lines into peaks and valleys.  The valley end should be at the top, this is the side that adheres to the base.  Thread a string up both sides leaving the loose ends at the top.  Thread a bead or knot the loose ends for the string pulls.  Adhere the valley side of the blinds down to the base by placing glue between the string holes.  Make sure to place glue only between the holes or the mechanism won't work. 
 
Valance:  Cut the valance out of another piece of pattern paper and partial die cut with the #6047 - Scalloped Square third largest die (should measure 3 1/4" wide by 3/4" tall).  Make a slight snip on either side at the bottom scallop to hold the string when pulled up.  Pop the valance up with foam tape and adhere just above the top of the blinds.
The bow and the flag heart are fussy cut from the pattern papers of the same paper pack.  Makes great accents!  The Hello die cut is part of the Shadowbox Window die set.

Thanks for joining me today.  Hope you have a wonderful and safe 4th of July weekend.
Keep creating!!

Copics used:  E000, E01, E11, E21, E23, E25, E50, E51, E53, E55
Y13, R20, R22, R24, R27
G20, G21, G24, G28
B0000, B000, B00, B32, B37