Showing posts with label Road Trip. Show all posts

Monday, August 5, 2024

Road Trip by Sharon Caudle

 Hello AI Fans!


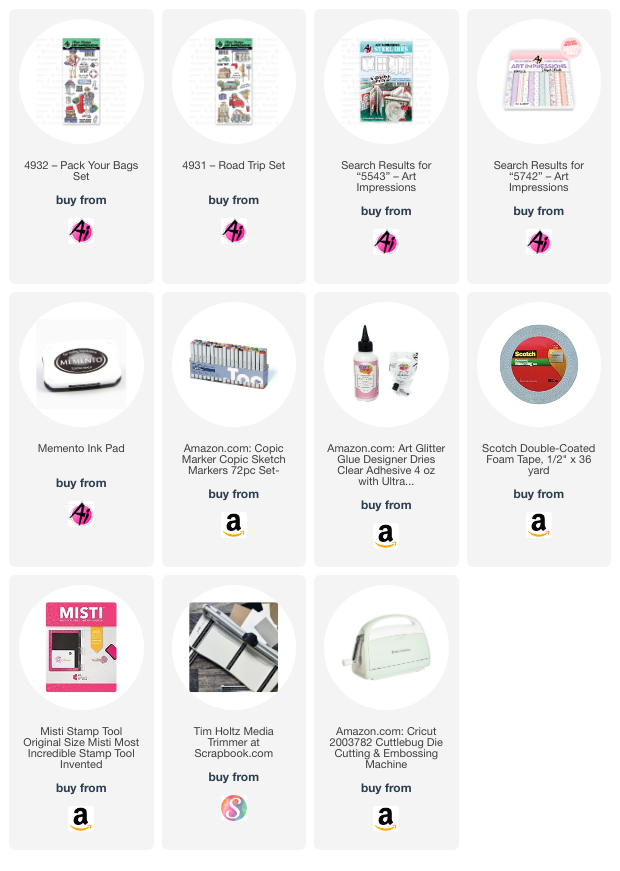
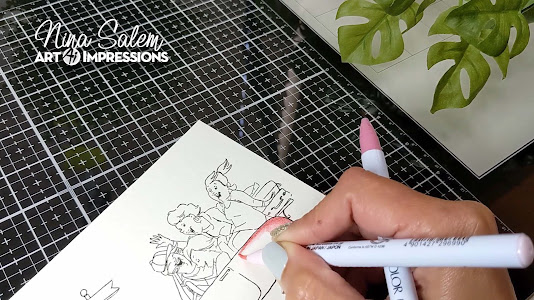
There's a new challenge going on right now called Never Have I Ever. We are asking you to use a stamp or die that you've had and never used.  I don't know how long I've had 4932 Pack Your Bags Set and 4931 Road Trip Set, but this is the very first time I've ever used them. Unreal! I stamped them onto Copic friendly paper with Memento Tuxedo black ink and then colored them with Copic markers which are listed below. Road trips are so much fun, don't you think? 


That's it for me today! Thanks so much for stopping by for a visit and until next time - stay crafty!!


Copics used:
E000, 00, 11, 21, 23. 33, 35, 37, and 41
Y21, 23, 26, and 28
R20, 81, 83, and 85
G12 and 24
C1


Thursday, July 20, 2023

Road Trip! By Cynthia Olheiser

 Hello Ai fans!

It's week 3 with our Guest Designer, Cynthia Olheiser.
Today she has a fun, embossed Road Trip card for you.


I'm having so much fun as Guest Designer for Art Impressions this month!  Today I'm sharing a clean and simple design featuring Art Impressions 4931 - Road Trip Set.  


I began this card by ink blending with Tim Holtz Distress inks - Salty Ocean, Mermaid Lagoon and Blueprint Sketch.  Two of the buildings from the set were stamped with Versamark ink and wet embossed with white embossing powder.


The group of lady travelers were stamped, colored with Copic Markers, fussy cut then adhered with dimension tape.  The finished panel was layered onto Stampin' Up! Night of Navy card stock.  A few enamel dots and coordinating sentiment finish the card.


Monday, July 25, 2022

Best Day Ever interactive card by Sharon

 Hello AI Fans! 


Today's card features SC0795 Road Trip from Art Impressions and it goes right along with the current AI Challenge of Summer Fun!  Is there anything more fun than going on a road trip with your Besties? I wanted to make this card interactive, but I wanted it to look like the car was actually rolling down the road instead of you seeing the sliding mechanism.  So I did a little googling and I love how it turned out! What can I say, interactive cards are always my favorite. Hopefully this video works and I apologize for the background noise...I forgot I had my little desk fan on.


Here's a picture with the slide tab open on the bottom where the call is pulled over to the left. I stamped Best Day Ever on it so it's only visible once it is pulled out. 


Here you get a little peek at the inside which I decorated as well.  Can you see the cute little Art Impressions Freebie? :) 


I also used the Art Impressions Fence dies on the inside decoration. You can see a little peek of it below. 


Thanks so much for stopping by today and hope you have a great week! See you next time! 


Tuesday, March 1, 2022

Girls Road Trip Slimline Card by Nina

 Hi crafty friends, Nina here with a new fun slimline card. The beautiful Road Trip Stamp Set inspired me to create a slimline setting for these happy girls on thier way for a crafts shopping trip! 


I stamped the girls image on Bristol smooth paper with watercolor friendly ink and colored it using my Zig Brush Markers. 


I then cut the background using the Double-Stitched Slimline Die Set and blended Salty Ocean and Tumbled Glass Distress Inks to create a sky in the background.


I added few more elements to complete my scene, some clouds, grassy border and hillside. I also cut scraps of papers and colored them with same markers to create some buildings.


Find below a step by step video tutorial on how I created this fun slimline card.


Monday, February 22, 2021

Are We There Yet Slimline Card by Bri Firth

Hello Ai Fans - Bri here! Today I am sharing a slimline card featuring the Road Trip stamp set. This card is also featured on my personal blog, check it out here


First, I cut the 3.5" x 8.5" slimline card base from gray cardstock and distressed the edges with Black Soot Distress ink. Next, I used the Slimline Stitched Hillside die set to cut the black and yellow road pieces. I used liquid glue to attach the road pieces to the card base.

To decorate the card I stamped and colored the images from the Road Trip Set with my Copic markers. The colors I used are listed at the end of this blog post. I used foam tape to attach the images to the card base. 


To finish the card I stamped the "Are we there yet?" sentiment with black pigment ink onto a Flag Double Stitched die cut and distressed the edges with Black Soot Distress ink.


Check back next week for more Ai inspiration made by me!

Ai Products Used

Copic Markers Used
R: R32, R35, R37, R39
Y: Y11, Y13, Y15, Y17
BG: BG11, BG13, BG15, BG18, BG000
E: E27, E43, E44, E47
C: C0, C2
G: G21, G24

Thursday, September 3, 2020

Are We There Yet? ROAD TRIP! by Crystal

Hi Art Impression friends! How is everyone doing anyone going on any road trips this summer? My family is 9+ hours away so we go on lots of road trips. This week I had fun playing with the Road Trip set. This is such a cute set. 
This set is full of fun buildings you would come across on a road trip. Of course we need a "Are we their yet?" sentiment stamp. When aver we are on the road someone in the cars asks a few dozen times that question.  

I colored all of the images in with water color pencils and then fussy cut them all out. I used different patterns of green paper for the ground and blue pattern paper for the sky. 


Happy Stamping!


Thursday, May 28, 2020

Girls Just Wanna Have Fun!


Hi Ai fans! This week I played with the Road Trip stamp set. I made two cards using this stamp set this week. For both cards I stamped this image onto smooth white card stock with Memento Black ink. I colored both images in with alcohol markers then fussy cut both images out. 


For both cards I die cut a rectangle out of Kraft card stock. 


Both card I stamped the stop light on the right side and colored them in with alcohol markers. I stamped the sentiment "Girls just wanna have fun!" on both cards on the left top corner. 


For my first card I adhered the car onto the Kraft card stock and added some sequins scattered around. I matted the Kraft card stock onto some pattern paper. 


For my second card I stamped some of the sentiment stamps randomly onto the Kraft card stock. then I adhered the car to the Kraft card stock. I also adhered some sequins onto the Kraft card stock. 


Happy Stamping!


Spectrum Noir markers:
DR1, DR3, DR4, DR5, DR6, DR7, BG5, BG6, CR7, CR8, CR10, JG4, JG5, JG7, FS6, FS7, FS8, VB1, VB2, VB3, IG2, IG4, IG5, IG6, IG8, IG9, TN1, TN2, BT3, BT4, BT5, MB1, MB2, MB4, BT7, BT8, BT9, GB1, GB3, GB5, JG1, JG2, JG3, TB2, TB3, TB4 

Thursday, November 7, 2019

Let's Have An Adventure! by Crystal

Hi Ai fans!


How is everyone's week going? This week I played with this Road Trip set


I stamped all of the images with Versafine black ink. I colored them in with Spectrum Noir Colorblend pencils. Once all of the images where colored in I fussy cut them out. 


I always have extra die cut pieces from other cards that I keep in  little bin on my desk. This card was made with extra little pieces I had cut out. The green pieces are negative pieces from another card. 

Happy Stamping! 


Friday, June 7, 2019

Road Trip | Father's Day Card By Jessica Shier

Hello Ai Fans!

Today I'm sharing a fun card using the Road Trip set. I thought this would be fun to make a comic book style card where you fill in die cut shapes with stamps. 


I started with die cutting a panel of white cardstock using Art Impressions Square Double Stitch dies and a few rectangle dies. I made sure to check to see if the stamps would fit in the die cut pieces before cutting. I did use some of the dies twice to get the desired look.


On another Neenah 80lb cardstock panel I took the die cut piece and placed it over it, then traced the die cuts with a pencil. Now that I had a layout of where to stamp I began doing so with some black ink. A few of the stamps are a bit larger then the die cut areas I had mapped out for them. I used a post it note to mask off those overhangs so that the images would only be in their designated areas.


I started coloring all my images with Copic Markers, listed below. I stamped the car and the lunch box so that I could fussy cut those out. I wanted to layers those over the top to add some dimension. I also took one of the sentiments from the Road Trip set and heat embossed it 3 times on black cardstock using white embossing powder. Then trimmed off the excess paper so that there was a bubble effect around the sentiments.


I used my ATG to adhere the die cut panel over top of the copic colored images and attached the sentiments. For the inside I used a sentiment from the Art Impressions Hop Hop set, which says "Admit it life would be boring with out us"! I can easily add a die cut sentiment that says Happy Father's Day, to make this a fun and slightly out of the box Dad card. I know, when I was little, I often asked my dad, "Are we there yet?!" on family road trips! 

Copic Markers Used:
W6, W3, W1, W0
YG67, YG41, YG03, G14
E43, E35, E31
BG13, BG000, Y13

Happy Stamping!