Thank you to the Art Impressions Design Team for all of the inspiration you share each week!
We can't wait to see your projects shared for the chance to win a free stamp set.
Let's see how YOU shake it up!
✻ Please make a new card or handmade crafty creation. You can make any item you wish; this is not limited to cards!
✻ Limit two submissions per person. You will receive extra votes if you use Art Impressions stamps!
✻Please include your first name and last initial on your submission.
✻We love to comment on your entries, but keep in mind if you use a private group or a platform that you need to sign up for, we probably won't be able to.
✻ The Ai Challenge is open to everyone, international submissions are welcome!
✻ Include a link back to the Ai Blog or grab our button on the top right of our sidebar!
✻ Share the Ai love if you can, by clicking and commenting on your fellow crafters.
✻ Make sure to get your link up by the deadline to enter your creations.
Welcome to the newest challenge here on the Art Impressions blog!
Our latest challenge is one we think you'll really like.
You can make ANYTHING in ANY theme you like as long as it has
embossing on it.
We want you to Emboss Like a BOSS!
This can mean dry embossing with a folder or bone tool etc. or wet embossing with embossing powders.
Maybe you'll create you own embossing using dies or die cut images.
We can't wait to see what you make!
We have the lovely Lynn up as our featured designer but before we see her sweet project and video, let's see who won our last challenge, Midnight Snack.
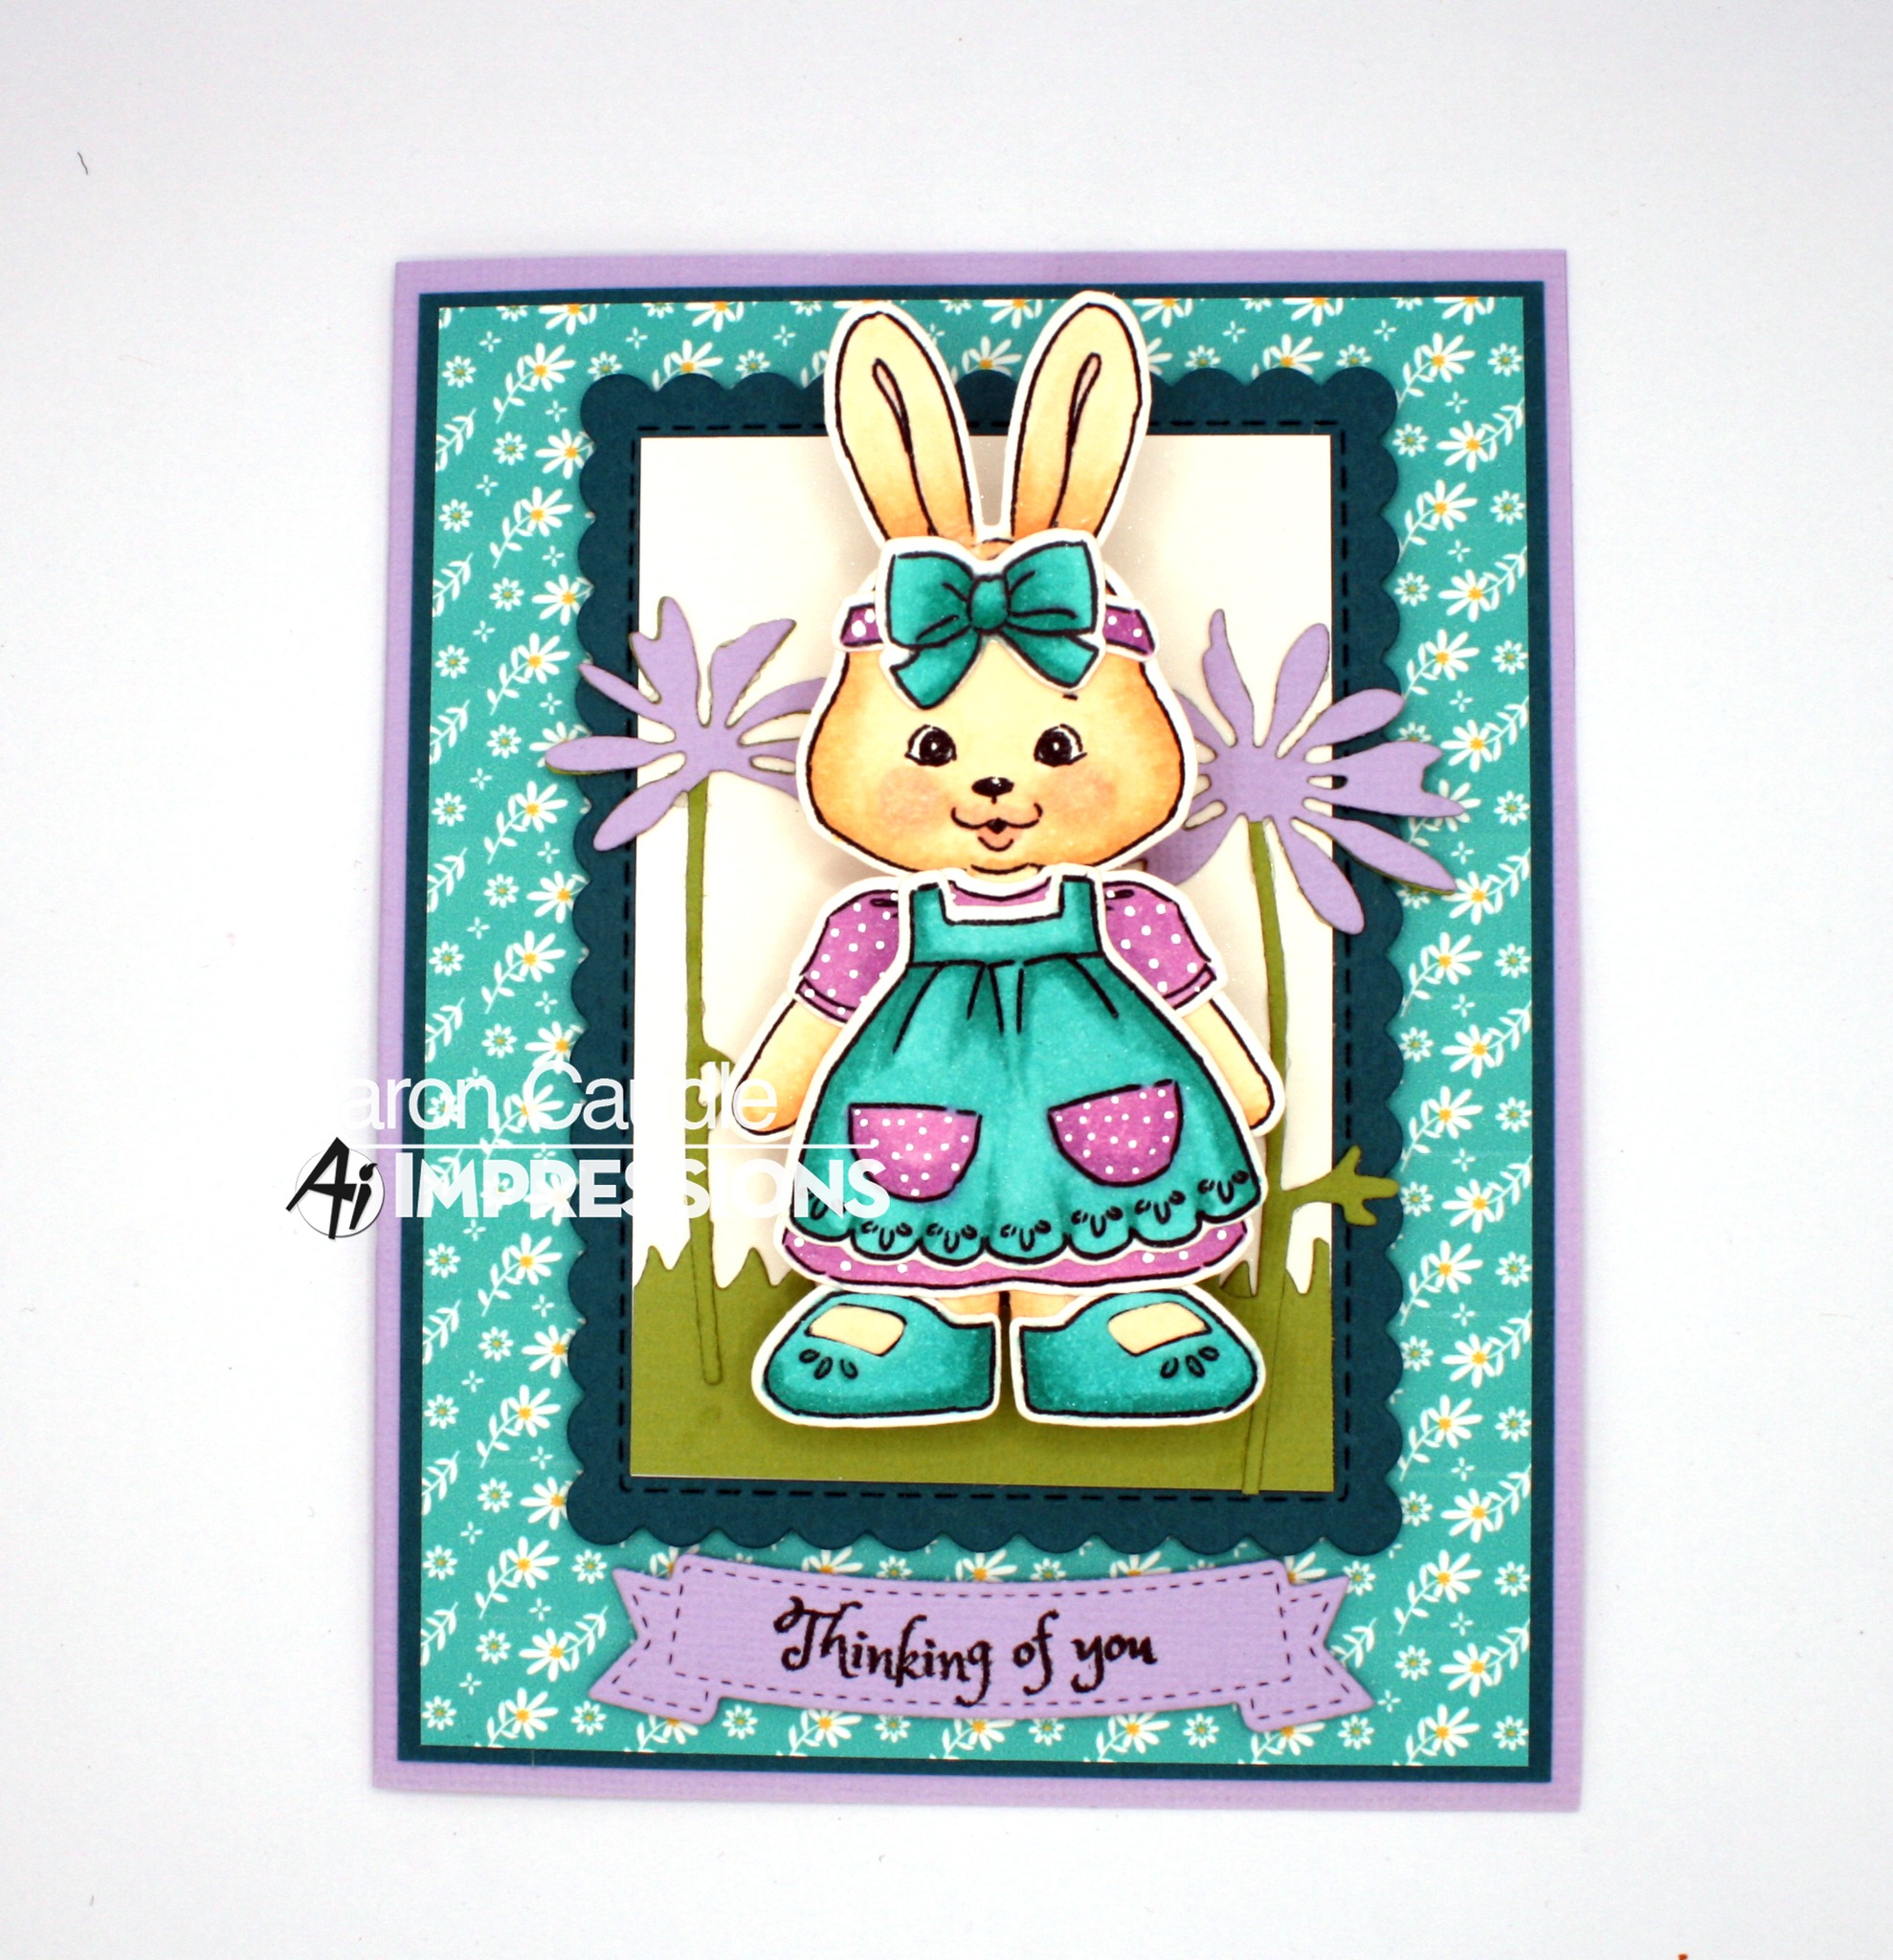
I'm so happy to be showing you a fun tag card which I created to kick off Ai's brand new blog challenge which is called "Emboss like a BOSS!". Any embossing will do...including both wet and dry techniques! We will be using both today!
For today's feature card we will be using the adorable Ai Baby Critters Set (5400) which includes several fun birthday critters along with several coordinating sentiments. We will be using many of these sentiments for this card!
Let's get started by stamping and coloring in all of our images using the Zig Clean Color Real Brush Pens in the following colors: Blender, Sugared Almond Pink, Pale Orange, Purple, Yellow, Bright Yellow, Persian Green, Lt Gray, Mid Gray, Beige, Mid Brown.
We'll also add some details to the balloons and little elephant using a white gel pen. This is a great way to personalized your images!
Next we will die cut a fun stitched tag from the Ai Tag Stitched Die Set (5132) using some Strathmore Bristol Smooth 100lb Cardstock. We will stamp and emboss several sentiments from this set using clear ink and white embossing powder. This will act as a resist for the layer of Distress Oxide Ink (Speckled Egg) that we will be applying over the top of these sentiments. Just be sure to grab a paper towel and wipe off any excess ink that is sitting on top of the sentiments because it will not dry and could rub off!
We will add a bit of a floral border at the bottom of the tag using the Ai Easter Journal Paper Pack (5742). This patterned paper will coordinate well with the coloring we have already done.
Next let's add a bit of baker's twine and a bow to the top of the tag!
Now we can add some texture and dimension to our card using a 3D Geometric Flowers Embossing Folder. We will keep this background in plain white so that the tag remains our focal point!
Finally, we can assemble the card and add a bit of sparkle with some pretty teal colored opalescent sequins!
It's really fun to combine the wet and dry embossing techniques for adding lots and lots of dimension and texture to your cards!
Thank you so much for joining me today! Have a fun and crafty day!!!
What will YOU create? Enter below for your chance to win a free stamp set of your choice.
✻ Please make a new card or handmade crafty creation. You can make any item you wish; this is not limited to cards!
✻ Limit two submissions per person. You will receive extra votes if you use Art Impressions stamps!
✻Please include your first name and last initial on your submission.
✻We love to comment on your entries, but keep in mind if you use a private group or a platform that you need to sign up for, we probably won't be able to.
✻ The Ai Challenge is open to everyone, international submissions are welcome!
✻ Include a link back to the Ai Blog or grab our button on the top right of our sidebar!
✻ Share the Ai love if you can, by clicking and commenting on your fellow crafters.
✻ Make sure to get your link up by the deadline to enter your creations.
Hello and happy Saturday everyone! If you want to make something special to hold your gift cards but don't have the time or energy to put a lot into it, I have a great solution! I bring you the Coffee Gift Card Holder, #5222. First your recipient will be touched by the adorable coffee cup but when they realize there's a gift inside, they will FLIP their LID!
This is a stamp and die set that includes all the dies to make the coffee cup shape and decorate it. Stamps are also included that allow you to personalize your message. One offers check the box choices like: Congrats, You're the Best, Thanks, You're Spectacular, Just Because and You Deserve it. There are also two sentiments in a pretty script that say, Thanks a Latte! and I Love You a Latte!
The photo above shows two options. On the right, I've made the cup by itself. This could be tucked into a gift basket, slipped into an A2 envelope or added to a package by securing a loop to the back. On the left, I mounted the gift card holder on an A2 sized card. Any way you present it will be a winner. Just don't forget to tell your recipient to pull up the cup lid or they might not know there's an insert with a gift card inside! It hides the surprise really well.
Here's another version I made using washi tape for the background, brads and bling for an entirely different look!
Below I attached the stand alone coffee cup to another A2 card base. And speaking of card bases, I made a coffee inspired watercolor background with two Karin markers, a bit of saran wrap and some water. This is a super technique to create organic watercolor patterns. If time is a big factor, you can simply pick your favorite cardstock for the background.
I have a video tutorial demonstrating how I made these gift card holders and the watercolor, spattered backgrounds. I think you'll enjoy learning how to create a grand effect in record time.
Thanks for Stopping by. I hope you have a great weekend!
Hello everyone. It's Janet and today I have a fun fold card featuring the new Hat's Off Mr. Stamp and Die Set. If you struggle with masculine cards like most people, this set is the answer to your crafting prayers! It's a must have for your card or scrapbook making collection.
This set includes many different hats and accessories to decorate the character for hunting, fishing, handyman and cooking themes. I had Father's Day in mind when I made this one but all the themes can be used for birthdays, thank you cards and all occasions when something special for a guy is needed.
I used Copic Markers to color the Mr. and his accessories. I embellished it by adding stubble, a pattern in his shirt and athletic socks. You can choose to enhance the stamped image as much or as little as you want.
As always, I have a video tutorial showing how to make this card. On my blog, you'll also find the measurements for the fancy fold card.
Thanks for stopping by. I hope you have a great weekend!