Hello Ai fans!
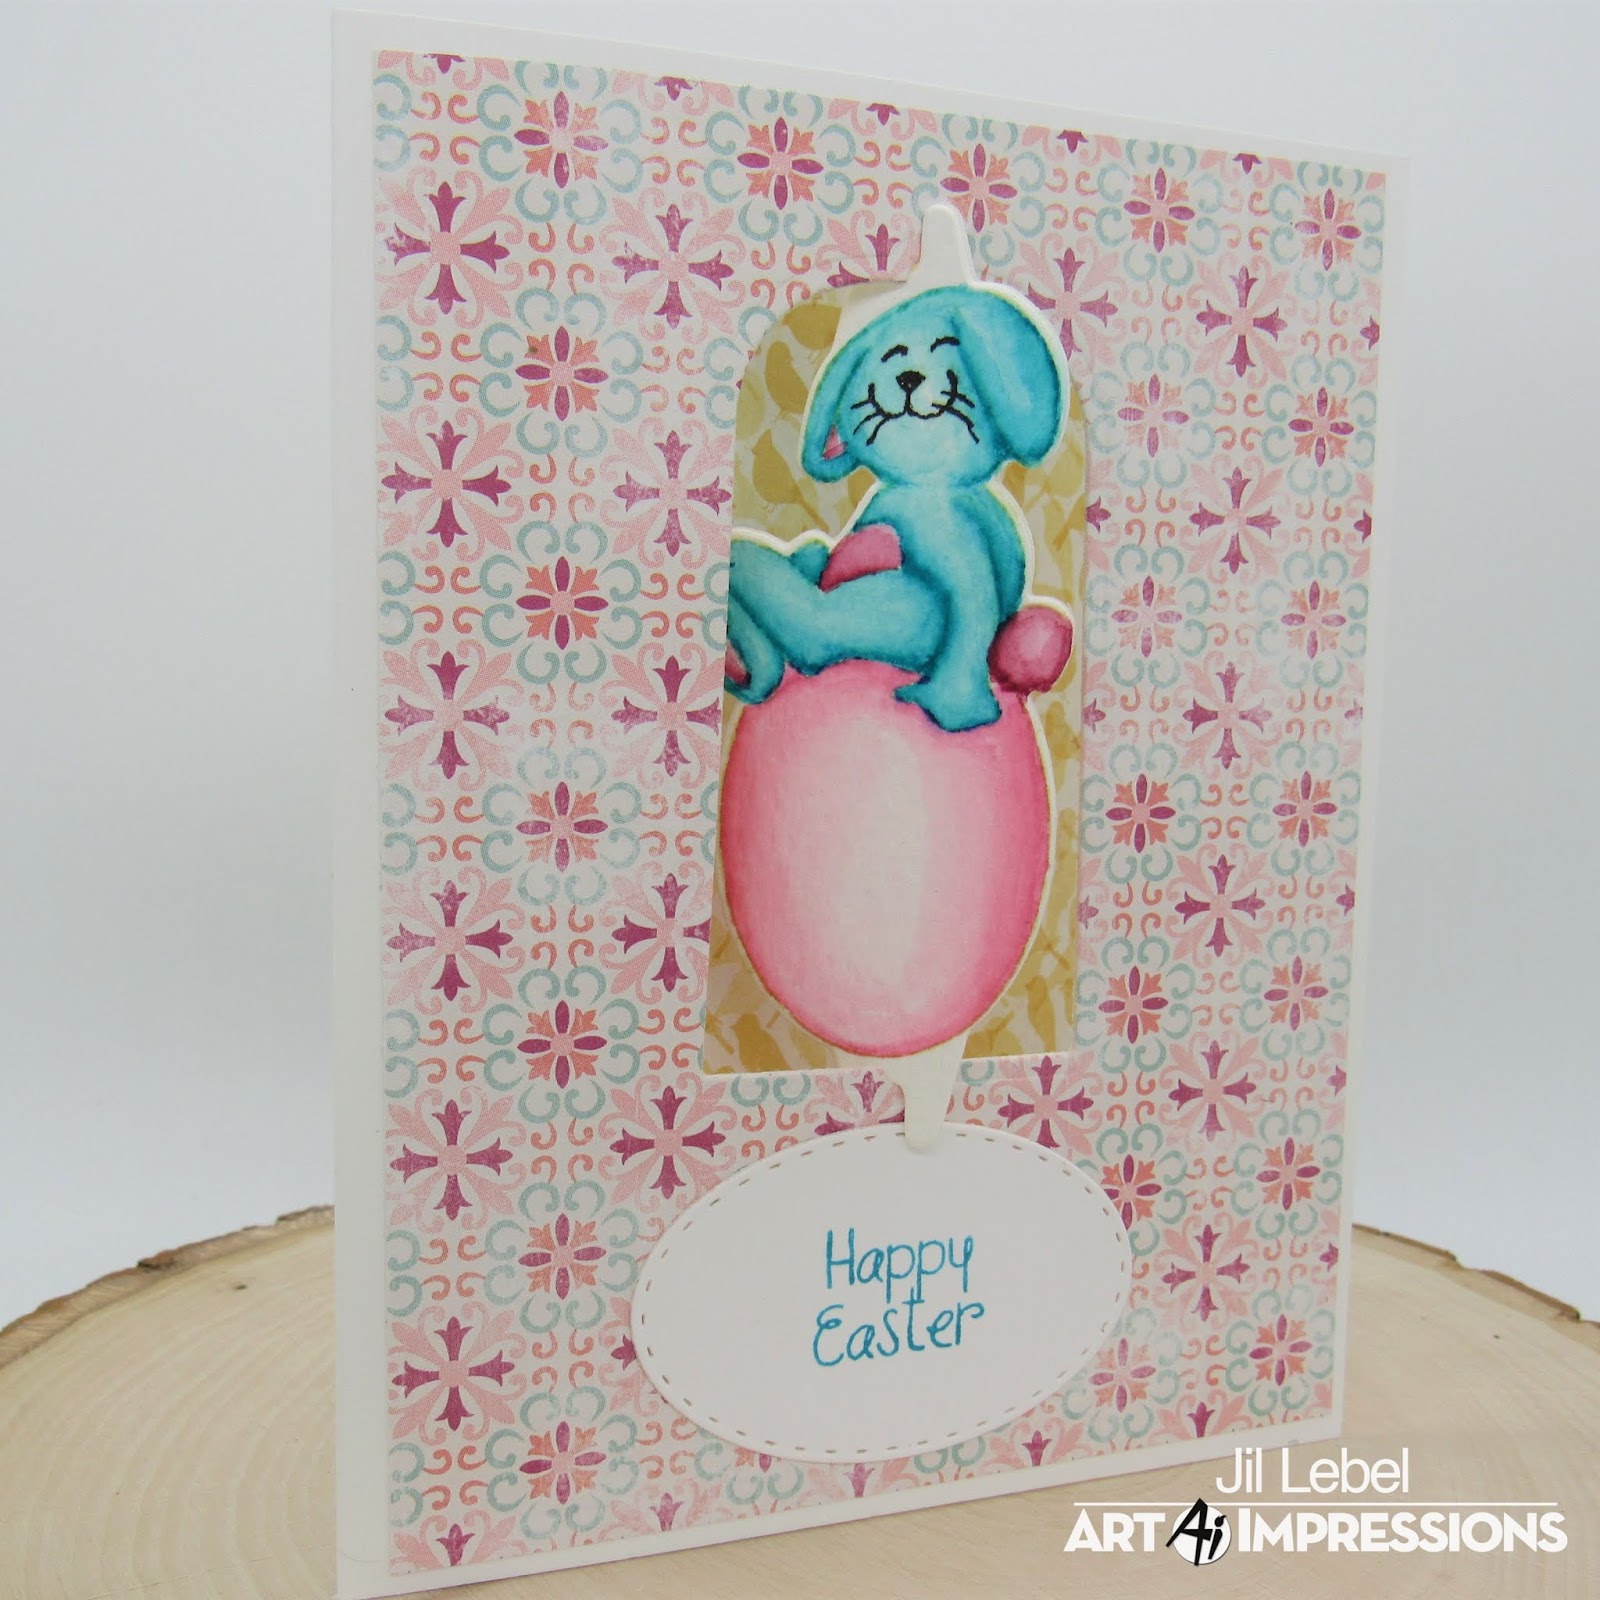
I used the Easter Twist Set to make two different Easter cards. I enjoyed adding in my Watercolor stamps to make one of the eggs patterned. They were both fun to make, but even more fun to play with once they're finished.

I started by stamping the images onto Strathmore Cold Pressed paper with Antique Linen Distress Ink and colored them with Tombow Dual Brush markers . The colors used are listed at the end of this post. I added in the full strength marker where I wanted it darker and used a damp brush to spread the color into the lighter areas. I also used some marker scribbled onto my Watercolor Palette to add color. I drew the faces on with a extra fine black Sharpie pen.
 To make the floral egg I masked off the bottom of the bunny and the edges of the egg with a Molotow masking pen. Once it was dry I stamped the heart flowers from the WC Mini Flower Set in small clusters with the Tombow 636 Imperial Purple markers and used my damp brush to soften the color. I then added the tiny leaves from the WC Foliage Set 2 with the 228 Gray Green marker and softened the color with my damp brush. Once everything was dry, I used a white eraser to remove the masking fluid. I then colored the bunny the same was that I did for the other card.
 I stamped the Happy Easter greeting onto a piece of white card stock with the Bright Blue Tombow marker. I used the Twist Frame Die to cut an opening into the card base that was covered with paper from the BoBunny Early Bird 6" x 6" paper pad.
Tombow Dual Brush Markers Used:
Bunny - 403 Bright Blue
Tail - 817 Mauve
Egg - 723 Pink
 Thanks for stopping by and Have a Great Day!
I started by stamping the images onto Strathmore Cold Pressed paper with Antique Linen Distress Ink and colored them with Tombow Dual Brush markers . The colors used are listed at the end of this post. I added in the full strength marker where I wanted it darker and used a damp brush to spread the color into the lighter areas. I also used some marker scribbled onto my Watercolor Palette to add color. I drew the faces on with a extra fine black Sharpie pen.


Tombow Dual Brush Markers Used:
Bunny - 403 Bright Blue
Tail - 817 Mauve
Egg - 723 Pink