Saturday, July 5, 2025

Summer Blooms by Janet

I hope you had a wonderful time celebrating with picnics, BBQs, and good company. Since our family lives far away, we spent the day with some dear friends—friends with benefits. (No, not those kinds of benefits!) The perk? They have an amazing pool and generously invited us over to enjoy it. It was such a fun, refreshing way to spend the holiday!

While the 4th may be behind us, it always feels like the official start of summer to me. So I kicked things off creatively by making a card in classic red, white, and blue. Nothing says summer quite like that bold trio of colors!

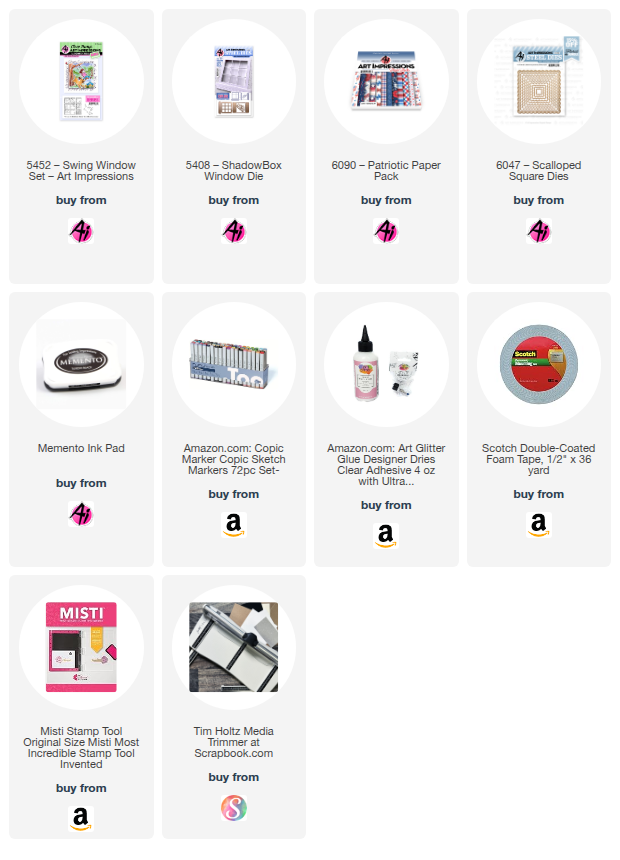
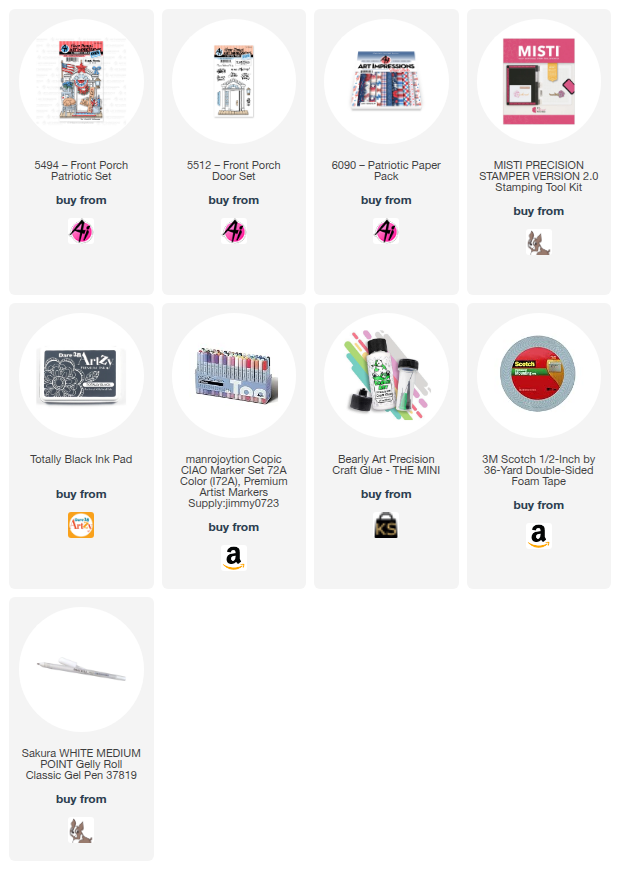
I was especially excited to dive into the new and vibrant 6090 - Patriotic Paper Pack. Unlike most of Art Impressions' soft and pastel collections, this one is rich, bright, and full of striking patterns. While I love Ai's paper packs, I really hope we see more paper packs like this one in the future!

I started by creating the iris planter focal point. For the base, I stamped the long, narrow planter from the 5923 - Farmhouse Container Set. To keep things clean, I masked off the top of the planter using Post-It Labeling & Cover-Up Tape (available in the Ai Store). This technique allows the flowers to be added into the planter without any unwanted overlap.

Next, I stamped the row of irises from the 6061 - Tulip Floral Set. Yes, it’s labeled as a tulip set—but there are other blooms in there, including the beautiful irises I used for this card. After stamping, I removed the masking tape to reveal a seamless composition of the planter filled with irises.

For the planter, I wanted a galvanized metal effect, so I used chunky strokes of grey Copic markers to give it a textured, industrial look. The irises were colored using one of my favorite blue Copic combos, and I added greens to the stems for contrast.

To tie in the metallic theme, I heat-embossed a silver sentiment directly onto the planter. It’s a subtle touch that really shines in person—even if the camera doesn’t quite capture it! This close-up shows it off a bit better.

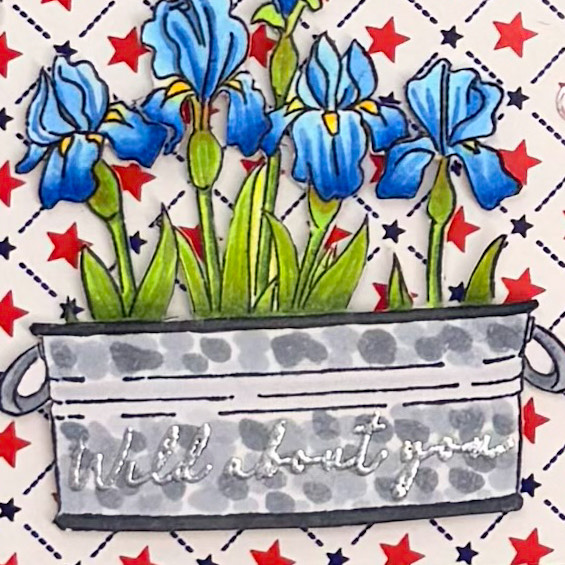
Once colored, I carefully fussy-cut the entire piece—scissors for the edges and a craft knife for the intricate inner cuts. It took some time, but the result was totally worth it. I added foam tape to the back of both the planter and the blooms for dimension and set it aside.

For the background, I selected three coordinating patterns from the Patriotic Paper Pack and layered them with red and blue cardstock. I popped up the center square with foam tape and added the sentiment-embellished piece right on top.

To finish, I scattered a few iridescent flat sequins around the flowers for a touch of shine and sparkle. The final result is cheerful, polished, and full of personality—just the way I like it!

Thanks so much for stopping by today! Don't forget to find your favorite stamps, dies, and accessories at the Ai Store! Make a visit today.

Happy crafting!

Janet YouTube - Blog - Facebook - Instagram - Pinterest     

Renee's 14th Anniversary Giveaway!

 Hello everyone and welcome to my 14th anniversary giveaway!

I'm not even going to make you upload an Art Impressions card because I know that makes some of you nervous! (I wish it wouldn't, we LOVE seeing your art)

All you need to do is leave a comment on this post telling me your favorite thing about Art Impressions or maybe how you discovered them. International entries are welcome. 

For me, it was the humorous stamps, especially the people, with the animals being a close second.


I love that they've now added dies and paper.

I can't get enough!!

I'll be giving away this Throwback from August 2024.
Winner will be announced on Sunday, July 13th.

If you already have this set and would still like to participate in the giveaway just let me know that in the comments. We'll figure something out.


P.S. Did you see the new Winsor Newton Ink 14ml – Gold Paint?
It's GORGEOUS!


Be sure to enter out Spritz, Splatter AND PAINT! Challenge for another chance to win free stamps!
Just click on my photo to be taken to the challenge.


Leave your comment below to be entered to win my Throwback.


Friday, July 4, 2025

Happy Fourth of July! Card by Tasha

 Happy Friday Art Impressions friends!

Tasha here sharing a fun and festive 4th of July card featuring the 5512-Front Porch Door Set and the coordinating 5494-Front Porch Patriotic Set. These sets are perfect for creating a warm, welcoming holiday scene, and I love how everything comes together so easily!


To get started, I stamped all the images in black ink and used the coordinating dies (included with both sets!) to cut everything out. After that, I colored the images with Copic Markers, using traditional red, white, and blue tones to keep with the patriotic theme.

Once my images were ready, I assembled the center panel with the decorated front porch scene; it really brings the whole card to life! I layered this on top of silver glitter paper for a little sparkle, blue cardstock, and a gorgeous American flag patterned paper from the new 6090-Patriotic Paper Pack. This paper is absolutely perfect for Independence Day cards!

To finish the card, I added some little banners and bows along the top edge for extra detail and dimension. They really help complete the festive look!

Thanks so much for stopping by today! I hope you’re feeling inspired to create your own patriotic card using these fun Front Porch sets.

Have a safe and happy 4th of July weekend!


Thursday, July 3, 2025

SPRITZ, SPLATTER AND PAINT! Challenge #407

 Hello Ai fans and welcome to the latest Bi-Weekly Challenge.

This one is Spritz, Splatter AND PAINT!

The reason behind this fun new challenge?
There is amazing new gold paint available at Art Impressions!


You can splatter this on your projects, add highlights, paint paper, stamp with it...yes, you heard me...It is SO gorgeous and versatile.

To enter our challenge it doesn't have to be gold. You can use the ever popular Dr. Ph Martin's Bleed Proof White, some spritzes you may have on hand or any other paint that you like to craft with.

Today I've created a card where I painted Canson XL WC Paper Pad – 9×12 and then die cut a frame from 5588 – Journal Oval Frames Die Set. Then, when I was almost finished, I took a paint brush and spattered little dots all over.

Read my post to hear all about it.


I die cut my frame and then painted it gold with a large brush. I used watercolor paper so that there would be less warping and then I cut a second piece to glue it to so that it would lay flatter and be thicker so that I could pop it up on dimensional foam tape.


My layered flower is from the new 6042 – Corner Bookmark Dies.


That beautiful gold border peeking out from under the frame was a happy accident. I used the 5972 – BJ Decorative Margin Dies on my recent PEACE Christmas card and this was the leftover remnant. I liked the way the "throw away" part looked so I embossed it and also painted that gold.


I die cut my two Hellos from 5408 – ShadowBox Window Die and 5718 – Mini Journal Template and the bees are from 5805 – Mini Journal Box Dies. See those tiny little pink hearts near the hello? Read on to see where those came from.


After I die cut the butterfly from 5811 – Gift Card Pocket Dies I was cleaning up the scraps. I noticed that two of the little pieces looked like hearts so I saved those.


After my card was completely assembled, I took my Royal Round Detail Brush #1, dipped into the paint and used my finger to TAP on the brush, spattering beautiful gold dots all over.


Look at all that golden goodness!! I feel like this is one of those things that you never missed because you didn't have it, but then once you have it, you wonder what on Earth you did without it!??? LOL!
I used the end of my paintbrush to curl the petals and leaves after I used brown ink to "age" the edges a bit.


Before we get to the current challenge let's see who won our last challenge, LEON Day!

For our Top Spot we selected Cindy P.


Please contact Leah at Feedback@artimpressions.com
to claim a free stamp set of your choice!!
Be sure to grab our badge to display on your social media too!


Our Lucky Random Winner was Mary Bernard


Please contact Leah at Feedback@artimpressions.com
to claim a free stamp set of your choice!!
Be sure to grab our badge to display on your social media too!


Now onto our challenge!
I hope I've inspired you to try out some paint on your projects! It doesn't have to be gold. You can use the ever popular Dr. Ph Martin's Bleed Proof White, some spritzes you may have on hand or any other paint that you like to craft with.

Be sure to enter your creation for the chance to win a free stamp set from Art Impressions. 
We award one Top Spot and one Lucky Random Winner and each will win a free stamp set from Art Impressions.

✻ Please make a new card or handmade crafty creation. You can make any item you wish; this is not limited to cards! (unless specified)

✻ Limit two submissions per person.
 ✻Please include your first name and last initial on your submission. You may include your entire last name, but it's not necessary.
✻We love to comment on your entries, but keep in mind if you use a private group or a platform that you need to sign up for, we probably won't be able to.
✻ The Ai Challenge is open to everyone, international submissions are welcome!
✻ Include a link back to the Ai Blog or grab our button on the top right of our sidebar!
✻ Share the Ai love if you can, by clicking and commenting on your fellow crafters.
✻ Make sure to get your link up by the deadline to enter your creations.
✻ Good luck and happy stamping! 

You are invited to the Inlinkz link party!

Click here to enter

Hello 4th by Dori Mendiola

 Happy Independence Day AI Friends!

WOW!  Have you seen the newest release of papers at Art Impressions?  Holy cow!  I couldn't stand it, I had to put a card together using the new #6090 - Patriotic paper pack.  Although a lot of the papers are 4th of July themed, there are many that can be used for any occasion.  The patterns are incredible and the colors are vibrant and fantastic.  Make sure to check them out!  I can't wait to design with the rest of the pack!!!

I started out by stamping the images from the #5452 - Swing Window set onto copic friendly paper and coloring them with my copic markers, listed below.  The little puppy has a coordinating die that comes with the set so you can pop him up, if you choose.  


I used the #5408 - Shadowbox Window Die to display the image and then I created an interactive venetian blind which was inspired by a Technique Tuesday die tutorial that I found on YouTube.

To create without the die:  Cut a piece of pattern paper 2 3/4" by 4 7/8".  Score every 3/4" along the longest side.  Before folding, punch a small hole, approx. 1/8" in, between each score line on both sides for the strings.  Try to center punch each of the holes, but it does not have to be perfect.  Fold each of the score lines into peaks and valleys.  The valley end should be at the top, this is the side that adheres to the base.  Thread a string up both sides leaving the loose ends at the top.  Thread a bead or knot the loose ends for the string pulls.  Adhere the valley side of the blinds down to the base by placing glue between the string holes.  Make sure to place glue only between the holes or the mechanism won't work. 
 
Valance:  Cut the valance out of another piece of pattern paper and partial die cut with the #6047 - Scalloped Square third largest die (should measure 3 1/4" wide by 3/4" tall).  Make a slight snip on either side at the bottom scallop to hold the string when pulled up.  Pop the valance up with foam tape and adhere just above the top of the blinds.
The bow and the flag heart are fussy cut from the pattern papers of the same paper pack.  Makes great accents!  The Hello die cut is part of the Shadowbox Window die set.

Thanks for joining me today.  Hope you have a wonderful and safe 4th of July weekend.
Keep creating!!

Copics used:  E000, E01, E11, E21, E23, E25, E50, E51, E53, E55
Y13, R20, R22, R24, R27
G20, G21, G24, G28
B0000, B000, B00, B32, B37

Wednesday, July 2, 2025

Combining Stamp Sets - Create a Cute Porch Scene - by Lynn Dionne

 Happy Wednesday Ai Fans!!!


Watch video tutorial here!!!


Today I thought it would be fun to grab a bunch of stamp sets (mostly from the Front Porch Series) to create a sweet little front porch scene! This is a fun way to use your stamps in a fun, new and unique way!

Let's get started by stamping and coloring all of our images from several different sets including Ai Front Porch Set (5512), Ai Front Porch Garden Set (5486), Ai Front Porch Farmhouse Set (5490), Ai WC Rocking Chair Set (5360), and the Ai Dwelling Animal Set (5991). All of the coloring was done using the Zig Clean Color Real Brush Pens in the following colors: Blender, Lemon Yellow, Yellow, Bright Yellow, Sugared Almond Pink, Peach Pink, Lilac, Violet, Lt Gray, Gray, May Green, Green, Beige, Mustard, Ice Blue, Lt Blue. Now we can die-cut the images using the coordinating dies and for the little kitten we will cut that out using our detail scissors.

We will also die-cut a pretty arched window using the Ai Mini Journal Template Set (5718) and place some yellow and white polka dot paper inside the window using the Ai Easter Bunny Paper Pack (6036). We will also use this same paper pack to die-cut the blue and white striped paper for the background. Let's go ahead and create the A2 size white card base and attach the striped paper.

Now let's also die-cut the pretty scallop rectangle for our scene using the Ai Decorative Belly Bands Set (5804). We will cut a piece of woodgrain paper for the inside of the rectangle using the Ai Winter Woodland Paper Pack (5963).

Let's stamp the front porch tiles only onto this woodgrain paper using the Post-it Labeling and Cover-up Tape to mask off the top part of the stamp. We can quickly color the porch!

Now we will start adding all of the items to the porch by gluing some flat and popping up some of the others. We will also pop up this porch scene onto the front of the card...but first we need to stamp the sentiment on a little bit of an angle. This sentiment will say "Have a Blessed Day" and will be perfect for this card!

Once everything is attached, we will add a few pretty champagne-colored gems for a bit of sparkle and elegance!

Thank you so much for joining me today!  Have a fun and crafty day!!!


Ai WC Rocking Chair Set (5360)

Ai Dwelling Animal Set (5991)

Ai Front Porch Set (5512)

Ai Front Porch Garden Set (5486)

Ai Front Porch Farmhouse Set (5490)

Ai Decorative Belly Bands (5804)

Ai Mini Journal Template (5718)

Ai Rectangle A2 Double Stitched Dies (5063)

Ai Easter Bunny PP (6036)

Ai Winter Woodland PP (5963)

Wink of Stella Glitter Pen - Clear

Post-it Labeling and Cover-up Tape


Tuesday, July 1, 2025

July 2025 Monthly Challenge with Simone Carr

Hello Ai fans!

Welcome to the July 2025 Monthly Challenge!
This month our Guest Designer is Simone Carr.
Please welcome her back and enjoy all of her wonderful creations!


 Hello Crafty Friends,


Today I’m sharing a peaceful coastal scene featuring a pelican perched on a rock. I had a lot of fun building this tranquil moment using a combination of watercolor stamping, masking, and scene layering.


On a piece of watercolor paper, I marked off a square measuring 2 ½" x 3 ¼" and placed Post-it tape around the edges to create a clean, framed look. I stamped the pelican from the KH5820 – My Favorite Bird Set using Tombow 565 and 969, stamping it off once for a softer outline, then onto the paper. Using my stamp positioner, I stamped the rock below the pelican using the same colors.

With the main images in place, I began painting the scene. I mixed Tombow 526 and 177 to create a serene water tone and brushed it in around the base of the rock. I taped off the horizon with Post-it tape and used 026 to paint a soft glow in the background, deepening the color to the left and right sides for balance. For the sky, I brushed in 565 and softened the edges with 526, fading it gently around the pelican.

Next, I added grass using the small grass from Foliage Set 1 (4051) stamped in 098. After shifting the tape slightly upward, I stamped in the cattails from Pond Set (5424) for added detail. In the foreground, I included more grasses using Tombow 177 and 969.

To finish, I watercolored the pelican with light shading in N55 and 969, keeping most of his body white, and added 026 on the beak. The rock was painted by pulling color from the lines, and I added definition with a brown TwinTone marker.

For a final touch, I wrapped some natural string with beads around the bottom of the card to give it a little coastal texture and interest.

Materials Used:

Stamps:

    KH5820 – My Favorite Bird Set

    Foliage Set 1 (4051) – Small Grass

    Rocks Set (5414)

    Pond Set (5424)

Inks & Markers:

    Tombow Markers: 177, 026, 098, N55, 526, 969, 565

    Brown TwinTone

Other:

    Canson Watercolor Paper

    Stamp Positioner

    Post-it Tape

    Natural String and Beads (for embellishment)


I had so much fun creating this playful get-well card using the Doggy Kisses Set (AI CS 38) that I ended up making two bonus cards as well, experimenting with different colors and layouts—perfect for sending a little extra comfort and cheer.


I stamped the image using Archival Ink in Shadow Grey onto Bristol Smooth Cardstock to keep the outlines soft and watercolor-friendly. To color the pup, I started with Tombow 947 for a light wash in the shadow areas, added 992 on the face and belly, and used 977 on the head and legs. I returned with 947 to deepen the shadows for more dimension. The teddy bear was colored with 899 and 992, while 703 added blush to the cheeks, ear, and tissue box. I used 407 for the slippers and 403 for the cup.

The tissue box and cup were fussy cut for added detail. I paired the scene with patterned paper from the Basic Teal Paper Pack (6011) and used an Envelope Edger Die to finish the layout with a clean, curved edge.


Materials Used:

Stamps:

    Doggy Kisses Set (AI CS 38)

    Catastrophe Set (4933)

    Portfolio (5952)

Paper:

    Bristol Smooth Cardstock

    Basic Teal PP (6011)
    Basic Pink PP ( 6010)
    Basic Green PP (6009)
    Basic Yellow PP (6012)

Inks & Markers:

    Archival Ink – Shadow Grey
    Memento Ink Pad

    Tombow Markers: 947, 899, 977, 992, 407, 403, N45, 195, 703, 177, 312, N55, N65, 026, 565

Other:

    Envelope Edger Die

    Fussy Cut Elements (Tissue Box, Cup)

Thanks so much for stopping by! I hope this cheerful card brings a little smile and inspires you to create something heartwarming of your own.
Until next time, happy crafting!
—Simone

You are invited to the Inlinkz link party!

Click here to enter