Showing posts with label Nina Mini Scrapbook Pages. Show all posts

Tuesday, December 19, 2023

Nina's Top 10 - 2023


So 2023 is about to end which is time for my favorite post sharing my top 10 projects that I created during the year. I actually adore every project I made with Art Impressions products but I selected these 10 ones to include in this post. They are in order from oldest to newest.


10. I love this cute Mushroom House Card 


9. Had so much fun creating this cute Barn little party Tag, it was one of a series of Tag Journals that I enjoyed creating!


These all the tags I created


8. This is my first 6X6 mini scrapbook page I made, also became a series, it was so much fun to create.


7. This beautiful fairy house card, inspired by watermelon colors


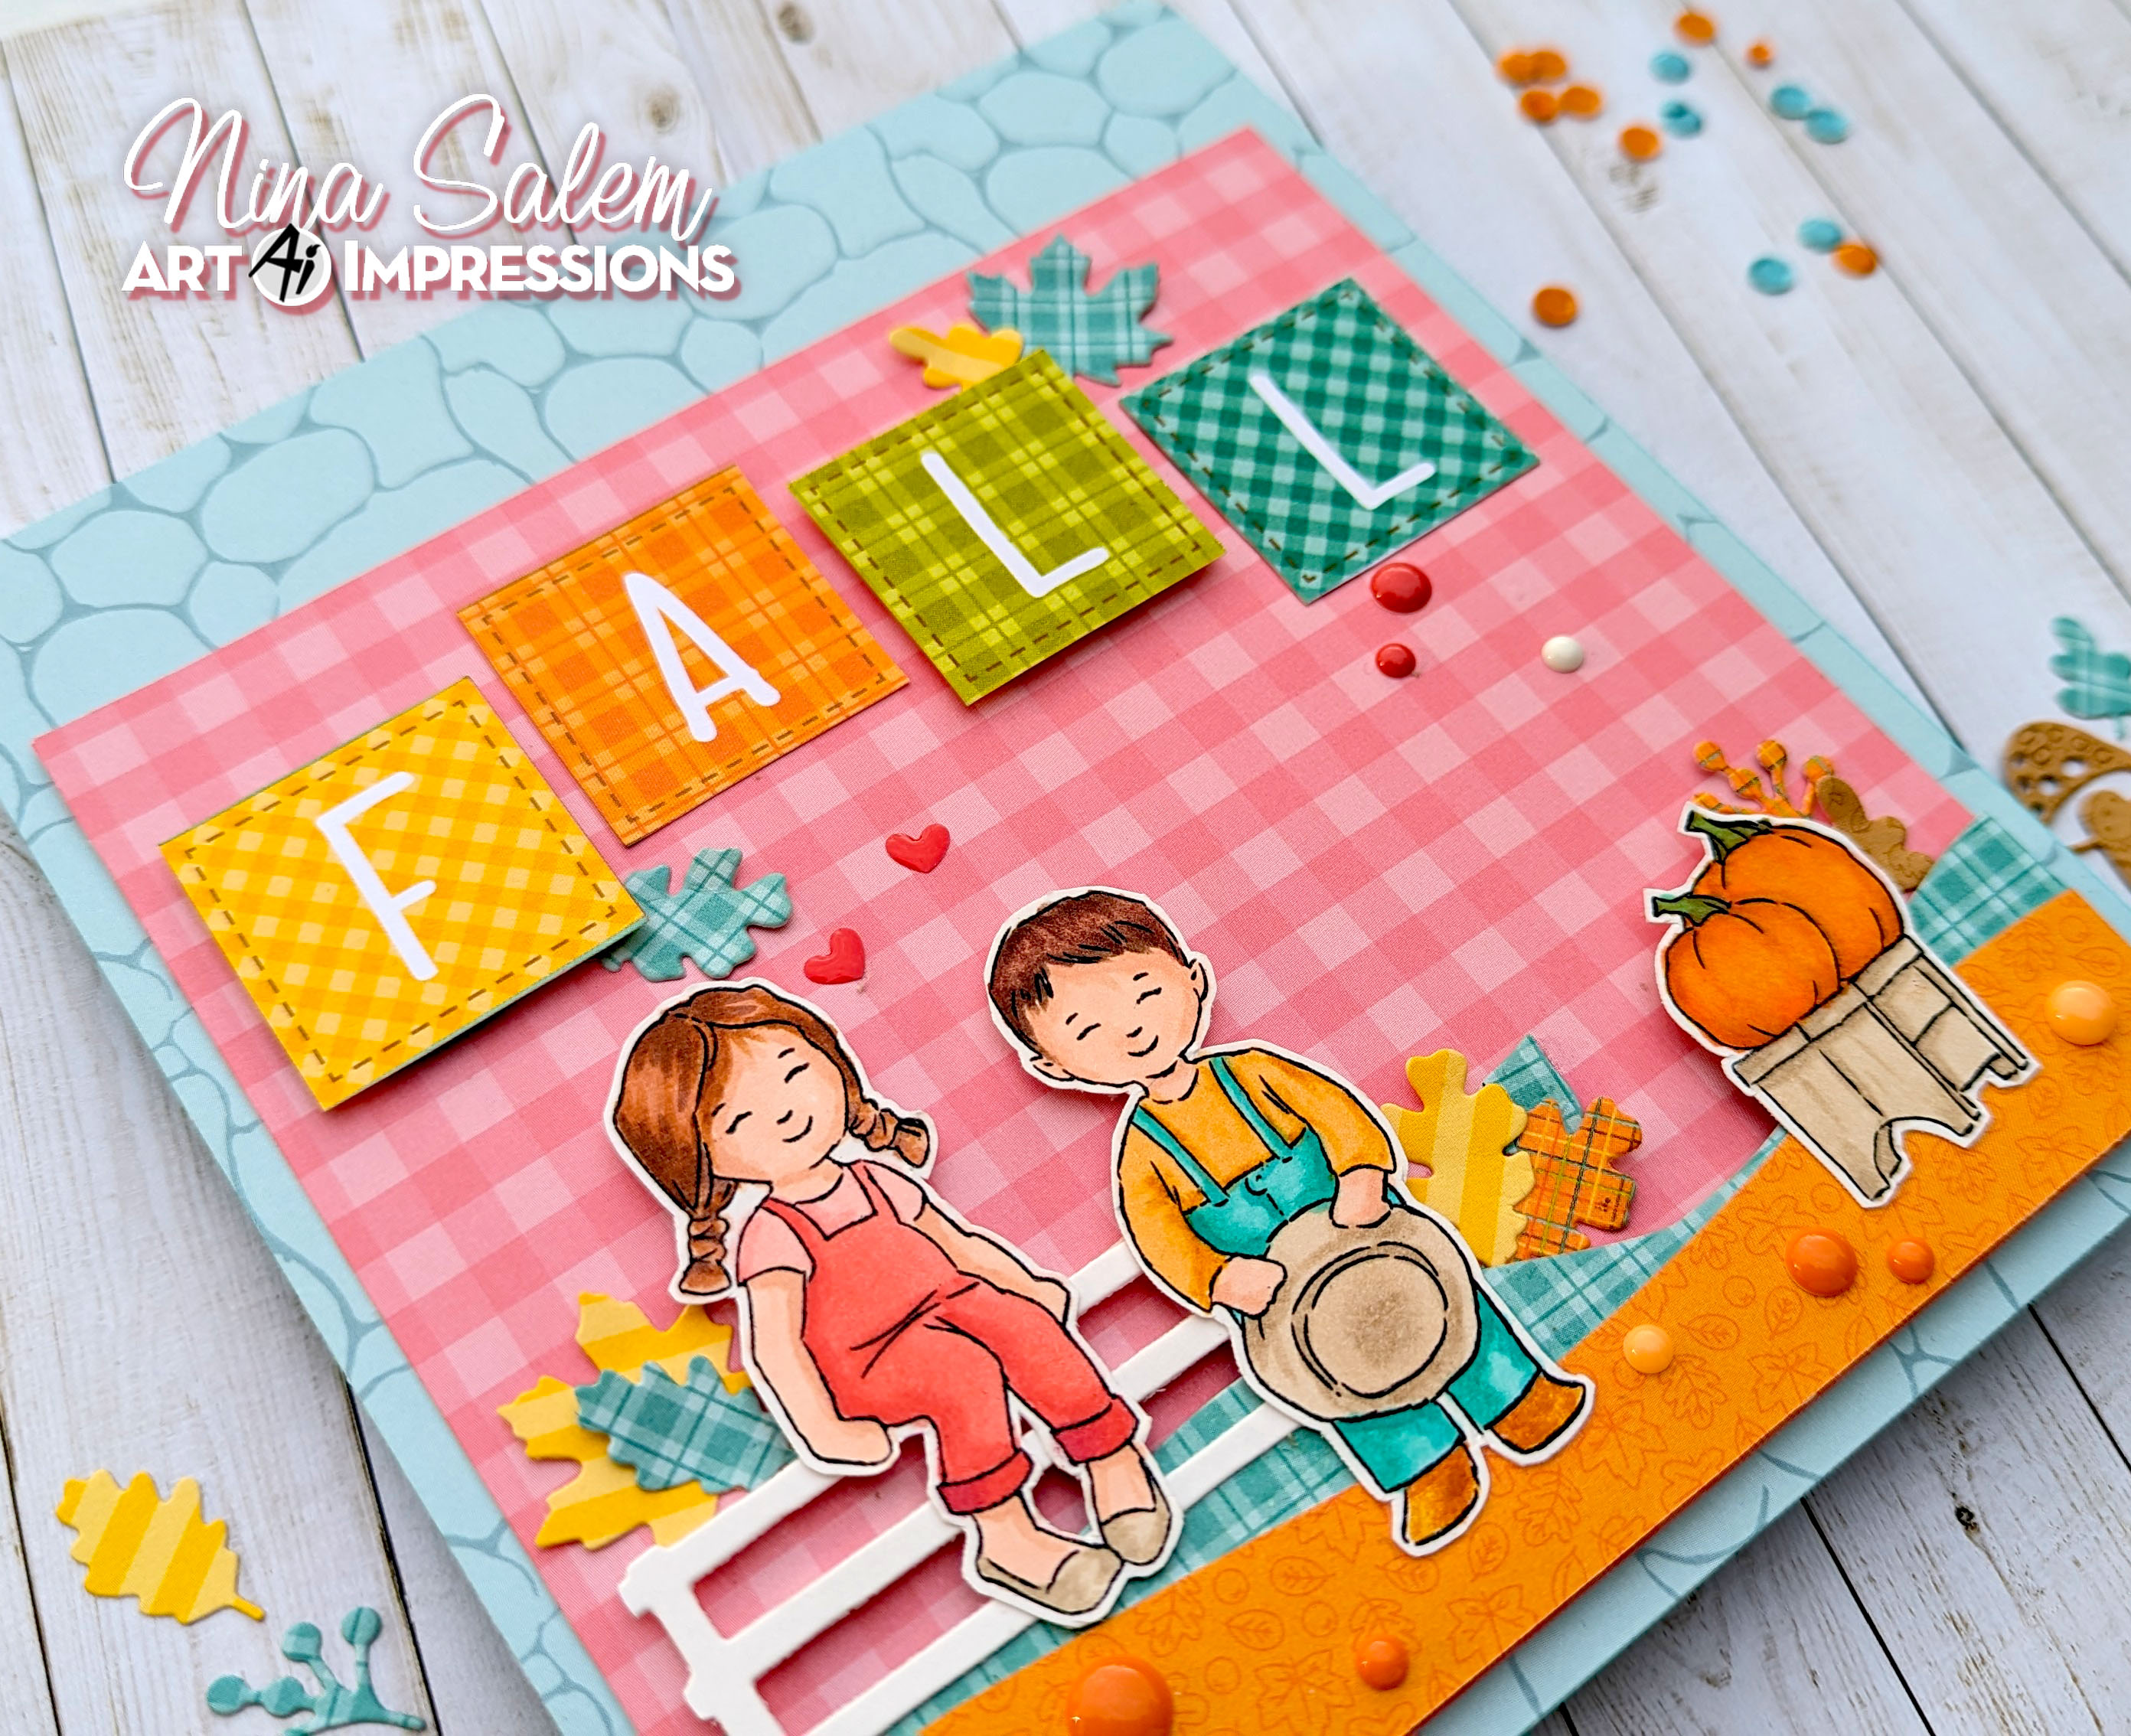
6. Another 6X6 mini scrapbook layout, loved the Fall colors


5. Love these little kids image caroling Slimline card


4. This genius dome shaped set by Ai made me able to create these cute ornaments


3. Love this fishing card too

\

2. Christmas Tag


1. Loved these little tags that I created with the frames from Journal Template dies


Thank you all for a great year, wish you a very merry Christmas and a Happy New Year!

Tuesday, October 24, 2023

Give us a Fright by Nina

 Hello Ai friends, Nina here with a new Scrapbook layout for our current "Give us a Fright" challenge. I am using multiple sets for this project, Ghoul Friend Set, Front Porch Halloween and MB Halloween.


I stamped the images using Memento Tuxedo Black Ink and Mini Misti.
I then colored them with Copic Markers that are Halloween colors.


I cut the images and attached them to a black background.
I used my white gel pen to draw a lot of webs between the images and around the edges then decorated with enamel dots and star stickers.


Thursday, October 19, 2023

Give Us a Fright Challenge #362 Week Two!

 Welcome to week #2 of our Give Us a Fright challenge!

We're loving all of the incredible Halloween cards that we're seeing so far. Keep them coming!!

 
Last week I was the featured artist and I made several projects.
You can find the picture tutorials and links to all the products I used HERE.


Now we have the rest of the Design Teams creations for you.  They're all SO CUTE!!

Tasha used:


Nina used:


Links to Diane's amazing card are HERE.


Thank you to our amazing Design Teams for their gorgeous Halloween inspiration!

✻ Please make a new card or handmade crafty creation. You can make any item you wish; this is not limited to cards!
✻ Limit two submissions per person. You will receive extra votes if you use Art Impressions stamps!
 ✻Please include your first name and last initial on your submission.
✻We love to comment on your entries, but keep in mind if you use a private group or a platform that you need to sign up for, we probably won't be able to.
✻ The Ai Challenge is open to everyone, international submissions are welcome!
✻ Include a link back to the Ai Blog or grab our button on the top right of our sidebar!
✻ Share the Ai love if you can, by clicking and commenting on your fellow crafters.
✻ Make sure to get your link up by the deadline to enter your creations.
✻ Good luck and happy stamping!

We want to see your handmade Halloween cards and crafty items!


You are invited to the Inlinkz link party!

Click here to enter

Tuesday, October 17, 2023

Halloweenish Fall Scrapbook Layout by Nina

 Hello Ai fans, Nina here with a new Fall Halloweenish project :) so I am creating this layout using the Autumn Owl Cubbies Stamp and Die Set.


I originally wanted to create a Fall themed layout with a little scary Halloween accent. Let me show you what I mean.
So I stamped my images using my Mini Misti and Memento Tuxedo Black Ink and colored them with Copics.

Copic Shades:
Yellowish Pumpkin: YR68 YR04 YR38 YR17
Orange Pumpkin: YR09 YR68 Y38
Beige Pumpkin: E43 E42 E40
Doors: E99 E25 and door accents: R39 E19 E09
Tree: C9 C6 C4 W10
Greens: YG23 YG01 YG67 YG17
Blues: B06 B04 B02


I then cut all around my pumpkin house and backed it with foam tape.

For the owls I cut a circle around them using my Double stitched Circle Die Set and colored then with green Copics (YG23 YG01) and yellow (Y08 Y06). I attached these circles to slightly bigger black circles to make stand against the background.

I used a yellow paper for the background and attached a strip for the ground then attached my pumpkin house on top along with the circles of the owls.

I then attached the whole panel to a shocking pink color scrap of paper and embellished with enamel dots and star stickers of matching colors.


Tuesday, October 3, 2023

Trick or Treat Mini Scrapbook Layout by Nina

  Hello Ai friends, Nina here with a new mini 6 X 6 scrapbook page. I am creating a page about Halloween using the lovely Ghoul Friends Stamp Set, Front Porch Halloween and MB Halloween Set.


I stamped the adorable images using My Memento Tuxedo Black Ink and my Mini Misti and colored them using my Copic Markers.

Copic Shades:

Blue Green: BG32 BG34
Oranges: YR24 Yr27 YR01 YR21 YR07
Reds: R21 R22 R24 R37
Yellow Greens: YG95 YG97
Yellow: Y38
Browns: E43 E42 E17 E15 E13 E11 E25 E27 E29 E99 E59 E37


I then  cut my images and backed them with foam tape, put them aside to start creating my scrapbook layout background.
I cut a piece of Purple Skulls pattern paper into a little bigger than 5.5 X 5.5 Inch and used a Halloween paper collection from my stash.


I cut two strips from same paper collection and stacked them behind each other to give to be my ground of the scene. I attached the girls image on the ground strips and created a table with black papr to put my treat bowls on.

I added my lantrn garland and the spiders. I positioned the spider as if they are trying to reach the candy :) they are so adorable.

I then decorated with stars, enamel dots and couple sentiment stickers and added the whole panel to a star pattern paper background.

I then cute the four squares of the letters forming the word Fall from the same paper collection and backed only two of them with foam tape to give a variety of dimension and attached them towards the top of my layout.


I die cut multiple leaves from different pattern papers using the Leaf Frame Die Set and glued them behind the girl, the fence, the hillside and the pumpkins. I even places some around the word blocks.

I finish off with couple heart stickers and enamel dots then placed my whole panel on a light teal background.


Tuesday, September 26, 2023

Fall Mini Scrapbook Layout Page by Nina

 Hello Ai friends, Nina here with a new mini 6 X 6 scrapbook page. I was creating a project for our current "fall for Fall" Challenge so I thought bringing these two front & back sets together would look so cute.


I am using the F&B Sitting Girl Set and the F&B Boy Set. I am also using the Fall Leaf Frame Die Set and the cute pumpkins from the Front Porch Harvest Set as well as the Journal Fence Dies Set.


I stamped the adorable images using My Memento Tuxedo Black Ink and my Mini Misti and colored them using my Copic Markers.

Copic Shades:

Blue Green: BG32 BG34
Oranges: YR24 Yr27 YR01 YR21 YR07
Reds: R21 R22 R24 R37
Yellow Greens: YG95 YG97
Yellow: Y38
Browns: E43 E42 E17 E15 E13 E11 E25 E27 E29 E99 E59 E37

I then die cut my images, put them aside to start creating my scrapbook layout background.
I cut a piece of Checkered Pink pattern paper into a little bigger than 5.5 X 5.5 Inch and used a Fall paper collection from my stash.


I cut two hillsides and stacked them behind each other to give to be my ground of the scene. I backed the boy, girl and pumpkins with foam tape and made them stand on the hillside. I made the girl sit on a fence that I die cut using one of the dies from the Journal Fence Die Set from different blues horizontally near the bottom of the page.


I then cute the four squares of the letters forming the word Fall from the same paper collection and backed only two of them with foam tape to give a variety of dimension and attached them towards the top of my layout.


I die cut multiple leaves from different pattern papers using the Leaf Frame Die Set and glued them behind the girl, the fence, the hillside and the pumpkins. I even places some around the word blocks.

I finish off with couple heart stickers and enamel dots then placed my whole panel on a light teal background.