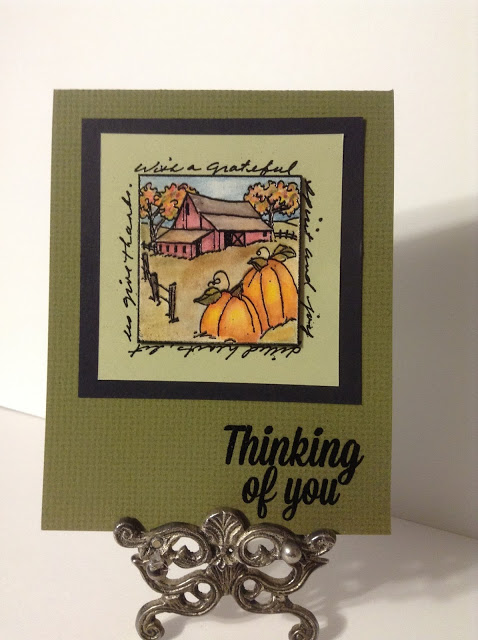
Today I'm sharing one of the cards that I made for the current Farm Fresh challenge. This theme has SO MANY possibilities. I may have gone a bit overboard but I was feeling really inspired by the fall weather and all of our local pumpkin farms.
This is also a piece that I created with my fireplace mantle in mind. Last week I shared two easel cards. Today, I have a slimline card.
The sign post has three of my favorite places to visit but we have several more that I didn't have room to mention. Fall is a big deal where I live!
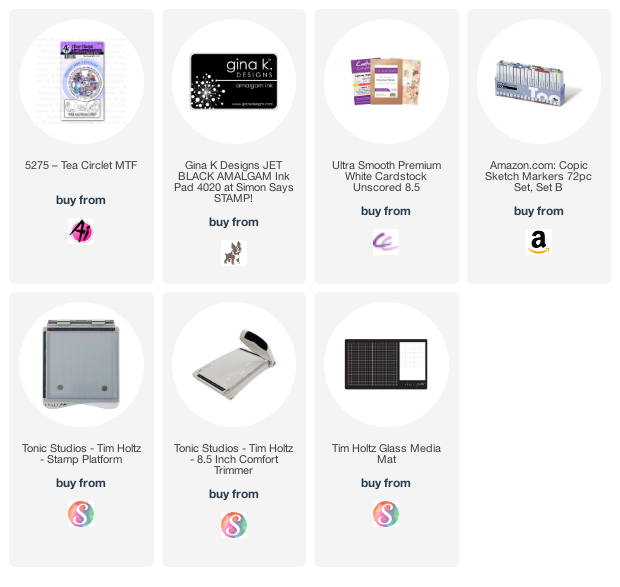
I used too many Art Impressions products to mention, so please see my list of links below to find everything that helped make this cute card.
Thank you to our amazing Design Teams for their gorgeous Halloween inspiration!
✻ Please make a new card or handmade crafty creation. You can make any item you wish; this is not limited to cards!
✻ Limit two submissions per person. You will receive extra votes if you use Art Impressions stamps!
✻Please include your first name and last initial on your submission.
✻We love to comment on your entries, but keep in mind if you use a private group or a platform that you need to sign up for, we probably won't be able to.
✻ The Ai Challenge is open to everyone, international submissions are welcome!
✻ Include a link back to the Ai Blog or grab our button on the top right of our sidebar!
✻ Share the Ai love if you can, by clicking and commenting on your fellow crafters.
✻ Make sure to get your link up by the deadline to enter your creations.
✻ Good luck and happy stamping!
We want to see your handmade Halloween cards and crafty items!
Happy Saturday and the start to the ever popular Memorial Day Holiday weekend here in the U.S.A.! This is the official start to summer and to celebrate, my project features the new Hen House Critter Cubbies set. I added a twist to this by making the hen house into a pop-up feature when the card is opened.
The freebie stamps this year have a definite farm vibe and I used three of them on the front of this card. They are perfect to give a hint of what will be found inside. Aren't they adorable?
If you'd like to see how I made this card, check out the video tutorial below. I'll show you how to create the pop-up mechanism using a paper cutter and a few simple measurements. You won't believe how easy it is to create this look which could be done with many of the "house" style Critter Cubbies sets.
Thanks for stopping by. I hope you have a great weekend!
Our new Tropical Circlet has everyone yearning for warm sunshine. This set features two adirondack chairs lounging before a sunrise or sunset--depending on how you color it!
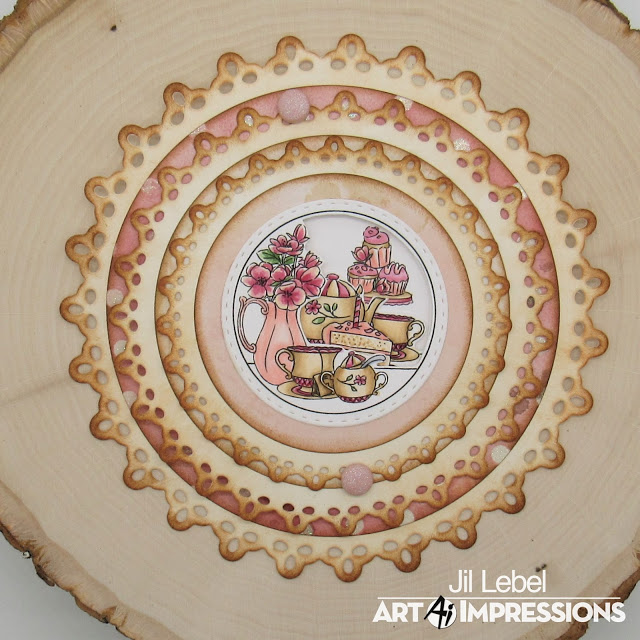
"The kettle's on, teacups are waiting, an afternoon with a friend anticipating" in our darling new Tea Circlet MTF set. This features a tea set, the adorable sentiment above, and can be used in so many ways!
This week Jil has a decadent design for us with her project featuring our Tea Circlet!
Hello Ai fans!
I used the New Tea Circlet stamp set. I am going to show you the steps involved in making this card. I also have pointers for lining up the three images for all Circlets. I hope you love the two New sets as much as I do.
I started by stamping all three images onto Spectrum Noir Ultra Smooth Cardstock with Gina K black Amalgam ink and colored them with Copic markers. I have the colors I used listed at the end of this post. I then cut the out with circle dies from We R Memory Keepers.
I cut three circles from the DCWV Garden Tea Party 12" x 12" papers using the same circle dies. I then used the We R Memory Keepers Lace Circle dies to cut out three lacy circles from cream cardstock.
I distressed all of the layers for the card with Tea Dye and Vintage Photo Distress ink.
I used the Circlet dies that come in the stamp set over two of the colored images and cut them out.
I then placed the cut top piece over the patterned paper circle and added the die to the cut opening. I traced the inside of the die with a pencil so I could see where I needed to place the die. I removed the colored layer and placed the die around the pencil marks and cut out the patterned paper layer.
I then did the previous two steps to cut out the base layer of the top panel. I glued all three layers together to form the top piece of the card.
I placed all of the middle layer where I want them and taped them together. I added the next die into the middle opening and traced around the second die. I took all of the layers apart and cut them the same way I did for the top layer.
I lined the bottom layer up and glued it in the right place.
I added two brads to the top of the bottom layer and one at the bottom of the top layer. You can look back at the main picture to see where they go. I didn't tighten up the brad too much. You want the layers to swivel.
Copic Colors Used:
Flowers - E51, R81, R85
Leaves - YG61, YG63, YG67
Vase - R00, R20, R21
Tea Bag - E50, E51, E55, E57
Tea Set - E50, E51, E55
Present - R81, R83, R85
Spoons - C0, C1, C3
Thanks for stopping by and Have a Great Day!
Thank you Jil!
Now, as we get ready for another new challenge, let's congratulate the winner of our
You're Invited Challenge!!!
Thank you all for participating and bringing joy to each of our challenges!
This week, Top Spot goes to NanaConnie who used our
Burnadette for a darling birthday card...that might require a few safety measures!!
Congrats NanaConnie!!!
Contact Claire at feedback@artimpressions.com with your mailing address, and choice of 3 stamps. Well done!
This week for our new challenge, we want to see how each of you play with layers!! It can be so fun to add texture, depth, and make your creations pop using height. If you're looking for some starter ideas, check out our 3D Projects, Circlets, Mini Try-folds, or Windows on our Pinterest Page.
We want to see how you create your best layered card! Though you can use any stamps you have, we'd love to see any Art Impressions products in your collection!
Hurry, challenge closes June 3rd at 5PM PT!
Here are the Challenge Rules...
✻ Please make a new card or creation. You can make any crafty item you wish; this is not limited to cards!
✻ Limit two submissions per person. You will receive extra votes if you use Art Impressions stamps!
✻ The Ai Challenge is open to everyone, international submissions are welcome!
✻ Include a link back to the Ai Blog or grab our button on the top right of our sidebar!
✻ Share the Ai love by clicking and commenting your fellow crafters.
✻ Make sure to get your link up by the deadline to enter your creations.
Prepare to be amazed with our FIVE new PopCards! These stamp and die sets feature fantastic, detailed images to build three-dimensional images inside your card! We had an early release of our Haunted Mansion PopCard, and now is the time to grab it for Halloween! Get ready for Christmas with our Singing Snowmen set, a quartet of carolers ready for winter! Those of you with a sophisticated taste will adore the Tea Party, Kitten Vanity and Floral Birdhouse sets, each featuring beautiful florals and sweet critters! Each PopCard set contains clear stamps and metal dies. Our dies also cut slits in your main images so you can slide in your PopCard Template to build a 3-D card that folds flat when closed and pops up when opened! Watch our video below to see our new sets POP into action! You can find our newPopCardsatartimpressions.com!
Today we have a spooktacular tutorial of our Haunted Mansion set with Sharon, launching our new 3-D challenge!
Hello AI Fans!
I'm super excited to show you one of the brand new PopCards today from Art Impressions! My card today features the amazing Haunted House PopCard!! These sets are AMAZING!! If you want to really WOW your recipient, then use one of these PopCards and you'll nail it! So just in time for Halloween, let me show you this amazing house that comes with all the stamps and dies you'll need to be able to make an interactive card that everyone will love!
The stamp set comes with all the stamps and dies you need. You'll have to separate all the dies as they're connected. I use needle nose pliers and they come apart very easily.
I stamped all my images and colored them with Copic markers, then lined up the dies over the colored image and held them in place with washi tape.
I place a circle die on my card front and ran it through the Cuttlebug so I could have a peek-a-boo window in the card.
Then I created a frame for the cutout by pairing it with a scalloped die and cutting it out.
After you've got all your pieces cut, you need to layer them up on the PopCard Template. (sorry...forgot to take a picture of it before I put it all together)
Now this is how I put my PopCards together with a window in the front of the card. I've found this to be the easiest. If you've ever tried to make a window in a card that has four or six layers of paper, you know it's almost impossible to get it done, at least without using a craft knife and doing a lot of it by hand. So I cut my normal 5 1/2 x 5 1/2 card and layer the pattern paper on top. Then I cut a SECOND card at 4 1/2" wide x 6" long. Score at 4 1/2" so you have a 4 1/2" square with a small flap to glue to the inside of the front face of the card. That's the card that has the mechanism for the PopCard on it. That way, the outside of your card stays nice and clean and you don't have a big chunk out of the side. Now when you glue the smaller card to the larger card, you only glue the thin piece to the card front, not the card back! The large piece (with the green chevron paper in the photo) is loose so the card will open and close freely. If you glue it to both sides of the card, the papers will buckle when you try to close the card. After the card is assembled, it slides so slightly that you will not even notice it is moving. Later in assembly, I put a vertical piece in place that will keep it from flapping about like a broken wing. So do all your cutting and gluing to get your mechanism for the PopCard.
After your mechanism is created, glue your PopCard and attach the pulling mechanism to the back of it. Don't you just love how all these characters are so happy? This house might be haunted, but it's definitely not scary!!
This is what it looks like from the side. You can see each layer with the roof being held up by the arrow tips. Finally, cut a strip of paper and attach it to the inside of your card making sure the green chevron piece is under it far enough that it won't slide out from under it when the card is fully open. Remember to only add adhesive to the top and bottom ONLY of the vertical piece. This will allow the smaller card part to move when you open and close the card. Picture of the completed inside of the card is below.
This picture shows the vertical strip that is holding the green chevron paper piece so it doesn't flap open. And you can also see where the small flap on the left is adhered to the front half of the card.
So I've given you my process for making a PopCard with all the amazing PopCard sets from Art Impressions! I hope you enjoyed it and thanks so much for stopping by! Until next time - stay crafty!!
Awesome project, Sharon! Just love your bold colors and flawless construction! What a fun way to start our new challenge!
This challenge we are taking things to the THIRD Dimension! We love creative cards that have a pop of fun! We are looking for dimensional aspects of your cards, such as PopCards, popups, dimensional creations. You don't even have to make a card - a bag or box would be fun as well!
Here are the Challenge Rules:
✻ Please make a new card or creation. You can make any crafty item you wish; this is not limited to cards!
✻ Limit two submissions per person. You will receive extra votes if you use Art Impressions stamps!
✻ The Ai Challenge is open to everyone, international submissions are welcome!
✻ Include a link back to the Ai Blog or grab our button on the top right of our sidebar!
✻ Share the Ai love by clicking and commenting your fellow crafters.
✻ Make sure to get your link up by Wednesday, November 8 at 5:00 p.m. PST to enter your creations.
Congrats, Cynthia! We love your whimsical style on this card featuring our Road Trip set! The way you combined the buildings with a watercolor wash and popped your bright red car on top is so cool! Email annelise@artimpressions.com with your address to claim your prize pack!
Congrats, you two! Kathy, way to combine your Front & Back stamps to make this fun window scene! Super cute! And Lynda, what an elegant fall card with our Farm Window and Sentiment! Ladies, please email annelise@artimpressions.com with your address and select the stamp set you would like for your prize!
Alright, folks, we only have a few more challenges left in the year - so be sure to join in the fun! Also, when you post projects of your Ai creations on social media, use #AiStamps so we can see what else you are up to!