Showing posts with label Valentine. Show all posts

Thursday, January 23, 2025

Monochromatic Challenge #395 Week #2

 Hello Ai fans!

Welcome to week two of our Monochromatic challenge.


We want to see your handmade projects using mostly one color.

Last week, I was the Featured Artist and I made one card and two gift card holders on the smaller side.


I loved this challenge so much that I made another card.


Sharon's sweet LOVE card is HERE.


Dori's frosty looking card is HERE.


Tasha's adorable card is HERE.

Gennette has BEES and GNOMES in yellow!


Lynn's warm bunny shaker is HERE.


Janet has a fa-bee-lous BEE card. 


We're seeing some wonderful Monochromatic cards so far!
Keep up the great work. We can't wait to see even more this week.

✻ Please make a new card or handmade crafty creation. You can make any item you wish; this is not limited to cards! (unless specified)

✻ Limit two submissions per person. You will receive extra votes if you use Art Impressions stamps!
 ✻Please include your first name and last initial on your submission.
✻We love to comment on your entries, but keep in mind if you use a private group or a platform that you need to sign up for, we probably won't be able to.
✻ The Ai Challenge is open to everyone, international submissions are welcome!
✻ Include a link back to the Ai Blog or grab our button on the top right of our sidebar!
✻ Share the Ai love if you can, by clicking and commenting on your fellow crafters.
✻ Make sure to get your link up by the deadline to enter your creations.
✻ Good luck and happy stamping! 


You are invited to the Inlinkz link party!

Click here to enter

Monday, January 15, 2024

Lovable Animals by Sharon Caudle

 Hello AI Fans! 


I hope you're having a great start to your week! It seems as though a lot of the US is experiencing super cold temperatures and lots of snow! I hope you are staying warm, safe, and cozy in your home and not having to do a lot of shoveling!! I've got two fun Valentine's Day cards for you today.  Have you started making yours yet? The images from 5219 Lovable Animals Set are stamped with Memento ink and colored with Copic markers. The decorative panel they're on was cut using 5768 Decorative Journal Page 1. 


Thanks so much for stopping by for a visit today and until next time - stay crafty!


Monday, February 6, 2023

New release Front Porch Valentines Set by Sharon Caudle

 Hello AI Fans!


I love when new releases come out, don't you?!  Today I'm featuring a brand new set for the Front Porch Line from Art Impressions. And this one is all about Valentines Day! Lots of pinks and reds and hearts! LOL! Hope you like this new set as much as I do!! I stamped them all onto cryogen white paper and cut them out with the dies that are all included with the set after I colored them up with Copic markers. 


Thanks so much for stopping by for a visit today and until next time - stay crafty!

Copic markers used:
Y26, Y35, Y38
G43, G46
E21, E33, E51, E53, E55
B000, B21, B23
R22, R24, R27
T1
C0
YR21


Monday, January 30, 2023

I love you tons by Sharon Caudle

 Hello AI Fans!!


Have you started making your Valentines Day cards yet? It's that time of year ya know! It's only a couple weeks away, believe it or not! I can't believe we are already through the month of January! So anyway, I have a little card to show you today that features the adorable 5219 Lovable Animals Set! Links for everything are below.  I love this adorable little elephant! I stamped it onto cryogen white paper and then colored her up with Copic markers. 


The scalloped card is so easy to create. Just score and fold your paper to be larger than the scalloped die you want to use. Then place your die where the top of it is above the card fold so it won't cut it. To hide the flat spot, just cut out a full scalloped circle mat and glue it on top of the card base. Voila! You have a round scalloped card which is the perfect size for a small Valentine!


So that's it for me today! Thanks so much for stopping by for a visit and until next time - stay crafty!!


Copic markers used:
W0, W1, W2, W3
R12, R22, R24, R27


Thursday, January 19, 2023

Windows to the World Challenge #343

Hello Ai fans!

It's time for a new challenge!

But...as always...we need to tell you who will be receiving a new stamp set.

We always award a Top Spot and a Lucky Random Winner.

For our last challenge, "Let's Celebrate," we selected Reetta H. for our Top Spot.

She used 4998 – Office Party Set.


Please contact Leah at Feedback@artimpressions.com
to claim a free stamp set of your choice!
Also, be sure to grab our badge to display on your blog, Facebook or Instagram!


Now for our Lucky, Lucky Random Winner!

Vicki Gray is our winner!


Please contact Leah at Feedback@artimpressions.com

to claim a free stamp set of your choice!
Also, be sure to grab our badge to display on your blog, Facebook or Instagram!


Now that we've announced our winners from the last challenge, let's check out what Janet has made for our new challenge!

-----------------------------------------------------------------------------------------------------------------------

Hello Ai Fans! It's Janet and I'm here today to kick off our latest challenge - Windows To The World. This is both easy and hard. Easy because there's so many great Window To The World stamps to choose from and hard because there's so many to choose from! Ultimately I selected one of my favorites, M3310-Heart in the Park  


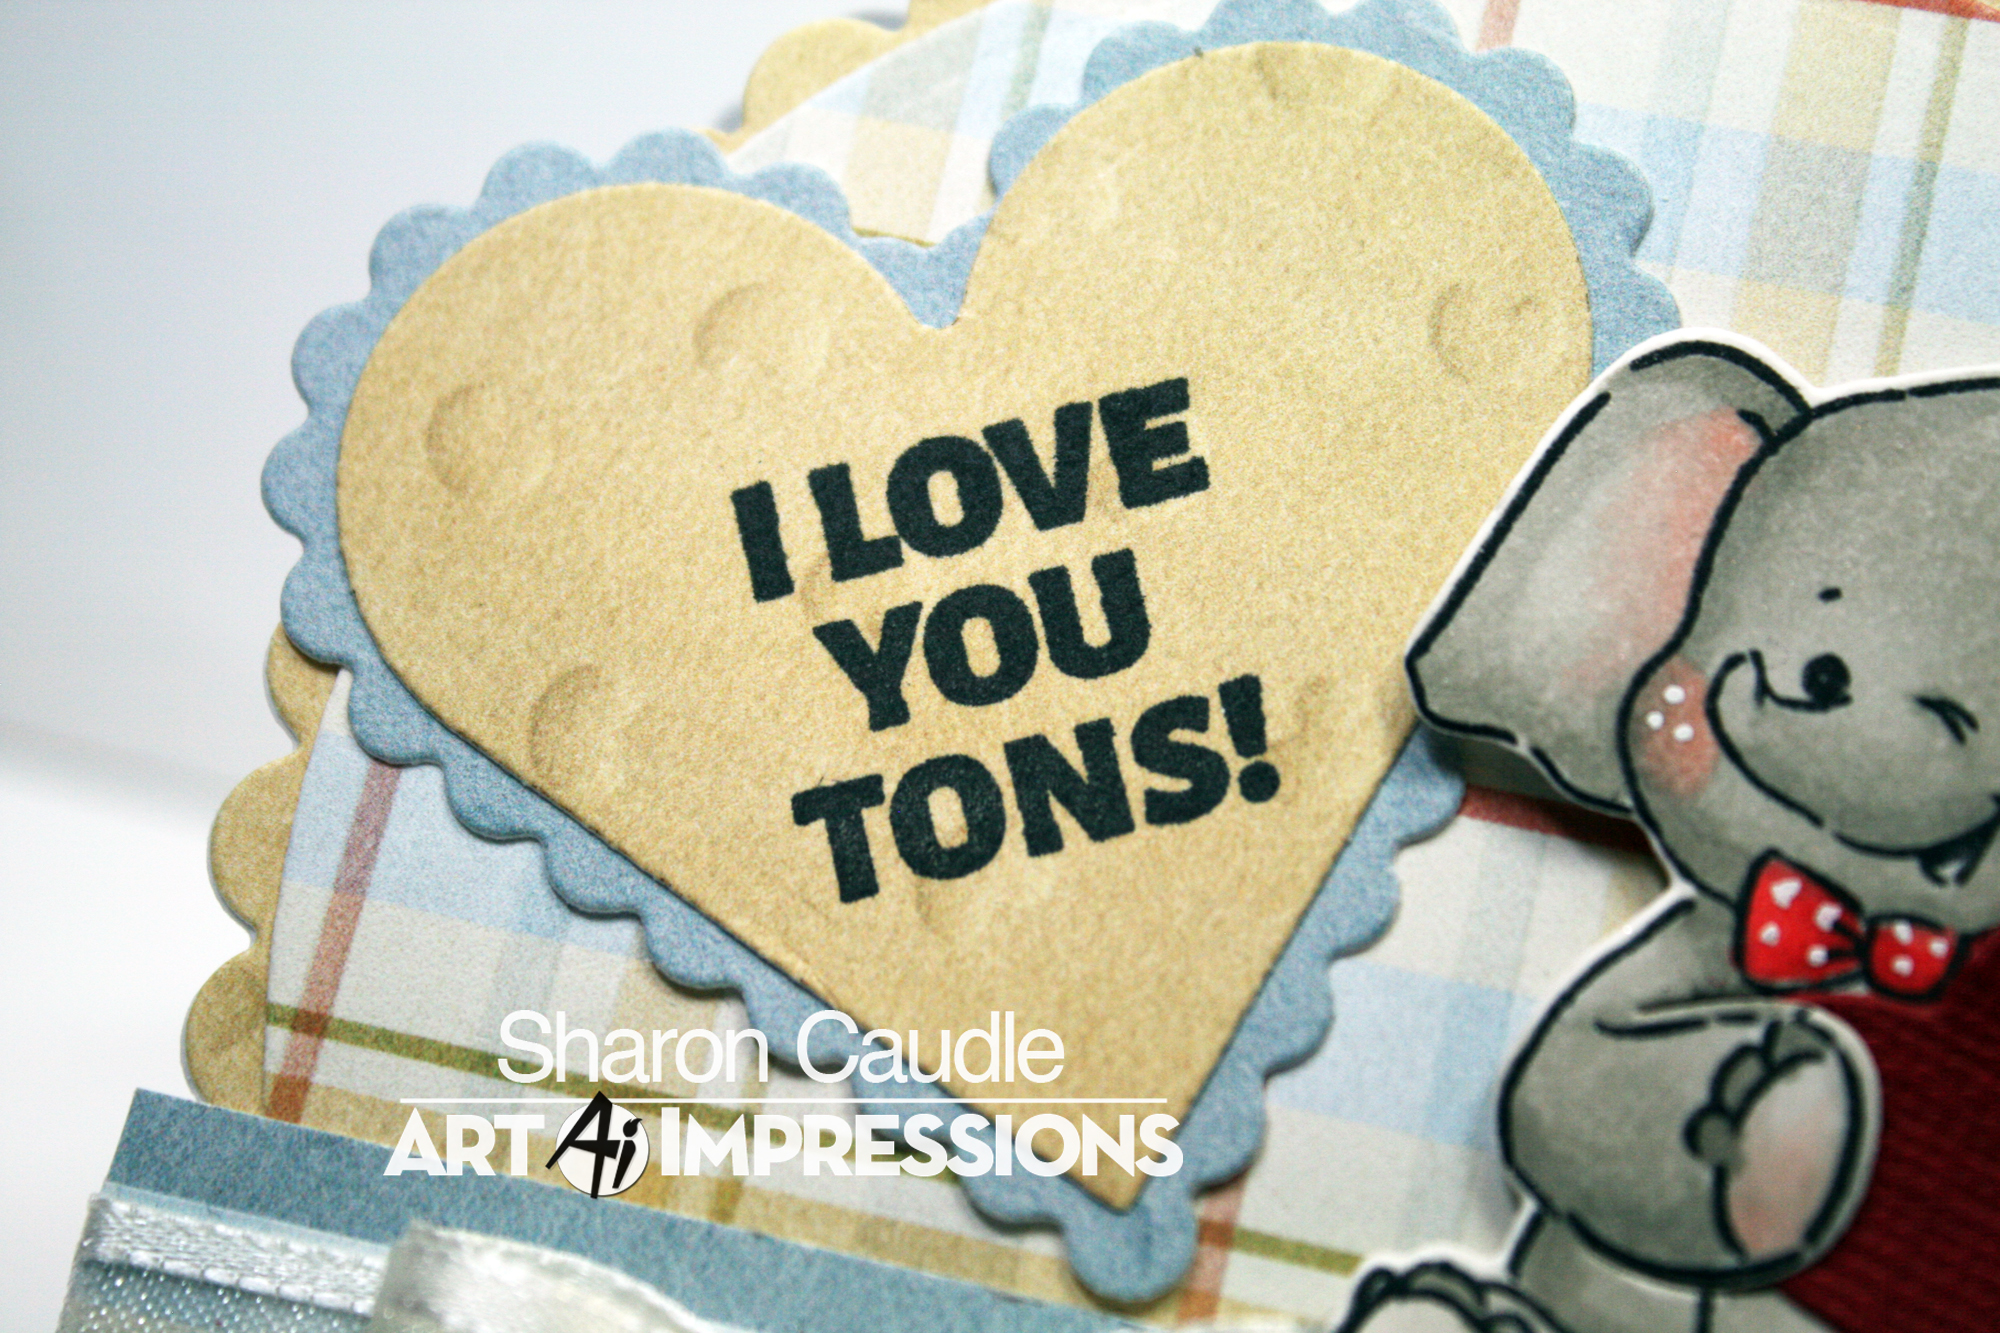
Before getting into the details, here's a closer look at the finished Windows To The World image all colored up and on the card. It sure makes me yearn for warmer weather and a day in the park soaking in some sunshine! I also love, love, love that huge heart balloon. Wouldn't that be fun to receive?


To begin, I made a white A2 card base by folding an 8 1/2 x 5 1/2" piece of white cardstock in half. I cut a panel of patterned paper to 4" x 5 1/4." Then I used the square die in the 5408-ShadowBox Window Die Set and cut it out of the patterned paper. I place the cut patterned paper on the white card front and traced the open square on the white cardstock. Then I removed the patterned paper and cut out the window in the card base, being careful to secure the die so that the square was perfectly placed. I glued the patterned paper on the card front to create a perfect window in the card. You could save some time and cut the patterned paper and white cardstock out all at once but I prefer this method to avoid indenting the card with the edges of the die. In this case that doesn't matter that much because I cover up the edges of the window.

One of the fun things to do with the Windows To The World stamps is to pair them with the 5408-ShadowBox Window Die Set. It cuts a window frame and a window sill. For this I chose a white woodgrain cardstock for a clean look. After cutting, I glued the pieces in place. This not only creates a perfect setting for the stamped image but finishes the raw edges of the cut square.


A great feature of the ShadowBox Die Set is that it includes a mechanism that will create a reverse pop-up element for the stamped image. When it's attached behind the window, it gives dimension by appearing to be a more realistic view into the window for the scene. I folded it as shown and set it aside to work on the stamped image which will be attached.


Next, I stamped the image and cut it out with the included die in the WindowBox Die Set. 


I colored this fun stamp with the Copic markers shown here. Additionally, I used V17, V15, V12 and V01 on the park bench. These are little scenes but are full of wonderful details.


I glued the finished image to the Pop-Up mechanism and attached to the inside of the card as show. Be sure you test the placement to confirm you can fold the mechanism flat for mailing but that it will also pop back up when the card is opened.


I wanted to make this a Valentine so I used dies from 5072-Block Letters Die Set to cut the word Love out of chipboard. I cut the letters again out of matching paper from the same pack as the patterned paper on the card front. I glued the paper to the chipboard to make thicker letters with more substance.

I cut out and attached a wide lacy border and glued it to the bottom of the card. I placed the letters on top. Finally I added a few heart shaped enamels for accents.

Thanks for joining me today. I hope you enjoyed my project and that you have been inspired to enter our Windows To The World challenge!

Janet YouTube - Blog - Facebook - Instagram - Pinterest

Thank you Janet for this wonderful tutorial and beautiful card.  You never disappoint!

Now for the new challenge rules.
Though our challenge is called Windows to the World you don't need to use one of the WTTW stamp sets.  Maybe you have a window die?  A car or truck with a window or a porch stamp with a window. A lighthouse or cottage... Any window will do!

If you'd like to join in our challenge be sure to link your project below...

✻ Please make a new card or handmade crafty creation. You can make any item you wish; this is not limited to cards!
✻ Limit two submissions per person. You will receive extra votes if you use Art Impressions stamps!
 ✻Please include your first name and last initial on your submission.
✻We love to comment on your entries, but keep in mind if you use a private group or a platform that you need to sign up for, we probably won't be able to.
✻ The Ai Challenge is open to everyone, international submissions are welcome!
✻ Include a link back to the Ai Blog or grab our button on the top right of our sidebar!
✻ Share the Ai love if you can, by clicking and commenting on your fellow crafters.
✻ Make sure to get your link up by the deadline to enter your creations.
✻ Good luck and happy stamping!


You are invited to the Inlinkz link party!

Monday, January 16, 2023

Owl Always Love You by Sharon Caudle

 Hello AI Fans!

So here I go - headed directly into Valentine's Day and Easter! LOL! Today I've got a cute little card made with the Art Impressions Lovable Animals Set. This set could not be any more perfect to create Valentines for your loved ones.  This amazing set has soooo many stamps with dies included! I just now noticed I forgot to put his heart in his little wings (hands)!   


Thanks so much for stopping by for a visit today and until next time - stay crafty!!


Friday, February 11, 2022

You're Still the One Card by Tasha

 Good morning Ai Fans!

Tasha here sharing a Valentine's Day card created with the AICS27-Love Birds Stamp Set. This set has great stamps for Valentine's Day and is perfect for this week's Ai We "Heart" Hearts Challenge!


I stamped the main image with black ink and colored with Copic Markers. This couple looks so sweet sitting on the bench together and you can feel the love in this little scene.


After stamping I moved on the creating the background. I used full-adhesive post-it paper to mask off the image and Distress Oxide Ink to stencil the falling hearts and pebbled ground. For extra detail I added little white accents with a gel pen on some of the hearts and ink blended around the edges of the card.


Lastly, I stamped "You're Still My Everything" with black ink and matted the greeting with coordinating card stock and pattern paper. I also used the same paper to add three layers before adhering the card to an A2 sized white card base.

Thank you for checking out today's project and I hope you will participate in the current Ai Challenge!