Showing posts with label Front Porch Valentines Set. Show all posts

Thursday, February 13, 2025

Pull Up Valentine by Dori Mendiola

 Happy Thursday AI Friends!

Valentine's Day is tomorrow.  Are you ready?  If not, I have a fun little pull up valentine for you with a cute little hidden sentiment using the #5902 Mini Scallop Frame die as well as many other sets listed below.  If you have already finished your valentine's, imagine this for other occasions using balloons, stars, etc. instead of hearts.  

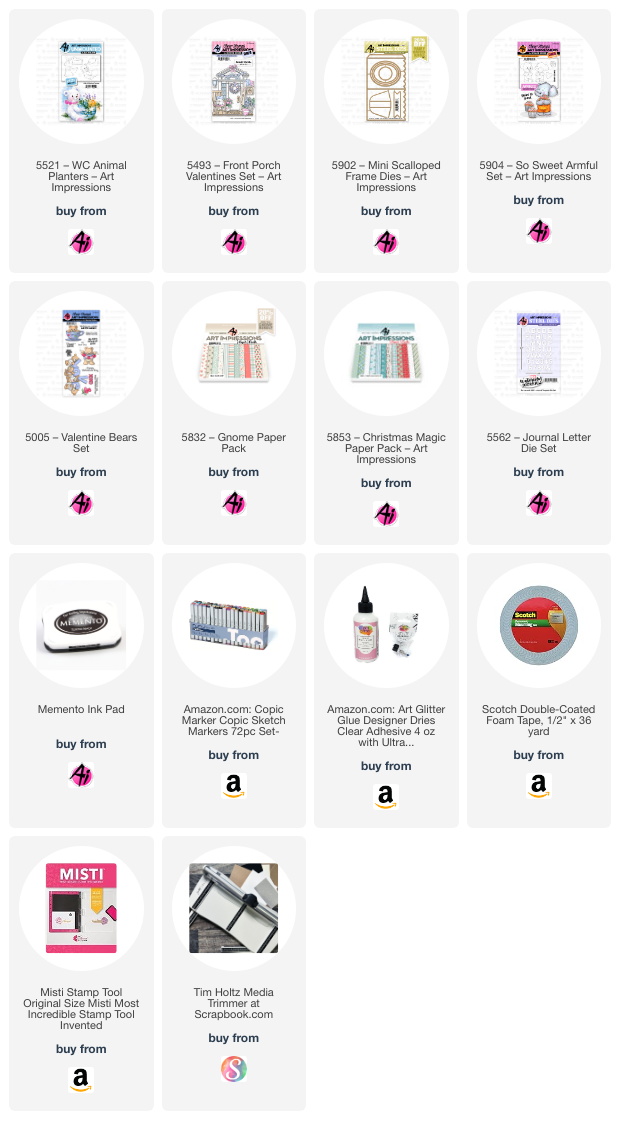
To begin, I took the bear image from the #5521 WC Animal Planters set and stamped onto copic friendly paper with Memento black ink.  I also stamped him to create a reverse image so that I could make his back leg and his left arm since the stamp set has a flower pot hiding both.  To do this, I stamped him onto a smooth silicone mat and then took my paper and pressed it onto the stamped image on the mat.  This will create a reverse image.  Using a misti is helpful incase you need stamp again to darken the image.  I colored both images with my copic markers, listed below.  I then used a wash rag and dabbed some alcohol onto it and lightly pressed it against the body parts of the bear to make him look fuzzy.  I fussy cut all the pieces (bear, back leg and left arm) and pieced him together using some foam tape between his legs.  I also placed a heart box of candy (from the #5493 Front Porch Valentine) in his arms.  I just love this cute little bear!  
I cut the #5902 Mini Scallop Frame using the brown hearts paper from the #5832 Gnome Paper Pack.  I cut a heart shape for the window and placed acetate on the inside of the window.  I also stamped the "You're So Sweet" and added a couple little die cut hearts to the inside.  I then placed a thin line of foam tape to the inside bottom scallop edge so the streamer wouldn't fall through.  I glued up the side of the frame and it is ready to decorate.  Don't forget to attach the easel to the back so your frame/card will stand up on display.

To make the pull up heart streamer, I die cut 16 red hearts (front and back) and strung them onto a white thread leaving about 2 inches above the first heart.  I die cut the letters for the sentiment "Love You" from the #5562 - Journal Letter die set and attached each letter to a heart leaving a blank heart between words.  Perfect size letters to make a cute little sentiment.  I cut two fishtail banner pieces in red cardstock.  I then cut a square 2 5/8 inch piece of red gingham paper and glued it to the bottom half of the back side of one of the fishtail banner pieces.  Snip off any paper showing in between the fishtail.  Take the streamer and glue the top thread to the middle of the banner above the gingham paper.   Take the other fishtail banner and glue the top halves of the banners together leaving the bottom half open so it can rest over the top of the frame.  I added the heart banner and bows to the front banner for some cuteness.

  Gather the heart streamer together over the gingham paper and insert into the top slit of the frame.  Some of the letters will show through the window but the message will be a mystery until the recipient pulls from the frame.

I hope you enjoyed my card today and your imagination is running wild with other variations.
Have a great day and keep creating!

Copics used:  E21, E23, E25
R20, R22, R24, R27

Monday, February 10, 2025

Hearts for you! by Sharon Caudle

 Hello AI Fans!

Have you finished all your Valentine cards yet? How about making some tags for a treat bag or two? That's what I've got to show you today. I love making cute tags and I had a lot of fun with this one. It could be for Valentines Day, could be for Easter, it could be for any occasion! I just love how they dress up a package!! I used a lot of sets for this one, and they are all linked below if you are interested in looking at them. I started out by stamping all the images onto a Copic friendly paper and coloring them with Copic markers that are listed below. 


So that's it for me today! Thanks so much for stopping by for a visit and until next time - stay crafty!!

Copic markers used:
R01, 02, 11, 20, 22, 24 and 27
YG13 and 17
Y00, 32, 35, and 38
E51, 53, and 55
R81, 83, and 85
B00
C5 and 6


Friday, February 2, 2024

Here for the Chocolate Card by Tasha!

Happy Friday Art Impressions Friends! 

Tasha here sharing a delightful Valentine's Day card featuring the adorable 5401 - Easter Chicks Set. Mixing and matching sets is one of my favorite crafting techniques, and this card was so fun to create.


To start, I stamped the two darling chicks, along with a bow tie, flower, and a tiny chocolate heart box from the 5493 - Front Porch Valentines Set. It's amazing how different sets can complement each other perfectly! Once I finished coloring all the images, I used the coordinating dies included in the sets to cut them out. Having the dies makes crafting so much easier.


For the background, I cut grass out of plaid paper and used the sweet heart pattern paper from Art Impressions for the sky. These vibrant colors and hearts work perfectly with the Valentine's Day theme.

To add a fun sentiment, I stamped "Here for the Chocolate" from the 5733 - Easter Sentiments Set. I then used a small banner die to cut out the greeting and layered it on a larger banner cut from pink glitter pattern paper because who doesn't love a bit of sparkle?


Lastly, I added layers of cardstock, glitter pattern paper, and a few glitter enamel dots to add dimension and shine to the card. The final result is a cheerful and whimsical Valentine's Day card that's sure to bring a smile to someone's face.


I hope this project inspires you to mix and match your stamp sets and get creative with your cardmaking this Valentine's Day season! Have a wonderful day!


Sunday, January 28, 2024

Buggy Valentines, Bunnies and Bees by Jami Steiger


Watercolor Weekend January 28, 2024


Hello everyone!  I hope everyone is having a great weekend.  

For my first card I wanted to make a Valentine card using the Ai set #5455 Birthday Buggy Set.  I love vintage VW Bug cars so I painted the car using Tombow marker #312 because that would be my dream color.  The balloons were each painted using Tombow marker #835, 817 and 772.  It is hard to see in the photo but I also added Wink of Stella in clear for a pretty shimmer.   For the red balloon I popped it up for added dimension. The heart balloons also came from set #5455.  I added the mouse from set #5425 WC Peeking Animals.  I wanted to add some more heart elements to the design so the heart garland was used from set #5493 Front Porch Valentine Set.  It is always fun to look at your stamp sets and dies to see if an element can be used to add interesting detail and texture to your card designs. The final touch was adding some flowers from set #5475 WC Flower Set 6.  The flowers were painted with Tombow #526, 817 and 177.  When all of the elements were painted I then die cut some clouds and the words "I love you".  To complete the card I used die set #5063 Rectangle Double Stitched to cut out my watercolor paper and then matted onto red cardstock.


 I am thinking ahead to spring!  It has been a cold, wet winter here in Ohio! 
 If you don't know me my favorite color is pink so this card was really fun for me to create.  I first started by painting the bunny in multiple colors.  I used shades of gray and added some rust color for added depth.  The bunny is from set #4874 WC Bunnies Set.  Next it was time to paint the stump from set #4871 WC Rustic Container Set.  I first stamped off the stump twice after coloring the stamp with Tombow markers #969 and 569.  Then I pulled out the color for shading and then I used Dr. PH Martin's to give the stump a more weathered look by brushing on the white using a "dry brush" technique meaning to not have much water on the paint brush and just lightly going over the image with the paint brush.  All of the flowers came from set #5475 WC Flower Set 6 which was perfect because there is a matching left and right directional flower.  I wanted to draw the eye towards the bunny in the center.  For the flowers I used Tombow markers #526, 025, 772 and 177.  The small grass from set #4051 Foliage Set was used to complete the setting.  For the final touch I added a bee from set #5561 Birds and Bugs Set.  I used the gorgeous pink gingham from the #5742 Easter paper pack.  


For the inside of the card I had a piece of paper left over so I took a paper punch and punched the edge of the paper to add design.


  • Thank you for taking the time to read my long posting.  As usual, if anyone has any questions please ask.  I am more than happy to answer any questions.  I hope you all have a wonderful day!


Saturday, August 19, 2023

Friendship Mini Journal - Cover and Pages 1-2 by Janet

 Have you seen the new Mini-Journal Template and the many new sets made just for its petite size? I don't know about you, but I'm in love! I could not wait to start playing with it. I have lots of ideas so I started putting them to work. My first creation is a friendship journal. I see this as something that I would give to a special person who is always there for me. It's such a unique gift to make and give to someone that you care for.

To begin, I used 5787 Mini Journal Template Set to create the journal covers and spine. If you've made the regular sized journal, it works the same way. You cut two identical panels and glue them together. Included in the set is the clasp so I cut that and also the border piece. The papers I used are from the new 5832 Gnome Paper Pack. The wood grain pattern is perfect for what I had in mind since I want this to reflect the nature theme I'll be using in the stamp sets. I also cut the hello sentiment and the stars using dies from the Mini Journal Template Set. I attached the clasp with mini pearl brads. This works very well to secure the clasp and it has holes in the each piece so you know just where to punch to fit the brads perfectly. The mail box is from the new 5787 WC Mini Journal Set. Of course, as with all the Ai Watercolor sets, they are not just for water coloring. They work really well for markers and pencils too. The bird is from 5561 Birds and Bugs Set. I drew a couple simple miniature envelopes and cut a slit in the box so I could slip them in to look like they are sticking out of the box.

Next I went to work on pages 1 and 2. The adorable rocker with the dog and cat comes from 5493 Front Porch Valentines Set. Both sentiments are from 5797 Little Things Sentiment Set. This is my favorite new sentiment collection. It's packed with 19 sweet phrases. The basket is also from 5787 WC Mini Journal Set. The flowers were stamped from a stamp in the 5493 Front Porch Valentines Set. I masked the flowers before I stamped the basket to create the combined image. I colored in the ground and used a grass stamp from 4051 WC Foliage Set 1. This is a go to stamp that I use a lot for grass in my scenes. I used the vine also on the mail box post. Last I added a tab cut from a die in the Template Set. I like how this can be used for a tag top or as a page tab. It's very versatile!

I hope you will enjoy my friendship mini-journal. I'll bring more pages over the next few weeks using new and existing sets. There is so much fun to be had with these little journals and so much of your stamp collection can be used with them. I hope you consider giving it a try.

Thanks so much for stopping by today and taking a peak at my mini-journal in process. I invite you to stop by the store to see all the new releases for your card and tag making projects.


Janet YouTube - Blog - Facebook - Instagram - Pinterest 

Monday, May 15, 2023

If Friends Were Flowers by Sharon Caudle

 Hello AI Fans

Sharon here, and I used a few different sets from Art Impressions to create my card.  I started off with #5405 Mrs Set from the Hats Off Line. I chose the flower hat to put on her (there's so many to choose from!). For the pot of flowers, I used a little pot of tulips that are in 5493 Front Porch Valentines Set. The cute dragonfly is from 5728 Mushroom Cubbies, and then I used the scalloped circle die from 5543 Journal Template Die Set and the heart that is on is from 5721 Nested Heart Die Set. I stamped all of them onto Cryogen White paper and colored them with Copic markers. I love having the dies to cut them out instead of having to fussy cut them all! 


Thanks so much for stopping by for a visit and until next time - stay crafty!!

Copic markers used:
E000, E00, E11
Y13, Y18
YG61, YG63
W2, W4
B000, B32
R20
RV32, RV34


Saturday, April 22, 2023

Spring Means Flowers (and bikes)! by Janet


Spring has sprung in my neck of the woods. I took out my bike and got her ready for the season. I washed the dust off from storage, added air to the tires and checked my breaks. Then I took her for a spin. It was so nice to ride through the neighborhood with the wind in my hair. Yay for biking season!

So - I had to celebrate by making this fun bike card using 5186 - Enjoy the Ride Stamp Set. This bike is just the best! I created the road and brick background using wide washi tape. I added the basket of flowers, heart banner, and bow from 5493 - Front Porch Valentines Set. The sentiment is from 5734 - Friend Sentiments Set. The main panel was cut with the 5063 - Rectangle A2 Double Stitched Dies to get a stitched edge. 

What do you like to do in the spring? Use what makes you happy to inspire your card making. You are sure to find something to help express it with Art Impression sets.

Thanks so much for stopping by today. I hope you'll stop by the store soon for all your card making needs. While you're there, make sure you check out the entire Cubbie line.

Wishing you a very crafty day!


Janet YouTube - Blog - Facebook - Instagram - Pinterest 

Monday, February 6, 2023

New release Front Porch Valentines Set by Sharon Caudle

 Hello AI Fans!


I love when new releases come out, don't you?!  Today I'm featuring a brand new set for the Front Porch Line from Art Impressions. And this one is all about Valentines Day! Lots of pinks and reds and hearts! LOL! Hope you like this new set as much as I do!! I stamped them all onto cryogen white paper and cut them out with the dies that are all included with the set after I colored them up with Copic markers. 


Thanks so much for stopping by for a visit today and until next time - stay crafty!

Copic markers used:
Y26, Y35, Y38
G43, G46
E21, E33, E51, E53, E55
B000, B21, B23
R22, R24, R27
T1
C0
YR21