Showing posts with label copic. Show all posts

Friday, April 15, 2022

All Are Welcome Card by Tasha!

 Good morning Ai Fans!

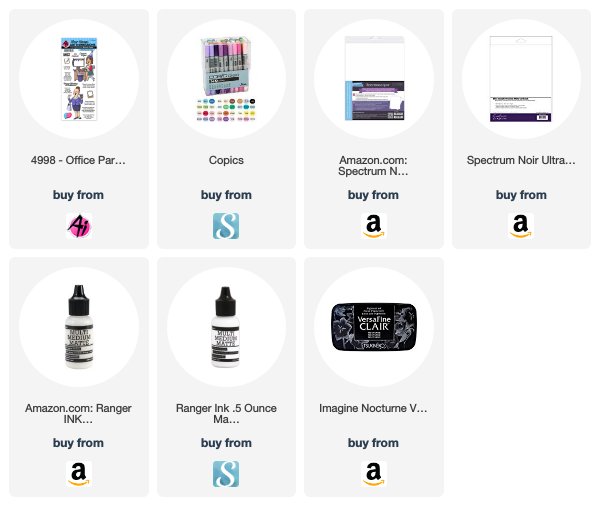
Tasha here sharing an Easter card created with the New 5512 - Front Porch Door Set and the 5488 - Front Porch Easter Set!

All of the Front Porch Door Sets include the coordinating dies making it super easy to cut all the pieces out. You can also use the door die to allow the door to swing open. I decided to keep the door closed and color the windows with yellow to look like the house had the lights on. I also love the blue and yellow color combination!


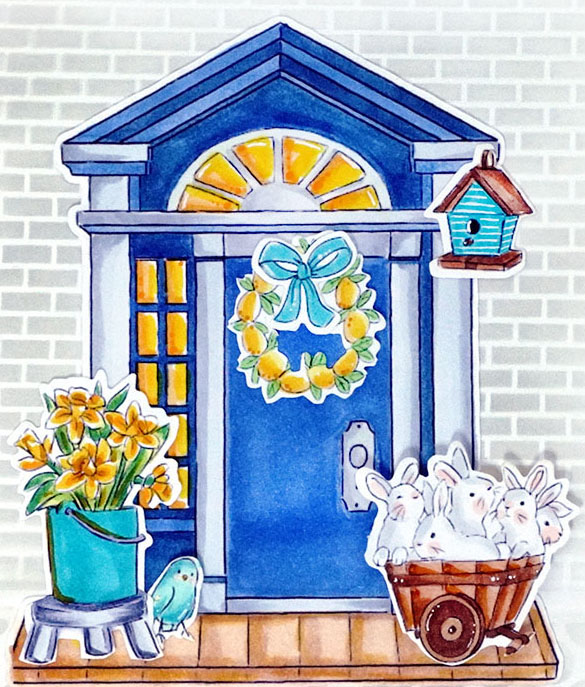
The wreath is perfect for Spring, Easter, or Summer. You can also customize it by having multi-colored eggs, or use yellow to look like lemons as shown. I think all the bright pops of yellow really makes this card happy. I also LOVE the little birdhouse!


For the sentiment, I stenciled a stone background and layered the "All Are Welcome!" greeting on to layers of blue and yellow paper. The Front Porch Door Set includes several sentiments perfect for year-round cards and projects!


Thank you for checking out today's project and I hope you are inspired to create a fun Spring/Easter card using the New 5512 - Front Porch Door and 5488 - Front Porch Easter Sets!


Wednesday, April 17, 2019

Just Add Water by Niccole Kulig

Hello Ai fans!!

Today I am sharing a card I made with the Windows to the World series set called Pleasures Window. I love how simple the windows are but yet they add such a punch to your card.


I started by diagonally cutting my patter paper and adding a strip of glitter paper for a little pop. I put two enamel dots in the upper left corner to even out the card. I colored my window with Copic markers, and did a double frame on it so it stood out a little more. Raised it up with foam tape. 

The sentiment I chose was from the WC - Sentiments Set. I thought the sentiment fit perfectly with what I wanted to say  with my image.   


It came together so quickly I had to make two cards. I can't tell which one I like better ... the square cut window or the window where I fussy cut around the words.  Which one do you like better?? 

In case you are wondering the window says "The pleasures of life are simple, just add water." Next time I want to water color the window.

Copics Used:
BG01, BG02, BG05, BG72, BG75
C3, C5, C7
E47, E49
G40, G43, G46
R24, R27, R29
W1, W3, W5
YG63, YG67, YG95, YG97 
YR21, YR23

Until next time ... Hugs & inky fingers!


Friday, February 22, 2019

I Wet my Plants By Jessica Shier

Hey Ai Fans!

Today I'm sharing a card using the Gotta Garden set. I know some of us are still experiencing freezing temperatures and snow falls, so hopefully this will remind you that spring is around the corner. Plus don't we all have a crazy garden person in our lives that would be tickled by this stamp set!? I know I do!


I first stamped the gnomes and the crazy garden lady, from the Gotta Garden set, with black ink and then colored them in, using copic markers, colors listed below. I also fussy cut those 4 images out using a craft knife to get into the smaller areas around the garden hose. 


The background I drew and colored with copic markers. I also drew the sign and trimmed it out then embossed the sentiment with white embossing powder. This set has so many good puns so I tried to incorporate as many as I could! I adhered the sign and the 2 gnomes on to my background and then stamped the "It's Birthday Thyme" with Salty Ocean Distress Oxide ink. 


I used one of the Art Impressions 4265 Action Wobbles behind this happy gardener, which makes me laugh every time she wobbles! She is just so excited. I love the bit of interaction these wobbles add to a card design!


I also used one of the gnomes on the inside. Which I had to cut and color again because I lost one, he is still MIA. I stamped two more sentiments that are full of puns and die cut them using one of the Flag Double Stitched Dies. 

Copic Markers Used:
W9, W6, W3, W1, W0
C1, Y18, Y02
R29, R17, R05, R02
E77, E74, E59, E51, E35, E34, E31, E15
G99, G94, G46, G17, G14
YG67, YG63, YG03
B12, B00

Thank you so much for stopping by today!
Happy Stamping!

Friday, January 11, 2019

XOXO Valentine Bears by Jessica Shier


Hello Ai Fans!

It's Jessica! Today I'm working on a couple of Valentine's Day Cards (or really any occasion) using the Valentine's Day Bears 5005 set. I also used a similar design to use as both a vertical and horizontal card. I decided to mix it up and go with bright tones.


I love playing with color. That is why there are two card designs. I couldn't decide on which color to use. Since I was already making two cards I went ahead and made one in a vertical layout and the other as a horizontal. They are quite similar with slight differences. For the vertical layout I adhered everything flat to the green cardstock then used adhesive foam to pop it up against the white panel. The horizontal layout was created with the bears and the "you" sentiment popped up while everything else is flatly adhered. I used the you from "you perk me up" a sentiment also found in the Valentine's Bear stamp set. 

Thank you all for the warm welcome to the Art Impressions Design Team! I'm so happy to be here and I hope you find some inspiration everyday.


Copic Markers
Bears - C1, C3, C5, E81, W0, W3, RV52
Sweater - R89, R37, R14, R12
Heart on Sweater - R89, RV55, RV52
Love - Y00, Y02, Y18, Y38, R14
and of course 0 Colorless Blender


Happy Stamping!


Tuesday, June 19, 2018

Craftiness = Happiness by Jil Lebel

Hello Ai fans!

Today I used the Craftiness = Happiness mounted stamp from Hobby Lobby. My friend Char and I go way back.  In fact, we met on the internet in a rubber stamping e-mail group in June of 1998! It was only fitting that I had to get this stamp to celebrate the anniversary of us being friends for 20 years.
This particular card is a birthday card.  I used a greeting from Office Party Set 4998. The two combined great to make this fun easel card.


The image is stamped with My Favorite Things Intense Black ink onto Spectrum Noir paper and colored with Copic markers.  The colors are listed below.  The panel is cut out and mounted onto a standard sized card panel.  The patterned papers I used are Picnic Table from Recollections.
 It was very simple to turn the standard A2 card base into an easel card.  An A2 card is a 9" x 51/2" piece of card stock scored at 41/4".  To turn it into an easel card, just score it at 21/8 on one flap.  Then you will need to attach your decorative panel to only the bottom half of the easel.  I added some rose trim to hold everything up once the card is opened.  I also stamped the sentiment inside. 


Copic Colors used:
Faces - E000, E00, E11, E04, R20
Hair - E30, E31, E33, E35, E37, C1, C3, C5
Blue - B00, B32, B34
Green - YG61, YG63, YG67
Yellow - Y11, Y32, Y35
Pink - R81, R83, R85
Orange - Y35, YR14
Grey - C1, C3, C5
Brown - E30, E31, E33, E35

Thanks for stopping by and Have a Great Day!

Sunday, October 20, 2013

Art Impressions and Ruby Rock-It Baby Card

Hello Ai Fans! 
 We're in the midst of our product swap with Ruby Rock-It!
My beautiful papers are from their My Romance collection.
I chose Little Dress-up girl (Sku#H940) from Art Impressions as my image.


The ribbon is found here and the die cuts can be found here.
Even though it's a wedding set I thought it worked well with a baby due to the pastels and the congratulations theme.


Don't forget to play in our perfect papers challenge going on right now!


  Follow Me on Pinterest

Friday, October 4, 2013

No Line Coloring.

Hello Ai Fans!!
Its me Piali here sharing a tutorial today.
Do you remember THIS post???
First time I tried out the No-Line coloring technique....after that few Ai fans asked me about that technique, last week I received an email from Audrey ( Edmonton, Canada) requesting more details.... like a tutorial for this no-line coloring . 
So Audrey here is a step by step photo tutorial ...just the way I did my card, I'm not a pro, so hope this helps!!!
You all can find video tutorials HERE, HERE and HERE....more on Youtube.

I used new Ai People stamp...Sally Swimmer Set (Sku#4323) 
Love this image!!!

Step#1
I used Memento Angel Pink ink for stamping...you can use any very light colored ink pad...I sometimes use Distress ink-Antique Linen too.
I use Copics for most of coloring.

Step #2
One important tip( I found it very useful)...make sure to stamp the image with black or dark ink on scrap paper for reference.Sometimes, light stamped image is very hard to see that's when reference image comes handy.


Step #3
Simple copic coloring....

You should color the image like usually, just follow the lines of image.
Try to do a bit of shading so that all the fine details of the image are seen.
I color the skin tones first , once the main body frame is done it gets lot easier.

Step #4

Finish coloring...
Make sure not to use very dark shades, blending the dark colors quickly so that there is no harsh line visible.
It gives a cool Water colored look!!!!!


Hope you all liked my tutorial!!!!
Don't forget to checkout our ah-mazing Try-Folds release...Check HERE.


Thanks for stopping by...
Have a Happy World Card Making Day tomorrow!!!

Sunday, July 28, 2013