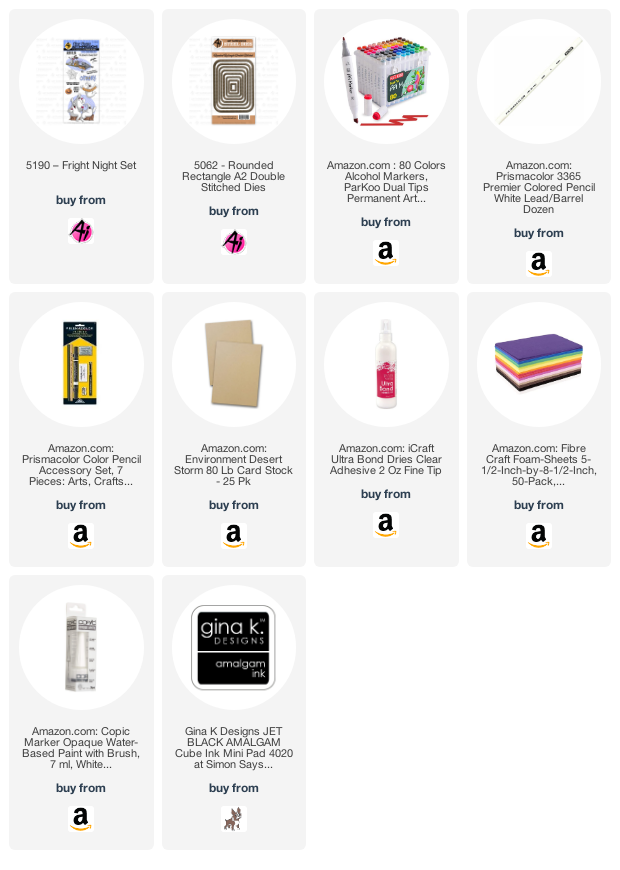
Showing posts with label Jessica. Show all posts

Friday, August 2, 2019

Happy Birthday Sloth Flip Card By Jessica shier


Hello Ai Fans! 

I wanted to create some flip cards this month. The first one I'm going to show you is this Happy Birthday design using the sloth flip card set, which I paired with the Flip card die


I used various Copic markers (list below) to color in the sloths. Stamping both the front and back on to Neenah 80lb Solar White card stock.  I kept the shading simple and used a very limited amount of markers. I've said it before, but I love the full colored packaging of Art Impressions stamps because it gives you such a great example of how to color and shade! 

Once I was done coloring I fussy cut both of the sloth images out. I decided on a easy watercolor background using a Everyday Tintable from Concord and 9th. These have a emboss resist background pattern and I chose the herringbone for this card. I got out my Kuretake Gansai Tambi Watercolor set and used several of the paints to create this blue to green gradient wash background. 


While that dried, I used the Flip card die and followed the easy directions on the back of the packaging, to create a Neenah 110lb Solar White card base. I accidentally scored all the way across the card base instead of just the areas around the flip portion. Luckily it didn't cause any issues, with this design. The Sloth Flip Card set also comes with some fun sentiment stamps but this time I used the die words from the Flip card die set for the Happy Birthday, I die cut those using black card stock. Before I adhered the Happy die cut, I scored a piece of light gray card stock that is trimmed to cover the flip portion of this card. This gave it a decorative border and added some interest. It also helped to conceal the score mark. 


I trimmed a portion of the watercolor background down and saved the strip for the inside. I adhered the large portion of that to the front of the Flip card. Then attached the sloths over top, positioning them so it looks like they are holding up the Happy! I did the same for the backside of the sloths and the small strip of watercolor. I also used the black Kuretake watercolor paint to add some shadows to where the sloths are sitting.  

Copic Markers Used:
E77, E74, W3, C1
E31, E35

Kuretake Gansai Tambi Watercolors:
50 Pale Aqua
57 Turquoise Green
52 Ocean Green
20 Black

Thank you so much for joining me today! Happy Stamping! 


Friday, July 26, 2019

Yoga Ladies | By Jessica Shier

Hello Ai Fans!

It's Design Team member Jessica here and I'm back with another birthday card! This time I'm fussy cutting the Yoga Set. These two ladies are part of the whole group image but can be easily cut apart from the rest to be used separately.


I stamped the Yoga set image on to a piece of Neenah Solar White 80lb cardstock with Amalgam ink. For these ladies I used Copic Markers to color them in. The list of colors I used is below. Once I had them colored up I used my Fiskars scissors to fussy cut them away from the rest of the group. I also used a craft knife to get into some of those harder to reach areas. The lady in purple does have a pony tail but it couldn't be salvaged, so she has a shorter hair cut. 


I've been experimenting in the craft room so the background was a trial run but I like the way it came out. For this I used Black cardstock, a stencil and texture paste mixed with Neon Aqua Pigments (neon pink and neon blue). This gave me a lovely pastel pink, purple and blue background. Which pops against that black cardstock! I let that dry and mounted it to a Neenah Solar White 110lb A2 sized cardbase. 


The Yoga mats I made for the ladies, are cut from pink and blue craft foam using the second to smallest Art Impressions Rectangle Double Stitch die. Normally I use the foam as a dimensional but I liked the texture of this craft foam and thought it fit well with the Yoga theme. Using a larger rectangle die I cut a piece of Neenah 110lb cardstock and adhered the yoga mats. Then I stamped the sentiment "Keep calm and yoga on" in black ink using my stamp platform in case the foam got in the way, which it didn't! Next I stamped the balloon that also comes in the Yoga Set. I situated it so that it looked like the yoga person at the top of the sentiment was holding it. Since the balloon was a little long, I stamped it again on a scrap piece of cardstock, colored it in and fussy cut it out. 


I attached the white cardstock panel to the texture emboss with some strong glue. Now all I had left to do was adhere the ladies to their yoga mats and attach the cut out balloon. I used some scrap craft foam  behind the presents and cake, so that they were even with the Yoga ladies. 

I forgot to get a photo of the inside but I did use another sentiment from the Yoga set that says... 
"It's just a birthday! Nothing to get bent out of shape over!
lol! 

Copic Markers Used:
W6, W3, W1, W0
E59, E77, E74
E51, E35, E31, E00
Y00, Y02, Y21
YG01, G40, YG41
BG13, BG11, BV11
RV93, RV55


Thank you so much for joining me today! Happy Stamping!


Friday, July 19, 2019

Sloth-some set By Jessica Shier


Hello Ai Fans!

This week I'm coloring up some sloths from the Sloth- some set with Prismacolor Pencils. Since the new challenge is Animal Print I thought coloring animal fur would be appropriate! I colored these very similar in this video here. 


I started off by stamping the sloths (Sloth-Some set 5002) hanging from the tree branch three times on a piece of Kraft cardstock, using Gina K amalgam ink. I used some Copic markers to help me map out where my colors would go. I have the list of all the colors I used down below, broken up into sections. To add a bit of depth and color to the Neenah Dessert storm cardstock I used Distress Ink in Pumice Stone with a make up blending brush. Blending that ink around the sloths, making the edges the darkest. 


I used another piece of Neenah Desert Storm cardstock to re-stamp the sloths three times so that I had 3 extra party hats and balloons. I decided on a black and white pattern paper to border the sloths and would need to cut off those sections which would slice right through them. By re-stamping and coloring those 6 elements I was able to fussy cut them out and place them over the top of the chopped hats and balloons. Plus it adds a little dimension. Speaking of which I also added some green craft foam underneath the sloth kraft piece. 


I mounted the sloths with the green craft foam on to a piece of MFT Black and White striped pattern paper, then to Neenah Solar White 110lb cardbase. For the sentiment I used Tombow Markers (173 & 493) to make it gradient from green to blue, playing off of the colors of the balloons and hats. I also fussy cut the sentiment with my Fiskars scissors, then added it to the top right hand side with a few adhesive foam squares. 

Prismacolor Pencils Used:
Sloths
PC935 Black PC938 White
PC1067 90% Cool Gray          
PC1063 50% Cool Gray          
PC1060 20%Cool Gray           
PC1076 90% French Gray       
PC1074 70% French Gray
PC1072 50% French Gray
PC1068 10% French Gray
PC1082 Chocolate
PC1082 Chocolate
PC939 Peach
PC9328 Blush Pink  

Blue Blend
PC208 Indanthrone Blue
PC133 Cobalt Blue Hue
PC1040 Electric Blue
PC1086 SKy Blue Light

Teal Blend
PC907 Peacock Green
PC105 Cobalt Turquoise
PC992 Light Aqua

Green Blend
PC908 Dark Green
PC912 Apple Green
PC989 Chartreuse


Thank you so much for joining me today! 
Happy Stamping! 


Friday, July 12, 2019

Birthday Laugh Lines By Jessica Shier

Hey everyone!

Today I'm sharing a birthday mashup! I thought it would be funny to combine two sets from Art Impressions, the Birthday Laugh Lines with the Yoga set. This ole' guy has some stretching to do!


To start off with I stamped the Birthday Laugh Lines guy on to a piece of Neenah Solar White 80lb cardstock. I did the same for the Yoga ladies too. Using Copic markers I colored them in, list of markers used below.  I also stamped the sentiment that I thought paired hilariously with these two images. I inked that up with Gina K Wild Wisteria ink and trimmed it down to a slim rectangle. 


I wanted the ole' guy in the foreground with the ladies in the background. So I trimmed most of the area on the guy's left, using a trimmer to get straight edges when I didn't have to fussy cut.  These are both larger images and this is an A2 (4.25 x 5.5inch) card so there wasn't a lot of room to place these funny people. Both images are brightly colored so I needed something to separate the two. For that I used some vellum cardstock. This worked and gives a window feel to the design; like the Yoga ladies are in another room. 


I also created a black cardstock edge, using the Art Impressions Rectangle Stitch die, second from largest. Then used the same rectangle die on the ole guy so that the panel fit into the black frame. All I had left to do after that was layer and adhere everything. The layers are; Neenah 110lb cardbase, Yoga ladies, vellum, Birthday guy/black frame and then the sentiment. 

Copic Markers Used;
100 Black
W9, W6, W3, W1, W0
W74, W35, W51, W34, W31, W18, W17
E00, Y02, YR02, R14, R27
Y26, Y23, Y21, YG67, YG03, G14
BV04, BV02, BV00, RV09, RV55, RV11

Thank you so much for joining me today! Happy Stamping! 


Friday, July 5, 2019

Tropical Island Window | By Jessica Shier

Hello Ai Fans!
Today, I'm sharing a fun tropical card, using the Island Window set. I've enjoyed using these Window stamps over the last month! I know I've said it before, but one of things I most like about these style of stamps is that they are great for quick cards! This time of year can be so crazy busy yet these style of stamps also give me enough area to experiment with coloring, so they are also fun! For this one I used Copic markers. I also added some texture behind the scene with some simple layers, using cardstock, cork and a stencil. 


I first stamped the image and colored with Copic Markers. Since I used bright and bold colors the last time I colored one of the window stamps (Desert Window with Tombow markers), I decided that I would try a lighter palette of colors. I have the markers I used listed below. 
The reflection on the water was tricky, since orange and yellow like to make green. I used the Copic Colorless Blender to push back most of the blue which helped. Another small coloring detail I did is adding a gradient of dots in the sand. I used the E34 for this. Small things like that can add simple but fun textures.  


I used one of the Square Rectangle Double stitch dies to die cut my colored Island Window, this time leaving the fun sentiment intact and added a slight black cardstock layer underneath. This card was feeling a little flat so I used an EK Success border die to create a decorative edge on the cork paper. then topped that with a layer of Lovely Lavender cardstock, before adhering the other pieces over top. 


The card base is 4 1/4 x 4 1/4 inches. I stenciled over the top of it using the Radiating Rays stencil and Sweet Corn ink. I also used liquid glue to attach any cardstock to the textured cork paper.

Copic Markers Used:

Thank you so much for stopping by today! Happy Stamping! 


Friday, June 28, 2019

Pedal Pushers with Island Window | By Jessica Shier


Hello Ai Fans!

This week I'm using the Island Window stamp as a backdrop for these fun loving gals from the Pedal Pushers set! 


For this one I started off with stamping these fun loving Pedal Pushers on to a piece of Neenah 80lb cardstock using Gina K. Amalgam ink. I colored these ladies with Copics, colors are listed below. Once I had them colored up I used a T-square and a W6 Copic marker to create the sidewalk. Then I trimmed the sidewalk and the ladies out, only the area above the tires though. That way I could layer it over the background.


This was super easy and quick to make. I first used a brick stencil with pumice stone Distress ink on top of a piece of fog cardstock. I kept the ink blending light and let it fade off around the edges. Then I stamped the Island Window three times across it. This was easily done with Distress Oxide inks since they are a pigment ink and layer nicely over colored cardstock and dye inks. I attached those together and ran them through with a rectangle die then layered a piece of  pink craft foam underneath, for a slight dimensional look. 


The sentiment is from the Pedal Pushers set also! There is a certain Birthday Wheelie Dog or Workout Gal Wheelie that the sentiments in this set would pair nicely with too. For this card though I simply stamped the "This is how we roll." with Picked Raspberry Distress Oxide ink on white cardstock.

Copic Markers Used:
C7, C5, C3, C1
W9, W6, W3, W1
E77, E74, E59, E51
E35, E34, E31, E17, E15, E11
YR27, Y38, Y35, Y26, Y21, Y02
B99, B95, B93, B02, B00
BG000, BV04, BV02, BV01
RV55, RV09, R85, R83


Thank you so much for joining me today! Happy Stamping!


Friday, June 21, 2019

Desert Window Pop Art Inspired | By Jessica Shier

Hello Ai Fans!

It's officially summer! This Desert Window set is perfectly paired with a few Succulents set sentiments to make a bright pop art watercolor design. I even used Tombow Markers for the first time and the Art Impressions Watercolor Palette. So easy and fun! I hope you enjoy the card process video I have below. 


To start this card design off, I stamped the Desert Window image 4 times on a piece of Arches Cold Press watercolor cardstock. I used Versafine Clair Nocturne ink and clear embossed each one. I'm going to use this Desert Window image in a similar way as I did with the Eagle Window in this blog post for Art Impressions that I did last week. I love the elegant sentiments that come with these window images but I also like the versatility of using other Art Impressions sentiments with them to make something even more unique. In this case, I used several phrases from the Succulents set. I even used one of the succulent stamp images as a backdrop to the center "Just for you" sentiment. I used vellum cardstock and white embossing powder for a subtle look. 


It's been a while since I have colored with a marker like the Tombow, so I really took some time playing with them. By mixing and layering the colors in this funky pop art inspired design, it was so fun letting loose and creating purple suns and pink cacti! The great thing about this though is if you are not a big fan of bright colors as I am this would also look lovely in pastels or muted tones. Since today is the first day of Summer I thought the bright colors were appropriate. 


Card Process Video


Tombow Markers Used:
Brights set
755 Rubine Red
743 Hot Pink
933 Orange
055 Process Yellow
133 Chartreuese
173 Willow Green
493 Reflex Blue
665 Purple
636 Imperial Purple


Thank you for joining me today! Happy Stamping! 


Friday, June 14, 2019

Home Grown Eagle Window By Jessica Shier

Hello Ai fans!

This month I'm using some of the Windows to the World stamps. This Eagle window caught my eye, and with it getting warmer in the Northwest, Americana decor is popping up everywhere! Today is also Flag Day (June 14th, 1777) in America. Perfect time to combine the eagle with these red white and blue pattern papers.


I first stamped the Eagle Window image with Gina K. Amalgam ink and colored it in with Copic markers, colors listed below. I used a Gelly Roll white pen to add a few highlights through out the image.  This went really quick and I also used minimal markers. Images like these window stamps, are great for the summertime, when we might be a bit more busy. All of them  are so picturesque,  they can simply and easily be the focal point to any card front.


This image has a beautiful sentiment that surrounds the square image but I trimmed that off and added a sentiment "Home Grown" from the Succulent set. I thought that sentiment fit so well and I really enjoy mixing stamp sets together. I knew I wanted to add a gold border with embossing powder around it. This is easily done by swiping your clear embossing ink pad across all the edges. 


The pattern paper I used for today's card is from the Pebbles America paper pack. Unfortunately it is another bundle of pattern paper that I've stashed away for years, I've linked to a similar one below. I love that I am using my pattern paper more instead of hoarding it! To add a bit more stars I used a die set from Papertrey Ink and die cut the three sketch stars from vellum. I adhered those to the card in a cluster with liquid glue and added the heat embossed sentiment "Home Grown" from the Art Impressions Succulent set. I left the inside blank. This card could be used for anything, from celebrating someone in the military, to July Fourth greetings to a friend.

Copic Markers Used:
W9, W6, W3, W1, W0
E77, E74, Y18
B99, B95, B93, B91
YG67, YG45, YG03

Thank you so much for joining me today!
Happy Stamping!


Friday, May 31, 2019

You Clever Cat | Cubbie card | By Jessica Shier

Hello Ai Fans!

I hope you guys have been enjoying these fun cubbies for the challenge #257 Furry Friends. Today I wanted to share this fun card I made using the Art Impressions Cozy Cat Cubbie. I still had the rainbow background I made for the Hero Arts 45th Anniversary blog hop and I thought it would look cute with this playful stamp set.


I stamped all my images out on some kraft cardstock. I selectively stamped a few of the cat beds, I did that by inking the area around the bed on the cat cubbie. I'm going to fussy cut those images, so the rest of the lines wont be seen.


This time, instead of using Copic markers, I used watercolor pencils. This is a inexpensive set I found at my local craft store. I've never used them on kraft cardstock and was pleasantly surprised by how well they colored. These pencils are not name and only numbered, so I wont be listing those today. The kraft cardstock I'm using is just regular cardstock from Neenah. So, it does not take to a lot of water well, but these watercolor pencils react and blend really easily. For all the white areas I used a white Prismacolor pencil.


I used a piece of black cardstock and stamped most of the sentiments and the yarn ball, all over half of the panel. Then I used clear embossing powder and melted that with a heat gun. I took the full panel that was die cut with the Hero Arts circle confetti die and adhered a piece of white craft foam behind it.

If you would like to see how the rainbow background was made check out this blog post on the Art Impressions blog.
Or click here and head on over to my you tube video showing the process.

 Once it was dry I sliced the panel at a diagonal and adhered one half to my black cardstock. Last step I adhered the kitty cubbie and extra bed, then attached the little cozy kitties to areas on the cubbie. 


Alright guys that's it from me! Thank you so much for joining me today!


Friday, May 24, 2019

O' Frap! Spring Chicken Set | By Jessica Shier

Hello Ai Fans!

With the release of those cute Hedgehogs and adorable Pandas, I decided to explore more of the cute critters in the Funny Farm line of stamps. I chose the Spring Chicken set and also the Oval Double Stitch die. It was not my intention to make the background the shape of a egg but it does work so well! 


I started with stamping the 2 chickens with Gina. K. Amalgam ink then coloring them with Copic Markers. I do have the list of markers I used below. This time I used maily cooled tone grays to match the same tone of the gray cardstock. After I was done coloring them, I fussy cut the pair out and inked the edges with a Memento black marker. 


For my fun egg shape I trimmed a piece of Gina K. Lemon drop cardstock with the Art Impressions Oval Double Stitch die. I believe I used the second from largest. To get the rays I ink blended 
Distress Oxide Ink in Tumbled Glass, through a radiant rays stencil. It didn't quite reach the bottom of the oval. But I easily remedied that with the green cardstock, which was a scrap and already had a curve. I use the same oval die on the green cardstock so that the stitching would continue all the way around. 

I've also been using some colored craft foam to create dimension lately. I cut some of the orange foam with a Art Impressions Circle Double Stitch die and also a darker yellow cardstock. I layered those so that the cardstock was on top and the orange craft foam is only glimpsed from the side. 

I cut two colors of gray cardstock with two different types of edge dies, just to mix it up and add more texture. 


For the sentiment I used a Distress Oxide ink in Abandoned Coral. I love this sentiment, I am not a morning person and only coffee will get me up and going. To create the speech bubble I sketched a oval around the sentiment and added a point. Then fussy cut it out and erased the pencil marks. I popped this up with some foam dimensional squares. 


The inside I used another fun sentiment from the Spring Chicken set, which I paired with the party hat wearing chicken. 

Copic Markers Used:
W6, W3, W1, W0
C5, C3, C1
E77, YG63, B00,
R05, R02,
Y38, Y35, Y21


That's it from me! Thank you for stopping by today. Happy Stamping!