Showing posts with label Day Spent Window. Show all posts

Sunday, July 16, 2023

Pet Sympathy by Reneé Matarese

 Hello Ai fans!

Today I'm sharing a pet sympathy card that my friend Jess requested. One of her other friends just lost their Corgi named Rocket.

I immediately thought of the M4584 – Day Spent Window from Art Impressions.


I know so many people say that the animal crosses the "Rainbow Bridge" when they pass so I wanted to have a rainbow on the card. I used 5725 – Nested Square Dies5463 – Slimline Dies Set for the banner,  Bleed Proof White to add some fur texture to the Corgi, 5543 – Journal Template Die Set for the heart and 5562 – Journal Letter Die Set for ROCKET.


A student at school gave me this card with some sweet gifts.  I hate to recycle something that I can reuse.  I decided to pull the cloud and rainbow off and repurpose them for the card. Imagine my surprise when there turned out to be two rainbows!  I made two cards to give her a choice.


I die cut a cloud that I have to cover over the text that I didn't need.


I went to Google and tried to find a Corgi to copy.  I found this photo and on the orange trimmed card I masked off the ear and tried to draw an ear to look like his.  I hope this somewhat resembles what the real Rocket looked like.


I cut off the sentiment because I just wasn't sure.  It's a BEAUTIFUL verse but talks about spending the day together.  Since they can no longer do that I wasn't sure if that would be painful for them.  Better safe than sorry.  I'll save using the stamp and verse for when a friend gets a new dog.


Friday, May 12, 2023

A Day Well Spent Card by Tasha!

 Happy Friday Ai Fans!
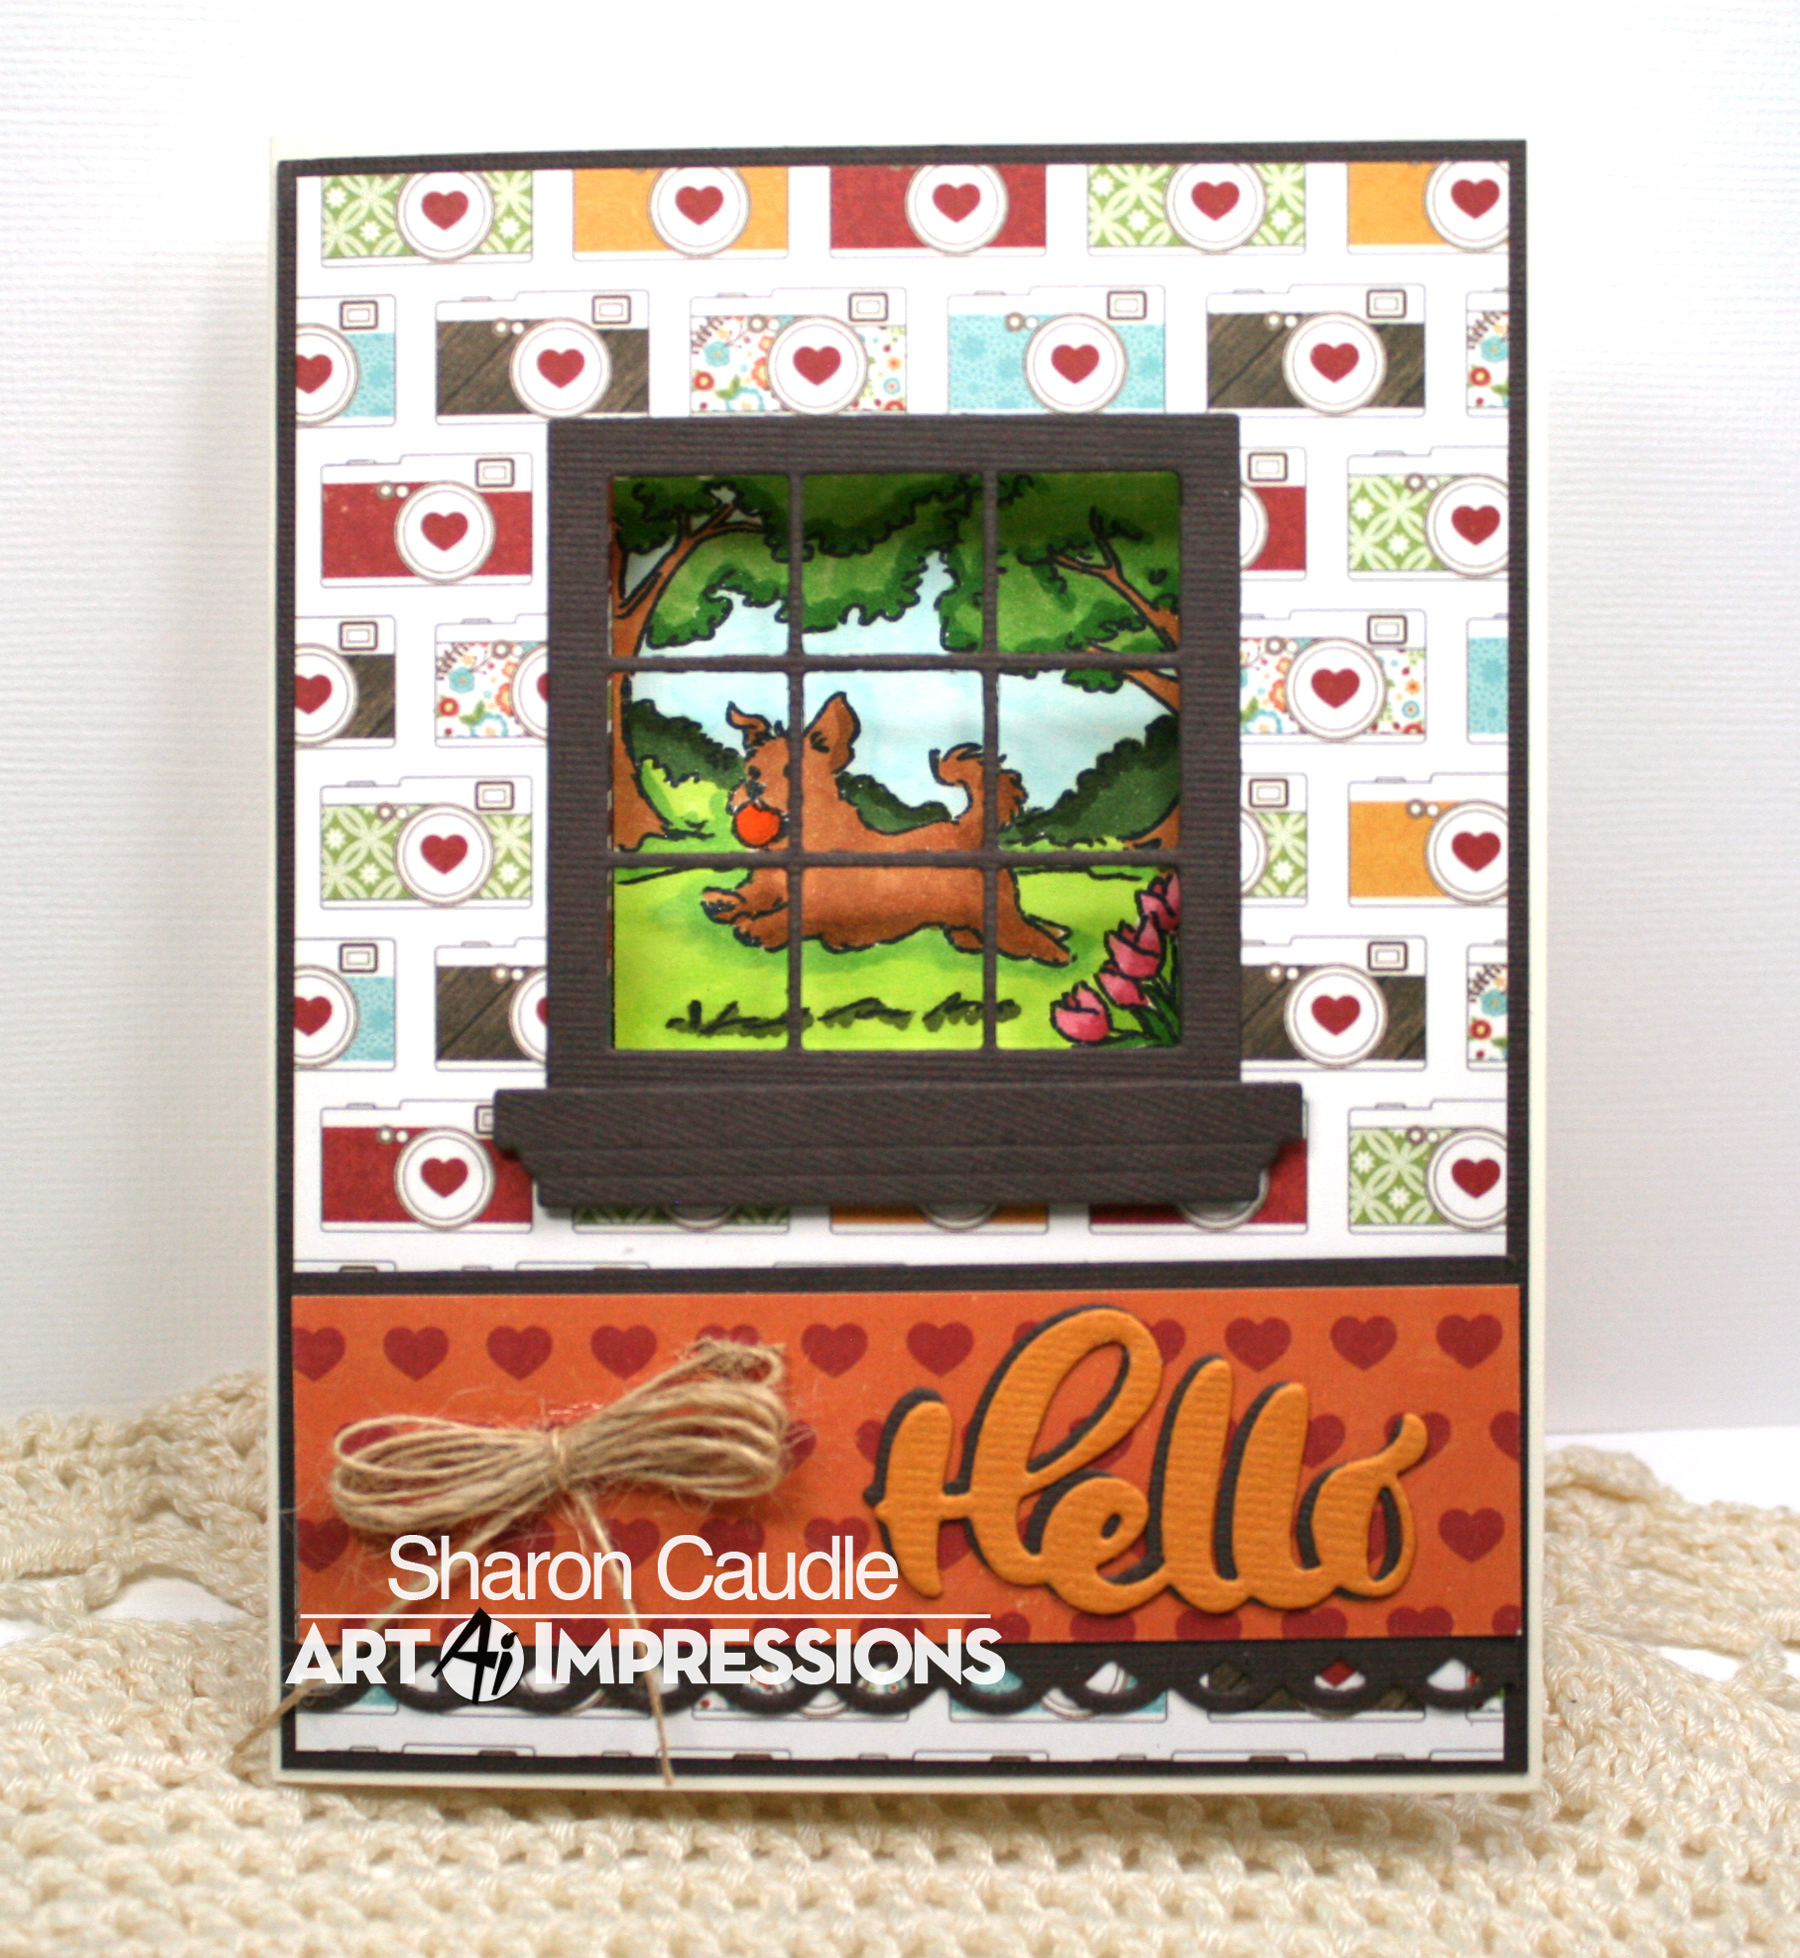
Tasha here sharing a card inspired by the new Furries and Feathers Challenge #351. I love dogs and this challenge was a perfect opportunity to use the fun M4584 - Day Spent Window Stamp


This image was stamped with black ink and colored with Copic Markers. I love that the Ai Windows have a little scene and a sentiment all in one stamp. This makes is super easy to create greeting cards or use on your scrapbook layout. I also love the way the greeting goes around the window.


Lastly, I added layers of silver glitter paper, mirrored paper, a green pattern paper, and gray card stock. I also stenciled a cloud background to go behind the happy dog. I enjoy making clouds and thought the bright blue clouds worked well with the little Spring scene.

Thank you for checking out my project and I hope you all have a wonderful day!


Monday, November 7, 2022

Art Impressions Shadow Box Window Die with Windows to the World

 Hello AI Fans!


Can I have all the Windows to the World fans raise their arms? Woah! I felt that gush of wind all the way in Reno!  So if you have a collection of Windows to the World stamps and are looking for something else to do with them, you can stop right here.  Bonnie came out with a Shadow Box Window Die Set that works with every single Windows to the World stamp you have! Every single one! I don't know about you, but I absolutely love shadow boxes!! So I took one of my WTTW stamps that I had to have cause it reminds me of my little Shih Tzu, M4584 Day Spent WTTW.  I stamped it onto Cyrogen White paper and colored it with Copic markers. Then used the Shadow Box Window Die Set to cut it out.  It actually cuts out the stamp leaving the sentiment surrounding the image behind. I love how it looks!!  There are new stamp sets that go with the new die set that contains an extra image, but it also works with all your old WTTW images too! 


Thanks so much for stopping by today and hope you have a great week! 


Copics used:
YG01, YG03, YG13, YG17
G43, G94, G99
E33, E35
R81, R85
B000


Monday, April 1, 2019

Day Spent by Carol Hintermeier

Hello Ai Fans!

My card today features the so sweet Day Spent Window set.  This is such a quick and easy stamp to use, so I made two cards!  One card is a simple easel style and the other has a die cut window in the card front to show the image that's adhered to the inside.  The sentiment on this stamp is perfect to use to send to a friend:  "A day spent with a friend is a day well spent indeed."


Have you noticed how so many of the stamps that are in the watercolor line also work with traditional cards?  The WC Sentiments Set was used for both of these cards.  I thought that the sentiments went perfectly with the sentiment that is around the scene.


For this card I used one of the Square Double Stitched dies to cut a window in the card front.  I used the same size die to cut the yellow paper to layer behind the stamped image.  I colored both images with Copic markers listed below.


This next card is a simple easel card.  I used an A2 card base that I added a second score line to at 2-¾" to create the easel.


The main thing to remember is to add adhesive only to the bottom portion of the square so that the image will pop up with the card open.


I used one of the Flag Double Stitched dies to make the piece for the inside of the card that will help the easel to stand open.  I added some Nuvo Crystal Drops to both cards for a bit of embellishment.


Thank you very much for stopping by today!  I hope your week is filled with a lot of crafty fun!


Copic markers:
G03, G07, G09, G14, G19, G20, G28, G29, 
YG01, YG03, YG11, YG13, YG63, YG67,
B0000, B000, B00, N0, N2, E33, E35, E39,
R30, R32, R35, R37, Y11, Y13, Y15

Thursday, August 4, 2016

New Challenge 190 - Glitter & Shimmer!

Hello, Ai Fans!
We're back with another challenge this Thursday! First, let's wrap of last week! We had some fabulous entrants for our "Sweet Summertime" Challenge!

Top Spot is awarded to...

 Congrats, Heidi! We love your sweet watercolor card wit the Cottage by the Beach, Flower & Foliage sets! Beautiful job! Email annelise@artimpressions.com with your address to claim your prize pack!

Honorable mentions awarded to...

Amy Marshall!

Linda M!

Way to go, ladies! Amy, your Days Spent Windows to the World card is so sweet and bright, with great pattern coordination! Linda, your bright colors with Mrs. Ed chilling is fabulous! Love the glittery accents you used, too! Be sure to email annelise@artimpressions.com with you address and the stamp set of your choice as a prize!

Thanks to everyone who entered the challenge! Be sure to play again next time, with out Glitter & Shimmer challenge! Cheri is here to kick off the challenge with a beautiful card tutorial! Take it away, Cheri!

Hi Ai Fans!
It's the start of a new Challenge called Glitter and Shimmer! This Challenge is right up my alley! If you know me, you know that I almost always add some sort of glitter or shimmer to my cards!
Today I am using the Girlfriends "Dancers" set (Sku# 3580). I thought their tutus would be the perfect thing to glitter up! I recently took a card class at my local Scrapbook store (Two Scrapbook Friends) on how to do a starburst background and decided that this would be a cool technique to use on this card.
I started by gathering up all my supplies and pre-coloured my image. I decided to use papers from the Julie Nutting Belle Vie 6x6 collection. I picked out 5 patterned papers from the collection, some pink glitter paper and some cardstock to layer behind everything.
 The first step is to cut the papers you will be using for the starburst into strips. I cut mine at 2x6". Then cut each piece on the diagonal with your paper trimmer.
To cut on the diagonal,  all I did was place opposite corners of the paper on the cutting line and cut through them to get a "triangle"
 Depending on the size of background you want, cut a slightly bigger piece of paper. Since my starburst is coming from the middle find the middle mark on your paper. You can make the starburst come from wherever you like such as the side or bottom.
Starting in one corner, glue your triangle with the small point in the middle. Continue gluing until you fill the circle all the way around.
As you can see, my starburst isn't perfectly in the middle. That's ok as my image will cover up the overlap.
Flip your starburst over and cut off the excess pieces.
I choose to cut the starburst out with a MFT Stitched Rectangle die. You can use any shape that you want.
 Now that your background is complete, it's time to go ahead and decorate your card base.
You might notice that I changed some of the cardstock. I wasn't happy with the original choice of the pink paper and found a different piece in my stash that actually has a bit of a shimmer to it. Perfect to go along with the Challenge theme!
Here's the finished card. I added a strip of ribbon and some pearls to finish it off. The sentiment comes with the "Dancers" set. I added Pink Taffeta Stickles to the tutus to fit with the Challenge theme! What I love about the starburst background is that you can use up those scraps that we all hoard  LOL. You can make it any size from a small background in a pocket page to a full scrapbook layout! The technique is the same but the size choice is up to you. 
Here's the inside of my cards with another sentiment from the "Dancers" set.
Copics Used:
Skin: E00, E11, E21, R20
Hair: E43, E44, E47 / YR31, YR14
Ballet suits: C1, C2, C3, C5
Shoes & accessories: R85, R89
Tutu: Pink Taffeta Stickles

Thanks for stopping by today!
Happy Stamping!

Supplies:


Thanks, Cheri! What a lovely card! Now it's your turn, fans! We want to see what you can create for our challenge! Just be sure to include some sparkle!


If you need some help uploading to InLinkz, this video may help.

Here are the challenge rules …
✻ Please make a new card or creation. You can make any crafty item you wish; this is not limited to cards!
✻ Limit two submissions per person. You will receive extra votes if you use Art Impressions stamps!
✻ The Ai Challenge is open to everyone, international submissions are welcome!
✻ Include a link back to the Ai Blog or grab our button on the top right of our sidebar!
✻ Share the Ai love by clicking and commenting your fellow crafters.
✻ Make sure to get your link up by Wednesday, July 20th at 5:00 p.m. PST to enter your creations.
✻ Good luck and happy stamping!