Showing posts with label Foliage Set. Show all posts

Wednesday, April 22, 2020

NEW VIDEO! Sweets Shop by Bonnie Krebs

Hello Ai Fans!

Welcome back, Watercolor Wednesday fans!

NEW VIDEO! Watch Bonnie use the second structure in our WC Large Shops Set to create this charming Sweets Shop! These shops can be dressed up using stamps you may already have in your collection or with more of our NEW releases! Enjoy! We still have ALL NEW RELEASES 20% off! Now is a great time to add to your collection and grab these new sets before the sale ends!


View on YouTube: 


Saturday, April 20, 2019

Watercolor Weekend Roundup - Happy Easter!

Hello, Ai Watercolor Fans! We're here this Easter Weekend with some lovely spring inspiration featuring some of our favorite animal watercolor stamps! Take a look at these projects, we hope they inspire your own creations!

Dot Freel - Instagram - Blog - Pinterest
Hello Friends,

Happy Easter weekend! I made this Easter card for the Art Impressions Watercolor Weekend. I stamped three bunnies from the 4874 - WC Bunnies Set using the 40 brownish grey, then pulled the color out of the lines for the shading. I stamped masks out of post-it tape for the two bunnies then stamped the tree from the 5056 - WC Fairy Doors Set using 969. I used brown 969 from the palette to watercolor the tree and then I stamped the leaves in green 177 from the 4051 - WC Foliage Set 1 and added water to soften the lines. I stamped the basket from UMG4117 in the 40 brownish grey. I used 86 African violet to shade the basket and watercolored each of the eggs with the pink 725, 17 steel blue, 5 yellow, 48 leaf green and 7 orange. I colored the bunny's ear and cheeks using the pink 725. The grass is from the 4051 - WC Foliage Set 1 and stamped in 48 leaf green and the flowers are from the 4868 - WC Flower Set 2 in the green 177 and pink 725. I colored the sky using 75 sky blue. I used my Copic pen to sign and date it. I cut it out and framed it using the 5062 - Rounded Corner Rectangle Dies. The sentiment flag was cut from the 5133 Flag Double Stitched Dies.

Karen Day - Blog - Facebook - Pinterest
Did you know that the Ai Bible Journaling sets make amazing cards? Since I knew that I wanted to use my oval Spellbinder's die set along with 5128 - As The Deer Set, I started by marking it's shape in pencil on my watercolour paper, so that I knew where I wanted my images to be placed. I coloured all of the images with my N57 Warm Grey marker, and other than the stones (where I pulled out the colour a bit for shading, with a damp #4 brush) - I didn't touch the lines, just painted within them. I used 947 Burnt Sienna for the deer and the tree, layering the colour to get the deeper tones. Using the floral cluster from 5074 Bible Flower Set, and my 856 marker, I stamped clusters of flowers and dabbed them with a damp brush to intensify the colour. I used the tiny leaf sprig from the set to add some foliage under the flowers and to the tree branches, using my 177 Dark Jademarker. I also used the 177 with the large and small grasses from the 5073 Bible Foliage set, and then pulled the green colour out to fill in the green areas. I darkened up their hooves and noses with the N57 Warm Grey, and then picked up 565 Deep Blue from my palette and painted in the flowing river. I went back in and added a few ripple marks around the rocks, and added shadows under the deer. This is another card that I think would make a wonderful Try-fold! The stamp set also includes three lovely script sentiments, perfect for journaling.
 

Tricia O'Bin - Blog - Instagram - YouTube - Pinterest - Facebook
Happy watercolor weekend Peeps! Monday is Earth Day. I thought in honor of that, I would do a post with the As the Deer Set called Earth Day Deer. I love this new watercolor Bible Journaling set. I plan to practice more with it to create lots of serene cards. Do you have a stamp set that reminds you of Earth Day? I would love to check it out…tag us on Instagram with #AIWatercolor.

The Watercolor Piece

I inked up the stamp with the 2 deer with Chocolate and Jet Blue. I added Jet Blue over the Chocolate where the rocks are. I stamped it down on my watercolor paper. I then inked up the land and tree stamp the same way and stamped it above the original stamp, leaving space for the water.

To start off, I lightly pulled the Chocolate color from the lines from each of the deer making sure to leave a highlight. I let each layer dry and slowly built up the color. On the deer at the top, I made sure to leave the top of his face white. I used a fine point to darken in the eyes and noses on the deer.

Next, I pulled the color out of the lines from the landscape. I pulled color from underneath the rocks and dragged it into the water. I added some Cyan and Navy Blue to my palette. I added the color to the water. Once the water was dry, I added some Chocolate to create shadows.

I added Dark Jade to my palette and added grass to the grassy areas of the stamp. Additionally, I added some Dark Jade to the small grasses from the original foliage set and stamped it in several places. Make sure you ink, walk out your stamp and pull the color out using an up and out brush stroke.

Lastly, I inked the flower bunch from the original flower set inked in Rhodamine Red and stamped several places around the scene. I pulled the color out of the lines. Remember to sign and date your work, which evidently, I don’t seem to remember all the time. LOL

Check out my blog to see all the details on creating the rest of the card.
Thanks, designers! What lovely projects! We can't help but think of Bambi and Thumper with all these deer and bunny cards! Such fun creations inspired by spring!

We hope you'll comment below what you think of these cards - we love hearing your feedback! Have a great day, and Happy Stamping!

Wednesday, October 24, 2018

Watercolor Throwback - Autumn Covered Bridge

Hello Ai Fans!

Welcome to today's Watercolor Throwback! We're throwing it back to September of 2016 with this beautiful Covered Bridge surrounded in autumn leaves, which we are currently loving outside! With a few rich Marvy Markers, this image transports you to a crisp, fall day.

If you are watching this video for the first time or revisiting from a previous viewing, leave us a comment over on YouTube of what you learned or what you noticed this time around! Take care and see you next week!

Happy Watercolor Wednesday!

Tuesday, September 25, 2018

Happy Fall Watercolor Card by Jil Lebel

Hello Ai fans!

The new Bible Journaling line of stamps are beautiful, but it just isn't something that I do.  That doesn't mean that I don't want several of the items from the new release.  I just had to have the Block Letter Die Set. I knew that I could use it in a variety of ways in my card making.  Once I saw how it was used on the packaging with masking paper, I had to try it myself.  The first way I had to try it was to make a Fall card because Saturday was the first day of Fall. Happy Fall!
The word Fall was cut out of masking paper using the Block Letter Die Set. It was attached to a piece of Canson XL Watercolor paper.  The area around the word was filled in using the Watercolor the Art Impressions way and the listed Ai stamp sets as well as the listed Marvy LePlume II markers. Once that was done, the masked letters were lifted off.  A shadow was added tot he letters with the Rosewood marker.
A piece of gold paper was added behind the watercolor piece.  It was added to a piece of dark brown paper with foam tape.  The brown paper was added to a pumpkin spice card with foam tape.  It was hard, but I kept the card very simple so the main image stood out.

Marvy LePlume II Markers Used:
Red 2, Brown 6, Olive Green 15,
Dark Brown 18, English Red 28, Rosewood 30,
Butterscotch 83, Tropical 101

Thanks for stopping by and Have a Great Day!


Monday, September 17, 2018

Watercolor Snowman by Carol Hintermeier

Hello Ai Fans!

I've jump started my Christmas card making with these three cards featuring the newly released Watercolor Snowman Set!  I totally love snowmen and this one is SO adorable!  I always try to get my Christmas cards done early as I find it so enjoyable without the rush of trying to get them done during the holidays.  When do you make your holiday cards?


For each card I've stamped the snowman and tress onto watercolor paper using Marvy LePlume II markers.  I used a pencil to lightly draw in the background hills and landscape, (well except for the first one.  It's all a learning process! :)    I cut a mask of the larger snow-covered tree to use while stamping the other two behind.   Just so you know, I stamped the snowman onto a scrap piece of watercolor paper four times just to practice and to use as a test piece for my colors.  I also referred to Art Impressions YouTube channel to watch Bonnie's videos that show how to watercolor snowy scenes.  Just scroll back to last November or later for many helpful tips.

For this card I taped off a square with blue painter's tape before stamping and watercoloring with my Marvy LePlume II markers.  I don't have a black marker, so I just smooshed some Black Soot Distress Oxide onto my pallet.  All of the colors I used are in the links below.  I added some sprigs of grass peaking through the snow.


I used a Molotow masking pen on all three of my cards to create a snowy background.   Again, Bonnie shows how to use this masking pen in her videos.  Each card was also die cut using the wonderful new double-stitched edge dies in squares, rectangles and rounded rectangles.  The links are at the end for you to click and see the full sets of these dies.


I love sparkly Christmas cards so I used a Spectrum Noir Clear Sparkle pen on each card to get the fun shine.  It doesn't show in the photos, so I took a close up for you to see how pretty it is!  It still doesn't show up as much as in real life!


Each card has a few details added with my Signo Uni-ball white gel pen.  I added some detailing on the scarf, the hat, or the snowy background on one card or another.


I hope I've inspired you to get started on your holiday cards and to give watercoloring the Art Impressions way a try!  Thank you for stopping by and happy stamping!


Saturday, July 7, 2018

Watercolor Weekend Roundup - Stretch Your Stamps!

Hello, Ai Watercolor fans! We love finding new ways to use our Ai Watercolor stamps, and our three WC designers have some fantastic ideas for you today! Let's take a look!

Dot Freel - Instagram - Blog - Pinterest
Hello Watercolor Friends,

I had so much fun making this whimsical card for the Watercolor Weekend roundup. I used the stump and the stamp positioner to widen the stamp and make it taller. I used one of the hobbit doors along with that cute little mailbox to make it look like my chipmunks have a home. It's a play off of Watercolor Wednesday (my favorite day of the week!) Art Impression's Owner/Creator Bonnie Krebs tutorial on YouTube, see it here. Create one of these cards yourself using any of the animals and any of the flowers and grasses. I love how they all work together to create whatever scene you can imagine.

Other Supplies: Canson XL Watercolor Paper

Tricia Kennedy - Instagram
My project for today’s Watercolor Weekend features my state – ARIZONA. This idea can be adapted to any state or country – the possibilities are endless. Print out the state onto copy paper. Trace the state onto masking paper and cut out with an X-Acto knife. Using the negative cut out, adhere to watercolor paper. Watercolor the Art Impressions Way by inking up the cacti from the Southwest Set in Olive Green and Pine Green using masks from Post-It Notes as you go. Stamp the long stem from Flower Set 2 in Terra Cotta and Olive Green. Add dried grass to the bottom from Foliage Set 1 in Sepia. Scribble a little Olive GreenPine Green and Salvia Blue to your palette. Brush Olive Green and Pine Green onto the cacti to add depth and dimension and Salvia Blue for the sky. Be sure to get the color all the way to the mask edge to create a definite outline. Remove the mask for that WOW moment!
Marvy Le Plume II Markers: 15 Olive Green45 Sepia, 60 Salvia Blue, 72 Pine Green88 Terra Cotta
Other Products: Masking Paper, Post-It Notes, X-Acto Knife, state outline printed from www.50states.com

Tricia O'Bin - Blog - Instagram - YouTube - Pinterest - Facebook
I am still obsessed with card quilting. I wanted to create my own patterned paper to use on my quilt card. I thought red, white and blue would be fitting for the 4th of July holiday! I used a retired quilt die from Stampin Up! I created watercolor background using only 2 stamps. 

First, I created a template with the quilt die so I could do a bunch of watercoloring at one time. I backed the watercolor sheet with Stick it adhesive. Using Crimson Lake and Prussian Blue, I created watercolor flowers all over the watercolor paper using the daisy bunch. I added vines using Olive Green. Once the page was full, I die cut the quilt pieces out. I also cut quilt pieces out of another piece of white watercolor paper. I pieced it all together and adhered it to a piece of Black Onyx cardstock. I ran this through my machine using a quilt top textured embossing folder. I adhered the piece to a folded notecard. I die cut the 4th from a retired number die from Stampin Up! I embossed the “TH” and “Happy” from the Gina K Designs stamp set “Peony Wishes”. 

I hope you will join us and share your projects with us! 

Marvy Le Plume II Markers: 15 Olive Green29 Prussian BlueCrimson Lake

Thanks, team! What FUN ideas! From chipmunk mailboxes and lengthening a tree stump, to creating an interesting border mask, to fabulous floral quilts, there are just so many ways you can use your stamps! We hope this inspires you to take another look at your stamps and find more creative uses for them. Be sure to share your creations with us with Happy Stamping!

Saturday, April 7, 2018

WC Wishing Well by Sharon Caudle

Hello AI Fans!!

Today's card is one that I will be teaching in class on Monday at Scrapbook Paradise!  I used the beautiful 5012 WC Wishing Well Mini Set, along with the tiny grass from 4051 WC Foliage Set 1,  a branch from 4867 WC Foliage Set 2,  flower from 4868 WC Flower Set 2, And grass from 4875 Garden Wagon Mini Set.  If you haven't been keeping up with Bonnie and her tutorial videos, you really need to tune in every Wednesday! She has wicked talent and shares every little tidbit with us so we can make beautiful watercolor cards! 


Thanks so much for stopping by to visit today and until next time - stay crafty!!

Marvy Markers used:
#45 Sepia, #29 Prussian Blue, #8 Violet, #15 Olive Green, #86 African Violet, #80 Victorian Rose


Wednesday, March 21, 2018

Pots & Buckets by Dana Warren

Hello AI fans!!

It's still cold where I live and there is even snow in the forecast, but I'm ready for spring!! Creating for spring helps to know that eventually, spring has to arrive for real!! 


I started with the different pots and then added in the flowers and foliage. I used the following Watercolor sets: Small Container, Foliage Set 1, Flowering Mailbox, Open Window, Chest of Flowers.


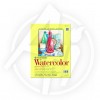
Along with the stamps I used many Distress Markers. I used: Peeled Paint, Worn Lipstick, Mowed Lawn, Mermaid Lagoon, Picked Raspberry, Twisted Citron, Fossilized Amber, Gathered Twigs, Shaded Lilac, Pumice Stone, Rusty Hinge, Forest Moss, Hickory Smoke, Vintage Photo, Ground Espresso, Victorian Velvet. These markers are nice as one end has a brush and the other a fine point. To add detail and or make darker shadows, I went in with the fine point.


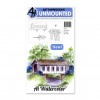
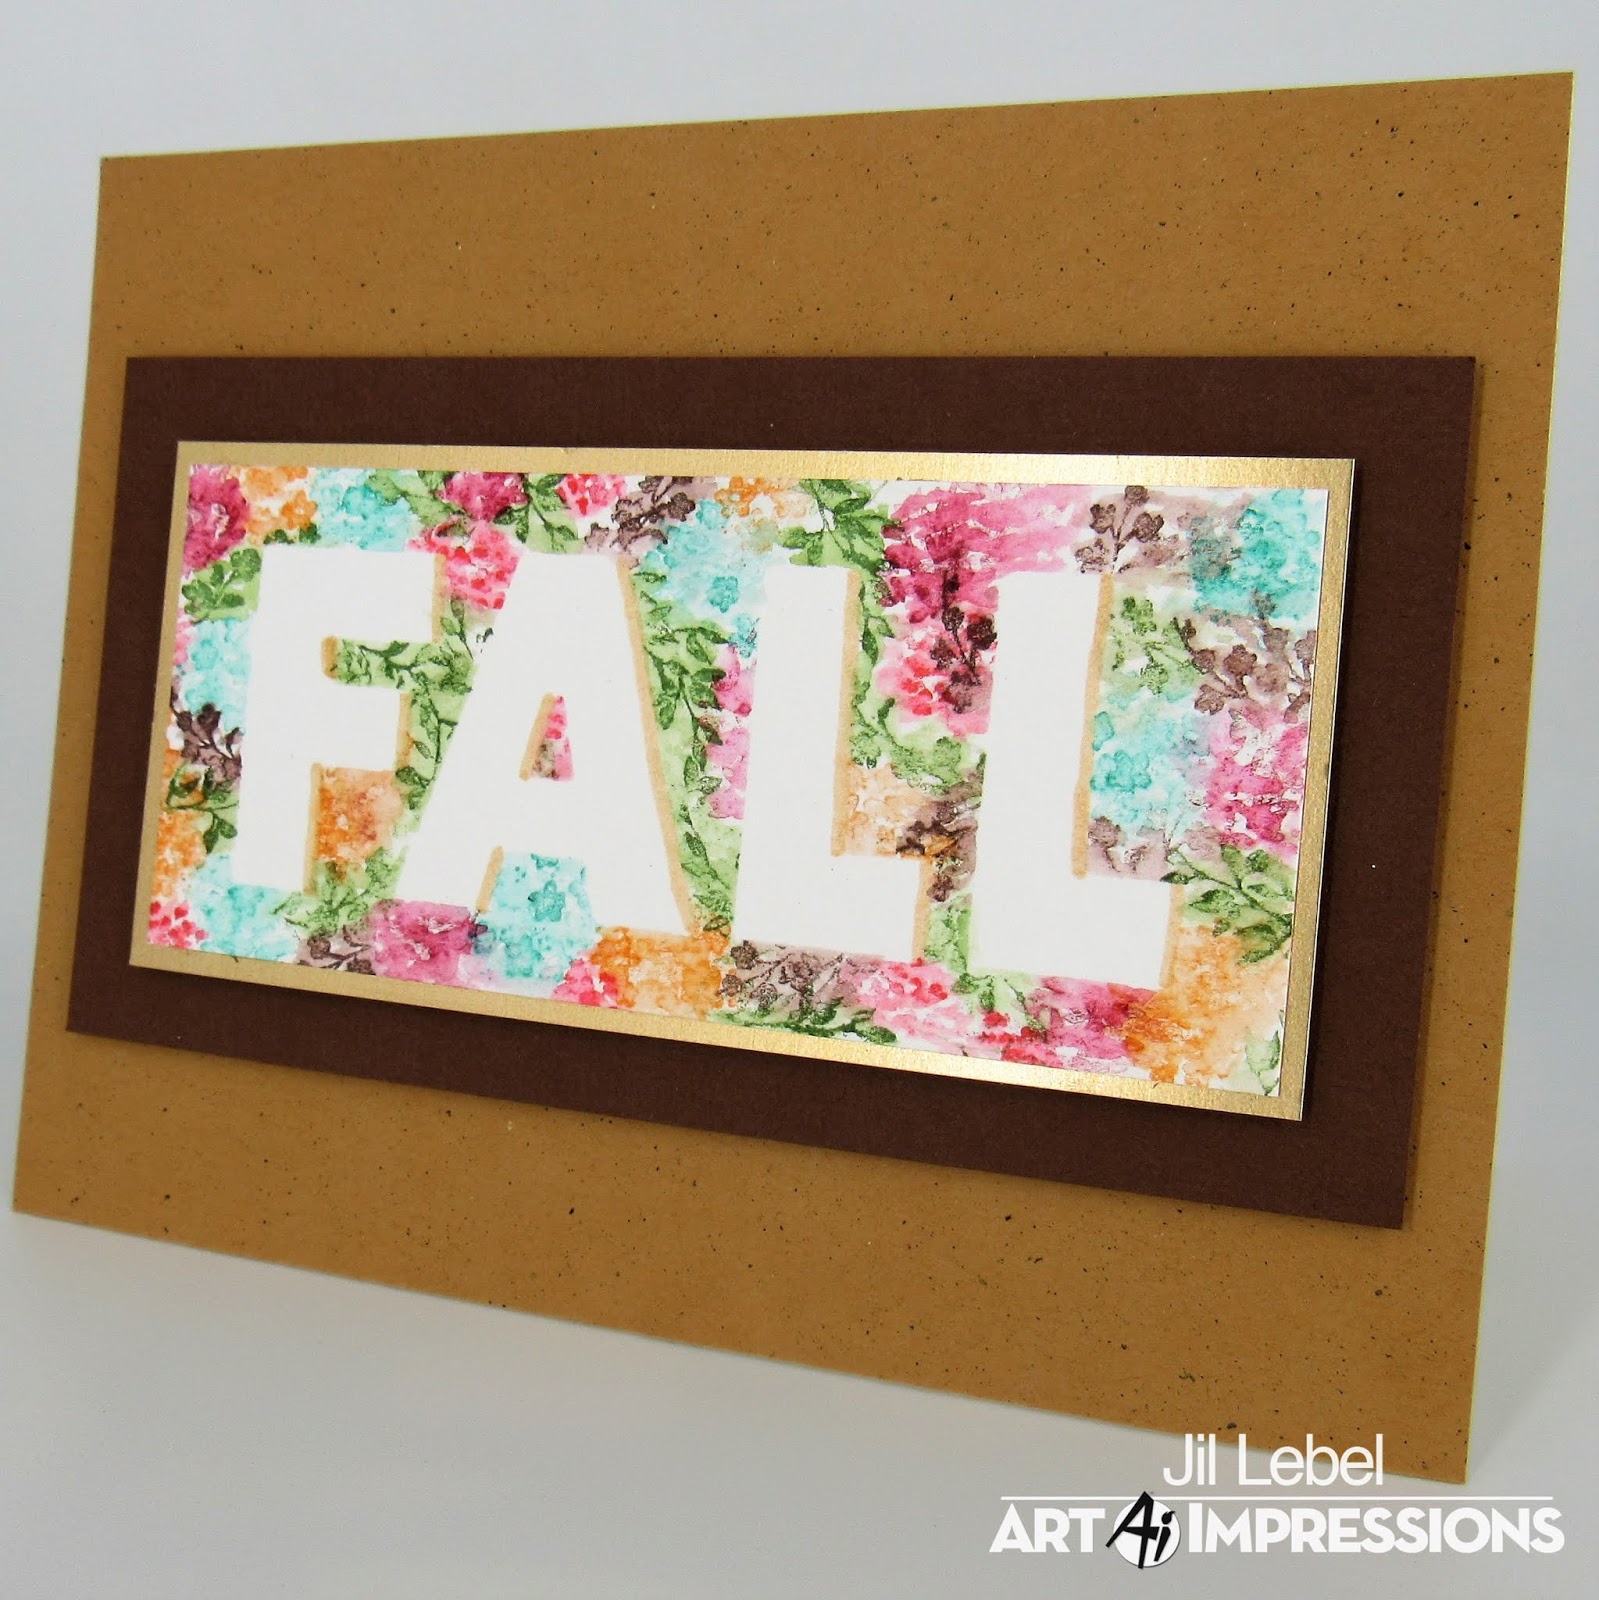
After everything was dry, I trimmed my panel and rounded the corners. Then I wrapped some twine around the panel and tied it in a bow off to one side. I picked out some pattern paper from Echo Park paper Co Petticoats and Pinstripes pad. The watercolor panel went on the pattern paper and then I adhered that to a white card base. I decided to leave off a sentiment, instead, one can be added to the inside to fit the occasion the card is needed for!

Thanks for stopping by! Happy Stamping!!