Showing posts with label Debbie. Show all posts

Thursday, September 4, 2025

When One Door Closes Challenge #412 Week #2

 Hello Ai fans and welcome to week #2 of our
When One Door Closes challenge.

We're looking for your creations using things with doors on them.

Last week we saw a fabulous hen house card with a handmade screen door from Dori.
You can read all about her card on her post from last week.

Tasha used:
Lynn created two door tags and you can visit her BLOG POST
to see her YouTube tutorial on these.


Janet used:


You can hear all about Sharon's card on her BLOG POST.


Debbie Hedges was our Guest Designer and you can hear all about her card on her BLOG POST.


I used the Mushroom Cubbies and you can see my post here.
5728 – Mushroom Cubbies


I just love the creativity of our Design Team.
If these don't inspire you to create something and enter then I don't know
what will. You could be our next winner and have a brand new set to play
with!


Be sure to enter your creation for the chance to win a free stamp set from Art Impressions. 
We award one Top Spot and one Lucky Random Winner, and each will win a free stamp set from Art Impressions.

✻ Please make a new card or handmade crafty creation. You can make any item you wish; this is not limited to cards! (unless specified)

✻ Limit two submissions per person.
 ✻Please include your first name and last initial on your submission. You may include your entire last name, but it's not necessary.
✻We love to comment on your entries, but keep in mind if you use a private group or a platform that you need to sign up for, we probably won't be able to.
✻ The Ai Challenge is open to everyone, international submissions are welcome!
✻ Include a link back to the Ai Blog or grab our button on the top right of our sidebar!
✻ Share the Ai love if you can, by clicking and commenting on your fellow crafters.
✻ Make sure to get your link up by the deadline to enter your creations.
✻ Good luck and happy stamping! 

You are invited to the Inlinkz link party!

Click here to enter

Sunday, August 31, 2025

When One Door Closes Gnome Home with GD Debbie Hedges

Hello Ai fans!

Every once in a while we just like to pick a talented artist and feature them as a Guest Designer.

This time we chose Debbie Hedges, and she's helping us out with our When One Door Closes challenge.


She created an amazing little gnome home and we're so excited to share it.

Please enjoy...

------------------------------------------------------------------------------------------------------------------------

Welcome to the newest bi-weekly challenge! I am excited to share Challenge #411 When One Door Closes. The first stamp set that came to mind was #5015 WC Hobbit Door set, so I built my project around that. For this challenge, think of anything with a door . . . houses, barns, cubbies, fairy houses, cars, etc.


 I began by stamping the hobbit door in the center of my watercolor paper. I then used a ruler along the bottom of the door and lightly drew a horizon line for the base of my little “house.” I wanted the focus on the door. With my stamp positioner, I added the gnome and my three mushrooms. That gave me the base to work with for my scene. I began by painting the door in grey tones, adding shadows as needed. I then worked on the stone path, using sepia, grey and brown tones so that the stones were multi-colored and then went back and added shading to create dimension. Next I added a brown/sepia wash to create the idea of a wall for my door. I wanted it to have light and dark areas for interest. I then used the vine to climb one side of the door by stamping it once from the base of the door, then only inking portions of it to go around the arch. I used my positioner for placement. It is a great tool to preview what it will look like before you commit it to paper! I then touched each leaf with my brush to soften the color. I used a single flower bud and my stamp positioner to add the purple flowers in the vine and then touched each one with my brush to soften. My next step was to paint the mushrooms and gnome. This is not my first attempt on this project and for this one, I wanted the mushrooms to have added color – not just yellow and orange. So, they are shades of yellow at the base, to orange, to red and then some purple at the top of the largest mushroom. The base of the mushroom are shades of brown and I added some brown lines for ridges. For the gnome, I used the same red for his hat, and gave him a steel blue jacket, green pants and brown boots and belt. I added some grey tones to his white beard for shadows and used a flesh tone marker for his nose – adding pink to the bottom for shading. To finish this up, I needed to add teeny tiny grass along my horizon line along the base of the wall. I created a paper mask for the mushrooms and the gnome and just used post-it tape to protect the door area. Once the grass was stamped, I used the fine tip of my green marker to add some stalks of grass in front of the mushrooms. I also used the grass to stamp some grass along the steps on the stone path. Once that was stamped, I pulled the color out and then created a wash of green for the foreground. I then used the taller grass to create a clump of grass behind the gnome. I love to add a few leaves to the top of a project to finish it off. It gives the feeling that tree branches are hanging down. So, I used the leafy branch – it is one of my favorites – and just stamped it a few times along each top corner of my project. I then added water to each leaf to soften it. With a ruler and a pencil, I lightly added some horizontal lines to give the idea of siding and added a few vertical lines in random spots along with a couple dots for nails. All of this was very faint. Then with Dr. Ph Martins white paint, I added a small dot highlight to the door handle, a single dot in the middle of each flower bud, multiple dots on the mushrooms, and small dots on the grass along the path so it looks like tiny white flowers. There are a few random tiny white dots on my foreground as well. I then added dots to the top of the tall grass clump to create three daisies. When it was fully dry, I added orange dots for centers. I also added some white paint for dimension on the gnome’s beard. I hope you like it and will give it a try! Here are the stamps I used for this project along with the links for the stamp sets.


Thank you so much Debbie for your beautiful creation and inspiration.

You can enter your "door" craft HERE.

Saturday, June 1, 2024

The Great Outdoors! Guest Designer Challenge #6 with Debbie Hedges

Happy June everyone!
Oh my gosh! The year is almost half over.
Wasn't it just Christmas?

It's the first of the month which means it's time for a new Guest Designer Challenge here at Art Impressions.

This month it's The Great Outdoors!

We want to see your cards that are set outdoors.
This could be a simple flower growing in the grass to an elaborate outdoor scene set in the woods, on a farm or at the beach. Maybe someone is outdoors grilling, fishing or golfing...great for Father's Day!  As long as your card shows the outdoors.


Before we see what our amazing Guest Designer Debbie Hedges made to inspire you, let's see who won our Anchors Away challenge.

Birds are from the Art Impressions #5069 - My Fortress Set
She created the sun using a die from 5719 – FB Fence & Window Set. (SO creative!)
and


She will be our Guest Designer in July.


Lisa,  please contact me at Renee@artimpressions.com
so that we can discuss your challenge theme and to claim a free stamp set of your choice.

Now for the Lucky Random Winner of my Exclusive Raccoon Freebie from 2022.
Congratulations #5 Julie W.

Please contact me at Renee@artimpressions.com with your address to claim your free stamp.
If you already have the raccoon, I have others to choose from.


Now for our June Guest Designer.

Debbie is a LONG time Art Impressions fan going all the way back to the 1990s.
She is an amazing watercolor artist and I know you're going to love her beautiful card.

---------------------------------------------------------------------------------------------------------------------------

Hello, my name is Debbie and my watercolor journey began as Bonnie was just developing “Watercolor the Art Impressions Way.”  I had met her several years prior and collected her cute bear and bunny stamps, but the watercolor stamps quickly became my favorite.  What I love about them is that it is a collection of elements and the creativity is endless!  Each project is unique even if multiple people do the same project with the same stamps.

As my three boys entered school, I didn't have as much time to stamp with a busy family life and returning to working outside the home.  About 7-8 years ago, I began to watch the newer tutorials and I have learned so much since then.   Each person develops their own style.  The tutorials are like a master class each time you try a new project. My style tends to be smaller projects -- usually with a container and flowers or a small scene with an animal.  Recently I have challenged myself to stretch and learn to create more complex scenes.

I am so excited to be chosen as the Guest Designer for June!  The theme is The Great Outdoors and I chose to do a more complex scene using a variety of sets.  I love spring and summer projects and I hope you will try something similar and join the blog challenge for June! 

I still use Marvy Le Plume markers for my projects.  Most of these can be converted to Tombow colors, but choose colors that work for you. These just happen to be some of my go-to colors for any project I work on.

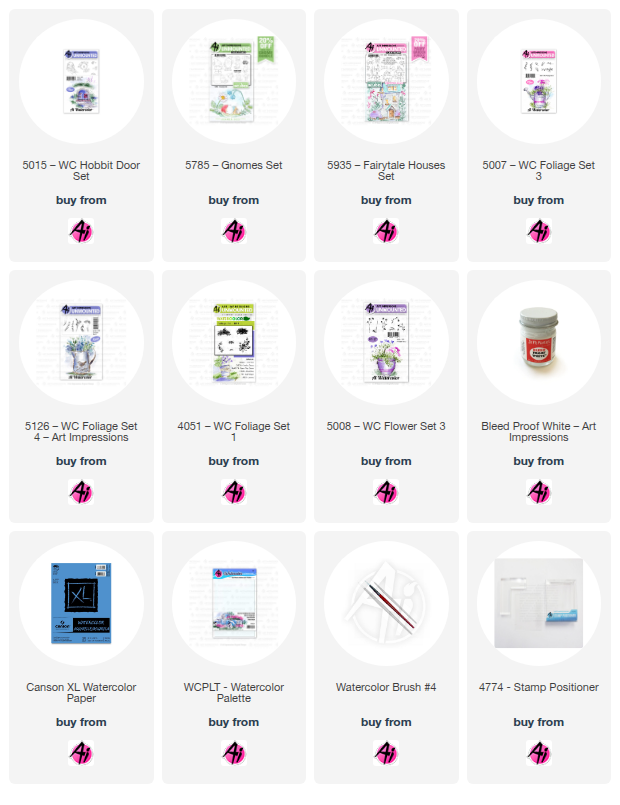
I began with a rectangle of watercolor mixed-media paper that measured 4” wide x 7” tall.  I needed it to be wider than my project so I could cut it down with a rectangle die later.  I then inked the bicycle from #5124-WC Bicycle Set in Sepia (45) and African Violet (86).  I stamped it once on my acrylic plate and then stamped off once on a scrap piece of watercolor paper.  Using the acrylic plate, I moved it until most of the bicycle was off the edge of my project.  I then used my stamp positioner and stamped it onto my watercolor paper on the right side.  With a pencil, I then lightly drew in my horizon lines.  I needed the tree to be a little taller than the stamp I had, so I put the tree on a small hill that slopes down to the bicycle.  I inked the smaller tree from #5010 – WC Tree Set 1 with Sepia (45) and repeated the process with my positioner to stamp it on the small hill on the left side of my project. 

The next step was to add a color wash to my pencil lines.  For the hill in the distance, I used Pine Green (72) and for the two closer hills, I used Olive Green (15).  I then added my sky using Sky Blue (75).  I like to add sky before adding other elements (like tree foliage or flowers) so I don’t have to try to add it in later and avoid those elements.  The green stamps really well over the blue and you can just make sure it isn’t too dark in areas you know you will be adding foliage later.  Using my stamp positioner, I then added my rock cluster in the foreground by inking #AA1038-Tiny Stones (wood-mounted vintage stamp) in Sepia (45) and African Violet (86), being sure to stamp off at least once so the rocks didn’t have too much color.


 At this point, I just began taking one section at a time.  I tend to use my #1 brush the most unless I am doing large areas and will switch to my #4 brush.  I used #5061-WC Foliage Set 1 (teeny tiny grass) to add grass along my middle hill line in Olive Green (17).  I protected the tree with a small piece of Post-It note tape.  I then used my #1 brush to pull the color out. I wanted the grass in place before I added the foliage to the bike basket. 

I then carefully pulled the color out of the lines on the bicycle and added Steel Blue (17) to the body of the bicycle.  On my palette, I mixed Sepia (45) and African Violet (86) to get grey.  I used the grey for the bike tire.  For the flower basket, I used Sepia on the edges and left a highlight in the center.  For the foliage in the basket, I used #5009-WC Mini Flower set.  I inked the small foliage stamp in Olive Green (17) and stamped it multiple times – re-inking as needed.  With my #1 brush, I added a very small amount of water to the foliage.  Once that dried, I then used the small dot flower by inking it in Aubergine (93) and also stamping it multiple times.  I used my #1 brush very little on the flower dots so the dots were more visible.  With a ruler and a pencil, I then added a few spokes to the bike tire.

Now that the bike was complete, I used my #1 brush to pull out on the color on the tree trunk.  I then used Sepia (45) and Brown (6) to add some color to the trunk.  I used my teeny tiny grass stamp to add grass to the closest hill including the area under the bicycle.  This time I wasn’t worried about some of the grass stamping over the base of the tree trunk.  I then used my #1 brush to pull the color out on the grass. Using the small grass stamp from #5126-WC Foliage Set 4 and my positioner, I added some taller grass under the bike tire in Olive Green (17).  With the small tip of my Marvy, I then added some dots to the tops of the grass stems for interest.  For the flowers, I started with the small vine from #5126-WC Foliage Set 4  to add some foliage for the violas near the tree trunk.  After stamping it several times with Olive Green (17), I used my #1 brush to dab at the foliage.  The violas need a positioner for placement.  I use the flower bunch from #4603-Blooming Birdhouse, but any of the flower bunch stamps would work – you just need to use one single flower from the set.  I ink them first with Brilliant Yellow (43) so that the two bottom petals are yellow and then the top three petals in Aubergine (93).  It is better if you have an odd number, so I stamped a total of 5 flowers, re-inking between each.  For the violas, I was not concerned about light and dark, I wanted them to be bright.  For the purple flowers on each side of the violas, I used the heart flower from #5009-WC Mini Flower set.  I still used my positioner, but I inked the stamp in Violet (8) and then stamped twice before inking again.  Then I used my #1 brush to pull the color out of all the flowers under the tree.

For the tree leaves, I used the larger leaf stamp from #5126-WC Foliage Set 4 and inked it with Olive Green (17).  I stamped multiple times (re-inking as needed) until I felt the tree foliage was the size I wanted.  I then used my #1 brush to dab at the leaves and pull the color out.  To finish the hill in the distance, I used #5372-WC Mini Foliage.  I used my positioner to ink the row of foliage in Pine Green (72) and stamped it along the line I had created with my pencil.  I would ink, stamp in once and then stamp it again slightly higher.  I repeated that all along the hill on either side of the tree.  For the evergreen trees, I place some post-it-note tape along the base of my hill line. I then stamped it twice before re-inking.  I wanted light and dark and varying heights to the trees as I added them down the hill. 

For the small stones in the foreground, I carefully added a color wash around them in Sepia (45).  I didn’t add it prior because I wanted to be sure the tops of the rocks were really light.  I used the grey I mixed along with Sepia, Olive Green and African Violet to create multiple colors on the stones, keeping the bases darker and the tops lighter.  I then used my brown Twin Tone to add some extra dots for pebbles and put the definition back into the base of the stones.  I also used my Twin Tone to add some lines to the tree trunk.  I added dots of white to the grass on the middle hill with Bleed Proof White.  After it dried, I used the fine tip of my yellow marker to add yellow dots to the white, so it looks like flower centers.  I also used the fine tip of my Aubergine marker to add dots to the centers of my violas.  With my Micron, I added some detail to the bicycle and signed my project.  I cut the project out with the 2nd to the largest rectangle of #5063-Rectangle A2 Double Stitched Dies and layered it onto a card base.

I hope you will give this project a try! 


What a GORGEOUS card, Debbie!
That blue embossed panel framing your stunning art is so perfect.
Thank you so much!

I also have a little bonus prize!

For as long as I have duplicate stamps I will choose a random winner.
These will be for U.S. residents only since these will be mailed by me personally
and not Art Impressions.

This month I have the Promo Farm Cow from 2021.
You will be automatically entered to win when you upload your project to the challenge.


Good luck everyone!


Here is the fine print:

✻ Please make a new card or handmade crafty creation.
✻You can make any item you wish; this is not limited to cards!
✻ Limit two submissions per person. 
✻You MUST use Art Impressions stamps or dies! You may use other companies products but the main focus should be on Ai items.
✻If you win, you will receive one free stamp set of your choice. In return you will create a brief write up explaining how you made your item and email it to me. (Reneé) and you will mail your project to Art Impressions at your expense. (cheapest method possible is fine) International winners may submit photos through email. We will share your creation on Art Impressions social media.
 ✻Please include your first name and last initial on your submission.
✻We love to comment on your entries, but keep in mind if you use a private group or a platform that you need to sign up for, we probably won't be able to.
✻ The Ai Challenge is open to everyone, international submissions are welcome!
✻ Include a link back to the Ai Blog or grab our button on the top right of our sidebar!
✻ Share the Ai love if you can, by clicking and commenting on your fellow crafters.
✻ Make sure to get your link up by the deadline to enter your creations.
✻ Good luck and happy crafting!


You are invited to the Inlinkz link party!

Click here to enter

Tuesday, September 28, 2021

Final Fan Groups Features

Hello Ai fans!

 Today is bittersweet.
Today is our last Fan Groups share for September but that means that Jil from the Design Team will be back next week!!  Hooray!

This group of artists who filled in while Jil was on leave have provided SO much inspiration!

Although this is the final week you'll see their creations on the Art Impressions blog you can join one of (or both) Ai fan groups on FB to continue to see all sorts of cards, projects, get tips, ask questions, etc. 

Art Impressions Stamp Group

The Art Impressions Way


For our final Fan Groups Share we're kicking things off with Toni Woods.

Her scene is a little bit Kendra...the wreath and dots! and a little bit Bonnie...The church and the colors.  (minus the yellow...lol!) She used 5058 Church Set, 5067 Gates of Righteousness,  4051  Foliage Set 1,  5126  Foliage Set 4, 4867 Foliage Set 2, 5074 Foliage  Bible Flower Set, 5129  He Leads Me    
                 

Sharon Caudle was a long time, extremely valued Design Team member.  We are so grateful that she agreed to come back, even if for a short time.   What other excuses can we come up with to keep her comping back?  lol!  She used 5399 – Gull-Friends Set on her adorable card. 


Ruthan Plant is one of the co-founders of The Art Impressions Way on FB.  She's usually famous for her watercolor nature scenes but this time she created a stunning holiday scene.  We love her creative spirit...her pinecones are artichokes!!  Can you believe it?!
5424  WC Veggies Set, 5418 WC Bible Foliage Set 2, 5126  WC Foliage Set 4, 4963. WC Fall Set


Roberta Bostrom created a beautiful river scene.
Even if you don't like to fish you MUST feel the peacefulness this amazing scene makes you feel!
She used silhouettes, small rocks, stone creek, tree set and foliage set 4.


             A while back Kendra challenged Ruthan and everyone to create a Terrarium.  Michelle Hoskins took that challenge head on!!  She created this amazing little scene with glass that is just above and beyond! 
She used Southwest set #4763. 


Kathy Acres is just one of the sweetest people you could ever hope to meet.   She is one of the founding members of the Art Impressions Way on FB.  She is one of the few people that both watercolors and loves the regular Ai stamps!  Today she's sharing her cute snow people scene.   She used the Sparkle & Cheer Set #4935 and the Christmas Wonder Set #4936


Irm Fondse-Beerens is famous for her butterflies!
She used multiple containers to create this sweet scene.  She used...
4702 - Wooden Door (Wreath), 4701 - Claypot,  5416 - Vintage Car set,  5373 - LG Tree set,  5009 - Mini Flower,  5418 - Bible Foliage set 2.  5126 - Foliage 4,  4966 - Bird Bath set,  5055 - Sitting Places set,  4051 - Foliage 1,  5258 - Flower 4,  4965 - Branches,  4960 - Fir Tree set,  5136 - Sentiment set 2


Fiona Garner has joined us for the last week and has two sweet cards!  For her first card she use 5349 – Koalas Set from the Funny Farm Series.

For Fiona's second card she used the ever popular 5399 – Gull-Friends Set. 


Diane Mason has a different style than a lot of watercolor artists.  She paints very bold colors. We look forward to seeing more and more of her work in the fan groups!
5426 - WC Veggies, 
5069 - WC Harvest Set, 4868 - WC Flower Set 2, 4867 - WC Foliage Set 2
5418 - Bible Foliage Set 2, 4964 - WC Branches Set, 4701 - Clay Pot     


Debbie Hedges has been an Ai fan for just about forever!  She created such an adorable lake scene with beautiful shades of greens, blues and purples!  She used
5118 - WC Beach Girls Set,  5258 - WC Flower Set 4,  5009 - WC Mini Flower Set,  4875 - WC Garden Wagon Mini Set,  5414 - WC Small Rocks Set,  5415 - WC Rocks Set,  4051 - WC Foliage Set 1,  4867 - WC Foliage Set 2,  5126 - WC Foliage Set 4,  5372 - WC Mini Foliage Set,  4603 - WC Blooming Birdhouse,  5062 - Rounded Rectangle Double-Stitched Dies


De Furey created a lovely bird bath scene.  We love the subtle background she created to highlight her pretty garden.
Scrapbook.com exclusive Hydrangeas, 4052 – WC Flower Set 1, 4051 – WC Foliage Set 1, 4872 – WC Birds Set, 4966 – WC Bird Bath Set, 5018 – WC Cobblestone Set


How many of you miss Diane Zechman  being on the Art Impressions DT as much as we do? She's such a talented artist.  For our final fan share she used MB Template, MB Birthday set, MB Kitchen Set, MB Wall Accessories, MB Cat Accessories, 5038- Ghoul Friend Set.


On behalf of everyone at Art Impressions I'd like to thank all of these amazing artists who shared their talents with us each Tuesday this September.  Their work has been an inspiration and we are thankful they chose to participate. 

Happy Stamping everyone!

Tuesday, September 21, 2021

Fan Group Features Part 3

Hello Ai fans! 

Is it just me or is September flying by?
I can't believe this is our 3rd fan group feature already!
These amazing artists have been filling in while Jil from our Design Team is away.


Kicking off week three is Irm Fondse-Beerens! 
She used 5376 Basic scene, 5371 Barn set, 4607 Flowering mailbox, 5388 Rugged tree, 5010 Tree set 1, 5426 Veggies, 5416 Vintage car set, 4052 Flower 1, 4051 Foliage 1, 5007 Foliage 3, 5372 Mini Foliage, 5414 Small rocks set and 4964 Branches.  Irm created a farm scene that reminds us of where we live.  So pretty!


Oh De Furey!! 
Cardinals are not the state bird of 7 states for no reason!  Your bird is so beautiful as is your entire scene. Your rustic wooden barrel is so realistic!  De used 5414 small rocks, 5261 Bird, 4871 rustic containers
5418 “Kendra" dots, Grasses 4875, 5007, 5059 and tiny grass, Tombows #177, 969, 528 and 856


Our fan group shares aren't limited to just fans.  Some are former Design Team members.  We all miss Diane Zechman's weekly inspiration terribly!  She used 5193- Woodland Holiday Set and 5134- Banner Double Stitched Dies on her sweet, rustic Christmas cards! We LOVE owls!!


Debbie Hedges...what can we say?  You've all heard "simple and elegant"...that describes her style.  She is an amazing artist that creates many sweet and simple scenes for the most perfect cards!
She used 5194 - WC Shoe Set, 5059 - WC Harvest Set, 4868 - WC Flower Set 2, 4604 - WC Chest of Flowers, 5009 - WC Mini Flower Set, 5126 - WC Foliage Set 4, 5418 - Bible Foliage Set 2, 4051 - WC Foliage Set, 5414 - WC Small Rocks Set, 5064 - Circle Double Stitched Dies


Diane Mason!  This woman can PAINT!!  
I dream of having this spooky pumpkin topiary on my front porch!
Art Impressions Stamps used for Decorative Pumpkin Topiary:  4870 - WC Ornate Container Set, 5426 - WC Veggies, 5069 - WC Harvest Set, 4964 - WC Branches Set, 4867 - WC Foliage Set 2, 5018 - WC Cobblestone Set, 5065 - Oval Double Stitched Dies


Kathy Acres created the sweetest  (Yes, pun intended...) Gingerbread Cubbies #5178 card!!  The Cubbies are a very cute, interactive more recent line at Art Impressions.  Kathy has shown us how much fun this set can be!  They are so easy to assemble because they come with matching dies so you don't have to fussy cut!


Michelle Hoskins is so good at using Art Impressions stamps and then adding her own personal touch to create fabulous scenes.  In this one there are two tiny, hiding gnomes.  I found them.  Can you?  She used 5102- Succulents set, 4763- Southwest, 5009- Mini flower set, 
4051- Foliage set,  5015- Hobbit Door set, 4961- WC Mini Cottages set, 5265- WC Wrought Iron set


Our personal favorite cards are fall themed cards and Roberta Bostrom has shown why!  Her fall wreath is just perfect with those colors and pumpkins and gourds!  We think she's channeling her inner Karen Day with the plaid paper background!   Beautiful!  She used 5426 – WC Veggies, 5418 – Bible Foliage Set 2,  branches, foliage sets 2 and 3.


Ruthan Plant has taken me back to my childhood.  I grew up on the road where the very first hot air balloon pilot in my area lived.  When the kids would hear the burner firing we'd come running.  He would "hop" us across his horse pasture before taking up his paying customers.  Ruthan's scene is just stunning with her balloon meandering down the river bed.  This is so peaceful!  She used  #5378 WC Stone Creek Scene#5372 WC Mini Foliage Set, and #5120 WC Palm Tree Set


Sharon's cards are just CUTE, CUTE, CUTE!!  Always!  This time she used 4382 Giant Cake Set with a sentiment from 5280 Practically Perfect Set.  Her cards are fun and bright and would put a smile on anyone's face.  She's a former DT member and always has amazing inspiration for you!


We can't believe that next Tuesday is the last of our fan group shares.  There has been so much
lovely inspiration through all of these amazing cards.  We'll miss these ladies but look forward to having JIL back!!  Don't forget to check out our bi-weekly challenges too!  You could win 3 stamp sets of your choice!

Happy Stamping!