Showing posts with label WC Hobbit Door Set. Show all posts

Sunday, August 31, 2025

When One Door Closes Gnome Home with GD Debbie Hedges

Hello Ai fans!

Every once in a while we just like to pick a talented artist and feature them as a Guest Designer.

This time we chose Debbie Hedges, and she's helping us out with our When One Door Closes challenge.


She created an amazing little gnome home and we're so excited to share it.

Please enjoy...

------------------------------------------------------------------------------------------------------------------------

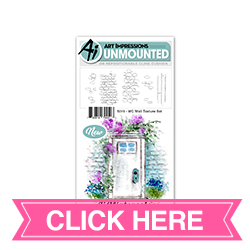
Welcome to the newest bi-weekly challenge! I am excited to share Challenge #411 When One Door Closes. The first stamp set that came to mind was #5015 WC Hobbit Door set, so I built my project around that. For this challenge, think of anything with a door . . . houses, barns, cubbies, fairy houses, cars, etc.


 I began by stamping the hobbit door in the center of my watercolor paper. I then used a ruler along the bottom of the door and lightly drew a horizon line for the base of my little “house.” I wanted the focus on the door. With my stamp positioner, I added the gnome and my three mushrooms. That gave me the base to work with for my scene. I began by painting the door in grey tones, adding shadows as needed. I then worked on the stone path, using sepia, grey and brown tones so that the stones were multi-colored and then went back and added shading to create dimension. Next I added a brown/sepia wash to create the idea of a wall for my door. I wanted it to have light and dark areas for interest. I then used the vine to climb one side of the door by stamping it once from the base of the door, then only inking portions of it to go around the arch. I used my positioner for placement. It is a great tool to preview what it will look like before you commit it to paper! I then touched each leaf with my brush to soften the color. I used a single flower bud and my stamp positioner to add the purple flowers in the vine and then touched each one with my brush to soften. My next step was to paint the mushrooms and gnome. This is not my first attempt on this project and for this one, I wanted the mushrooms to have added color – not just yellow and orange. So, they are shades of yellow at the base, to orange, to red and then some purple at the top of the largest mushroom. The base of the mushroom are shades of brown and I added some brown lines for ridges. For the gnome, I used the same red for his hat, and gave him a steel blue jacket, green pants and brown boots and belt. I added some grey tones to his white beard for shadows and used a flesh tone marker for his nose – adding pink to the bottom for shading. To finish this up, I needed to add teeny tiny grass along my horizon line along the base of the wall. I created a paper mask for the mushrooms and the gnome and just used post-it tape to protect the door area. Once the grass was stamped, I used the fine tip of my green marker to add some stalks of grass in front of the mushrooms. I also used the grass to stamp some grass along the steps on the stone path. Once that was stamped, I pulled the color out and then created a wash of green for the foreground. I then used the taller grass to create a clump of grass behind the gnome. I love to add a few leaves to the top of a project to finish it off. It gives the feeling that tree branches are hanging down. So, I used the leafy branch – it is one of my favorites – and just stamped it a few times along each top corner of my project. I then added water to each leaf to soften it. With a ruler and a pencil, I lightly added some horizontal lines to give the idea of siding and added a few vertical lines in random spots along with a couple dots for nails. All of this was very faint. Then with Dr. Ph Martins white paint, I added a small dot highlight to the door handle, a single dot in the middle of each flower bud, multiple dots on the mushrooms, and small dots on the grass along the path so it looks like tiny white flowers. There are a few random tiny white dots on my foreground as well. I then added dots to the top of the tall grass clump to create three daisies. When it was fully dry, I added orange dots for centers. I also added some white paint for dimension on the gnome’s beard. 
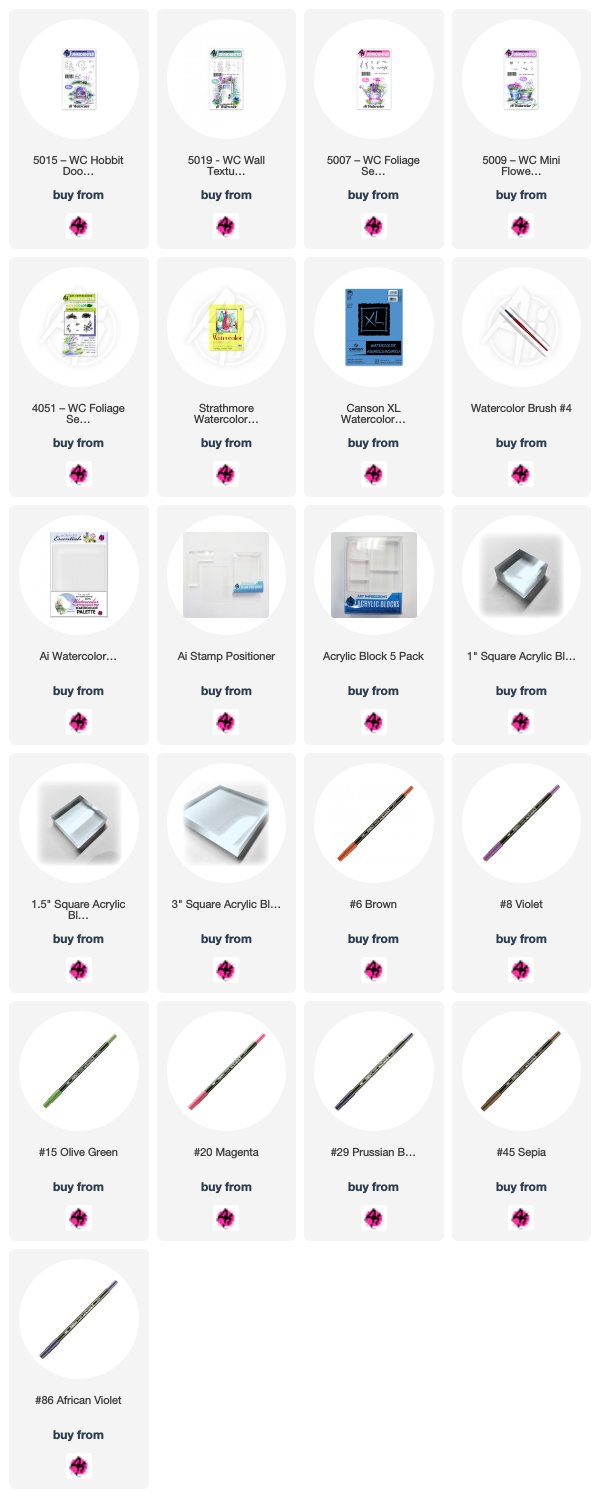
I hope you like it and will give it a try! Here are the stamps I used for this project along with the links for the stamp sets.


Thank you so much Debbie for your beautiful creation and inspiration.

You can enter your "door" craft HERE.

Saturday, January 18, 2020

Watercolor Weekend Roundup - Combining sets!


Hello, Ai Fans! Happy Watercolor Weekend!

We are so excited to share this week's Watercolor cards! We love what the gals have done combining stamp sets to come up with beautiful designs. We would love to see what combinations you are coming up with! 
Be sure to follow these lovely ladies on social media by clicking the link in pink next to their names!

Dot Freel - Instagram - Blog - Pinterest
Hello,

I made this card made for the Art Impression's Watercolor Weekend. I just love this raccoon from the 4208 - Furries TF set and doesn't he look like he's startled or forgotten a birthday? I stamped the raccoon and then I stamped a mask for him on post-it tape, cut it out and covered him up. I then used my Misti to stamp the bench in 969 from the 5066 - Light to my Path set in the perfect spot. I pulled the color out of the lines then got to watercoloring the raccoon with 969, N25, and 565. I colored the bench with 379.  I used 993 for the light and even colored around the outside of the light with it. Next, I stamped the foliage in 228 from the 5126 - WC Foliage Set 4 - both the vines and the grass. I pulled the color out of the lines then I added the flower in 177 and 743 from the 4868 - WC Flower Set 2. I used 177 on the palette to watercolor between the stones. I used 565 to watercolor the sky, the shadows under the bench and under the raccoon. I used a fine tip black marker to add some details back into the raccoon. I cut out my scene and background piece of paper using the 5062 - Rounded Rectangle Double Stitched Dies.

Thank you for checking out my blog!  You can find more of my cards on my Instagram account here


Karen Day - Blog - Facebook - Pinterest


I started by die cutting my Canson XL Watercolour Paper with one of the 5062 - Rounded Rectangle Double Stitched Dies, and then I selected my colour palette of Tombow Dual Brush markers.  I began by scribbling #991 Light Ochre onto my palette, and picked it up with a very wet #6 paintbrush, creating a background wash.  I dropped in touches of #947 Burnt Sienna to add a little warmth.  I took all three of the pine tree stamps from 5010 - WC Tree Set 1, and coloured them in varying shades of #098 Avocado#177 Dark Jade and #249 Hunter Green, making some 2-toned.  I stamped them to look like a forested hillside, doing second and third generation stamping to create some trees in the background.  Using a damp #1 paintbrush, I went over the tree boughs to blend the colours, and then pulled out the colour to pool below the trees, adding more colour where necessary to have the colours drip & blend together.  I picked up a watery brush full of #493 Reflex Blue and dropped a few bits of colour around the scene where needed.  I purposefully kept a lighter area in the center of my scene, and after my background was dry, I stamped the quote from 5127 - Build My Life Set using Versafine Onyx Black Ink.  I spattered a little black paint around, and then using a black fine point marker, I drew in the birds in the upper left corner.  On my creamy cardstock base, I blended some Vintage Photo Distress Oxide ink, then mounted a piece of kraft cardstock cut 1/8" larger than my scene.  I added 3D adhesive squares to my panel and adhered it to the card base. 


Tricia O'Bin - Blog - Instagram - YouTube - Pinterest - Facebook
Welcome back watercolor fans to another Art Impressions watercolor weekend!  This week I decided to create this cute little Mushroom Fairy by combining my Butterfly stamp set with the Elves stamp set.  I love when I can stretch my stamps.  What can you make by combining your stamps?

Project Details

I started off by inking up the sleeping elf from the Elves stamp set in 969.  I stamped it off and then stamped it on the right side of the watercolor paper.  Next, I inked up the closed butterfly from the Butterfly stamp set and stamped it onto my stamp positioner.  I rubbed off the body of the butterfly. I lined it up on top of the sleeping elf and stamped it to make the elf into a fairy.  I pulled the color out of the lines.
From my watercolor palette, I added color to the elf and to the wings using Pink, Blue, and Yellow.  I made sure a hit of the top of the elf showed through the wings.   Next, I inked up the mushroom from the Elves set with 969.  I, again, used my stamp positioner to place the mushroom next to the fairy.
I added the window and door from the Hobbit Door set using my positioner.  I pulled the color out of the lines and added some additional 606 to the mushroom.  I added some additional 969 to darken areas on the mushroom.  I added some grasses (from the original foliage set and foliage set 3) inked up with 177.  I pulled the color up and out of the lines.  Lastly, I added some 565 to my palette and painted a sky behind the mushroom.
I signed and dated my project.

Card Details

I cut my Mushroom Fairy out with a rectangle stitched die.  I glued it to a Gina K Designs Edible Eggplant card stock mat.  I glued that to a Neenah Solar White card panel.
Thank you so much for spending some time with me today.  I hope you will look at your new light.  Try something different, you will be glad you did! 


Thank you, ladies, for your continued inspiration! We absolutely love seeing everyone's personal style show through on each card!  
Happy Stamping!

Saturday, July 7, 2018

Watercolor Weekend Roundup - Stretch Your Stamps!

Hello, Ai Watercolor fans! We love finding new ways to use our Ai Watercolor stamps, and our three WC designers have some fantastic ideas for you today! Let's take a look!

Dot Freel - Instagram - Blog - Pinterest
Hello Watercolor Friends,

I had so much fun making this whimsical card for the Watercolor Weekend roundup. I used the stump and the stamp positioner to widen the stamp and make it taller. I used one of the hobbit doors along with that cute little mailbox to make it look like my chipmunks have a home. It's a play off of Watercolor Wednesday (my favorite day of the week!) Art Impression's Owner/Creator Bonnie Krebs tutorial on YouTube, see it here. Create one of these cards yourself using any of the animals and any of the flowers and grasses. I love how they all work together to create whatever scene you can imagine.

Other Supplies: Canson XL Watercolor Paper

Tricia Kennedy - Instagram
My project for today’s Watercolor Weekend features my state – ARIZONA. This idea can be adapted to any state or country – the possibilities are endless. Print out the state onto copy paper. Trace the state onto masking paper and cut out with an X-Acto knife. Using the negative cut out, adhere to watercolor paper. Watercolor the Art Impressions Way by inking up the cacti from the Southwest Set in Olive Green and Pine Green using masks from Post-It Notes as you go. Stamp the long stem from Flower Set 2 in Terra Cotta and Olive Green. Add dried grass to the bottom from Foliage Set 1 in Sepia. Scribble a little Olive GreenPine Green and Salvia Blue to your palette. Brush Olive Green and Pine Green onto the cacti to add depth and dimension and Salvia Blue for the sky. Be sure to get the color all the way to the mask edge to create a definite outline. Remove the mask for that WOW moment!
Marvy Le Plume II Markers: 15 Olive Green45 Sepia, 60 Salvia Blue, 72 Pine Green88 Terra Cotta
Other Products: Masking Paper, Post-It Notes, X-Acto Knife, state outline printed from www.50states.com

Tricia O'Bin - Blog - Instagram - YouTube - Pinterest - Facebook
I am still obsessed with card quilting. I wanted to create my own patterned paper to use on my quilt card. I thought red, white and blue would be fitting for the 4th of July holiday! I used a retired quilt die from Stampin Up! I created watercolor background using only 2 stamps. 

First, I created a template with the quilt die so I could do a bunch of watercoloring at one time. I backed the watercolor sheet with Stick it adhesive. Using Crimson Lake and Prussian Blue, I created watercolor flowers all over the watercolor paper using the daisy bunch. I added vines using Olive Green. Once the page was full, I die cut the quilt pieces out. I also cut quilt pieces out of another piece of white watercolor paper. I pieced it all together and adhered it to a piece of Black Onyx cardstock. I ran this through my machine using a quilt top textured embossing folder. I adhered the piece to a folded notecard. I die cut the 4th from a retired number die from Stampin Up! I embossed the “TH” and “Happy” from the Gina K Designs stamp set “Peony Wishes”. 

I hope you will join us and share your projects with us! 

Marvy Le Plume II Markers: 15 Olive Green29 Prussian BlueCrimson Lake

Thanks, team! What FUN ideas! From chipmunk mailboxes and lengthening a tree stump, to creating an interesting border mask, to fabulous floral quilts, there are just so many ways you can use your stamps! We hope this inspires you to take another look at your stamps and find more creative uses for them. Be sure to share your creations with us with Happy Stamping!

Wednesday, June 6, 2018

NEW VIDEO! Stump Hobbit Door Watercolor!

Hello Ai Fans!

We have a cute Watercolor Wednesday for you this week! Watch Bonnie extend our rustic stump to add an adorable hobbit door and resting robin on top. Bonnie simply stamps the doorway first, then adds a post-it mask over the door, using her positioner to stamp the stump twice on either side to give the tree a wider base. Add the cute little robin, your flower and foliage, and voila! We always love to hear your comments, hop over to the video and leave a little feedback!

Happy Watercolor Wednesday!


View on YouTube: https://youtu.be/2qlPa05uGZs


Saturday, June 2, 2018

Watercolor Weekend Roundup - Happy June!

Happy June, Ai Watercolor Fans! With summer on the way, we are dreaming of blooming flowers and sunshine! Today we have three gorgeous projects from the Watercolor Guest Design Team that we hope will inspire some summery cards! Perhaps you'll find a few ideas to use your stamps a little differently!

Dot Freel Instagram - Blog - Pinterest
Hello Watercolor Friends,

I made this card during the Memorial weekend for this week's roundup and I guess I was feeling patriotic. I needed to make the log base bigger than it was so I used the stamp positioner to make it wider which made the larger birdhouse fit better. I used eight stamp sets and nine markers to create it, and a white gelly pen for stars on the flag. See my list of supplies below:

Other Supplies: Sakura Gelly Roll, Tim Holtz Distress Watercolor Cardstock

Tricia Kennedy - Instagram
Take a look “Through the Porthole” for today’s Watercolor Weekend project. Watercolor the Art Impressions Way by inking up the round door from the WC Hobbit Door Set (omitting the cobblestones and the little window) in Sepia. Draw in the bottom of the circle with the fine tip of Sepia to achieve the porthole. Stamp the same round door onto a post-it note and cut out a mask. Next stamp the siding from the WC Wall Texture Set in Sepia on both sides of the porthole. To get the wooden plank look, draw in lines, squiggles and knots with the fine tip of Sepia. Scribble a little Manganese Blue, African Violet, Olive Green and Salvia Blue onto your Watercolor Palette. Mix Manganese Blue with African Violet and brush into the porthole for the sea. Take Olive Green and brush in for the land and finally Salvia Blue for the sky.


Marvy Le Plume II Markers: 15 Olive Green, 36 Manganese Blue, 45 Sepia, 60 Salvia Blue, 86 African Violet
Other Supplies: Darice Wave Embossing Folder, Post-It Notes

Tricia O'Bin - Blog - Instagram - YouTube - Pinterest - Facebook
I really loved using this bird bath as a container for some spring flowers. I was inspired by one of my neighbor’s bird bath that was turned into a flower pot. I love using the AI Stamps in unique ways. I am hooked on the flowers in the Flower Set 3 along with the original foliage set. We would love for you to join us for Watercolor Weekend. Tag us on Instagram with #AIWatercolor!!

Marvy Le Plume II Markers: 15 Olive Green7 Orange8 Violet3 Blue20 Magenta45 Sepia

Aren't these projects so fun? Each projects offers ideas on how to stretch your stamps! Whether you are "extending" a stamp like Dot's larger tree stump, transforming a door into a porthole like Tricia K, or filling your bird bath with lovely flowers, there is something for everyone!

Do you ever save these projects to your Pinterest board? Every single one of our blog posts has a small Pinterest icon at the bottom so you can easily pin your favorite posts! While you're at it, be sure to visit our Wonderful Watercolor board on Pinterest to find more of your favorites! Also, check out Dot and Tricia O's boards while you're at it! They are seriously jam-packed with beautiful cards!

Dot Freel - 
Pinterest
Tricia O'Bin - Pinterest

Happy Stamping!


Wednesday, March 14, 2018

NEW VIDEO - Hobbit Door Watercolor

Hello Ai Fans!

Welcome to a new Watercolor Wednesday!

This week, Bonnie uses another one of our 2018 Watercolor Releases with this adorable Hobbit Door tucked into a hillside. She starts by inking the Hobbit Door in Sepia and African Violet. From there, she creates a wash of Prussian Blue around the wall and adds color to the door. Next, she easily masks the door to add the bricks from our Wall Texture line around the arch. To add some green she uses her vines, tall grasses, and tiny grass. For the final touches, she adds tiny buds and stemmed flowers around the image and a wash of blue sky.

We hope you enjoy this new video! Don't forget to subscribe to our YouTube, like us on Facebook, and follow us on Instagram for the latest watercolor inspiration!

Happy Watercolor Wednesday!


View on YouTube: https://youtu.be/nvDx80D9fbo


Thursday, March 8, 2018

Watercolor Release Week 2! Six More WC Sets! Challenge 217 Watercolor Wonders!

6 New WC Sets
Designed with you in mind, we are excited to launch the next SIX sets of our 2018 Watercolor release! Our new additions are sure to expand your watercolor boundaries with wall-based scenes, textures, and adorable critters! There is something special about the doorways we enter, so we have added a stunning WC Door Set, as well as a cute WC Hobbit Door Set to gently tuck into a hillside. Throw open the shutters with our WC Window Set, and tuck a sweet WC Mini Critter into the corner. Add even more to your scenes with our new WC Cobblestone Set (created with perspective to lead to your main image), and our WC Wall Texture Set to place your windows and doors into a rustic brick scene. Our Watercolor Guest Design Team does it again with stunning samples, and watch Bonnie’s introduction to these sets in our video from Creativation! You can purchase these sets TODAY, and don’t forget to grab all 12 from our new release!
WC Door Set WC Window Set WC Hobbit Door Set
WC Critter Set WC Cobblestone Set WC Wall Texture Set
Let's see what our design team has in store for us today! Don't forget you can also follow the designers' blog and social media pages for more inspiration throughout the week!

Dot Freel - Instagram - Blog - Pinterest
Hello Watercolor Friends,

Ready for SIX more brand new sets of watercolor stamps by Art Impressions? You still have time to enter the current challenge called Watercolor Wonders and you could win some new stamps! My card was made using the brand new 5013 - WC Door Set and the 5019 - WC Wall Texture Set. I also used new foliage and flowers from the new 5007 - WC Foliage Set 3 and 5008 - WC Flower Set 3. I added the bunny from the 4874 - WC Bunnies Set and the basket to make my card an Easter card.

Art Impressions Products: 5013 - WC Door Set, 5019 - WC Wall Texture Set, 5007 - WC Foliage Set 3, 5008 - WC Flower Set 3, 4874 - WC Bunnies Set, 4773 - Acrylic Blocks, 4774 - Stamp positioner, #4 Brush
Marvy LePlume II Markers: 72 pine green, 45 sepia, 31 pale violet, 20 magenta, 27 olive brown, 32 laurel green, 29 Prussian blue, 86 African violet, 18 dark brown, 40 brownish grey
Other Supplies: Canson Watercolor Cardstock

Tricia Kennedy - Instagram
I’m excited to feature two NEW watercolor sets, Window Set and Cobblestone Set, for the Art Impressions Watercolor Wonders Challenge in my “Weathered View” card.

Begin by stamping the tall window from the NEW Window Set in a combination of Sepia and African Violet to make a lovely steel grey. Pull the color from the lines using water and your paint brush. About a ½ inch down stamp a selection of the cobblestones from the NEW Cobblestone Set in Sepia. I used the stamp positioner to stamp the same four stones directly next one another. Stamp the small filler flower from the Blooming Birdhouse Set in Ochre, then the tall flower bunch from Flower Set 2 in English Red and Olive Green and then the leafy branch from Foliage Set 2 in Olive Green to fill in around the flowers. Add the vines to the top of the window from the Foliage Set 2 in Olive Green. Scribble a little Sepia and African Violet on your palette and brush onto the shutter. Add a little onto the cobblestones for added dimension. Put a little Olive Green on your palette and brush in between the cobblestones and under the flowers/foliage. Finish with dot detail using the fine tip of English Red around the tall flower bunch.

Other Supplies: Cottage Cutz Stitched Oval Die, The Stamps of Life Stitched Circle Die

Tricia O'Bin Blog - Instagram - YouTube - Pinterest - Facebook
It's such an exciting time at Art Impressions Rubber Stamps. We are back again this week with the release of 6 more brand new watercolor sets. I can't tell you how much I LOVE all these new sets. It's also week 2 of the Watercolor Wonders challenge over on the blog. There is still time to enter! I decided to create a Winter Hobbit House. This little house was so adorable and I am such a big fan of the Hobbit series that I was excited to ink it up. Of course, I made it in the snow. I am so thrilled with all of the new sets and hope to share more projects with you.

Marvy Le Plume II Markers: 45 Sepia86 African Violet43 Brilliant Yellow
Other Supplies: Wink of Stella Glitter Clear Brush Pen – ClearSilver Brush, Black Velvet , Round, Size 8Classic Crest Cover Solar White 8-1/2x11 110lb 250/pkg : BlankScor-TapeHeavy Base Weight Card Stock- Black OnyxHeavy Base Weight Card Stock- Moonlit Fog

Awesome job, team! Love your creative ways to use our newest stamps! This is the perfect inspiration for our challenge...
It's your chance to win Ai stamps by entering this week's Watercolor Wonders Challenge! We know we have huge watercolor fans, and we want to see your style shine! Enter our challenge by sharing a link to your artwork using our inLinkz below. We can't wait to see what you create! Hurry, just one week left to enter!

Here are the Challenge Rules
✻ Please make a new card or creation. You can make any crafty item you wish; this is not limited to cards!
✻ Limit two submissions per person. You will receive extra votes if you use Art Impressions stamps!
✻ The Ai Challenge is open to everyone, international submissions are welcome!
✻ Include a link back to the Ai Blog or grab our button on the top right of our sidebar!
✻ Share the Ai love by clicking and commenting your fellow crafters.
✻ Make sure to get your link up by Wednesday, March 14 at 5:00 p.m. PST to enter your creations.
✻ Good luck and happy stamping!