Showing posts with label Wooden Door. Show all posts

Wednesday, July 3, 2019

NEW VIDEO! Oceanside Doorway Watercolor

Hello Ai Fans!

We are back for a NEW Watercolor Wednesday! This week, Bonnie creates a doorway in a stone wall, with a path leading down to the oceanfront. We love the hanging vines and colorful bushes that adorn this wall. Bonnie also added the birds from our My Fortress Set in the blue sky!

We hope you enjoy this week's special video!

View on YouTube: https://youtu.be/YVy5-YJGYpo


Saturday, December 1, 2018

Watercolor Weekend Roundup - Wreaths Three Ways!

Happy Saturday, Ai Fans! Get ready to cozy up with a cuppa and enjoy these wintery watercolor scenes from our fabulous design team! Dot, Tricia K. and Tricia O. have three beautiful and different projects to inspire your holiday creations. Let's take a peek!

Dot Freel - Instagram - Blog - Pinterest
Hello Watercolor Friends,

I have been busy making Christmas cards since I usually mail out 30-40 handmade cards. I imagined this farmer went out and cut his own tree and dragged it back with his tractor for this country Christmas card made for the Art Impressions Watercolor Weekend. I used the tractor from the 5059 - WC Harvest Set and the barn and fence from the 5011 - WC Truck Mini Set. The tree is from the 4960 WC Fir Trees Set. I added some sparkle to the snow with a Wink of Stella glitter pen. I drew the little wreath on the barn using the fine tips of the Marvy pens. I used a white Uni-ball Signo pigment pen to make the snow. 

Other Supplies: Wink of Stella glitter penUni-ball Signo pigment pen, Tim Holtz Distress Watercolor Cardstock

Tricia Kennedy - Instagram
My project for today’s Art Impressions Watercolor Weekend, “Holiday Wreath”, is a perfect gift to make this holiday season.

Being by tracing the outline of the ornament on watercolor paper twice (this is a double sided ornament). Draw a 1” circle in the middle of each piece. Stamp the small straight pine bough around the 1” until you have achieved a full wreath. Repeat. Watercolor the Art Impressions way by pulling the color from the lines. Add red and silver drops of glitter glaze, let dry. Cut out, glue back to back and place inside the ornament. Tie holiday ribbon at the top and enjoy!

Marvy Le Plume II Markers: 72 Pine Green
Other Products: 80mm Ornament from Michaels, Queen and Company Red Twinkle Glitter Glaze, Queen and Company Silver Twinkle Glitter Glaze, Ribbon, Xyron Tape Runner

Tricia O'Bin - Blog - Instagram - YouTube - Pinterest - Facebook
Til the season for wonderful winter wonderland projects. My favorite time of the year! My watercolor weekend project showcases the bench and light from the Light to my Path Set. I added the sleeping deer from the Mini Critter Set and the wreath from the Wooden Door Set. The Christmas Bench is a really simple way to create a snowy scene perfect for your Christmas Cards!

To begin I stamped the sleeping deer with Sepia and pulled the color lightly out of the lines. I continued to slowly build up the color adding Brown as well with my watercolor palette. To add the white details, I used my Uni-Ball white gel pen. I created a mask and covered the deer. 

Next I used Sepia and African Violet (on the pole and light) and stamped the Light to my Path bench and light. I pulled the color out of the lines and added some additional color to the bench, light and pole. I stamped the wreath in Pine Green onto the pole and added Crimson Lake to it once I softened the lines. I also drew in a bow. 

To create the snow, I added African Violet randomly around the background and underneath the deer. I mixed Black and African Violet and added it to the background. I also added some Brilliant Yello to the lantern and the sky. I also added some Brilliant Yellow highlights on the snow and in the sky. Once everything was dry I added some additional snow in the sky and over the project using my Sharpie white paint pen and uni-ball white gel pen. I then added some Wink of Stella clear shimmer over the deer and snow. 

I am so excited to get some of my Christmas cards done and hope you will show us what you come up with. We hope that we have inspired you! 

Scor-Pal Scor-Buddy Mini Scoring Board, 9 by 7.5-InchWink of Stella Glitter Clear Brush Pen – ClearSharpie Paint Marker white extra fineUni-Ball Signo Broad Point Gel Impact Pen White

Thanks, designers! Your projects have us dreaming of a white Christmas! We love how each of you used a wreath in your project in a different way, from a teeny tiny wreath on a barn, to a wreath over a light post, to a wreath ornament! It is so fun to see the same motif customized for any project. If you'd like to share your projects with us, be sure to tag us with #aistamps and #aiwatercolor on Instagram so we can take a peek at what you create! Til next time, have a great weekend!

Happy Stamping!
Saturday, November 18, 2017

Watercolor Weekend Roundup - Holiday Inspiration

Have you started your holiday cards? Our Watercolor Guest Design Team sure has! Glean some new ideas for your projects here on Watercolor Weekend! Take a look and leave a little comment love about how the team has inspired you today!

Dot Freel - Instagram - Blog - Pinterest
I made a shaker card for the Watercolor Weekend Round-up on the Art Impressions blog this weekend. I used the - Wooden Door stamps for this one. I love purple and green together so I made the door purple. I knew I wanted to add multi-colored lights on the house, wreath and fir trees which I made using the new 4960 - WC Fir Trees Set. I used a Sakura Gelly Roll pen to add that little bit of sparkle to the lights and the snow.  I just used the fine tip of the Marvy LePlume II pens to draw the multi-colored lights.
Tricia Kennedy - Instagram
I’m excited to share this fun and festive last minute Thanksgiving project for today’s Art Impressions Watercolor Weekend – Personalized Turkey Place Cards. 

Using a 3”x4” piece of watercolor paper, trace around a 7/8” button, set the button aside. Take the large straight pine bough from the WC Fir Trees Set and stamp one on each side of the circle (slightly overlapping the pencil line) in 82 Mustard, 13 Ochre, 88 Terra Cotta, 27 Olive Brownand 45 Sepia to create the turkey feathers. The final center feather is stamped once in 18 Dark Brown. Erase the pencil line. Pull the color with your watercolor brush and water. You can either hand write, stamp or print the name on the place card. I opted to print it. Measure down 1½” and score a line lengthwise across avoiding the stamped image. Use an xacto knife to cut out the top few feathers so they pop up once folded. On a small scrap piece of watercolor paper, stamp the large straight pine bough from the WC Fir Trees Set in 13 Ochre then cut into a tiny triangle for the beak. Next stamp the large branches vine WC Foliage Set 1 in 28 English Red then cut out one teeny tiny leaf for the snood (yes, I looked that up, it’s the red dangly thing on the beak). To assemble the turkey body, place two self adhesive pearls onto the button as eyes, use a small glue dot or glue to add the beak and snood. And finally, attach the body onto the feathers with a glue dot and your turkey is complete. Happy Thanksgiving!
Marvy Le Plume II Markers: 82 Mustard, 13 Ochre, 88 Terra Cotta, 27 Olive Brown, 45 Sepia, 18 Dark Brown, 28 English Red
Other Supplies: Want 2 Scrap Self Adhesive Pearl Bling, 7/8” Black Buttons, Glue Dots, Xacto Knife, Stylus, T-Square Ruler, Printer, Blossoms Script Font

Tricia O'Bin - Blog - Instagram - YouTube - Pinterest - Facebook
I used the pumpkin stamp as a container for the fall flowers. I first inked half of the pumpkin stamp with African Violet and Sepia. I wanted my pumpkins to be white, leaving off the top of the pumpkin to allow for the flowers to spill out the front and sides.

I added the leaves in Brilliant Yellow, Orange and English Red. I softened each layer after I stamped it so that I could layer each color easily. I stamped the wheat (I think that i what it is LOL) in Brilliant Yellow. I softened it and then inked the Lily stamp up with Terra Cotta and Olive Green. I then added the branch with the red berries inked with Sepia and English Red.

I cut these out using a square stitched die. I cut a piece of Sweet Mango cardstock to back the middle image.

I created the background by using alcohol inks on photo paper. I cut the shadow of the Thankful die out of this layer. I backed it on a piece of Cranberry Tart cardstock. I cut the word thankful from Sweet Mango cardstock. 

Love these festive projects! What do you think? Let us know in the comments below, and share your own projects with us with #AiWatercolor on Instagram, or posting pictures on our Facebook Page! If you are looking for even more inspiration, be sure to visit the designer's other social media pages below:

Dot Freel - Instagram - Blog - Pinterest
Tricia Kennedy - Instagram
Tricia O'Bin - Blog - Instagram - YouTube - Pinterest - Facebook

Happy Watercolor Weekend!

Wednesday, December 7, 2016

NEW VIDEO - Garland Doorway Watercolor

Hello Ai Fans!

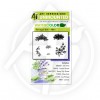
Welcome to another Winter Watercolor Wednesday! This week, Bonnie created a beautiful entryway filled with foliage, including topiaries and garland. She used the doorway from WC Series 6 Set 2 and adds overflowing garland with the vine from her Foliage Set. She then creates topiaries with the wreath from our Wooden Door Set, after adding Molotow Masking for the white dots, and then stamps the wreath in the middle of the doorway. The topiary containers are simply drawn in and you can easily add snow and shadows with the #86 African Violet pen. The final touches are adding berries, a few drawn ribbons and make it shine with your Wink of Stella!

We hope you love this week's video! Can you believe it only took 3 stamps to make this stunning image? Make sure to hop over to YouTube to give Bonnie a "thumbs up" on the video and feel free to leave comments there! Also, thanks to all who subscribe! We are so excited to be close to 6,500 subscribers!

We look forward to seeing you next week for our last Watercolor Wednesday of 2016!
Happy Stamping!
View on YouTube: https://youtu.be/N69xPVANur8


Wednesday, October 19, 2016

NEW VIDEO - Winter Barn Watercolor

Hello Ai Fans!

Welcome to a new Watercolor Wednesday and the start of our Winter Watercolor series! In this video Bonnie created this beautiful, snowy barn using our Old Barn Set. She masked some softly falling snow using the Molotow Masking Liquid (now available at artimpressions.com) and created a blue sky backdrop to set the scene. Mixing in another set, Bonnie grabbed the wreath from her Wooden Door Set and easily added berries and a ribbon with a red Marvy Marker. To finish the scene, Bonnie added some barren trees using the twig stamp from our WC Series 6 Set 1. This scene is perfect to send holiday wishes with a stunning Christmas card!

We hope you enjoy the first tutorial of our Winter Watercolor series. If you like this video, make sure to subscribe to our channel and give a "thumbs up" over on YouTube. We appreciate all your feedback and look forward to sharing more snowy scenes soon!

Happy Watercolor Wednesday!


View on YouTube: https://youtu.be/Y5_TcxYMas8