Showing posts with label WC Fir Trees. Show all posts

Friday, June 13, 2025

For the Beary Best Dad! card by Tasha

 Happy Friday, Art Impressions friends!

Tasha here, and I’m excited to share a beary sweet Father’s Day card using the adorable new 6064-WC Bear Set and 6063-Just For Him Set; just in time for Sunday!

For this card, I started by stamping the baby bear first, then masked him off so Papa Bear could stand behind him; just like a big bear hug moment! With both bears masked, I brought the background to life using the 4960-WC Fir Trees Set(these trees are one of my favorites!). I stenciled yellow clouds and added yellow ink to the trees to give the effect of sunshine streaming through; so warm and cheerful!


To frame the scene, I used the 5135-Hexagon Double Stitched Dies for a fun focal point. The sentiment “Dad, You’re the Beary Best!” combines a greeting from the Bear Set and the word “Dad” from the Just For Him Set; plus a cute little paw print for extra charm!

I finished the card with layers of green, white, and gray cardstock and a fun tree print from the new 6072-Father’s Day Paper Pack.

Hope you all have a wonderful day!


Sunday, December 1, 2024

Baby Mini Foundation Set by Karen Day

 Hello Ai Watercolour fans!


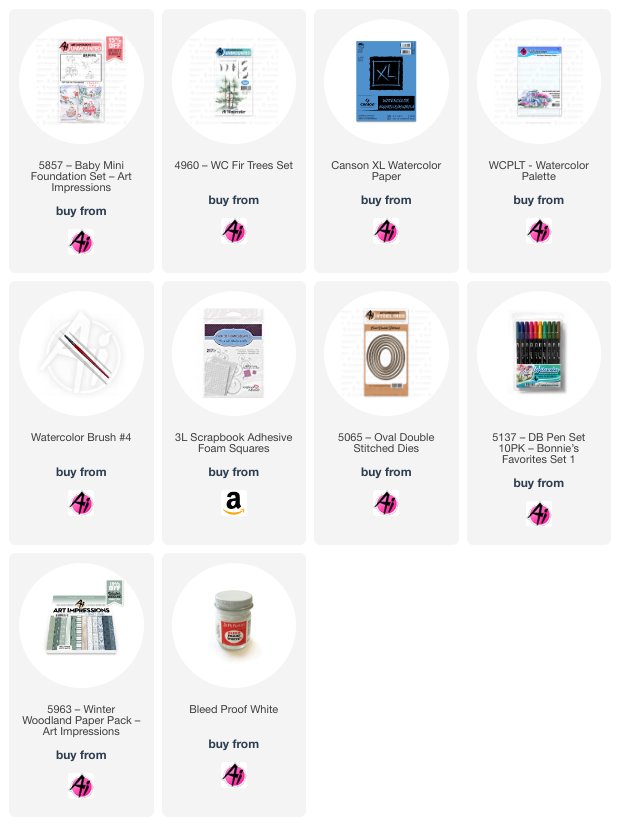
Time for one last Christmas card on my 2024 Watercolour Weekends... and I am using the 5857 - Baby Mini Foundation Set that was released last year.  This image was part of the Nativity Journal Bundle, but works great all on it's own as a card.


Before stamping, I determined that I was going to use the 5065 - Oval Double Stitched Dies to cut out my image, so I traced the outline on my Canson XL Watercolour paper to give myself a painting guideline.  I stamped my image using #N65, as I wanted a soft outline to paint with.  I used four of the branches from 4960 - WC Fir Trees Set coloured in #249/565 and stamped in all of the pine boughs.  There are two branches that bend in each direction, so it allowed me to make it look as though the branches were hanging down from each side.  I coloured each branch in #249, then added #565 along the bottom edge to provide a built in shadow.  I touched all the branches with a damp brush to bring out the colour, and soften the lines.  The birds were painted with #969/947/865, with several layers to add some depth.  #992/969 were painted in streaks on the manger, to indicate a wood-like texture, and I used the #992/993 markers directly on the paper to create the hay underneath.  #850/947 were painted on the Baby's face, with a little glow added to His cheeks.


A wash of #565 was painted on the sky, but it was a bit too purple for my liking, so I darkened it up a little using Blueprint Sketch Distress ink.  It was also added to the snowy hillsides, and as shadows around the manger.  I used my Twintone markers to add in the bird's eyes/beak/legs, and the Baby's features.  I used Bleedproof White paint to add snow to the branches, along with a few snowflakes in the sky, then painted in some shadows with #565 on the snow.


I used the oval die to cut out the image, then matted it and mounted it onto my background paper from 5963 - Winter Woodland PP with 3D foam adhesive.  A few jewels and a foiled sentiment finished it off.  *I am sharing one project this morning, and Gennette will be posting another one this afternoon, so be sure to check back!  


Sunday, October 9, 2022

Watercolor Angels by Tricia

I am incredibly honored to have been asked to do a blog post for a recent set of paintings that I created with the new Angels set.  I originally wanted to challenge myself to think outside of the box and stretch my stamps. I thought I was creating Halloween costumes but it turns out after creating the backgrounds that is not necessarily what they turned out to be in the end. 

Here are the before and after pics in case you missed my Instagram and Facebook posts.


Let's get a closer look!

First, we have this little dragon with her new mouse friend surrounded by a sweet pumpkin patch. The NEW Harvest watercolor stamps have the best pumpkins I have ever seen!

This cute little witch continues our Fall/Halloween theme. I colored her up like the wicked witch of the west and created my own broom.  I love these night scenes when I can just keep layering color to get more and more depth and make little stars, of course.


I was really torn on what to do with the background for this sweet bee, but then my new stamps arrived just in time and these hay bales were perfect.  I am in LOVE with the sunflowers and I know they will be showing up on lots of my projects. 


I wasn’t really sure what to do with this sleeping angel so I decided to dress her like Minnie Mouse. I found a picture of Minnie’s house to hand draw her background. Makes me think that she must have been exhausted trying to get there.

Finally I have a snowy scene with this cute angel.  I extended her wings a little a placed her in a winter wonderland. Creating these trees is one of my all time favorite things to do in watercolor.  I should have gotten out the bleed proof white to add some snow to the branches.  Next time!

I had so much fun creating these scenes.  I was glad I didn’t rush through the process and just let the inspiration come.  Thank you so much for joining me and I am so blessed to be surrounded by such a talented, loving and encouraging community. I hope you all have a wonderfully creative day!


SUPPLIES:

Wednesday, July 22, 2020

NEW VIDEO! Snowy Birdhouse

Hello Ai Fans!

Welcome back, Watercolor Wednesday fans!

NEW VIDEO! Christmas in July is BACK! Watch Bonnie as she shares a simple snowy birdhouse project!


View on YouTube: https://youtu.be/t9VQG3plbbc

Saturday, November 16, 2019

Watercolor Weekend Roundup - Sparkle & Shine Holiday Cards!

Hello, Ai Fans! We've been looking forward to Watercolor Weekend all week! Today the team is here with some awesome holiday inspiration! Let's take a look, and don't forget to follow these ladies on their social media platforms in pink next to their name for even more inspiration throughout the week!

Dot Freel - Instagram - Blog - Pinterest
Hello Watercolor Friends,

Don't you love Christmas trees? I hope you like my Christmas tree card for the Art Impressions bi-monthly Watercolor Weekend. The first thing I stamped was the bunny in brown 969 from the 4874 - WC Bunny Set and then I stamped it on post-it tape to make a mask. I stamped the barrel from the 4871 - WC Rustic Container Set after inking it in blue 565 and then brown 969. I watercolored the bands with N25 on the palette and the wood parts in 947. I watercolored the inside of the ears of the bunny in 772 and then I took the fine tip of the brown Tombow TwinTone to the eyes, nose and other areas that needed to be darker. I stamped the tree trunk from the 4960 - WC Fir Trees Set in 969 and the branches in two greens, 177 and 249. I dabbed all over the tree with a wet brush and then stamped more branches and repeated my process to really fill in the tree. No Charlie Brown trees for me, I like them fat and full. I stamped a branch from the 4964 - WC Branches Set with the 969 and then added leaves in 177 from the 4867 - WC Foliage Set 2. I dabbed at the leaves with a wet brush and then I took the fine tip of the red 847 to make the berries. I watercolored with 565 for the snow on the ground and the sky. I dabbed circles of glossy accents all over the tree and then I sprinkled red glitter on them. After I used a hot gun to dry the glossy accents, I cut out the scene with the largest die from the 5065 - Oval Double Stitched Die Set. I cut out the background piece of white glitter paper with the largest die from the 5062 Rounded Rectangle Die and then put it all together on an A2 card base.


Karen Day - Blog - Facebook - Pinterest
There was a lot of pre-planning on scrap paper for this one! I wanted to use all four elves from the 5125-WC Elves Set, so I played around with positioning based on their poses and the angle of how their heads were tilted, until I got something that I could work with. I also wanted them to be in and around the presents, so had to figure out the shape of the parcels, while still leaving room for the branch to hang down. I positioned all four elves on the same block to ensure they were placed correctly, and coloured them first in Tombow #565 Deep Blue, and then #969 Chocolate - stamped them off on scrap paper and then onto my Ranger Watercolor Paper. With a pencil and ruler, I drew in the presents, and lightly drew a line where I wanted the branch to be. 
The elves are painted with #837 Wine Red, #177 Dark Jade and #969 for their shoes. A touch of #850 Flesh for their skin tone, and #026 Yellow Gold and #969 Chocolate for their hair. The presents are painted with #026, #565, #969 and #N65 Cool Grey. I layered the colour to get the darker shades on some sides of the boxes, and went in with the fine points of the markers to draw the crisp edges of the boxes in. I dove into my Christmas wrap to dig out a bow, and loosely sketched it in on the large present, painting it in with #565 Deep Blue. With the pine bough from 4867 - WC Foliage Set 2 New, and my #249 Hunter Green marker, I repeatedly stamped it to create the tree branch. After dabbing it lightly with my damp #1 paintbrush, I went back in with the fine point to draw in a few needles, and darken a few areas. I picked up #565 from my palette, and painted a faint blue wash in the background, and also used it to add shadows in and around the elves & presents. 
Since this paper has a fair bit of texture, some of the definition of the elves had been lost in the stamping, so I used my TT41 Chocolate TwinTone Marker to redraw the outline of the elves. The image is die cut with one of the 5063 - Rectangle A2 Double Stitched Dies. I wanted a softer edge to my scene, so I used blending brushes with two shades of Distress Oxide Inks (Evergreen Bough & Blueprint Sketch) to shade the outside of my rectangle giving it a bit of a soft focused look. I matted it with some dark blue cardstock and adhere it with pop dots onto my plaid card base, then wrapped it with an organdy bow. A few sparkles liven it up a little!


Tricia O'Bin - Blog - Instagram - YouTube - Pinterest - Facebook
Hey watercolor fans! Welcome to another Watercolor Weekend. With Thanksgiving coming up soon I thought I would do a simple Blessed & Grateful Harp. I love the elegance of the harp. I just love the shine that the Wink of Stella adds. I hope you have a wonderful Thanksgiving and feel as blessed as I do.

Project details

I started out by inking the harp with Yellow. Then, using a light hand, I i
nked it with the Brown sporadically around the stamp. I wanted to create a mixture of color without losing the Yellow. The stamp is pretty delicate, so I decided to use my #1 brush to pull the color out of the lines. I also used it to pull the color slightly out of the strings, making sure to hold my brush vertical to keep the lines thin. I added some additional color from my palette.

Next, I inked the small vine from the Foliage Set 4 with the Green. I wanted it to be more of a Hunter Green so I used 249 but any green will work. I added water to the leaves. I knew that I was going to use red and I didn't want them to mix and make brown. I inked the small dots from the Mini Flower Set with Red. I added water to soften the blooms.

I added some Brown mixed with Blue to the bottom of the harp to ground it. To create some additional depth and interest, I added some blue to the background. To make the harp look like gold, I added some Wink of Stella to it. Lastly, I signed and dated my painting. 

That's it! Amazing right. You can create some quick and easy paintings that come out amazing.

To create the card I cut it out with a rectangle stitched die. I added it to a mat created from Gina K Designs Wild Dandelion cardstock and one created with Dark Chocolate cardstock. I added both of these to a Neenah Solar White card base.

I am so happy you stopped by and I hope you have been inspired by all the awesome projects. Tag us on Instagram so we can check out your fantastic projects.

Have a blessed & crafty day!


Thanks, team! What amazing holiday projects! We love the touches of sparkle added to your projects to make them pop and display more holiday cheer! Did you enjoy these projects? Let us know in the comments below! Thanks for stopping by this Saturday, and have an awesome Watercolor Weekend!

Happy Stamping!

Wednesday, August 14, 2019

NEW VIDEO! Nighttime Silhouette Watercolor by Kendra Krebs

Hello Ai Fans!

We are excited to have guest artist Kendra Krebs back this week for a NEW Watercolor Wednesday! Kendra always brings a new perspective and today she shows us how to create a whimsical forest scene, creating a dark foreground and lighter background, and uses a Molotow marker to create dots of light. Kendra simply used a couple tree sets and a few foliage sets to design this scene with three markers! At the end, Kendra asks what your favorite part of the video was, so hop over to YouTube to leave her a comment!


View on YouTube: https://youtu.be/U0IpJL06UeY


Saturday, May 4, 2019

Watercolor Weekend Roundup - Homey Inspiration!

Hello, Ai Watercolor Fans! We have three more fabulous projects for you from our Watercolor Guest Design Team! We hope you enjoy these outdoorsy house scenes from Dot and Karen, as well as a colorful floral wreath by Tricia! Let's take a look!

 Dot Freel - Instagram - Blog - Pinterest
Hello Friends,

I was inspired by my camping/fishing weekend in Utah to make a card for my son's birthday. I stamped the boat from the 5057 - WC Boat Set in both 86 African violet and brown 969 and then I pulled the color out of the lines. Next I stamped the shed from the 5121 - WC Garden Shed Set again first using African violet and then the brown. After pulling the color out of the lines, I used the brown to color in the roof, shingles and door knob area. I used African violet to color the windows, add shade under the roof, on the door, and the water around the boat. I used the brown to watercolor the oars, the bench and the top of the boat. I used the brown to watercolor the ground on the other side of the boat and the walkway from the shed. I stamped the tree trunks from the 4960 - WC Fir Trees Set in brown, then I stamped in the branches using green 249. I added 75 sky blue to the palette to color in the sky. I stamped the grass from the 4051 - WC Foliage Set 1 in with 27 olive brown. I stamped the tall grasses from the 5007 - WC Foliage Set 3 also in the olive brown. I stamped the flowers by the boat from the 4868 - WC Flower Set 2 using green 177 and orange 885 for the flowers. I stamped in the heart flowers by the cabin from the 4868 - WC Flower Set 2 in the same orange color. I cut out the picture and a background piece using the 5063 - Double Stitched Rectangle Dies. I used my Copic pen to sign and date it.

The birthday card below is the first card I made which I will give to my second son Chad and then I made the other version for the Art Impression's Watercolor Weekend blog post. Give it a try!

Karen Day - Blog - Facebook - Pinterest
To create my scene today, I've paired up one of the cottages from 4958 - WC Cottages Set (this is SO typical of historic homes in my area!), with the footbridge from the just released 5122 - WC Bridge Set, inking them both with Tombow #969 Chocolate. Using the smaller tree from 5010 WC Tree Set 1, I stamped it several times on each side of the cottage with my #969, then softened all the lines with a damp #4 paintbrush, pulling out the colour on the tree trunks, and on the footbridge. I coloured my #177 Dark Jade marker onto the tiny foliage sprig in the 5009 WC Mini Flower Set, stamping it repeatedly to get 2nd & 3rd generation foliage in the trees, and creating shrubs around the house. Also from the Mini Flower Set - I used my #533 Peacock Blue to colour the tiny floral cluster (it looks like dots!) stamping it around the shrubs to suggest purpley/blue flowers. Dabbing at them with my damp brush softened the images, and intensified the colours. I initially drew the tufts of grass directly with my #076 Green Ochre marker, but since it is quite a yellow/green, my scene had a bit of a fall feel to it, and I was aiming for spring! So I picked up the #177 green off of my palette, and painted a wash of green grass, darkening up the grasses directly with the marker as well. I painted the pathway with #992 Sand, and added #491 Glacier Blue onto the roof & door. I painted a touch of #856 Chinese Red onto the chimney, then went in with the fine point of it to sketch in the bricks. I picked up #565 Deep Blue with my brush to paint in the stream, and then added the shadows to the windows, pathway, around the house & trees, and finally painted in the sky. With my scene complete, I always walk away for a few hours (days?) and come back with a fresh eye. I did want to darken things up a little, so I went back in with both my 177 and 565 markers, adding grasses and flowers in the deeper tones.


Tricia O'Bin - Blog - Instagram - YouTube - Pinterest - Facebook
Hey there! Welcome to another Art Impressions Watercolor Weekend! Today I am sharing my "Enjoy The Day" spring wreath. 

Step 1: Start off by lightly tracing around a circle die. This can be any size you like based on how big you want your wreath to be. Make sure you leave space around the circle for your leaves and flowers.

Step 2 : I chose a larger branch from the 4964 - WC Branches Set and inked it up with 969-Chocolate. I stamped it along the circle, trying to keep the largest part of the branch on the traced circle. I stamped it a couple of times, then re-inked it. You don't need to add any water to the branches, they are more of an accent stamp.

Step 3: I inked up the leaves from the 4605 - Spring Basket with 177-Dark Jade. You can use either one. I inked it up and stamped it several times on each branch. I added water to each of the leaves. The water may cause the color from the leaves to mix with the brown from the Branches but this is OK, unless you don't like that. I actually think it creates more interest and depth.

Step 4: I inked up the flower from the 4604 - Chest of Flowers with 443-Turquoise and stamped it around the wreath. I added water to each bloom. Next, I inked up the small dots flower from the 5009 - WC Mini Flower Set inked with 725 - Rhodamine Red and stamped them alongside the flowers. I added water to the blooms and then stamped them again using 606 - Violet.

Step 5: Using my MISTI, I inked the Enjoy The Day sentiment with the Rhodamine Red and Violet. I re-inked and double stamped it. I carefully added a small amount of water using a #1 paintbrush. Lastly, I signed and dated it.

Check out my blog for more details on how I put the card together. Check out the other design team members inspiration over on the AI Blog. Tag us on Instagram with #AIWatercolor.


Thanks, team! These projects really are beautiful and perfect for giving to a loved one this spring. We are always searching for inspiration for structure scenes, and your projects with stepping stones, bridges, trees, and water is just so pretty! Also, the floral wreath has some really lovely flower stamps tucked in some of our favorite mini sets!

We'd love to hear what you think about these projects, drop us a comment below! Did these cards give you ideas for your projects this weekend?

Happy Stamping!

Saturday, December 1, 2018

Watercolor Weekend Roundup - Wreaths Three Ways!

Happy Saturday, Ai Fans! Get ready to cozy up with a cuppa and enjoy these wintery watercolor scenes from our fabulous design team! Dot, Tricia K. and Tricia O. have three beautiful and different projects to inspire your holiday creations. Let's take a peek!

Dot Freel - Instagram - Blog - Pinterest
Hello Watercolor Friends,

I have been busy making Christmas cards since I usually mail out 30-40 handmade cards. I imagined this farmer went out and cut his own tree and dragged it back with his tractor for this country Christmas card made for the Art Impressions Watercolor Weekend. I used the tractor from the 5059 - WC Harvest Set and the barn and fence from the 5011 - WC Truck Mini Set. The tree is from the 4960 WC Fir Trees Set. I added some sparkle to the snow with a Wink of Stella glitter pen. I drew the little wreath on the barn using the fine tips of the Marvy pens. I used a white Uni-ball Signo pigment pen to make the snow. 

Other Supplies: Wink of Stella glitter penUni-ball Signo pigment pen, Tim Holtz Distress Watercolor Cardstock

Tricia Kennedy - Instagram
My project for today’s Art Impressions Watercolor Weekend, “Holiday Wreath”, is a perfect gift to make this holiday season.

Being by tracing the outline of the ornament on watercolor paper twice (this is a double sided ornament). Draw a 1” circle in the middle of each piece. Stamp the small straight pine bough around the 1” until you have achieved a full wreath. Repeat. Watercolor the Art Impressions way by pulling the color from the lines. Add red and silver drops of glitter glaze, let dry. Cut out, glue back to back and place inside the ornament. Tie holiday ribbon at the top and enjoy!

Marvy Le Plume II Markers: 72 Pine Green
Other Products: 80mm Ornament from Michaels, Queen and Company Red Twinkle Glitter Glaze, Queen and Company Silver Twinkle Glitter Glaze, Ribbon, Xyron Tape Runner

Tricia O'Bin - Blog - Instagram - YouTube - Pinterest - Facebook
Til the season for wonderful winter wonderland projects. My favorite time of the year! My watercolor weekend project showcases the bench and light from the Light to my Path Set. I added the sleeping deer from the Mini Critter Set and the wreath from the Wooden Door Set. The Christmas Bench is a really simple way to create a snowy scene perfect for your Christmas Cards!

To begin I stamped the sleeping deer with Sepia and pulled the color lightly out of the lines. I continued to slowly build up the color adding Brown as well with my watercolor palette. To add the white details, I used my Uni-Ball white gel pen. I created a mask and covered the deer. 

Next I used Sepia and African Violet (on the pole and light) and stamped the Light to my Path bench and light. I pulled the color out of the lines and added some additional color to the bench, light and pole. I stamped the wreath in Pine Green onto the pole and added Crimson Lake to it once I softened the lines. I also drew in a bow. 

To create the snow, I added African Violet randomly around the background and underneath the deer. I mixed Black and African Violet and added it to the background. I also added some Brilliant Yello to the lantern and the sky. I also added some Brilliant Yellow highlights on the snow and in the sky. Once everything was dry I added some additional snow in the sky and over the project using my Sharpie white paint pen and uni-ball white gel pen. I then added some Wink of Stella clear shimmer over the deer and snow. 

I am so excited to get some of my Christmas cards done and hope you will show us what you come up with. We hope that we have inspired you! 

Scor-Pal Scor-Buddy Mini Scoring Board, 9 by 7.5-InchWink of Stella Glitter Clear Brush Pen – ClearSharpie Paint Marker white extra fineUni-Ball Signo Broad Point Gel Impact Pen White

Thanks, designers! Your projects have us dreaming of a white Christmas! We love how each of you used a wreath in your project in a different way, from a teeny tiny wreath on a barn, to a wreath over a light post, to a wreath ornament! It is so fun to see the same motif customized for any project. If you'd like to share your projects with us, be sure to tag us with #aistamps and #aiwatercolor on Instagram so we can take a peek at what you create! Til next time, have a great weekend!

Happy Stamping!