Showing posts with label WC Truck Mini Set. Show all posts

Tuesday, April 30, 2019

Good Shepherd Watercolor Cards by Jil Lebel

Hello Ai fans!

For today's card I wanted to use the Good Shepherd Set from the Bible Journal line of watercolor stamps.  I used it with the Watercolor Sentiment Set 2 to make two everyday cards.
I used the Ai watercolor method to color my stamped images.  I've listed the Tombow marker colors I used at the end of the post.  I kept the main image the same but changed up everything around it.  I added a barn to one of the watercolor panels and a fence to the other.  I also changed up the flower placement.  I kept all of the colors the same.
Once my panels were complete, I cut the using my Double stitched dies from Ai and added them to the dry embossed background.  I used a seam binding bow and a button to embellish the top of the embossed layer. The sentiment is stamped with Versafine Claire Nocturne ink and cut into a banner. I attached everything to a teal A2 card.
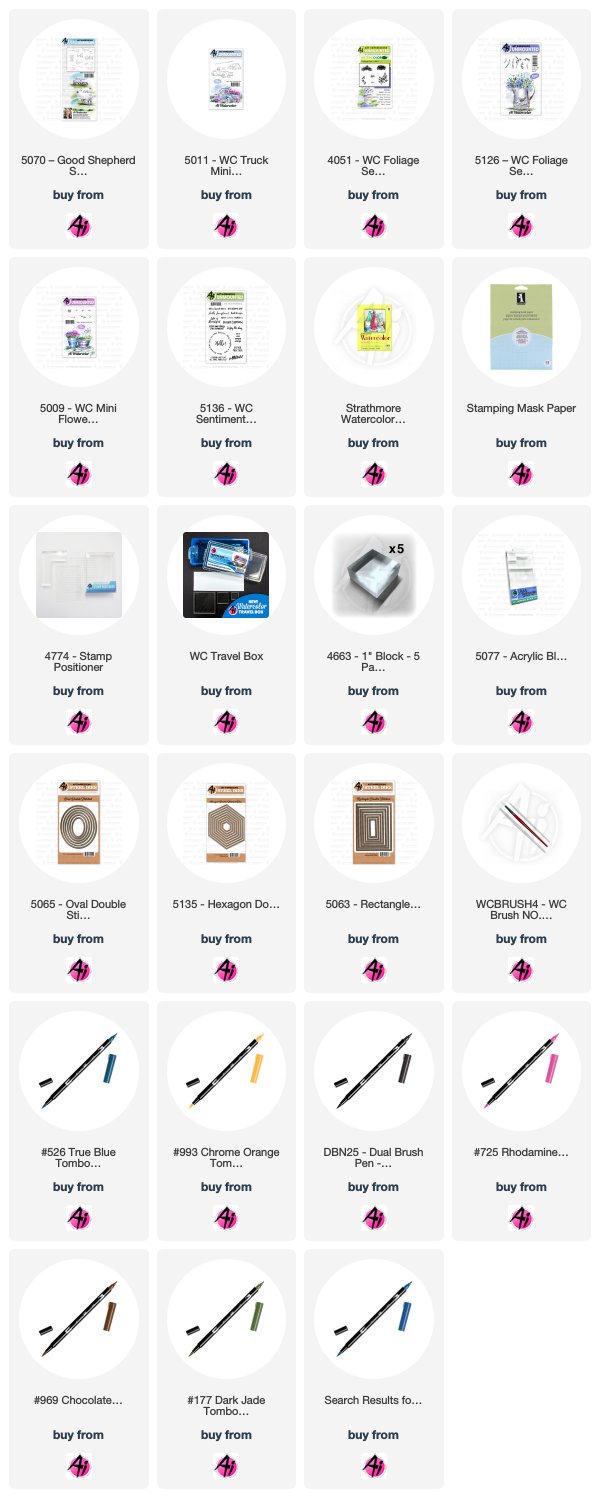
Tombow Dual Brush Colors Used:
177 Dark Jade, 526 True Blue, 565 Deep Blue,
725 Rhodamine Red, 969 Chocolate, 993 Chrome Orange,
N25 Lamp Black


Thanks for stopping by and Have a Great Day!

Wednesday, February 20, 2019

NEW VIDEO - Snowy Dock and Barn Watercolor

Hello Ai Fans!

Anyone ready for a new Watercolor Wednesday? With chilly temps still sweeping across the U.S., Bonnie thought it fitting to give us one last snowy scene! She used our WC Boat Set dock along an icy bank of a river or stream. She added the barn from our WC Truck Mini Set in the distance with some barren trees. We love how versatile this scene is, a great option for a masculine card!

Check out this and other snowy scenes on our Winter Watercolor YouTube playlist!

Hope you have a wonderful Watercolor Wednesday!


View on YouTube: https://youtu.be/27_kSIMN2xw


Saturday, December 1, 2018

Watercolor Weekend Roundup - Wreaths Three Ways!

Happy Saturday, Ai Fans! Get ready to cozy up with a cuppa and enjoy these wintery watercolor scenes from our fabulous design team! Dot, Tricia K. and Tricia O. have three beautiful and different projects to inspire your holiday creations. Let's take a peek!

Dot Freel - Instagram - Blog - Pinterest
Hello Watercolor Friends,

I have been busy making Christmas cards since I usually mail out 30-40 handmade cards. I imagined this farmer went out and cut his own tree and dragged it back with his tractor for this country Christmas card made for the Art Impressions Watercolor Weekend. I used the tractor from the 5059 - WC Harvest Set and the barn and fence from the 5011 - WC Truck Mini Set. The tree is from the 4960 WC Fir Trees Set. I added some sparkle to the snow with a Wink of Stella glitter pen. I drew the little wreath on the barn using the fine tips of the Marvy pens. I used a white Uni-ball Signo pigment pen to make the snow. 

Other Supplies: Wink of Stella glitter penUni-ball Signo pigment pen, Tim Holtz Distress Watercolor Cardstock

Tricia Kennedy - Instagram
My project for today’s Art Impressions Watercolor Weekend, “Holiday Wreath”, is a perfect gift to make this holiday season.

Being by tracing the outline of the ornament on watercolor paper twice (this is a double sided ornament). Draw a 1” circle in the middle of each piece. Stamp the small straight pine bough around the 1” until you have achieved a full wreath. Repeat. Watercolor the Art Impressions way by pulling the color from the lines. Add red and silver drops of glitter glaze, let dry. Cut out, glue back to back and place inside the ornament. Tie holiday ribbon at the top and enjoy!

Marvy Le Plume II Markers: 72 Pine Green
Other Products: 80mm Ornament from Michaels, Queen and Company Red Twinkle Glitter Glaze, Queen and Company Silver Twinkle Glitter Glaze, Ribbon, Xyron Tape Runner

Tricia O'Bin - Blog - Instagram - YouTube - Pinterest - Facebook
Til the season for wonderful winter wonderland projects. My favorite time of the year! My watercolor weekend project showcases the bench and light from the Light to my Path Set. I added the sleeping deer from the Mini Critter Set and the wreath from the Wooden Door Set. The Christmas Bench is a really simple way to create a snowy scene perfect for your Christmas Cards!

To begin I stamped the sleeping deer with Sepia and pulled the color lightly out of the lines. I continued to slowly build up the color adding Brown as well with my watercolor palette. To add the white details, I used my Uni-Ball white gel pen. I created a mask and covered the deer. 

Next I used Sepia and African Violet (on the pole and light) and stamped the Light to my Path bench and light. I pulled the color out of the lines and added some additional color to the bench, light and pole. I stamped the wreath in Pine Green onto the pole and added Crimson Lake to it once I softened the lines. I also drew in a bow. 

To create the snow, I added African Violet randomly around the background and underneath the deer. I mixed Black and African Violet and added it to the background. I also added some Brilliant Yello to the lantern and the sky. I also added some Brilliant Yellow highlights on the snow and in the sky. Once everything was dry I added some additional snow in the sky and over the project using my Sharpie white paint pen and uni-ball white gel pen. I then added some Wink of Stella clear shimmer over the deer and snow. 

I am so excited to get some of my Christmas cards done and hope you will show us what you come up with. We hope that we have inspired you! 

Scor-Pal Scor-Buddy Mini Scoring Board, 9 by 7.5-InchWink of Stella Glitter Clear Brush Pen – ClearSharpie Paint Marker white extra fineUni-Ball Signo Broad Point Gel Impact Pen White

Thanks, designers! Your projects have us dreaming of a white Christmas! We love how each of you used a wreath in your project in a different way, from a teeny tiny wreath on a barn, to a wreath over a light post, to a wreath ornament! It is so fun to see the same motif customized for any project. If you'd like to share your projects with us, be sure to tag us with #aistamps and #aiwatercolor on Instagram so we can take a peek at what you create! Til next time, have a great weekend!

Happy Stamping!

Wednesday, October 31, 2018

NEW VIDEO! Winter Truck with Tree Watercolor

Hello Ai Fans!

It's the most wonderful time of the year for Watercolor Wednesdays! Bonnie is kicking off our winter and holiday series with this Winter Truck tutorial! She adds a Christmas tree and holly to our rustic truck in this snowy scene! There are so many wonderful ideas for Christmas cards on our Watercolor Wednesday playlist on YouTube, so we hope you are inspired to start your holiday cards early!

This week, we want to hear your favorite part of the holiday season! Head over to this YouTube video and tell us in a comment. We can't believe how quickly this year has gone, but we are so excited to celebrate our favorite season!

Happy Watercolor Wednesday!


View on YouTube: https://youtu.be/YPGAx1EbqCI


Sunday, September 30, 2018

Christmas on the Farm by ReneƩ Matarese

Hello Ai fans!

Today I'm sharing the first Christmas card I made this year.

I used:


I made a vignette card by cutting an oval out of the top layer of paper after I embossed it and then popped it up for some dimension.


Wednesday, September 26, 2018

NEW VIDEO - Rusted Tractor Watercolor

Hello Ai Fans!

It's our favorite day of the week - Watercolor Wednesday! This week, Bonnie uses our new WC Harvest Set to create a rusted tractor in a field, with a barn in the background. We are loving these autumn scenes, and hope you are too! Don't forget to like this video and subscribe to our channel for more videos!


View on YouTube: https://youtu.be/If-b0QIQlW8


Saturday, August 18, 2018

Watercolor Weekend Roundup - Doors of Possibilities!

It's time for another Watercolor Weekend! Come check out these three amazing projects from our Watercolor Design Team, created to inspire your weekend projects! Let's take a look!

Dot Freel - Instagram - Blog - Pinterest
Hello Watercolor Friends,

I made this card for the bi-monthly Art Impressions Watercolor Weekend Roundup using the truck from the 5011 - WC Truck Set and I used the quail family from 4207 - Feathers TF. As you can see from the pictures, I have quail that travel through my back yard, every spring. Do you see the little baby chick on the log? They make the cutest sounds and I just love how protective the parents are of their sweet little chicks. The flower stamps I used are from 4868 - WC Flower Set 2 and the grass is from 4051 - WC Foliage Set 1. The sentiment is from the set 4903 - WC Sentiments.

Other Supplies: Ranger Watercolor Paper

Tricia Kennedy - Instagram
My “Dimensional Door” project for today’s Watercolor Weekend is a tiny 3D delight. So get out your X-Acto knife and foam tape! Lets get started. 

Stamp the door from the Door Set on your watercolor paper using a combination of Sepia and African Violet which creates a lovely grey. Stamp the foliage from Foliage Set 3 in Olive Green near the base of the door and around the top. Add in the long stem flower from Mini Flower Set in Scarlet and Olive Green. Watercolor the Art Impressions way by pulling the color from the lines with your paint brush and water. Next, stamp in the tiny dot flowers Mini Flower Set in Scarlet. Using the fine tip of African Violet, darken the hinges on the door and the key hole. On a separate piece of watercolor paper, paint in a line of Sepia, free-hand a small vase sitting on top in African Violet, then stamp the long stem flower from Mini Flower Set in Scarlet and Olive Green and foliage from Foliage Set 3. Watercolor the Art Impressions way by pulling the color from the lines with your paint brush and water. And finally, it’s time to get out your X-Acto knife. Using the edge of a metal ruler and your X-Acto knife, cut down the middle, top and bottom of the door. Then cut out the windows. Score at the hinges and bend slightly open. Place foam tape on the backside of the door watercolor paper and align the vase watercolor behind.


Other Products: Post-It Notes, Foam Tape, X-Acto Knife, Metal Ruler, Scoring Tool

Tricia O'Bin - Blog - Instagram - YouTube - Pinterest - Facebook
Hello Art Impressions Fans and welcome to another Watercolor Weekend. I am excited to share my Sleeping Dog project with you. This is a fun summer project that is easy to create! My design team colleagues and I would love for you to join us on Instagram using #AIWatercolor.

I used several sets to create this sleeping dog project. I stamped the sleeping dog from the Mini Critter set. I masked him off and stamped the Chair from the Wooden Chair Set. I masked that off and stamped the bricks from the Cobblestone set. Once these were stamped, I pulled the color out of the lines and added additional color with my watercolor palette. I masked off the dog and stamped some small grass around him and the chair.

I masked the chair off and stamped the Birch Trees from the Covered Bridge stamp set. I pulled the color out from the outside of the trees. I added more leaves with the leaves from the same set. I added the left and right grasses from the Garden Wagon mini set. I then added the flower bunch to the right side of the chair. To finish it off, I added some Blue to the sky.

Check out my blog for more details! Join us!

Marvy Le Plume II Markers: 86 African Violet45 Sepia15 Olive Green8 Violet3 Blue20 Magenta

Thank you for your beautiful projects, team! Comment below to let us know what you most enjoyed about this week's edition! Happy Stamping!

Saturday, July 21, 2018

Watercolor Weekend Roundup - Blue Skies!

Hello, Ai Watecolor fans! Today we're celebrating blue skies with two beautiful projects! Take a look and be inspired by what our designers have in store for you!

Dot Freel - Instagram - Blog - Pinterest
Hello Watercolor Friends,

I always dream of being near a sandy beach and the ocean during the summer time. I wonder if others feel that way, too? So I made a scene by an ocean using a cabin from the 4962 - WC Rustic Cabins Set. I just sort of penciled in the rocky wall, trail and shore line then watercolored them using my palette. I used the Molotow 2.0mm masking liquid to leave some white space where my flowers would be. After it dried, I used the foliage from 5009 - WC Mini Flower Set to add the leaves, wiped off the masking liquid then painted in the little flowers. I used part of the fence from the 5011 - WC Truck Mini Set. I used the kite from the 4606 - Cottage by the Beach Set to add that whimsical touch it needed.

Art Impressions Products: 4962 - WC Rustic Cabins Set, 4606 - Cottage by the Beach, 5009 - WC Mini Flower Set, 5011 - WC Truck Mini Set, 4774 - Stamp positioner, 4773 - Acrylic Blocks, WC Brush No. 4, Watercolor Palette
Marvy LePlume II Markers: 45 sepia, 15 olive green, 86 African violet, 101 tropical, 17 steel blue, 44 lt. brown, 30 rosewood, 46 crimson lake, 43 brilliant yellow
Other Supplies: Molotow 2.0mm masking liquid, Tim Holtz Distress Watercolor Paper

Tricia Kennedy - Instagram
My project for today’s Watercolor Weekend incorporates a Watercolor Resist technique to create a Silhouette Scene. It’s a quick, easy, fun and totally different way to use your Art Impressions Watercolor Stamps. 

Stamp the pail, bird, flowers and grass onto the watercolor paper in embossing ink. Add embossing powder and set with a heat gun. Scribble a little Olive Green and Salvia Blue onto your palette. Brush Olive Green in for the ground and Salvia Blue for the sky. Add several layers of color for depth and dimension. Be sure to take the color all the way up to, over and around the stamped/embossed image (I kept the pail completely white by not adding any color inside those lines). Use a paper towel to buff off the stamped/embossed lines once the color has dried.


Marvy Le Plume II Markers: 15 Olive Green, 60 Salvia Blue
Other Products: VersaMark Embossing Stamp Pad, Ranger Super Fine Detail White Embossing Powder

Tricia O'Bin - Blog - Instagram - YouTube - Pinterest - Facebook
After a recent visit to Foxwoods in CT, with my Mother In Law, I was inspired by some of the beautiful flower arrangements they had. 

I drew the large square vase with a ruler and my 45 Sepia marker. I softened the lines and added some additional 45 Sepia from my Watercolor Palette. I covered the bottom of the vase and stamped the cobblestone from the 5018 – WC Cobblestone Set below it inked in 45 Sepia. Next I added a couple of leaves from the 4867 – WC Foliage Set 2 on each side inked in 72 Pine Green. I inked up the top of the larger vine from the 5007 – WC Foliage Set 3 in 15 Olive Green and stamped it in front of the vase. To create the sticks at the top, I inked up one of the trees from the birch trees in the 4808 – Covered Bridge Mini Set in 45 Sepia. I repeated that process with another birch tree. I inked up one of the branches from the in 45 Sepia. To add a bit of color, I used the daisy bunch from the 4052 – WC Flower Set 1 inked up with 20 Magenta. I added them sporadically around the vase. I added some additional greens with 15 Olive Green using one of the vines from 5007 – WC Foliage Set 3. To add a background I used my Watercolor Palette and 3 Blue.

I hope you will join me and the other guest designers for Watercolor Weekend! We can’t wait to see your projects. Tag us and use the #AIWatercolor so we can see what you have come up with. Have a great weekend!!!

Marvy Le Plume II Markers: 45 Sepia72 Pine Green15 Olive Green3 Blue20 Magenta

Thanks, team! From crafting a large scene to spotlighting a main image with embossing and creating new shapes of containers, there is so much you can do with our watercolor stamps! We love hearing what you have to say, so be sure to comment to tell us what inspires you to create today! Happy Stamping!

Thursday, July 19, 2018

Challenges 237 Summer Vibes!

Happy Summer, Ai Fans!

Welcome to a NEW challenge! Carol's here with a sweet creation to inspire your challenge entries! Take it away, Carol!

Hello Ai Fans!

Are you enjoying your summer?  Where I'm at it's too hot to do much outside!  I'd love to be at a beach and the Loungers Set - 4473 was perfect for this new challenge:  Summer Vibes!


Here's something I like to do--when I remember!  Haha!  After I first stamp the image using my MISTI, I leave the stamp in place.  When I am finished coloring, I put my card back in the MISTI.  Because I'm SO afraid, after all my work, it may not be lined up perfectly, I then stamp onto a piece of acetate.  I can then make any tiny adjustments to the alignment so that it stamps over it perfectly.  I just keep re-stamping until it lines up exactly right.  I do this because sometimes with highly detailed stamps, I feel like the Memento ink isn't as crisp as the Onyx Black.  I think re-stamping the image with Onyx Black ink really makes the image pop!   I hope that makes sense!


For embellishments, I added a sun die cut and some tiny lemon slices, along with some Glossy Accents and sparkle with a Spectrum Noir clear sparkle pen.

I just love this sentiment!  I wish that it didn't take getting older to feel this way, but for me, it did!  How about you? 


Thank you for stopping by today, and we sure hope you'll join in our Summer Vibes challenge!  


Thanks, Carol! We sure love your vibrant beach card! Too cute!
Our challenges run for TWO weeks, so you have 14 days to get crafting! We LOVE seeing your creations with your unique style, so "choose to be fabulous" and join our challenge! This challenge is all about summer, and feel free to interpret it as you wish, whether that's bright colors, summery stamps or papers, happy weather, and more!

Here are the Challenge Rules
✻ Please make a new card or creation. You can make any crafty item you wish; this is not limited to cards!
✻ Limit two submissions per person. You will receive extra votes if you use Art Impressions stamps!
✻ The Ai Challenge is open to everyone, international submissions are welcome!
✻ Include a link back to the Ai Blog or grab our button on the top right of our sidebar!
✻ Share the Ai love by clicking and commenting your fellow crafters.
✻ Make sure to get your link up by Wednesday, August 1 at 5:00 p.m. PST to enter your creations.
✻ Good luck and happy stamping!
Before we go, let's celebrate the winner's of last week's Masculine Challenge!

Top spot goes to...

Congrats, Katrin! We love your wonderful watercolor scene featuring our WC Truck Mini Set with lovely rustic colors and bright greens. Email annelise@artimpressions.com with your address to claim your prize pack!

Honorable Mentions go to...


Congrats, you two! Gail, we think your camper card is just too clever! Our fishermen look great Catching Z's before their next venture to the lake! And Lynn, the coloring on the Buzzard is just stellar! Email annelise@artimpressions.com with your address and select a stamp set of your choice to enjoy as a prize!

See you for more challenge inspiration next week! Happy Stamping!