Showing posts with label Christmas Sentiments 5566. Show all posts

Thursday, September 26, 2024

Farm Fresh Challenge #388 Week #1

Hello Ai fans and welcome to our newest challenge on the Art Impressions blog!

Farm Fresh!
We're looking for your projects that take us down on the farm...hay bales, animals, barns, wagons, wheelbarrows, trucks, tractors, chicken coops, produce/veggies etc.

Before we see what our Featured Designer Lynn has created, let's see who won our last challenge.

For our Top Spot we selected #10 Meghan Kennihan


Please contact Leah at Feedback@artimpressions.com
to claim a free stamp set of your choice!!
Also, be sure to grab our badge to display on your blog, Facebook or Instagram!

Our Lucky Random Winner was: #21 Consuelo G.
She used 5339 – Santa GCH Set


Please contact Leah at Feedback@artimpressions.com
to claim a free stamp set of your choice!!
Also, be sure to grab our badge to display on your blog, Facebook or Instagram!

Congratulations!

Now for Lynn's fabulous Farm Fresh inspiration! She created a gorgeous diorama card and has a video tutorial to walk you though everything step by step. Sit back and enjoy. We hope you'll give this challenge a try. You may be the next lucky winner of a free stamp set.

----------------------------------------------------------------------------------------------------------------------

Watch video tutorial here!!!

Today I am the Featured Artist for the brand-new Art Impressions "Farm Fresh" Blog Challenge! I'm really excited to be asked to create a card that includes anything farm related such as, hay bales, animals, barns, wagons, wheelbarrows, trucks, tractors, chicken coops, produce/veggies etc. So, I thought we would create this fun, interactive, diorama card!

I'm calling today's card the "Christmas on the Farm" diorama card and we will be using the Ai Christmas Truck Set (5457) which includes a truck, tree, Christmas lights, presents, a candy cane, and a cute little signpost. We will also be grabbing the hay bales from the Ai Harvest Set (5598).

Let's go ahead and stamp, color and cut the pieces that we will be using today. To do our coloring we will be using the Zig Clean Color Real Brush Pens in the following colors: Blender, Lt Pink, Wine Red, Orange, Yellow, Mustard, Ice Blue, Persian Blue, Lt Green, Deep Green, Lt Gray, Warm Gray 4, Beige, Mid Brown.

To create the diorama card base we will be using the Lawn Fawn Ta Da! Diorama! Set. This die set will cut and score all of the pieces that we will need to create this fun design. For paper we will be using the Ai Christmas S2 Paper Pack (5812). I'll give you a detailed demonstration in the video for how to easily assemble this fantastic and fun diorama.

For the little signpost we will add a "Joy" sentiment using the Ai Christmas Sentiments Set (5566). This just looks so cute on our woodgrain sign!

Again, I will show you the assembly of the card base and all of the dies needed in this video! The end result is just so cute and interactive!

I hope you will join us in this new challenge! We would love to see what you create! It is a great opportunity to dig through your stash and combine some of your stamp sets to create your own "Farm Fresh" project!

Thank you so much for joining me today! Have a fun and crafty day!!!

Ai Christmas Truck Set (5457)

Ai Harvest Set (5598)

Ai Christmas Sentiments Set (5566)

Ai Rectangle A2 Double Stitched Dies (5063)

Ai Christmas S2 Paper Pack (5812)

Steel Die Cutters (5765)

Dr. Ph. Martin's Bleed Proof White Ink

Post-it Labeling and Cover-up Tape

WC Brush Mini Angular

Thank you SO MUCH Lynn for that amazingly cute card and wonderful tutorial.

Now, here is YOUR chance to enter and win...

✻ Please make a new card or handmade crafty creation. You can make any item you wish; this is not limited to cards! (unless specified)

✻ Limit two submissions per person. You will receive extra votes if you use Art Impressions stamps!
 ✻Please include your first name and last initial on your submission.
✻We love to comment on your entries, but keep in mind if you use a private group or a platform that you need to sign up for, we probably won't be able to.
✻ The Ai Challenge is open to everyone, international submissions are welcome!
✻ Include a link back to the Ai Blog or grab our button on the top right of our sidebar!
✻ Share the Ai love if you can, by clicking and commenting on your fellow crafters.
✻ Make sure to get your link up by the deadline to enter your creations.
✻ Good luck and happy stamping! 

You are invited to the Inlinkz link party!

Click here to enter

Thursday, May 9, 2024

Just For You! Challenge #378 Week #1

 Welcome to our new challenge!

For the next two weeks we want to see what you make for someone else.

Something just for them.

We're calling it Just For You!


We want to see your Gift Card Holders and Gift Pockets, Gift Boxes and Bags, treat holders...anything that says this is Just For You!

This is perfect with graduations coming up. Or, create something for a birthday, wedding, retirement, housewarming, new baby or just because you care about someone.

Before we see what our Featured Designer Tasha has made "Just for You,"
let's see who won our Birds of a Feather challenge.

We were SO excited to see that we had a Page 2 for this challenge. We're so glad that so many of you entered. We hope you'll give our new challenge or our Guest Designer challenge a try as well.

For our Top Spot we selected Yvette Jacobs.


Please contact Leah at Feedback@artimpressions.com
to claim a free stamp set of your choice!
Also, be sure to grab our badge to display on your blog, Facebook or Instagram!

Our Lucky Random Winner was:
#7 April J.


Please contact Leah at Feedback@artimpressions.com
to claim a free stamp set of your choice!
Also, be sure to grab our badge to display on your blog, Facebook or Instagram!

-----------------------------------------------------------------------------------------------------------------------------------------------

Now let's see what Tasha has created to help inspire you.
She's our Featured Artist for this challenge and she has an amazing, Multi-Pocket Gift Card Holder to help inspire you. 


 Hi everyone! 

My "Just For You!" Challenge project is a multi-pocket gift card holder featuring the new 5811-Gift Card Pocket Dies. This gift card holder is easy to make and perfect for any occasion!

Step 1: Cut a piece of card stock to 3" x 11" 

Step 2: Score at 8-1/2", 7-3/4", 4", and 3-1/4". 

Step 3: Use the pocket base die to cut several pockets. I used four (4) for my holder, but you can cut more pockets. This holder can easily hold six (6) with gift cards.


Step 3: After you assemble the pockets, use a small circle die or punch to cut the same size hole on the back side of the pocket as shown below. This makes it super easy to pull the pockets.


Step 4: After the holes are cut, use a trimmer to even out the pockets as shown below. 


Step 5: Use the shorter side of the pocket base die to cut a piece of pattern paper. This is a great way to use scraps and it will add a pretty pattern to the inside of the card holder.


Step 6: (Optional) I used the 5780 - FB Sitting Dog stamp set to add a little doggie to the front pocket. I love how cute the doggie looks peeking over the pocket!
Step 7: To attach the pockets to each other, use liquid adhesive and only apply glue to the center of the back of each pocket. You want to be able to pull out the pockets and gluing them completely down will not allow them to extend all the way. 

Step 8: After all the pockets are connected, cover the back of the last pocket with liquid glue and attach it to the inside of the holder.


Step 9: (Optional) I used the included "Thank You" die to add a greeting to the inside of the pocket holder.  This large script lettering looks awesome against the plaid paper.

Step 10:  To add more color to the front of the holder, I attached a piece of Art Impressions heart paper paper to the front panels. I also stamped "A Gift For You" on to a layered frame and added a teal enamel heart sticker. 


Step 11: To complete the project, attach a small Velcro dot to keep the holder closed. 


I hope you enjoyed today's project and will join in the "Just For You!" Challenge.

Have a wonderful day!
Fabulous job Tasha!

✻ Please make a new card or handmade crafty creation. You can make any item you wish; this is not limited to cards!

✻ Limit two submissions per person. You will receive extra votes if you use Art Impressions stamps!
 ✻Please include your first name and last initial on your submission.
✻We love to comment on your entries, but keep in mind if you use a private group or a platform that you need to sign up for, we probably won't be able to.
✻ The Ai Challenge is open to everyone, international submissions are welcome!
✻ Include a link back to the Ai Blog or grab our button on the top right of our sidebar!
✻ Share the Ai love if you can, by clicking and commenting on your fellow crafters.
✻ Make sure to get your link up by the deadline to enter your creations.
✻ Good luck and happy stamping! 

You are invited to the Inlinkz link party!

Click here to enter

Saturday, December 9, 2023

Joyful Holiday Cheer by Janet


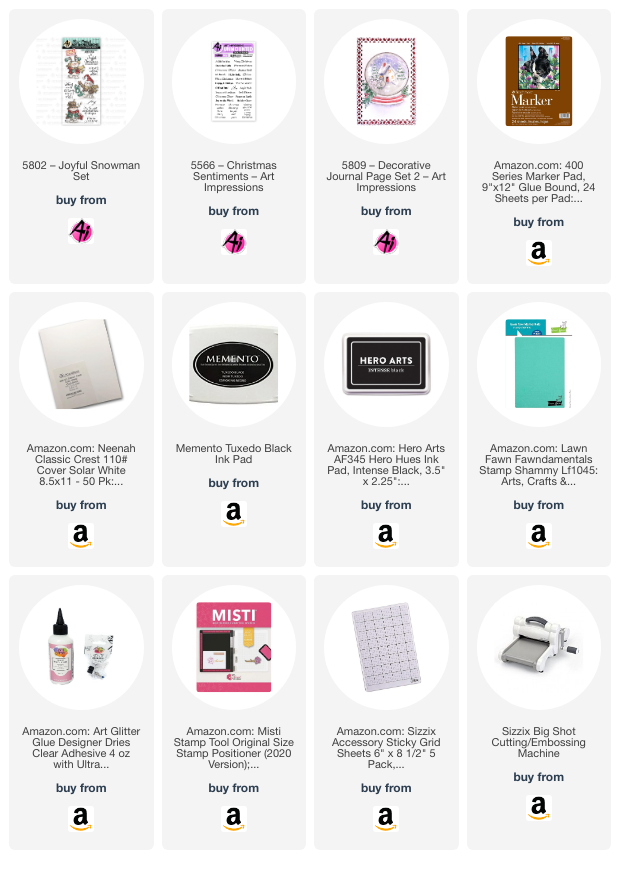
Happy Saturday Ai Fans! I'm so happy to share with you a cute little card that was so easy to make using just a few Ai products. Most of this card was formed using the 5809 - Decorative Journal Page 2 template. I cut the red frame using the stitched rectangle die and the decorative frame from this set at the same time. I cut it again on silver cardstock so that I could piece it inside the red frame to make a base for the cute snowman. I also cut the banner in this set and stamped it with a sentiment from the 5566 - Christmas Sentiments Set. Before stamping, I curved the ends of the sentiment up to match the curve of the banner on my glass block. 

Speaking of snowmen, this adorable image is from the 5802- Joyful Snowman Set. There are three chubby snowman doing various holiday activities. The one I chose for my card shows a snowman who has gotten a little carried away with his lighting work and is wearing more lights than he hung! 

To finish this card, I adhered the red frame on a green 4 Bar card base. I glued the silver inset to the opening of the red frame. I adhered the sentiment with a single layer of foam tape and used two layers of foam tape on the snowman image. I really love the overall look of this sweet card. I hope you do too!

Thanks for stopping by today. I hope you'll stop by the store to see all the things you need for your card, journal, and tag making projects. 


Janet YouTube - Blog - Facebook - Instagram - Pinterest  

Thursday, November 16, 2023

Making Spirits Bright Challenge #364 week 2

 Hello everyone and welcome to week two of our Making Spirits Bright challenge!

As promised last week, we have Janet's feature tutorial for you.  Her card is so full of sparkle and cheer that it's sure to make everyone's spirits bright!  Let's see what Janet has prepared for you!

Hello everyone! It's week 2 of our Making Spirits Bright challenge. To participate and possibly win free stamps from Ai, you just need to make an upload a holiday themed card to our challenge post.

Today I'm showcasing the 5779 - FB Snowman stamp and die set. To begin this project, I stamped the front and back of the snowman, colored them with Copic markers, and cut them out with the dies included in this set. I glued them together. Because they are a Front Back set, they match up perfectly when glued glued with wrong sides together.

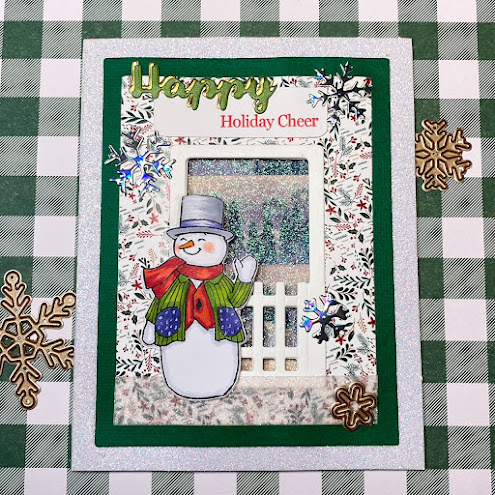
To make the front of the card, I started with a white glitter A2 sized card. I cut a piece of holly cardstock from the 5812 - Christmas S2 PP with the 3rd largest rectangle die from the 5724 - Nested Rectangle Dies set. I cut another piece of green cardstock with the largest rectangle die. I glued these on top of each other and then glued the stack to the top of the card. I used the rectangle die in the 5719 - FB Fence & Window Dies to cut a rectangle in the three layers of cardstock. This die is exactly the correct size so that the fence die in this set fits around the rectangle. After cutting the rectangle, I cut two fence pieces and glued one on the front of the car and the other on the inside.


The next step was to cut the word Happy twice with green and gold cardstock and I glued them together slightly staggered. Then I stamped the phrase Holiday Cheer from the 5566 - Christmas Sentiments in red ink and then I glued the Happy phrase from 5103 - Flip Card Die to the sentiment. I glued the finished sentiment to the top of the card. With this done, I adhered the finished snowman at the edge of the fence so that part of him shows when the card is opened.

Inside I added a rectangle covered in winter glitter washi tape. When the card is shut, the glittered trees and snow show through the window cut with the fence die.  


Last but not least, I used the 5353 - Large Snowflake Dies to cut 3 snowflakes in silver cardstock. I arranged them on the front of the card as the finishing touch.


Thanks for stopping by today. I hope you'll stop by the store to see all the things you need for your card, journal, and tag making projects. 


Janet YouTube - Blog - Facebook - Instagram - Pinterest  

What a gorgeous card Janet!! Thank you for such amazing holiday inspiration!

Now for the rest of the Design Team.


You saw my card last week and can find all of the details here.

Next we have Tasha who used:

4936 – Christmas Wonder Set
5782 – Snowflake Frame Die
5566 – Christmas Sentiments

Sharon made this darling card.


Lynn has a YouTube tutorial on how to emboss with your Art Impressions dies.


Nina has an adorable trio of shaker tags.


One of my favorite things about our Design Teams is how they can all be given the same challenge and yet all of their projects turn out so different!  Thank you all for all of your hard work and to Janet for the wonderful tutorial.
Now, let's see what you create and enter, so that you might win a wonderful new stamp set!

You are invited to the Inlinkz link party!

Click here to enter


Snowman Puppet Ornaments by ReneƩ Matarese

 Hey everyone!

Last week I shared a cream and gold snowflake slimline card.

This week I have two snowman ornaments for the Art Impressions Making Spirits Bright challenge.


One is a Front and Back "see through" ornament and the other features the snowman front with a sentiment on the back.


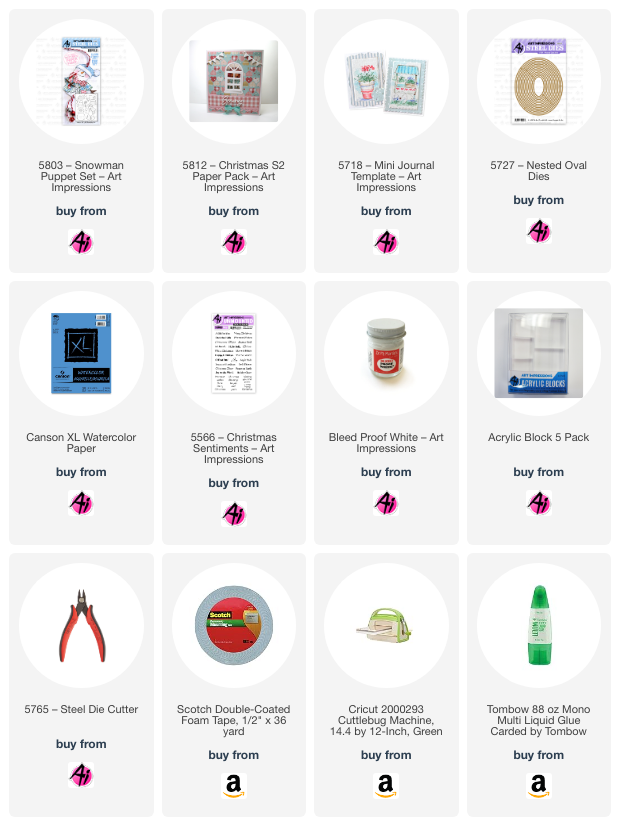
His clothes are cut from 5812 – Christmas S2 Paper Pack and I framed him using
5727 – Nested Oval Dies.


I added some stitching where I pieced his coat together on his back.


The little hanger hook was cut from 5718 – Mini Journal Template.


On the back of this one I stamped a sentiment from 5566 – Christmas Sentiments.


He's stamped on Canson XL WC Paper Pad – 9×12 and I used Dr. Ph Martin's Bleed Proof White paint on his hat.