Showing posts with label owl. Show all posts

Tuesday, June 16, 2026

Focus on Faith: Seek Wisdom Wreath by Sara Furr

 Blessings my dear friends, and welcome to my second edition of "Focus on Faith" for the month of June. 

As many of you know, June is usually a time of graduation for children from high school, so I thought I would try to create a faith inspired card that could be used as a graduation card, so I dug out the two new "Wisdom" stamp sets. I didn't really have any idea of what I wanted to do, so I just pulled out the stamp set and decided to play around.


I started by creating a 4 1/2" x 4 1/2" square out of Canson XL Bristol smooth cardstock. I placed the square into my MISTI stamping tool, and took out the florals from the "Wisdom set 1". I positioned them on my card stock in the top center, and decided I would try to create a wreath.  I inked them up with black Versafine ink and stamped them down. I then turned my cardstock 1/4 turn, and inked, and stamped them again. I did this 2 more times until I had created a circle wreath. I then positioned the owl from the same set, and the "SEEK wisdom" sentiment from the "Wisdom Set 2", in the center of my wreath. I inked them in the black Versafine ink and stamped them. I wanted the owl to be holding a "diploma", so I inked up just the very top of the large scroll from the "Wisdom set 1" with a very light gray dye ink marker. I stamped it so that the owl appeared to be sitting on or holding the scroll. 

 At this point, I still had no idea what I was going to use as my coloring medium. I had originally planned to watercolor it, but thought I would try a little experiment!  So,  I waited till the Verksafine ink was completely dry, and did a test sample to see if I could actually use my alcohol inks to color them. Now, they say that you can only use Memento black ink as your base medium for alcohol markers, but I found that the Versafine ink was fine, as long as it was completely dry. I just made sure to not touch the lines too much with my alcohol markers!  So, I went about coloring the florals with three shades of purple alcohol ink markers; a light, a medium, and a dark. I colored the whole flower in the lightest color of purple, then I added in the medium purple up to about the middle of the flower. Then, I went back in and added lines of the darkest purple with a light flicking motion. Lastly, I  went back in with the lightest purple to blend out all three. I proceeded to color the green leaves with two shades of green alcohol ink markers. I colored each leaf base in the light green, and then added in a dark green just in the center base of the leaf.  

At this point,  I decided that my wreath needed some filler so I added in the little berry sprigs from the "Wisdom set 1", here and there, randomly around my wreath with the black Versafine ink. I colored the berries with a very dark purple alcohol marker.  

My wreath still wasn't quite full enough, so I inked up just the very top of the leafy vine stamp from the same set with a dark green dye ink marker, and stamped it in three sets in each little section so I had a dark, medium, and light variation of color. I continued stamping this way all the way around the entire wreath inking the vine, and then stamping off three individual times to give me a nice full wreath.  I then decided to add some of those vines coming off from behind, and to the side of my owl and the scroll in the center of the wreath.  To blend things out a bit, and give a sort of watercolor look, I used two very light shades of green alcohol ink markers, and blended around the inside and outer edges of the florals.  I then took two shades of a very light greenish blue alcohol ink marker, and did the same around the very edges of the outside of the wreath where the vines are, to create a sort of watercolory sky.

I then worked on coloring my owl with alcohol markers in shades of tan, and brown, and bright green for his eyes. I felt that the owl and the flowers both needed a lot more detail, so I broke out my Polychromos colored pencils,  and I decided to add in all my details on my owl and in my florals and leaves.  For the flowers, I used a very sharp purple pencil to very gently draw in the leaf veins, and then I took a black pencil and darkened along the edges of each petal, and the very middle of the flower, leaving the centers of the flowers white. This added a lot of depth and shading to give my florals a lot more dimension.

I added gentle lines horizontally across my owl's chest and wings so that it resembled layers of feathers. While I had the pencils out,  I decided to add a couple more details in the center of my wreath where the vines are sprouting from behind the scroll, and I did more blending with the light green alcohol markers, and then added in more details with a light and darker green pencil. I then decided to take those two green pencils and add in more details on my leaves. I left the vine leaves alone.  I did not add any details to them at all. I very lightly colored the scroll with a soft tan to give it a vintage scroll look.  

When I was happy with my focal piece, I distressed the edges of it with the edge of a scissors.  I created a white mat for behind my focal piece, and distressed the edges of that as well. I then added foam tape behind that whole focal piece.

 I then created another white mat for my 6x6 card base that I embossed with a dotted circle motif embossing folder. This embossed detail helped bring my whole card together by adding more texture, and repeating the circle motif as from my wreath. I adhered that whole piece to my card base with my focal piece popped up in the center.  


To create the inside of my card, I cut two mats of a light and very dark purple for my center focal piece. I used another 4 1/2" x 4 1/2" square made from Canson XL Bristol smooth cardstock and placed it into my MISTI. I chose two sentiments, the jewels, and the two floral pieces , and positioned them in my MISTI to create a cross in the center of my focal piece. I only colored the florals. I followed the exact same coloring as previously described on the front.

 I thank you so much for joining me today! I hope that you liked my project, and got inspired to create some Faith inspiring artwork.

God bless you all my crafty friends,

Sara Furr- The Crafty Farm Chick


Art Impressions products 

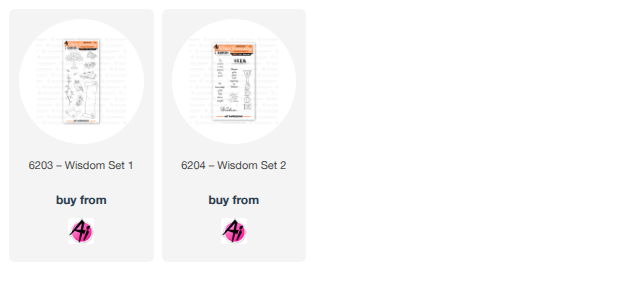
6203- Wisdom set 1

6204- Wisdom set 2
Other products:

Canson XL Bristol Smooth cardstock

Versafine Black ink pad

Alcohol ink markers

Faber-Castell Polychromos colored pencils and a pencil sharpener

Green dye ink marker

Sand color dye ink marker

Scissors

Embossing folder

Die cutting machine

Paper cutter

MISTI stamping tool

Friday, May 15, 2026

Seek Wisdom Card by Tasha

Happy Friday Art Impressions friends!

Tasha here sharing a card created with the new 6203-Wisdom Set 1 and 6204-Wisdom Set 2. These sets are perfect for so many different projects, and the images can be used on their own or combined for completely different looks.


As soon as I looked through the stamps in Wisdom Set 1, I was drawn to the owl and jewels and knew I wanted to create something featuring both images. To make this scene, I stamped the owl first and covered him with masking paper before stamping the jewels. I also masked the jewels before stamping the large banner so it would sit nicely in the background. Masking paper is definitely one of my favorite crafting tools!


I usually reach for bright colors with lots of pink and white, but this time I wanted to try something a little different. I used shades of brown inspired by the owl and blended Distress Oxide inks around the center panel to give the card a soft vintage feel. For a little extra detail, I added a piece of Art Impressions patterned paper that worked perfectly with the colors and overall theme of the card.


To finish everything off, I stamped two sentiments from Wisdom Set 2. The longer sentiment fit beautifully across the banner, and the larger “Seek Wisdom” greeting was layered with the same tan and brown cardstock used throughout the design.

I hope you enjoyed today’s project and are having a wonderful start to your weekend!


Friday, October 17, 2025

Boo Crew! Card by Tasha

 Happy Friday Art Impressions Friends!

Tasha here sharing a fun Fall card featuring the new 6112-Pumpkin Parade Set.

I always enjoy making Halloween cards, and Art Impressions has the cutest characters for creating little Fall and Halloween scenes. For my project, I used the not-so-scary cat dressed in her ghost costume along with the adorable owl image; because I absolutely love owls!

To set the scene, I added a tree filled with colorful leaves, a rake, and two pumpkins. A piece of patterned paper worked perfectly for the ground to tie everything together.

For the greeting, I heat embossed “Boo Crew!” on black cardstock and attached it with foam tape for some extra dimension. Finally, I layered plaid patterned paper with brown, white, and orange cardstock to complete the design.


This cheerful little Fall card just makes me smile. I hope it inspires you to create something festive for the season! šŸŽƒ


Friday, December 10, 2021

Owl Be Yours For Christmas Cards by Tasha!

Happy Friday Ai Fans!
Tasha here sharing two holiday cards created with the super cute 5193 -Woodland Holiday Set!


The first card is super sparkly and uses different shades of green. I stamped the little owl on to white card stock and colored it with Copic Markers. I used Distress Oxide Ink to bring in the green color around the image and added little snowflakes with a white gel pen. I love these light green colors!

The background was created by ink blending a stencil design and embossing with clear glitter powder. The glitter is so pretty and I think this design looks really cool!


The second card uses the same owl image, but I colored it with traditional red & green holiday colors and used a stamp from the 5420-Frameworks Set 1 to spotlight the owl. I also used a gel pen to add falling snow to the background, I think it looks so nice against the blue sky!

The sentiment "Owl be yours for Christmas" was stamped on to a banner from the 5133- Flag Double Stitched Dies. To continue with the winter theme, I added a piece of snowflake pattern paper and used silver glitter paper to add extra shimmer. 


Lastly, I added little silver sequins to the card before attaching it to a white A2 sized card base.

I hope you enjoyed today's projects and are inspired to create with the 5193 -Woodland Holiday Set!


Friday, September 24, 2021

Magic is in the Air Card by Tasha!

 Happy Friday Ai Fans!

Tasha here sharing a Fall card created with the fun Happy Hauntings Stamp Set!


This set has a variety of images and sentiments, but nothing says Fall like owls! These witchy owls are too cute with their little hats and the bright colors pop against the dark sky background!


The circle frame is from the Bible Journaling Frameworks Set 1 and the frame design works perfectly with the owl images!


The sentiment "Magic is in the Air" was stamped with black ink and I used purple Distress Oxide Ink around the edges. To complete the card, I added glitter card stock and a Halloween pattern paper to the panels; I love all the sparkle!


Thank you for checking out today's project and I hope you are inspired to create a Fall/Halloween card!


Monday, February 3, 2020

Owl Always Love You by Carol Hintermeier

Happy Monday Ai friends!  Today I have another card using Art Impressions new Lovable Animals set.  If you missed the first two I made, check out the blog post here.  

This card features the cute little owl, which is one of the four cute critters in the set.  I love how the included dies cut slits for the critters to hold various objects!


After I stamped and Copic colored the owl and flower, I used the coordinating dies to cut them out.  The Copic colors I used are listed at the end of this post.  Next I used the heart die that's also in the set to cut an opening in some red card stock.  I used a white gel pen to add some stitching around the edge of the heart. I added foam tape to the back of the red layer and wrapped some bakers twine around the top before adhering it to the white layer.


I adhered the flower in his wings, added some foam squares to the back of the owl and centered it in the heart opening.  I stamped the sentiment in black ink and die cut it with a Tag Stitched die.  I used more baker's twine to tie it on.


Stay tuned for next week when I'll have the fourth critter in the set on a sweet card.  Thank you so much for stopping by!  Stay crafty!


Copic markers:
owl:  E18, E39, E15, E13, E11, Y19, Y08, Y13
flower:  Y19, Y15, Y08, YG17, YG25, YG01

Thursday, October 6, 2016

Challenge 194 The Perfect Pair Week 2!

Hello, Ai Fans!

Getting ready for the holidays? Last week we announced the perfect pairs for your holiday stamping, from Ai to a store near you! Our three new stamp and die cut sets, produced in collaboration with Hampton Art, are wonderful for creating easy cards for your favorite time of year! AC Moore now offers our adorable Fright Night set and will receive our Snow Much Fun set in October! And don't forget to stop by your local Michaels store in October to check out our new Warm Wishes set! Keep an eye out for them in stores near you!

Clear _ Dies Sets
Happy Fright Night Snow Much Fun Warn Wishes

Our design team is here to bring you plenty of inspiration for these exciting new sets, from Halloween to Christmas and other wintery goodness!

Cheri with Warm Wishes (available at Michaels in October)


Dana with Fright Night (available now at AC Moore)
Diane with Snow Much Fun (available at AC Moore in October)


Karen with Snow Much Fun (available at AC Moore in October)

Karen with Fright Night (available now at AC Moore)

Kerry with Fright Night (available now at AC Moore)

Renee with Fright Night (available now at AC Moore)

Sharon with Snow Much Fun (available at AC Moore in October)

Awesome projects, DT! We're loving these fabulous holiday cards!

Will you join our challenge? We want to see how you use a stamp with a matching die! The craft can be for any occasion. Top spot and honorable mentions win Ai stamps!

Here are the challenge rules …
✻ Please make a new card or creation. You can make any crafty item you wish; this is not limited to cards!
✻ Limit two submissions per person. You will receive extra votes if you use Art Impressions stamps!
✻ The Ai Challenge is open to everyone, international submissions are welcome!
✻ Include a link back to the Ai Blog or grab our button on the top right of our sidebar!
✻ Share the Ai love by clicking and commenting your fellow crafters.
✻ Make sure to get your link up by Wednesday, October 12th at 5:00 p.m. PST to enter your creations.
✻ Good luck and happy stamping!