Showing posts with label Snowman. Show all posts

Friday, December 5, 2025

Christmas in the Woods! Card by Tasha

Happy Friday Art Impressions friends!
Tasha here sharing a Holiday card created with the new 6085-Woodland Snowman Scene stamp set. Now that we’re officially in December, it’s the perfect time to finish (or start!) those holiday cards and projects, and this sweet snowman scene is wonderful for sending warm Christmas wishes to someone special.
To build my scene, I stamped the snowman and added a cluster of pine trees behind him to give the design a cozy woodland feel. I used Bleed Proof White to paint snowy highlights on the trees, add texture to the ground, and create soft falling snowflakes; this little detail really brings the winter magic to life.


For the sentiment, I stamped “Merry Christmas” in bright red ink on a crisp white banner and attached it to layers of Green, Red, and White cardstock. A festive plaid patterned paper ties everything together and adds that classic holiday charm.

I hope this card inspires you to get creative and enjoy a little crafty time this season! 


Tuesday, November 18, 2025

Art Impressions Simon Says Stamp Exclusive Snow Globe Gift Card Holder by Reneé Matarese

Hello Ai fans!

Yesterday was a very exciting day!
Art Impressions had this adorable snowman snow globe set release at Simon Says Stamp!

The set is called 6123 Snow Globe GCH and there is a 
coordinating die set called 5344 Envelope GCH Set.

Together they make a spectacular gift card holder presentation.


Here's the back of the envelope. You can see where the dies cut a slit
to tuck the flap into and a GC fits just perfect.


The snowman set contains 24 dies and the envelope set contains 8 dies.
That's a lot of dies to experiment with, so go ahead and have fun with them!


Stretch your imagination and use this snow globe on a card as well!


Be sure to grab yours before they're gone.
There are limited quantities and they won't last long.

Friday, August 8, 2025

Warm Winter Wishes! Card by Tasha

 Happy Friday Art Impressions friends!

Tasha here sharing a card inspired by the current Stitches & Scallops Challenge. For this project, I used the super cute 5802 – Joyful Snowman Set and 6047 – Scalloped Square Dies to create a cheerful winter scene. It’s never too early to get a head start on holiday cards!

I stamped the snowman with black ink and colored him with Copic markers. To give his winter accessories extra personality, I used a black liner pen to draw a knitted pattern; little custom touches like this are some of my favorite ways to add detail. I even added a tiny heart to his pocket for an extra sweet look. After that, I cut him out with the coordinating die and popped him up with foam tape for dimension.

For the background, I created a snowy hill and paired it with Art Impressions snowflake pattern paper for the sky. To match the challenge theme, I added scalloped frames in two sizes; one with a slightly different scalloped edge, which adds great visual interest.

The card base features layers of blue, white, and gray cardstock, along with a piece of blue plaid pattern paper that ties in perfectly with the colors on the snowman. To finish it off, I used a white gel pen to add extra snowflakes directly onto the snowman for that frosty, wintery feel.

Thanks for stopping by, and I hope you’ll join us in the challenge!


Friday, December 6, 2024

It's the Most Wonderful Time of the Year! Card by Tasha

 Happy Friday!

Tasha here sharing a Christmas card featuring the 5802 - Joyful Snowman Set. This set has the cutest little snowmen stamps and several greetings for holiday cards and projects. I think this snowman would also look great on gift tags.

To begin, I stamped the snowman and used the included dies to cut the image out. For the coloring, I used  teal, purple, and blue Copic Markers and added a light pink for his cheeks. I also used a white gel pen to create a design on the hat and scarf, I love coloring clothing!

To make the background, I added a pattern paper for the sky and cut a hill out of white paper to look like snow. I also attached several small white enamel dots to go with the snowy sky. 

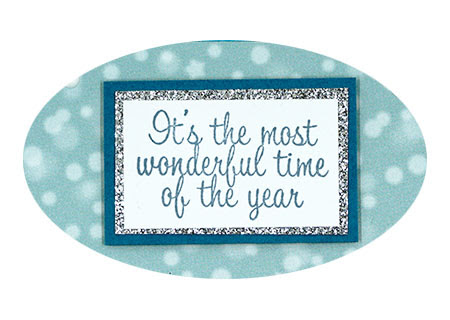
After I completed the background, I attached a metallic teal frame and stamped a sentiment with teal ink. I think this sentiment goes perfectly with the joyful snowman and I like how it looks with the silver glitter frame.

Lastly, I added layers of plaid paper, dark teal card stock, and silver glitter paper. All of these colors look so pretty together and in person the glitter is so sparkly. Teal and silver colors always look awesome on winter cards and it's one of my favorite color combinations.


I hope you enjoyed today's card and are having a wonderful day!


Monday, December 12, 2022

Joy of Christmas by Sharon Caudle

Hello AI Fans!


I love this card I'm showing you today.  This snowman exudes such joy that I can't help but smile every time I see him.  Bonnie is so talented in conveying emotions through her wonderful characters! This adorable cutie pie and sentiment are from #5041 Snow Friend Set. I can't help it, I adore him!!  I stamped him onto some Cryogen White paper which has a little sparkle to it, and then colored him with Copic markers. I cut the image out using the #5062 Rounded Rectangle A2 Double Stitched Die Set. For the mat behind him, I cut out another piece the same size in the gray paper and just offset it from the image panel. To balance out the card, I used three different beautiful snowflakes from 5353 Large Snowflake Dies and topped them off with some Diamond Stickles. 


Thank you so much for taking the time out of your busy schedule to stop in and take a peek at my card! Until next time my crafty friends!! 

Copics used:
Y08, Y35, Y38
YR12, YR14
C1, C2, C3, C4, C5, C6
R12, R22, R24, R27
T1, T2
B000, B04
YG07


Friday, December 2, 2022

Christmas Wishes Card by Tasha!

Happy Friday!
Sharing a holiday card created with the sweet 5351-Chubby Snowmen Set. I used one of the snowmen stamps and the little bunny on my project, but you could really mix and match any of the characters and greetings.
I love starry backgrounds, but instead of stenciling or coloring one, I used a piece of paper from the 5605-Halloween Journal Paper Pack. The purple sky and gold stars are great for a winter night scene; I just love the stars!


Both characters were stamped with black ink and colored with Copic Markers. I used the included dies to cut the images out (super easy) and layered them on to a snow hill with foam tape. I like that they are raised up a bit. For their scarves, I used a white gel pen to create designs; I enjoy customizing clothing.


The greeting "Winter Kisses and Christmas Wishes" is also included in the set. To coordinate with the background, I stamped the sentiment with dark purple ink and added a deep yellow frame. The bright white center reminded me of a moon and I think gold and purple always look great together!

Thank you for visiting today and I hope you enjoyed this card!


Saturday, December 4, 2021

Oh What Fun! by Janet


Hi everyone! Janet here with a cheerful wintery card celebrating the winter season. You know how sometimes things speak to you? This guy told me that's his name! It's Barney. I just fits him I think. Isn't he adorable?

This stamp set used from my card is #5041 - Snow Friend Set. There two snowman images and related sentiments in this super fun set along with a birdhouse, birds and holly.

This snowman actually holds a string of lights and I thought it would be fun to try masking it so I could eliminate the light string. This way, this festive little guy works for Christmas and the winter season generally. I found it was pretty easy to do and it makes him usable all winter.


To make this card I first stamped and colored Barney. Then I covered him with a mask and colored the pond around him with Copic markers. Then I used a stencil to create the clouds in the background. This worked beautifully to allow me to create the scene all around him. Once done I peeled away the mask and then I embossed the sentiment with blue heat embossing powder. 

I cut the image down and put it on an A2 card. I created a stitched frame and put it up on foam tape. I think it gives the feel of looking through a window. The final touches were to add a light blue enamel heart in his hand, a white pompom to his hat and some small pearls and snowflake sequins around him. I hope you like Barney as much as I do!

Happy Creating!

Janet YouTube - Blog - Facebook - Instagram - Pinterest

Friday, November 13, 2020

2 More Ways to Use the Snowman GCH | By Jessica Shier

 Hello Ai fans!

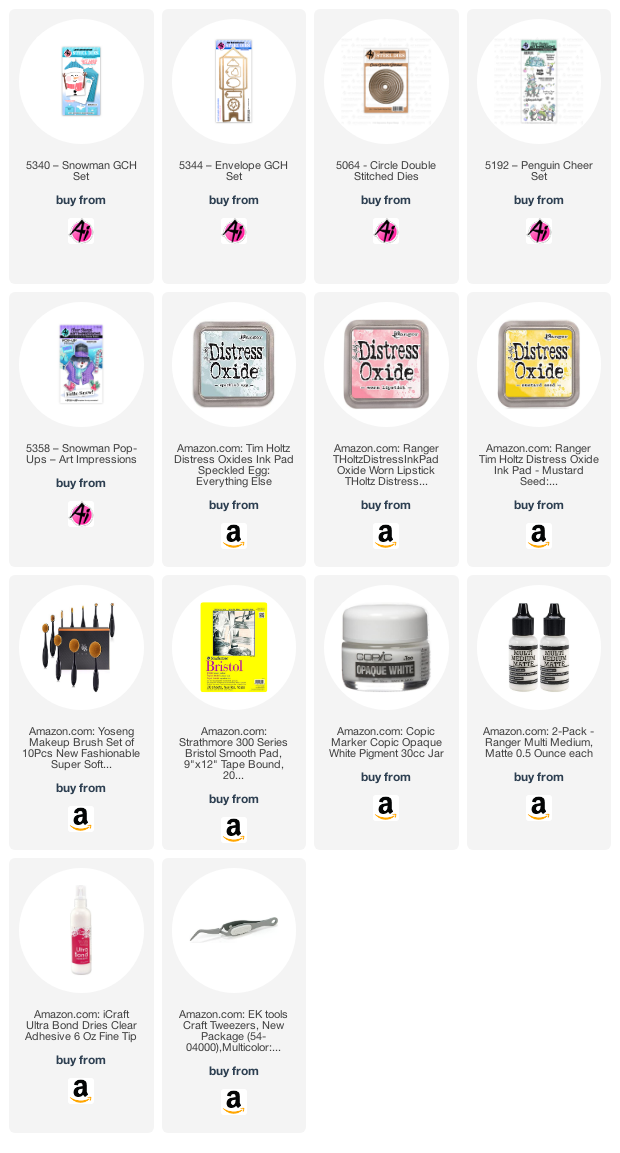
Happy Friday! This week I felt like playing with a few ideas for using the new Gift Card Holders. I enjoy when stamps and dies can be used in multiple ways. I thought making one of the Gift Card Holders an ornament would be fun. How cute would this look hanging on the tree? I also created a card using the Snowman GCH and the Circle Double Stitch die set. 

Snowman GCH Ornament

Using the Envelope GCH die and pattern paper I created the base. I chose a dark blue pattern paper. I'll be using several different textures, including the pattern paper and colored card stock. For the body of the snowman I used white craft foam. I also used a bright pink craft foam for the hat border. The sticks and scarf are such a fun accessory. I used felt for those. The cheeks, eyes, carrot, mouth and buttons are all die cut with colored card stock. To make this a ornament I used Baker's Twine and sandwiched that between two of the oval die cut shapes. This would be easy to die cut a bunch of pieces and put together a bunch in a sitting. 

Snowman GCH Card

This card was really easy to put together. Not as easy as the GCH but still easy enough to create multiples at a time.  I started with the background using several Distress Oxide inks on a piece of Bristol Smooth card stock. I masked off the bottom quarter with a piece of masking tape to keep that area white. The ink I used are listed below. I used a two different sizes of circles from the Circle Double Stitch die set. Those are cut from Neenah Solar white 110lb card stock. 

I used the same felt for the scarf and sticks, and also the same card stock from the Snowman GCH. Before adhering the circles to the background I blended a light gray ink around the edges, very lightly. I also stamped the sentiment from the Penguin Cheer set that reads "Merry Christmas to you and yours." This is stamped with a medium gray ink. I had an extra bird from this project using the Snowman Pop-up set, so I added that to one of the snowman stick arms. 

I hope you try out some fun materials and make a snowman or use one of the other GCH sets.

Thank you so much for joining me today! Happy Stamping!


Saturday, October 10, 2020

Snowman Gift Card Holder by Sharon Caudle

 Hello AI Fans!!


So I'm sure you've seen the new Gift Card Holders that Art Impressions has released. These are the coolest gift card holders and so fun and super simple to make!!! It's all a matter of die cutting the pieces using the papers you want and then gluing them together!! And they are SUPER CUTE!!! Today I'm showing you the Snowman Gift Card Holder Set.  Ok, I took a few liberties.  I wanted his eyes and mouth to look like little pieces of coal, so I used my Pearl Pen to make those.  And then I used some vintage buttons on him too.  I just adore how he turned out! Who wouldn't love getting a gift card dressed up like this??!!!  So if you're planning on giving some gift cards this holiday season, this new release is for you!!

Thanks so much for stopping by for a visit today and until next time - stay crafty!!

hugs!


Sunday, December 8, 2019

There's snow friend like you! by Reneé Matarese

Hello Ai fans!

Today I'm sharing a snowman card because who doesn't love snowmen?

I used one of the images from the set 4935 – Sparkle & Cheer.


I love old fashioned Christmases and this guy in his sweet top hat reminded me of that feeling.  I popped the snowman up on foam tape to give him some dimension.


I used one of the verses on the inside of the card.


Copics used:
YG11, YG63, R56, R81, R85
E42, E43, C0, C1, T3


Saturday, January 6, 2018

Watercolor Weekend Roundup - Welcome 2018!


Happy Saturday, Ai friends! The design team is back this new year with fresh and fun ideas! For those of you looking forward to spring, you will love Dot's floral arrangement! If you are still enjoying winter, Tricia K.'s inventive snowman and Tricia O.'s snowy neighborhood on a hill will inspire new ways to use your favorite supplies! Check out these ideas below, and be sure to visit their personal social accounts for more fabulous ideas!

Dot Freel - Instagram - Blog - Pinterest
Hello Watercolor Friends,

I'm excited for 2018 and so glad that I've had some time to watercolor now that the holidays are over. I made this card using the 4959 - WC Dogs Set, 4871 - WC Rustic Container Set. I used flowers from 4868 - WC Flower Set 2 and the 4761 - Watering Can and the grass and leaves from the 4051 - WC Foliage Set 1. The pink paper looked too plain so I was going to sew a stitched border but when I was looking at the decorative stitches on my sewing machine, I found this dog stitch and thought, how cute would that be? Happy New Year and happy crafting!

Other Supplies: Canson WC Paper, No. 4 Brush

Tricia Kennedy - Instagram
My project for today’s Art Impressions Watercolor Weekend is a “40¢ Snowman”.

Gather 40¢ - one quarter, one nickel and one dime - trace the coins onto a 4x6 piece of Canson watercolor paper. Using a Molotow masking pen, place dots all over the paper for snow, let dry. Stamp the snowman’s arms using the smallest branch from the 4963-WC Fall Set in 45 Sepia with the Stamp Positioner. Stamp the snowman’s hat using a pot from the 4869-WC Small Container Set in 1 Black also with the Stamp Positioner. The Stamp Positioner is very helpful for placing items exactly where you want them. Pull the color from the lines. Scribble 86 African Violet onto your Watercolor Palette and brush onto the background going up to the pencil lines of the snowman and around the arms and hat. Remove the masking snow dots and the pencil lines with an eraser. Add the eyes and buttons with 45 Sepia and the nose with 88 Terra Cotta. Complete the snowy scene by brushing a Wink Of Stella Clear Glitter Brush Pen onto the background.
Marvy Le Plume II Markers: 1 Black, 45 Sepia, 86 African Violet, 88 Terra Cotta
Other Supplies: Quarter, Nickel, Dime

Tricia O'Bin - Blog - Instagram - YouTube - Pinterest - Facebook
First I stamped the WC Mini Cottage in the front in Sepia. I cut a mask out of post-it notes, covered it to protect it while I stamped the next cottage in Sepia as well. I placed this cottage do the left and overlapping the first cottage slightly. I cut another mask and covered this cottage. I then stamped the third cottage to the left and slightly higher than the second cottage, and overlapped it slightly. I followed the same procedure for the last cottage. I used a stamp positioner to place each cottage where I wanted them.

I pulled the color out of the lines and added color from the palette to each cottage. I added a small amount of texture to the front of the first cottage using Sepia. I added snow with African Violet

I replaced the masks over each of the cottage. I used the large fir top from the WC Fir Tree Set to stamp the trees behind the cottages in Bottle Green and Pine Green. I added Black and Sepia to the left side of the cottages to create the idea of a snowy street. Using Blue I added the sky.

I cut the water colored piece to 3.75 x 5 and adhered it to a Gina K Designs – Christmas Pine Cardstock that measured 4 x 5.25.
Other Supplies: Post-it notes, Scissors, Gina K Designs – Christmas Pine Cardstock

Let us know what you think of our project in the comments below! Do you have projects to share with us? Be sure to hasthtag ##AiWatercolor on your online projects, and you can also post pictures to our Facebook PageHappy Stamping!