Showing posts with label 5867 - Mini Easter Sentiments Set. Show all posts

Tuesday, March 31, 2026

Round & Round Easter Cards by Reneé Matarese

Hello Ai fans and welcome to my Round & Round
challenge post.


I created 2 circular cards with a circular mat behind my animals and
there are circle cut outs on my doily die.


I love the pastel colors against the white background.


Did you create any Easter cards or projects this year?
If not, there's still time.


Copics used:
Bunny and Lamb:
RV0000, RV91, YG11

Baskets and Eggs:
Y11, RV000, V00, V12, V91, YG11, E81, B000


Thursday, March 19, 2026

Pop Up Easter Easel Box by Dori Mendiola

 Happy Thursday AI Friends!

I found this cute little easel box on youtube and thought I would create one for Easter.  Have you ever fallen down the rabbit hole (no pun intended) when viewing youtube videos or even pinterest?  I love seeing all the creative ideas out there but, man, I get hooked and then away I go.

One of my favorites sites and where I found this box is The Paper Pixie.  If you click on that link, it will take you to her box instructions.  Box measures 3" x 3".  

Here's my version using Art Impressions #5742 - Easter PP and the #5870 - Peeking Bunny set.


When you pull on the ribbon, the box opens and the easel pops up.  I wanted to grab some easter candies and fill the box before I took the picture, but I went to the store and forgot the candy.  😬


I just LOVE the easel on the box top and how it pops up.  Sooo fun!

Thanks for joining me today!  Hope you have a fantastic day!
Keep creating!
Copics used:  E50, E51, E53, E55, E95
N0, N1,       R20, R81, R83
B12, B14       V12, V15
G40, G43         YR20, YR23

Sunday, March 30, 2025

Bonus 5th Sunday Watercolor Weekend with Simone Carr

 Hello Ai fans and welcome to Watercolor Weekend!
This is one of those months where we get a bonus, 5th Sunday, so Simone Carr will be filling in as our Guest Designer for our last Sunday in March.


Please enjoy her amazing art!

Hello Fellow Crafters,

It’s my turn for Watercolor Weekend, and I’m excited to share two new watercolor cards with you! I hope they inspire you to create something beautiful this weekend!
Card 1: Easter Bloom Wreath


For my first card, I took an egg-shaped die to draw an outline so that I knew where to stamp my flowers and foliage. I placed my Canson watercolor paper into my stamp platform. I used the stamp from the Frameworks Set and colored parts of it with 969 before stamping it along the penciled egg shape. Once that was done, I stamped in the bunnies using 569 and 969, stamping off twice before applying them to the paper.
I colored the wreath first by pulling out the stamped color, then moved on to the bunnies, adding layers as needed. I stamped in some foliage but left space for flowers. I stamped grass in front of the bunnies using the larger grass stamp and then added flowers from Flower Set 2. For the white flowers, I used Dr. PH Martin’s Bleedproof White. Finally, I stamped the little bird on the branch using only 969. The sky was softly blended with 526 to complete the scene.
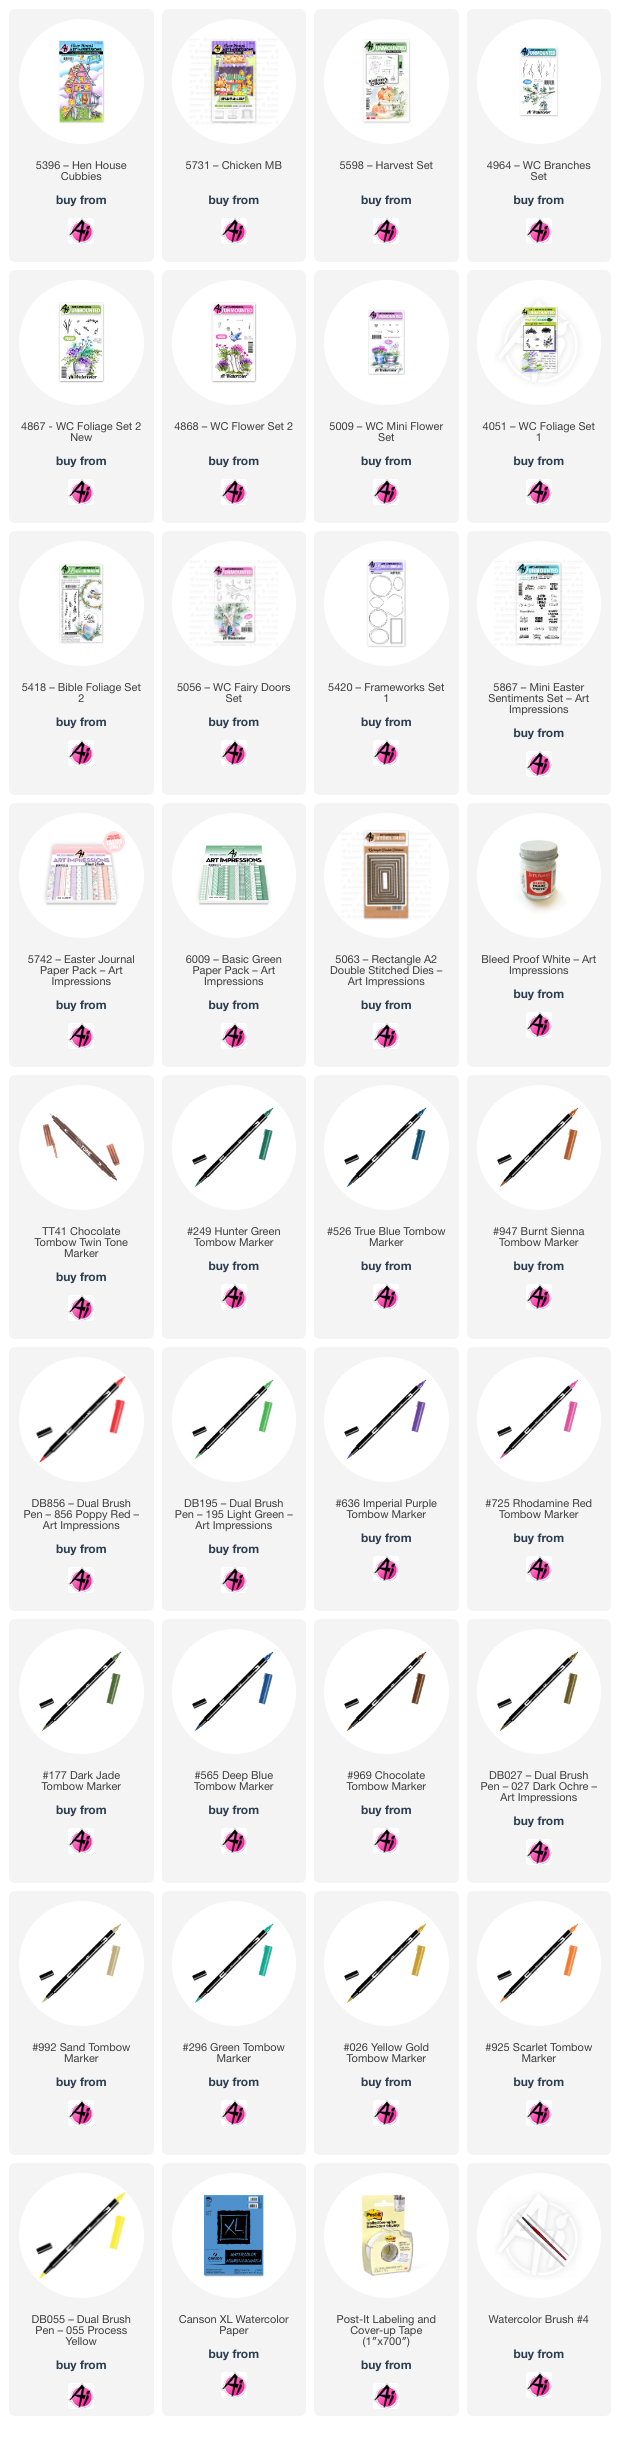
Materials Used:
Stamps:
  • Frameworks Set 1 (5420)
  • Fairy Doors Set (5056)
  • Furries TF (4208) Retired
  • Bible Foliage Set 2 (5418)
  • Foliage Set 1 (4051)
  • Mini Flower Set (5009)
  • Flower Set 2 (4868)
  • Flower Set 2 (4867)
  • Branches Set (4964)
Dies:
  • Rectangle A2 (5063) – Used the largest
  • Mini Easter Sentiment Set (5867)
Paper:
  • Canson Watercolor Paper
  • Easter PP (5742)
Inks & Markers:
  • Tombow Markers (969, 569, 526, 249, 177, 725, 565, 636, 195, 856, 947)
  • Dr. PH Martin’s Bleedproof White
  • Twintone Brown
Other:
  • Stamp Platform
  • Pencil for Sketching

Card 2: Cozy Coop


For my second card, I created a scene using the Matchbox Chickens Set and Hen House Cubbies.
I began by placing Canson watercolor paper into my stamp platform. Since the Matchbox stamps include flaps designed for creating 3D matchbox scenes, I used tape to block off the edges before inking the stamp with Memento Toffee Crunch. After removing the tape, I stamped the image, ensuring only the main elements transferred onto the paper.
With my scene set, I started coloring. For the chicks, I applied Tombow 055 around their heads, blending into 025 and 985 for the body. Their beaks were painted with 925. The hens were given warm, natural tones using 947 and 856. For the chicken coop, I used a combination of 947, 992, and 296, while the chicken feed bag was shaded with 027. To enhance the rustic feel, I stamped a hay bale from the Harvest Set (5598) using 026 and 985.
To tie the whole card together, I used patterned paper from the Basic Green PP (6009) as a background.
Materials Used:
Stamps:
  • Matchbox Chickens (5731)
  • Hen House Cubbies (5396)
  • Harvest Set (5598)
Paper:
  • Canson Watercolor Paper
  • Basic Green PP (6009)
Inks & Markers:
  • Tombow Markers (027, 992, 969, N55, 569, 296, 026, 856, 925, 055, 025)
  • Twintone Brown
  • Memento Toffee Crunch
  • Versafine Clair Nocturne
Other:
  • Stamp Platform
  • Masking Tape for Selective Stamping

I had so much fun creating these two watercolor cards, and I hope they inspire you to try something new in your crafting!
Happy Crafting,
Simone


Monday, March 3, 2025

Peeking Bunny Butt by Sharon Caudle

 Hello AI Fans!

I hope you had a wonderful weekend! The weather here was amazing, but it turned cold again on Sunday. But it's getting closer and closer to spring! It will be here before you know it! I've got an Easter card to show you today. I started with stamping the pot of tulips and that adorable bunny butt from #5870 Peeking Bunny Set onto some Copic friendly paper. The Copic colors I used to color everything is listed below. That fun sentiment is from 5867 Mini Easter Sentiment Set.  See that horizontal strip of paper across the bottom half of the card? That is actually the back panel that comes in Art Impressions paper packs. Don't forget that makes for a fun patterned paper that you can use as well! It's sooo funny that my Design Team sister Janet did the same with her card this past Thursday, so make sure to check out her post and how she used it! Great minds think alike! I used 6012 Basic Yellow PP. To mat that horizontal panel, I matted it with a piece of cardstock that I used the scalloped die from 5543 Journal Template Die Set.  To make the fuzzy cotton tail, I just pulled the end of a Q-tip off and cut it down to the perfect size for the image. 


So that's it's for me today! Thanks so much for stopping by for a visit, and until next time - stay crafty!! 


Copic markers used:
E50, 51, 53, 97, and 99
Y11 and 13
V000, 01, and 12
YG91 and 93
R12
B000 and 00


Saturday, March 1, 2025

Hoppy Easter Honey Bunny! by Janet

Easter is coming! Easter is coming! I'm a little excited about it as you can tell. Today I've made a card to celebrate some calorie free Easter sweetness! Let's get into it.

Do you have some of Ai's paper packs? There is always a back cover that has a sample of of paper patterns in it. Every time I use the paper packs, I look at those back covers and think they'd make an interesting background. Today I finally decided to do it! This is the back cover of the 5742 - Easter Journal PP. This is a 6 x 6 square card base made in white. I matted the patterned paper on blue and purple mats before centering it on my white card base. 

To make the circle piece, I used the 5726 - Nested Circle dies to cut out a white frame and two larger circles in blue and purple. The center circle I decorated is the negative circle that results when cutting the white frame. I used two blue inks for the sky and then cut a grassy hill out of patterned paper from my stash. It looks like grass with flowers in it. 

Next I stamped and colored the bunny holding his prized egg. I fussy cut it out and mounted it on the grass with foam pads. I carefully glued the purple and blue circles together. Then I mounted the circle with the bunny and grass on top. Finally, I put thin foam strips under the white frame and placed it around the decorated circle. I mounted the finished circle piece on the card base but thought it would be fun to place the circle so it overhangs the top fold. I saw this done on another card recently and I do like it. Would I do it a lot? Maybe not, but it gives a little different flavor to this card.

To create the bottom strip, I used a leftover 1/2" piece I had cut off the paper pad back cover. I mounted it on top of slightly larger strips of blue and purple cardstock and glued it toward the bottom of my card.

Next came the sentiment. This time I used one from 5867 - Mini Easter Sentiments Set. It's stamped in blue on a white rectangle. I mounted it on top of blue and purple cardstock to keep the look cohesive with the rest of the card. The sentiment has a heart but I covered it with a pink heart pearl. I really like the little pop of pink this provides. I glued this on the strip and added blue and lavender enamel hearts to finish it off. 

I hope you this sweet Easter Card! Thanks so much for joining me here at the blog. As always, please visit the Ai Store for the products I used and all the things you need for your card, journal, and tag making projects. Happy creating!

Janet YouTube - Blog - Facebook - Instagram - Pinterest