Showing posts with label Easter cards. Show all posts

Friday, April 10, 2026

Egg-tremely Cute! Card by Tasha

 Happy Friday Art Impressions Friends!

Tasha here sharing an egg-stra cute card created with the 5737-Bunny & Chicks Set, 6198-Flower Signage Set, and 6008-Bunny Hugs Set.


To create this project, I started by stamping the center card with the Flower Signage stamp and added the "Egg-tremely Cute," greeting from the 6008-Bunny Hugs Set to the center of the sign. It fit perfectly! 
After, I drew in flowers and colored everything with Copic Markers. I used a black liner pen and white gel pen to add more details to the flowers.

I love little chicks, and this trio is just too adorable. To coordinate with the sentiment, I also added three eggs using the egg stamp from the Bunny Hugs Set. They work great to bring the whole scene together!

Lastly, I added layers of blue, yellow, and white cardstock, gold glitter paper for sparkle, and a piece of plaid pattern paper that I thought went well with the design. 

I hope you enjoyed today's card and are having a wonderful day!


Friday, March 20, 2026

Hello Spring! Card by Tasha

Happy Friday Art Impressions friends!

Tasha here sharing a Spring card featuring the super cute 6008 Bunny Hugs Set and 6046 Scalloped Oval Dies. Now that we are in the Spring season, I have been pulling out my Spring and Easter sets and I cannot stop coloring the bunny stamps. I love all of them, but this sweet bunny with the tulips felt just right for this time of year.


For this card, I stamped the image in black ink and colored it with Copic Markers. I chose a pretty floral pattern paper for the background and matched the tulip colors to the soft pastel shades in the paper. I really love how those colors came together.


For the center, I used cloud and grass stencils to create a simple outdoor scene. I added a few glitter enamel sparkles to the clouds for a little texture and shine. I always like adding a bit of sparkle.

To finish the card, I used a scalloped oval die cut from metallic pink cardstock and layered it with dark purple, white, and lavender cardstock to coordinate with the flowers.

I hope you enjoyed today’s card and that it inspires you to start working on your Spring projects!


Have a wonderful day!


Friday, April 11, 2025

Easter Blessings! Card by Tasha

 Happy Friday Art Impressions Friends! 

Tasha here sharing a new Easter card featuring the sweet 4886K-Easter Blessings Set. The bunny stamps included in this set are so cute and have a whimsical look that I love.

To begin, I stamped the bunny with the tulip on to white paper to start creating the Spring scene. After stamping, I used Copic Markers to color the grass and sky before attaching little white clouds. It's hard to tell in the photo, but I used foam tape on one cloud to raise it up a bit. 

The greeting "Easter Blessings" was also included in this set and I used a small scissors to cut around the letters. This greeting fit perfectly in the center of the card and I like the handwritten lettering.


To complete the card I added two little Easter eggs to go with the theme and attached layers of pastel colored card stock, and a piece of Art Impressions floral pattern paper. This paper is so pretty and I love the purple flowers!

Thank you for checking out today's card and I hope you are inspired to create an Easter card using the 4886K-Easter Blessings Set!

Have a wonderful day!


Tuesday, April 1, 2025

April 2025 Monthly Challenge with Guest Designer Simone Carr

Hello Ai fans and welcome to our April Monthly Challenge.

These monthly challenges will have no theme. It's just fun to create something using Art Impressions products and then possibly win some free stamps!

April is Simone Carr's turn to be our Guest Designer.

How do you win free stamps? Add your creation (it doesn't have to be a card) using Art Impressions products below for your chance to win a free stamp set from Art Impressions or a freebie from me. (US addresses only for my freebie...The free stamp set from Ai is open world wide)
Let's see what Simone has created to inspire you this month.

Hello Crafty Friends,

I chose to create two cards with the Happy Easter Set (4754) because I absolutely loved the cute egg-shaped heads of the Easter bunnies.
For my first card, I started by stamping the images onto masking paper and fussy cutting them out. Using an egg-shaped die, I drew a pencil outline to guide where to place the bunnies. I stamped the smaller bunny first with Memento Toffee Crunch and placed the masking paper over it. Then, I stamped the second bunny next to the first one and masked it as well. Finally, I stamped the standing bunny behind the two smaller bunnies.


After all the bunnies were stamped, I removed the masking paper and began coloring the images. I used Tombow markers to color in the bunnies and added details to the grass and foliage around them. Once the coloring was complete, I cut a piece of white cardstock to 3 ¾” x 5”, centered it on my die, and ran it through the die cutting machine. I then embossed the frame with a lovely texture and used two dies to cut out a frame that fit the opening. I added some double-sided foam behind the frame to give it a bit of dimension before adhering it to the watercolor paper. To finish the card, I stamped a sentiment on white cardstock, die cut it out, and added a sweet bow to complete the design.
Materials Used:
Stamps:
  • Happy Easter Set (4754)
    Foliage Set 1 (4051)
    Foliage Set 3 (5007)
    Bible Flower Set (5074)
    Gift Card Pocket Set (5811)
    Easter Chicks Set (5401)
Dies:
  • Egg-shaped Die (for drawing the outline)
    Die for Frame
    Bow Die
Paper:
  • White Cardstock
    Easter PP (5742)
    Canson Watercolor Paper
    Mirri Paper
Inks & Markers:
  • Memento Toffee Crunch
    Bleed Proof White
    Tombow Markers: 177, 526, 977, 992, N55, 925, 195, 452, 703, 985
Other:
  • Masking Paper
    Embossing Folder
    Double-sided Foam Tape

For my second card, I created a design using the Postage Die on Strathmore Bristol Smooth Cardstock. I started by cutting out the postage shape and placed it in my Stamp Positioner to ensure proper alignment for the stamping. I used Post-it tape to mask off certain areas of the stamp to prevent overstamping. Once the areas were masked, I stamped the images using Memento Toffee Crunch and then colored them in with Tombow markers using a #4 brush for a soft watercolor effect.


The result was a whimsical Easter scene framed by the postage die, which really helped to highlight the stamped images. I finished the card by adding some patterned paper from the Basic Yellow PP (6012) to add an extra pop of color behind the frame.
Materials Used:
Stamps:
  • Happy Easter Set (4754)
    Foliage Set 1 (4051)
    Foliage Set 3 (5007)
    Bible Flower Set 2 (5418)
Dies:
  • Postage Die
Paper:
  • Strathmore Bristol Smooth Cardstock
    Basic Yellow PP (6012)
Inks & Markers:
  • Memento Toffee Crunch
    Versafine Clair Nocturne
    Bleed Proof White
    Twintone Brown and Black
    Tombow Markers: 025, 055, 993, 905, 933, 195, 856, 703, 526, 401, 177, N55, 947
Other:
  • Stamp Positioner
    Post-it Tape

I hope these cards bring some Easter joy to your crafting! It was such a pleasure to create them, and I can't wait to see what you come up with for your own Easter projects.
Happy Crafting,
Simone

Here is the fine print...
✻ Please make a new card or handmade crafty creation.
✻You can make any item you wish; this is not limited to cards and it can be any theme you like.
✻ Limit two submissions per person. 
✻You MUST use Art Impressions stamps or dies! You may use other companies products but the main focus should be on Ai items.
✻If you win, you will receive one free stamp set of your choice. 
This will be a random drawing so all levels of ability are encouraged to enter!
 ✻Please include your first name and last initial on your submission.
✻We love to comment on your entries, but keep in mind if you use a private group or a platform that you need to sign up for, we probably won't be able to.
✻ The Ai Challenge is open to everyone, international submissions are welcome!
✻ Good luck and happy crafting!

You are invited to the Inlinkz link party!

Click here to enter

Sunday, March 30, 2025

Bonus 5th Sunday Watercolor Weekend with Simone Carr

 Hello Ai fans and welcome to Watercolor Weekend!
This is one of those months where we get a bonus, 5th Sunday, so Simone Carr will be filling in as our Guest Designer for our last Sunday in March.


Please enjoy her amazing art!

Hello Fellow Crafters,

It’s my turn for Watercolor Weekend, and I’m excited to share two new watercolor cards with you! I hope they inspire you to create something beautiful this weekend!
Card 1: Easter Bloom Wreath


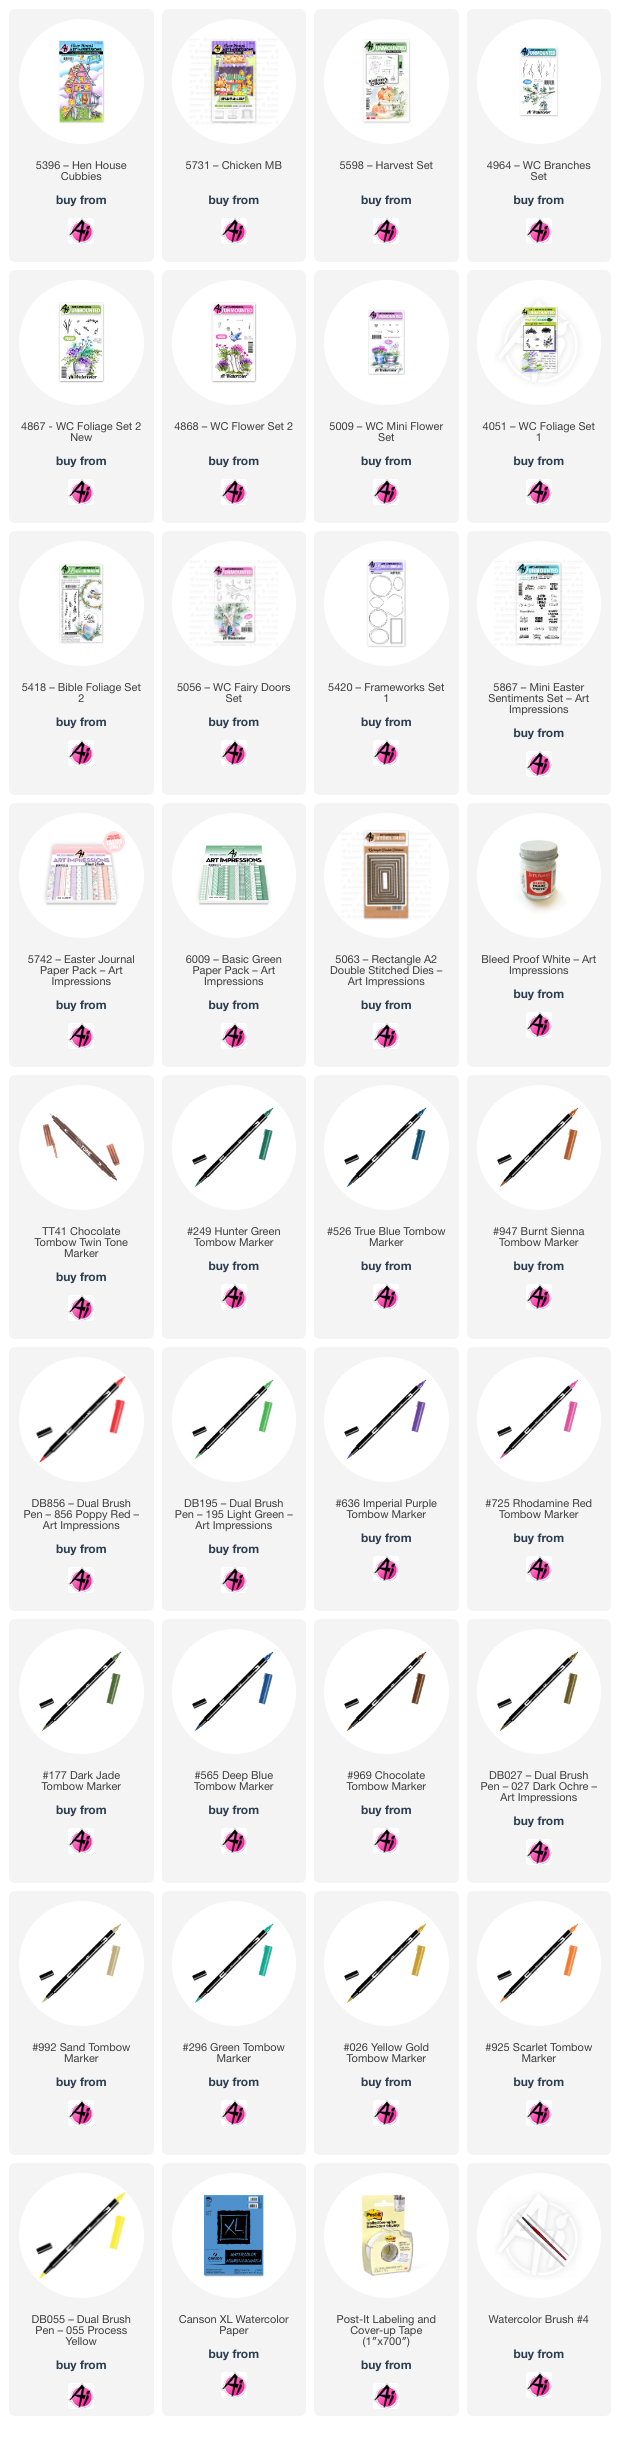
For my first card, I took an egg-shaped die to draw an outline so that I knew where to stamp my flowers and foliage. I placed my Canson watercolor paper into my stamp platform. I used the stamp from the Frameworks Set and colored parts of it with 969 before stamping it along the penciled egg shape. Once that was done, I stamped in the bunnies using 569 and 969, stamping off twice before applying them to the paper.
I colored the wreath first by pulling out the stamped color, then moved on to the bunnies, adding layers as needed. I stamped in some foliage but left space for flowers. I stamped grass in front of the bunnies using the larger grass stamp and then added flowers from Flower Set 2. For the white flowers, I used Dr. PH Martin’s Bleedproof White. Finally, I stamped the little bird on the branch using only 969. The sky was softly blended with 526 to complete the scene.
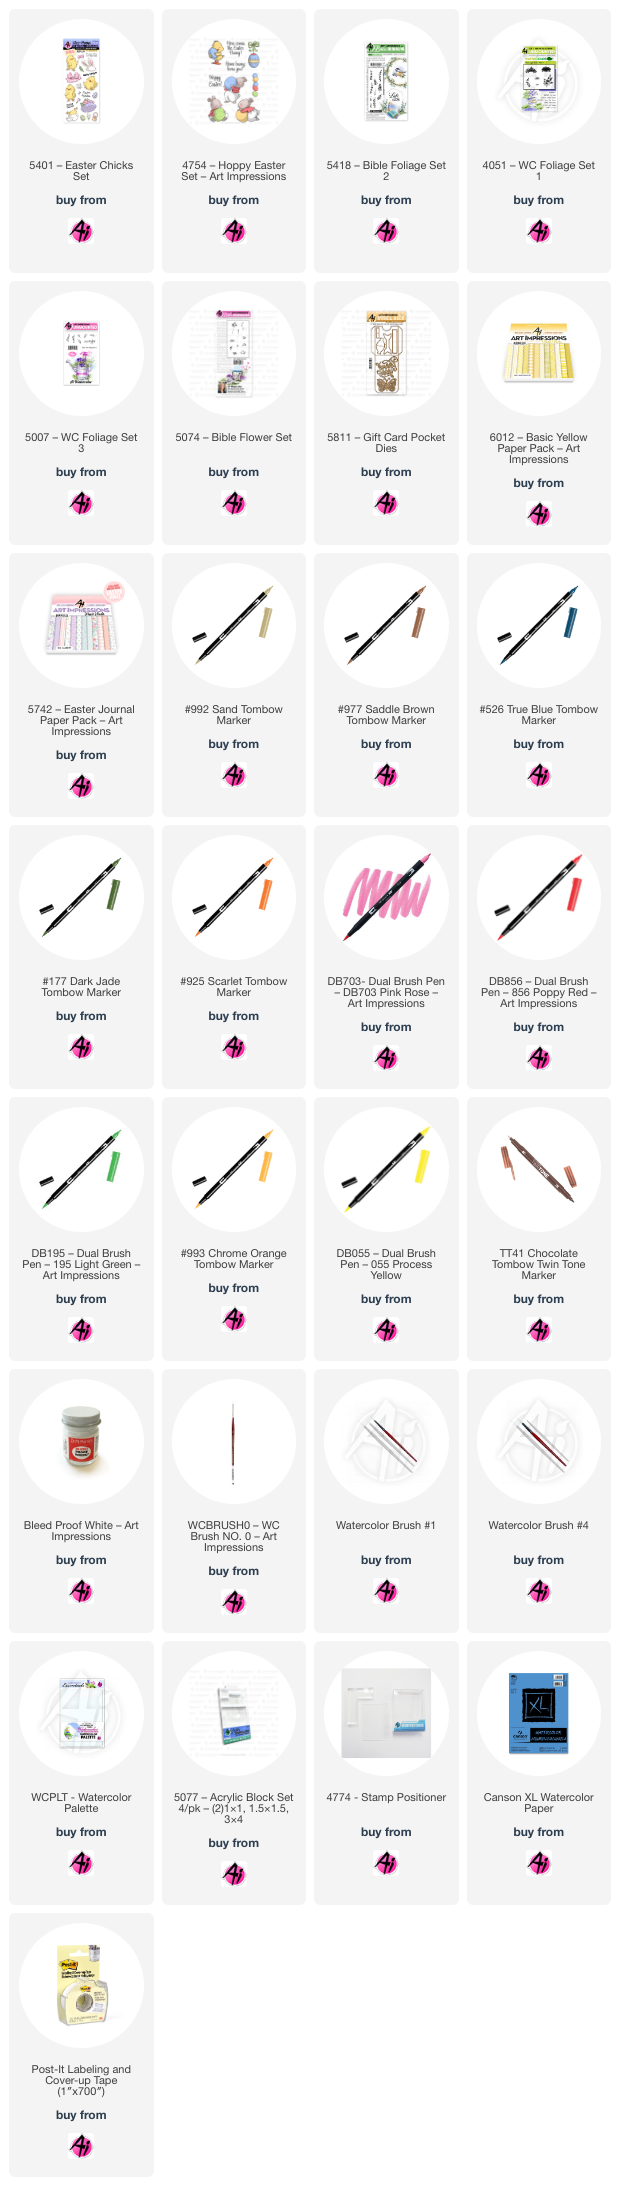
Materials Used:
Stamps:
  • Frameworks Set 1 (5420)
  • Fairy Doors Set (5056)
  • Furries TF (4208) Retired
  • Bible Foliage Set 2 (5418)
  • Foliage Set 1 (4051)
  • Mini Flower Set (5009)
  • Flower Set 2 (4868)
  • Flower Set 2 (4867)
  • Branches Set (4964)
Dies:
  • Rectangle A2 (5063) – Used the largest
  • Mini Easter Sentiment Set (5867)
Paper:
  • Canson Watercolor Paper
  • Easter PP (5742)
Inks & Markers:
  • Tombow Markers (969, 569, 526, 249, 177, 725, 565, 636, 195, 856, 947)
  • Dr. PH Martin’s Bleedproof White
  • Twintone Brown
Other:
  • Stamp Platform
  • Pencil for Sketching

Card 2: Cozy Coop


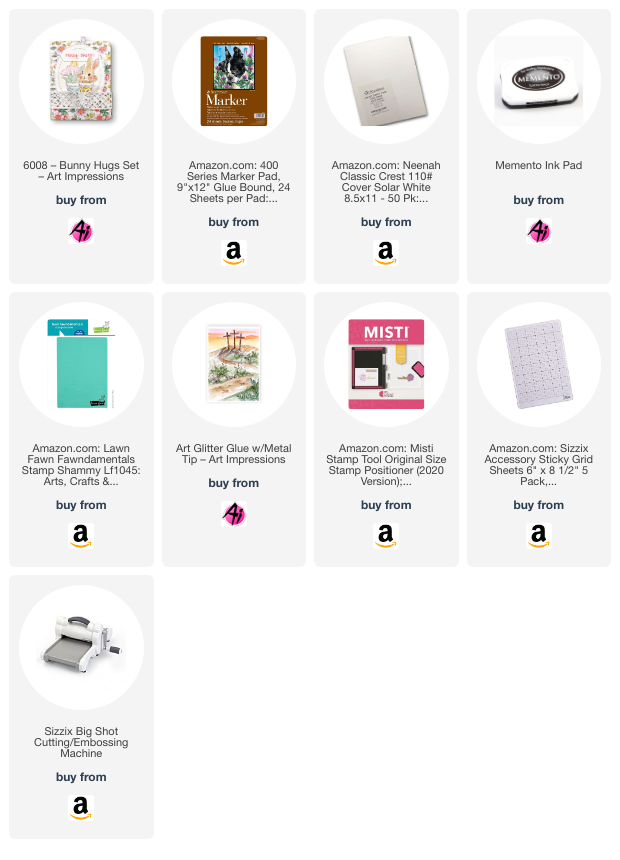
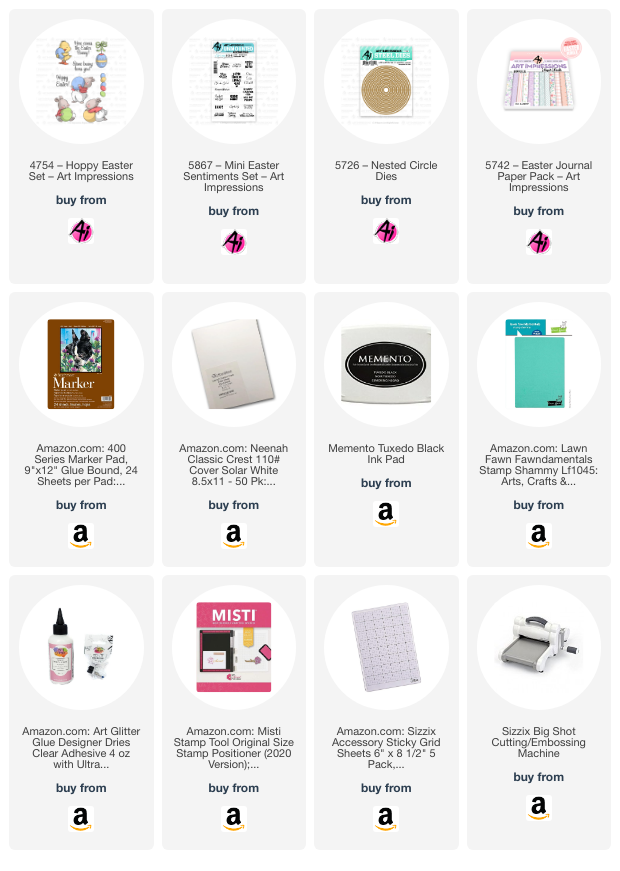
For my second card, I created a scene using the Matchbox Chickens Set and Hen House Cubbies.
I began by placing Canson watercolor paper into my stamp platform. Since the Matchbox stamps include flaps designed for creating 3D matchbox scenes, I used tape to block off the edges before inking the stamp with Memento Toffee Crunch. After removing the tape, I stamped the image, ensuring only the main elements transferred onto the paper.
With my scene set, I started coloring. For the chicks, I applied Tombow 055 around their heads, blending into 025 and 985 for the body. Their beaks were painted with 925. The hens were given warm, natural tones using 947 and 856. For the chicken coop, I used a combination of 947, 992, and 296, while the chicken feed bag was shaded with 027. To enhance the rustic feel, I stamped a hay bale from the Harvest Set (5598) using 026 and 985.
To tie the whole card together, I used patterned paper from the Basic Green PP (6009) as a background.
Materials Used:
Stamps:
  • Matchbox Chickens (5731)
  • Hen House Cubbies (5396)
  • Harvest Set (5598)
Paper:
  • Canson Watercolor Paper
  • Basic Green PP (6009)
Inks & Markers:
  • Tombow Markers (027, 992, 969, N55, 569, 296, 026, 856, 925, 055, 025)
  • Twintone Brown
  • Memento Toffee Crunch
  • Versafine Clair Nocturne
Other:
  • Stamp Platform
  • Masking Tape for Selective Stamping

I had so much fun creating these two watercolor cards, and I hope they inspire you to try something new in your crafting!
Happy Crafting,
Simone


Saturday, March 29, 2025

Easter Bunny Greetings

Today I have made a card made with the new 6008 - Bunny Hugs Set. This set was one of several new items added to the store this past week. It's oozing cuteness with bunnies, flowers, and Easter accessories. This is one of those have-to-have sets if you celebrate the Easter season.

To start the card, I worked on the background, coloring it with Copic markers. Then I colored the bunny and tulip images, along with the basket of carrots, and two butterflies. I also stamped the Easter Greetings sentiment and drew a border around it with a Navy Twintone marker. 

After coloring, I cut the images out with the included dies. I arranged the bunnies, pots and baskets by attaching them at different heights using foam pads to make some images higher than others. The sentiment was also attached with foam pads. I cut the panel down to 4" x 5 1/4" and mounted it on white cardstock sized 4 1/8" x 5 3/8". This was mounted on a pre-printed pink and white A2 card base. Finally three clay carrots and two clay tulip embellishments were glued on the card. This bunny is ready to share with someone special for the Easter holiday!


Janet YouTube - Blog - Facebook - Instagram - Pinterest 

Thursday, March 20, 2025

I Like to Move it, Move it!" Challenge #399 Week #2

 Hello Ai fans and welcome to week #2 of our

I Like to Move It, Move It! challenge!

We want to see your projects that have movement on them.

These can be sliders, shakers, wobbles, swiper cards, pop up cards etc. You name it! If something on your project moves, then it qualifies.

Last week, Dori was our featured artist. You can find all of the details about her card on her BLOG POST and be sure to watch the quick video clip of how her card moves!


Janet created this darling slider card using 5870 – Peeking Bunny Set.


I created two bee themed shaker cards.


Lynn has a fabulous get well shaker card. Visit her
BLOG POST to hear all about it and view her video tutorial.


Last but not least, Tasha created an adorable shaker as well.
 5504 – Happy Spring Set
We hope we've inspired you to "get moving" and create something for our challenge. You just may win a free stamp set!

✻ Please make a new card or handmade crafty creation. You can make any item you wish; this is not limited to cards! (unless specified)

✻ Limit two submissions per person. You will receive extra votes if you use Art Impressions stamps!
 ✻Please include your first name and last initial on your submission.
✻We love to comment on your entries, but keep in mind if you use a private group or a platform that you need to sign up for, we probably won't be able to.
✻ The Ai Challenge is open to everyone, international submissions are welcome!
✻ Include a link back to the Ai Blog or grab our button on the top right of our sidebar!
✻ Share the Ai love if you can, by clicking and commenting on your fellow crafters.
✻ Make sure to get your link up by the deadline to enter your creations.
✻ Good luck and happy stamping! 

You are invited to the Inlinkz link party!

Saturday, March 15, 2025

New Matchbook - He is Risen by Janet

Hello my fellow card makers! I hope you are having a great day. I have a treat for all of us that love the Matchbook Card Series from Art Impressions. Several new designs are now available! Yay! I chose the new 6015 - MB Cross & Tomb set to feature today.

This set tells the story of resurrection and it shows the moment when the women came to prepare Jesus' body after death. The rock in front of the tomb is moved away and the tomb is empty. So much is packed into this tiny scene from the women making their way, to the crosses on the hills of Golgotha, to the empty tomb. It has instantly become one of my favorite sets in the series.

This card goes together like all the Matchbook set. They all fit into the card base made with 5317 - MB Template Dies. The pieces from each matchbook set are made to fit perfectly in this card base which means you only have to buy that part once. The 5318 - MB Envelope Dies is great to have as well. It makes a perfectly sized envelope for all the matchbook cards. It is the perfect way to present and store these tiny creations.

Thanks so much for joining me here today and I hope you enjoyed seeing my matchbook card. As always, please visit the Ai Store for the products I used and all the things for your card, journal, and tag making projects. Happy Creating!

Janet YouTube - Blog - Facebook - Instagram - Pinterest  

Saturday, March 1, 2025

Hoppy Easter Honey Bunny! by Janet

Easter is coming! Easter is coming! I'm a little excited about it as you can tell. Today I've made a card to celebrate some calorie free Easter sweetness! Let's get into it.

Do you have some of Ai's paper packs? There is always a back cover that has a sample of of paper patterns in it. Every time I use the paper packs, I look at those back covers and think they'd make an interesting background. Today I finally decided to do it! This is the back cover of the 5742 - Easter Journal PP. This is a 6 x 6 square card base made in white. I matted the patterned paper on blue and purple mats before centering it on my white card base. 

To make the circle piece, I used the 5726 - Nested Circle dies to cut out a white frame and two larger circles in blue and purple. The center circle I decorated is the negative circle that results when cutting the white frame. I used two blue inks for the sky and then cut a grassy hill out of patterned paper from my stash. It looks like grass with flowers in it. 

Next I stamped and colored the bunny holding his prized egg. I fussy cut it out and mounted it on the grass with foam pads. I carefully glued the purple and blue circles together. Then I mounted the circle with the bunny and grass on top. Finally, I put thin foam strips under the white frame and placed it around the decorated circle. I mounted the finished circle piece on the card base but thought it would be fun to place the circle so it overhangs the top fold. I saw this done on another card recently and I do like it. Would I do it a lot? Maybe not, but it gives a little different flavor to this card.

To create the bottom strip, I used a leftover 1/2" piece I had cut off the paper pad back cover. I mounted it on top of slightly larger strips of blue and purple cardstock and glued it toward the bottom of my card.

Next came the sentiment. This time I used one from 5867 - Mini Easter Sentiments Set. It's stamped in blue on a white rectangle. I mounted it on top of blue and purple cardstock to keep the look cohesive with the rest of the card. The sentiment has a heart but I covered it with a pink heart pearl. I really like the little pop of pink this provides. I glued this on the strip and added blue and lavender enamel hearts to finish it off. 

I hope you this sweet Easter Card! Thanks so much for joining me here at the blog. As always, please visit the Ai Store for the products I used and all the things you need for your card, journal, and tag making projects. Happy creating!

Janet YouTube - Blog - Facebook - Instagram - Pinterest  

Saturday, March 30, 2024

Welcome Spring! by Janet


 Easter is here and that means one sure thing....spring has arrived! Before I go further, I want to wish you all the blessings of Easter on this special day. I hope you will have a beautiful Sunday full of family, friends and all those you hold dear.

This card is another window card which is something I can't seem to get enough of lately! They are so fun to do and the frames around the window let me mix many paper patterns which I enjoy. This time I've used one of my most favorite shape dies from Art Impressions. It's the 5062-Rounded Rectangle A2 Double Stitched Dies. I used three of the dies to cut an opening and double frames using the 5892-Easter S2 Paper Pack. The paper patterns in this pack have become my favorites for spring. The cute image of chicks and eggs is from 5870-Peeking Bunny Set


After cutting the frames and the window, I glued the negative piece of the cardstock to the inside of the card so it is centered in the window when closed. The cart image is glued to that and stays in place when the card is opened. I also stamped the sentiment on this. It is part of the 5867-Mini Easter Sentiment Set. I added a paper flower with a jewel brad center and two additional colored eggs to finish this card. Yay for spring! 

Thanks for stopping by today. I hope you'll visit the store to see all the things you need for your card, journal, and tag making projects. Have a GREAT Saturday!

Janet YouTube - Blog - Facebook - Instagram - Pinterest