Showing posts with label Southwest Set. Show all posts

Wednesday, January 8, 2020

NEW VIDEO! Cactus Row Watercolor

Hello Ai Fans!

Bonnie is back with this vibrant, Southwest-inspired card, which features bright colors to light up the new year! This tutorial can be adapted to include different foliage or florals from our Watercolor series, but looks "sharp" when using our Southwest and Desert sets in versatile watercolor containers. We're certain you're going to enjoy trying a fresh new style of watercolor with your favorite instructor!


View on YouTube: https://youtu.be/Oh-yZptll0U


Saturday, September 21, 2019

Watercolor Weekend Roundup - Rustic Fall Projects!

Happy Fall, Ai fans! We're so excited to watercolor with autumn hues, and the team is here to share some lovely rustic projects today! Let's take a look at what the team created today. Remember to follow these ladies on social media by visiting the links next to their names!

Dot Freel - Instagram - Blog - Pinterest
Have you seen Art Impression's new 5198 - WC Mountain Set? I'm in love with it! It comes with two sizes of traditional mountains and two sizes of Southwestern mountains. They are so easy to use yet make a wonderful impact on any scene! This is my card for the bi-monthly Watercolor Weekend on the Art Impression's blog. I stamped the mountain in 969 and pulled the color out of the lines. I watercolored them with four different colors - 977, 757, 969 and 933, trying to get that orange color of the Utah mountains that my adventurous son Brad (with his dog Sgt) always captures in his photos. I used this photo below for inspiration.
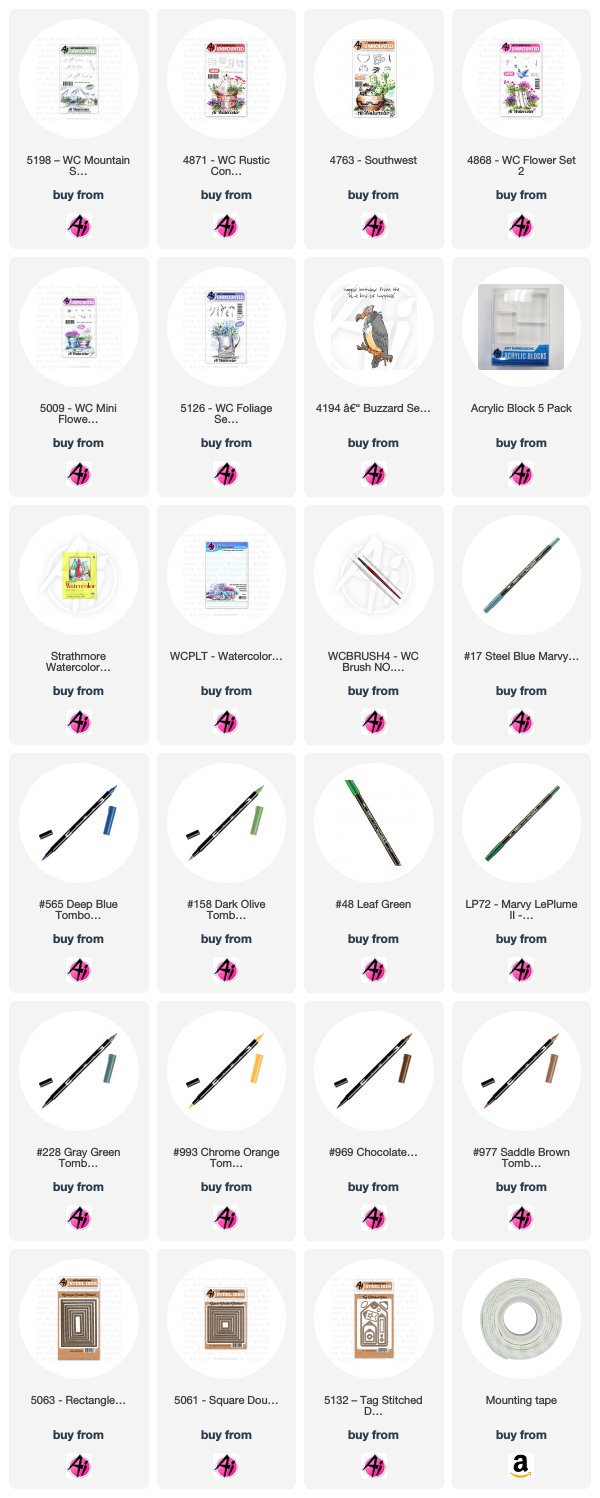
Next, I stamped the boot in 969 from the 4871 - WC Rustic Container Set then colored the bottom with 969 and the top with NO. 17 steel blue. I used the flowers from 4868 - WC Flower Set 2 and stamped them in the steel blue and 158. I stamped the cacti in 177 from the 4763 - Southwest Set and then added 228, 155, NO. 48 leaf green and No. 52 yellow green to them. I used the fine tip of the No.72 pine green to draw some of needles back in. I stamped the rocks in both 969 and 565. I stamped the flowers with 933 from the 5009 - WC Mini Flower Set on top of the round cactus. I stamped the grasses in 977 from the 5126 - WC Foliage Set 4 then added that color to the ground from the palette. I added dots with the fine tip of the sepia pen. I used 565 to add the shadows, the sky and to darken the boot heel. I cut out my scene with the largest 5061 - Square Double Stitched Die and used double sided foam tape to adhere it to the base which I cut out using the largest of the 5063 - Rectangle Double Stitched Dies. I stamped the happy birthday from the 4194 - Buzzard stamp and cut it out with the 5132 Tag Stitched Die Set.

Karen Day - Blog - Facebook - Pinterest
I began my wreath by tracing a 2 1/4" circle onto my Canson Watercolor paper with a pencil, to use as a guideline. I picked my colour palette of softer, faded colours of Tombow Markers. Using #098 Avocado, I coloured up the leafy branch from 5126 - WC Foliage Set 4, stamping it in first and second generation in four clusters around the circle. Using both of the vine stamps from the same set, I coloured them both up in #992 Sand and tucked them around the greenery (I love it that there are two vines bending in different directions - they make great filler stamps on a wreath!).
Now I wanted to add in the pumpkin elements before my wreath got too full, so I started with the cluster of tiny flowers from 4868 WC Flower Set 2. Using #533 Peacock Blue I stamped them 3 times in a circle in the lower left corner of my wreath, and then tucked them in three other places around the perimeter. Starting with the smaller pumpkin from 5059 - WC Harvest Set, I coloured the body in #946 Gold Ochre, and the stem in #098 Avocado. I masked it, and stamped the larger pumpkin behind it. I softened the lines with a damp #4 paintbrush, pulling out the colour - leaving the top edges white as the highlight. I picked up some #879 Brown from my palette adding shadows to the lower sections of the pumpkins, and in their crevices. I took the wheat image from 5008 - WC Flower Set 3 (I think it's supposed to be lavender, but today they are wheat stalks!) and colouring it with #991 Light Ochre - I stamped them repeatedly behind the pumpkins, and cascading below them. And finally I used one of the berry images from 4963 - WC Fall Set coloured in #879 Brown and #837 Wine Red for the berries, and tucked them in and around the wreath where I could. I only dabbed lightly with my damp brush, as I don't want the lines of the images to deteriorate with the addition of too much water. I picked up #098 from my palette, and wherever I had white space, I hand painted in a few extra leaves. The sentiment is from the 4205 - Harvest TF Set, stamped in Versafine Onyx Black ink. I die cut my panel with the 5063 Double Stitched Rectangle Die, matted it with black cardstock, and used 3D pop dots to adhere it to my kraft paper base. I added a few amber coloured tiny sparkles to finish it off. 

Tricia O'Bin - Blog - Instagram - YouTube - Pinterest - Facebook
It’s that wonderful time of year again, FALL!! It is my next favorite time of the year, Winter being first LOL. I decided to make a really sweet fall scene. I put one of the little sitting boys on the tire swing.

To start I masked off around my picture using Post-It tape. This gave me a nice clean border around my picture. I inked the tire, from the NEW Swing Set, up with 569 and 969 and stamped it slanted in the middle of the paper. I wanted it to look like it was swinging in the air. Using my #4 paintbrush, I pulled the color from the lines making sure to leave some white space in the middle of the tire. 

I masked off the tire with some Post-It tape and, using my positioner, stamped the sitting boy from the Little Boys set. I stamped him off once and placed him on the tire. I pulled color out of the lines to just the shadowed areas. I didn’t pull any color into the face. I added some 47 to my palette and added it to the face, neck, arm and foot. I added 526 to my palette and added it to his overalls.

I stamped the small leaves from the Foliage Set 4 set in yellow, red and orange randomly around the top of the picture. I added some water to them to create a feeling of trees with their leaves changing into Autumn colors. I added some 569 between the trees and the boy as a sky. I added some 249 to my palette and painted in the field and mountain. I used it to also ink up the pine tree from the Trees set. I stamped these randomly to the left and right of the boy to create some depth. I added water to them. 

I inked the branch from the Desert set in 969 and stamped it along the bottom of the painting. I again used my small leaves stamp inked in 757, 925 and 025. I added water to the leaves. I added some additional color between the trees to extend the grass.

Using a small ruler and my black marker, I drew a line from the trees to the tire swing. Finally, I signed and dated the picture. 

I cut the painting down to 4.75 x 3.5 and mounted it on a piece of Gina K Designs Red Hot cardstock. I added that to a white card base.

I hope you get to do some water coloring this weekend! Be sure to tag us on Instagram with #AIWatercolor so we can see what you are working on.

Thank you so much for stopping by and I hope you have a great weekend!
Thanks, team! We love these projects in lovely fall colors! The reds, oranges, and browns really pop in your cards!

We hope these cards have inspired your weekend creations!

Happy Stamping!

Saturday, December 16, 2017

Watercolor Weekend Roundup - Christmas Inspiration

Happy Saturday, Ai Fans! Our design team has been busy working on more wintery inspiration for you this holiday season! Please enjoy these fabulous, snowy projects from our Watercolor Guest Design Team! See something you like? Don't forget to "follow" them on social media to see more beautiful projects in your feed!

Dot Freel - Instagram - Blog - Pinterest
Hello Watercolor Friends, I'm busy making and sending Christmas cards. I made this one using the new 4961 - WC Mini Cottages Set. I used the new 4964 - WC Branches Set to make the trees. For the pinery I used the new 4867 - Foliage Set 2 and the bushes are from 4604 - the Chest of Flowers set. I used some Zig Wink of Stella to add glitter to the snow which doesn't photograph well but it is so pretty in person! I hope you have tried it. I used a Uni-ball Signo pen to add the snow to the sky and the smoke to the chimneys. Our next Watercolor Weekend will be in January so happy holidays to you all!


Tricia Kennedy - Instagram
I’d like to wish every a Very Merry Christmas and Happy Holiday Season from Arizona! My project for today’s Art Impressions Watercolor Weekend represents a little piece of where I live.

I wanted a tall saguaro-type cactus to feature Christmas lights, so I modified the barrel cactus from 4763-Southwest. Start by inking up about two thirds of the right two lines of the barrel cactus from 4763-Southwest and stamp near the top of your watercolor paper. Clean off the stamp and ink up the left two lines of the barrel cactus from 4763-Southwest and stamp next to the previous impression using your stamp positioner. Now you have the top of a tall saguaro-type cactus. You will complete the cactus in a bit. Next stamp the clay pot from 4763-Southwest roughly 1 ½ inches below the top of the saguaro-type cactus. Place a post-it note to mask off the pot and stamp the prickly pear cactus then the agave cactus from 4763-Southwest. At this point you can draw in the lines of the saguaro-type cactus down into the pot. Pull the color from the lines using your brush and water. Scribble a little 8 Violet and 72 Pine Greenonto your palette and add to the prickly pear cactus. Draw in the lines for the Christmas lights in a zig-zag pattern down the saguaro-type cactus using the fine tip of 18 Dark Brown. Draw little circles for the Christmas bulbs with the fine tip of 2 Red. Add shadow detail and needles to the cacti with 15 Olive Green and 72 Pine Green. Scribble 45 Sepia on your palette to add shadow detail to the pot. And on the pot, add line detail with 45 Sepia and 86 African Violet. Brush in the clouds using 60 Salvia Blue. The final step is to add glossy accents to each red bulb.
Marvy Le Plume II Markers: 2 Red, 8 Violet, 15 Olive Green, 18 Dark Brown, 45 Sepia, 60 Salvia Blue, 72 Pine Green, 86 African Violet
Other: Glossy Accents, Post-It Notes

Tricia O'Bin - Blog - Instagram - YouTube - Pinterest - Facebook

I stamped the snowglobe with African Violet. I used the Molotow art masking fluid to the snowglobe to create snow. Once the masking fluid was dry, I then pulled the color out of the lines along the outside of the globe. I stamped the base in Sepia. I added additional Sepia from the color palette. 

I stamped the snowy tree from the WC Tree Set inside the snowglobe with Pine Green. I pulled the color out of the lines. I added African Violet from the palette around the tree to create the snow shadows and over the masking fluid. 

Using the fir trees large fir top I stamped it a few times at the top in Pine Green. I added berries with the fine tip of the English Red marker. I also added a base underneath the globe with English Red from the palette.

Once the entire piece was dry, I removed the masking fluid and added some Wink of Stella to the white areas of the snow. I added some white gel pen to the tree for some additional snow.

I used the rectangle stitched die to cut the piece out and adhered it to a Pine Green card base.
Marvy Le Plume II Markers: 86 African Violet, 45 Sepia, 28 English Red, 72 Pine Green

Great work, team! Makes us want to get watercoloring our own cards right now! These are beautiful ideas for this year's Christmas cards - and beautiful for New Years or other occasions, too! Did you know you can share your projects with us on our Facebook Page, and also on Instagram with #AiWatercolor? We would love to see your cards any day of the year! That's a wrap for our last Watercolor Weekend of 2017, we can't wait to see you again with fresh ideas for 2018! Happy Stamping!


Saturday, September 2, 2017

Watercolor Weekend Roundup - Creating Projects Big and Small!

Hello, Ai Fans! It is the first Saturday of the month, so we are happy to share another Watercolor Weekend with you! We started this "twice a month" series in August, and our Watercolor Guest Design Team ( Dot Freel, Tricia Kennedy and Tricia O'Bin) is excited to share new projects with you this month! Find out what other projects they are up to on their personal blogs and Instagram!

Dot Freel - Instagram - Blog - Pinterest
Hello, I created this somewhat masculine scene with Art Impressions stamps from the set Southwest, the Rustic Container Set, the grass from the Foliage Set 1, and the Furries set. It seems I'm constantly needing masculine cards, probably because I'm married with three sons and three grandsons. I always make cards for my family and friends. I truly love making cards. If you have always wanted to try it, do it! Your friends and family will love getting your homemade cards. Mine sure do.

Art Impressions Products: 4763 Southwest, 4871 WC Rustic Container Set, 4051 WC Foliage Set 1, 4208 Furries, 4773 Acrylic Blocks, 4774 Stamp Positioner, #4 Brush
Marvy LePlume II Markers: 6 Brown, 19 Carmine, 45 Sepia, 72 Pine Green, 75 Sky Blue
Other Supplies: Tim Holtz Distress Watercolor Paper

Tricia Kennedy - Instagram
I’m excited to share my watercolor jewelry project with everyone today. I have two options – “Spring Flowers” and “Southwest”. This is Watercolor the Art Impressions Way on a very small scale – 1 inch to be exact!

For the “Spring Flowers” pendant, I started by stamping the long stem flower bunch from the WC Flower Set 2 in 55 Iris Purple and 15 Olive Green followed by the single long stemfrom the WC Flower Set 2 in 8 Violet, 13 Ochre and 15 Olive Green. Do not pull the color from the lines for any part of the flowers - just leave them as is. I then stamped the small grass from the WC Foliage Set 1 in Olive Green. I did slightly pull the color from lines on the grass by dipping my brush in water, but just a bit. The final step was to add dot detail in 55 Iris Purple around the flowers. 

Onto the “Southwest” pendant. I stamped the prickly pear cactus from the 4763 Southwest set in 15 Olive Green. I then stamped the single long stem, flower only, from theWC Flower Set 2 in 55 Iris Purple to make the cactus blooms. Do not pull the color from the lines for the cactus or flowers - just leave them as is. I put 15 Olive Green on my palette and added a few shadows onto the cactus. And, Salvia Blue on the palette for the clouds.

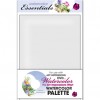
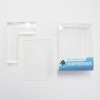
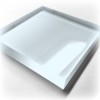
To complete both pendants, I placed a thin coat of Craft Fantastic Glaze onto the Craft Fantastic Glass Square. I set the glass square onto my watercolor piece, pressing it down so any excess glaze would ooze out the side. FYI, once the glaze touches the image, the glaze reacts with the ink just like water – that’s why I didn’t pull the color from the lines as I normally do - try not to move it. Remove any excess glaze around the edges of the glass with a cotton swab or toothpick. Let dry. I trimmed the watercolor paper from the glass piece by cutting right along the edge with my scissors. I placed a Craft Fantastic Jeweler’s Dot into the center of the Craft Fantastic Pendant Tray, removed the red backing and pressed the watercolor backed glass square firmly into the tray. I slid the pendant onto ribbon and voila a necklace.

Try this project and you, too, can wear your watercolor art!
Marvy Le Plume II Markers: 15 Olive Green, 55 Iris Purple, 8 Violet, 13 Ochre, 60 Salvia Blue
Other Supplies: Craft Fantastic Medium Square Pendant Tray, Craft Fantastic Medium Glass Squares, Craft Fantastic Jeweler’s Dots, Craft Fantastic Glaze, 3/8” Sheer Ribbon By Celebrate It 360 in white and pink

Tricia O'Bin - Blog - Instagram - YouTube
Hi, I am using the Stone Bridge for today's project for this Watercolor Weekend round-up. I just love these stone bridges, don't you? It reminds me of the one in Central Park NY. It can be used for so many occasions, just add a sentiment. Let’s jump right into how you can make this project as well.
I decided to create a stone bridge with rocks in a stream. The rocks are actually created with a stamp from the 2016 Exclusive set that is only available when you take an Art Impressions class. I love them and use them often.

I inked the Stone Bridge with #86 African Violet. I stamped it off a couple of times and re-inked it with #45 Sepia. This creates a nice grayish brown color for the bridge and rocks. After I softened and pulled the color out of the lines, I covered the bridge with a mask I made from a post it note.

The birch trees are inked with #45 Sepia and the tops of the trees are inked with #72 Pine Green. I added water to the outside edges of the trees to keep them white and used more water on the tops of the trees to create a background for the leaves. I stamped the leaves over the background to define them within the trees.

I added a bush of leaves on each side of the bridge in the #72 Pine Green. I added water and softened the leaves. I stamped the rocks into the stream using the same combination of #86 African Violet and #45 Sepia. I softened the lines and added some definition to the tops of the rocks. Once that was dry, I added the water using #60 Salvia Blue first, adding #36 Manganese Blue and finishing it off with #3 Blue to get a nice highlight.

I added the tiny grass to the hill on each side of the river using #15 Olive Green. To add a hint of sky I used a watered down version of #3 Blue from my palette.
Here is a close up.
This is such a fun project to do. I hope you will break out your stamps and markers and have a go! If you want to see me create this project, I will be posting the video soon so head over to my YouTube channel and paint along with me.

I hope you are inspired to watercolor this weekend. I look forward to seeing your creations.

Have a crafty day!!

Marvy Le Plume II Markers: 86 African Violet, 45 Sepia, 15 Olive Green, 72 Pine Green, 3 Blue, 36 Manganese Blue, 60 Salvia Blue
Other Supplies: Neenah Classic Crest Paper 110 lb, Post-It notes

What do you think, Ai Fans? Leave some comment love! We always look forward to reading what you like about our new roundup! Do you make your own watercolor projects? We would love to see them! Join in on any of our weekly challenges here on the blog, or show us on Instagram with #aistamps and #aiwatercolor so we can see your creations! Happy Stamping!

Wednesday, May 3, 2017

NEW VIDEO - Masculine Watercolor Card

Hello Ai Fans!
Welcome to a new and unique Watercolor Wednesday! This week, Bonnie created a western boot from our WC Rustic Containers set and perfectly paired it with elements from our Southwest Set. This is a great idea to create a masculine card for Father's Day or celebrating your favorite guy! Bonnie starts by stamping the main boot, pulling the colors from the lines and adding Tropical and Brown from our WC Palette. A quick mask with a sticky note, and she adds the cactus and surrounds it with rocks, both from the Southwest Set. Next, she adds some tall grasses from our Garden Wagon Mini Set and a couple buds to the top from our WC Flower Set 2. For the final touch, she uses the tiny grass from our WC Foliage Set in Sepia to set the rustic look. Bonnie colors in the sky and ground from the WC Palette and finishes this quick project!

We hope you enjoy this week's video and if you like this masculine-themed watercolor, make sure to give us a "thumbs up" over on YouTube so we know to create more! You can also subscribe to our channel, our subscribers are always notified first when new videos are released! Take care and we will see you next week!


View on YouTube: https://youtu.be/hWTaXgY031U