Enter your crafty project below. The challenge isn't limited to cards.
✻ Please make a new card or handmade crafty creation. You can make any item you wish; this is not limited to cards!
✻ Limit two submissions per person. You will receive extra votes if you use Art Impressions stamps!
✻Please include your first name and last initial on your submission.
✻We love to comment on your entries, but keep in mind if you use a private group or a platform that you need to sign up for, we probably won't be able to.
✻ The Ai Challenge is open to everyone, international submissions are welcome!
✻ Include a link back to the Ai Blog or grab our button on the top right of our sidebar!
✻ Share the Ai love if you can, by clicking and commenting on your fellow crafters.
✻ Make sure to get your link up by the deadline to enter your creations.
I have two cards for you today that were inspired by the "Birds of a Feather" challenge (see the Bi-Weekly Challenge tab above for more details). Both cards feature the #5367 - Birdcage Dies, the #5892 Easter S2 paper pack, the #5817 Potting Garden Shed plus several others.
Let's take a look at the first card.
Friendly Blue Birds:
I first stamped several of the birds using Memento Black ink on cryogen white cardstock and colored with copic markers. I die cut each of the birds out with the coordinating dies that come with the stamp set. Using a few of the sheets from the #5892 Easter S2 paper pack, I die cut the birdcage and also hand cut a backing for the birdcage. I made the frame by cutting individual leaves (including the leaf from the #5591 Journal Rectangle Frame) from white cardstock and layering behind the arch frame. The pattern paper behind the arch frame and the gingham paper are from the Easter S2 paper pack. The sentiment is from the new stamp set #5817 Potting Garden Shed. The arch frame and other leaf dies were from my stash.
Love Birds:
The patterned paper background and the birdcage die cut is from the #5892 Easter S2 paper pack. I just love the Art Impressions paper packs. Double sided, strong and soooo pretty. What's not to love?
I began by stamping the tree branch from #5034 Tree Twist Ties, leaves and birds from #5100 Woodland Tree Cubbies with Memento Black ink onto cryogen white cardstock and colored with copic markers (see list below). The tree branch was stamped at the top of a 4" x 5" piece of cryogen. I very lightly inked clouds into the sky around the tree branch to minimize the white space. I stamped several of the leaves onto the branch and several I stamped, colored and die cut to place around the other leaves to add dimension. I stamped and colored a poppy from the #5273 Poppy Border stamp and fussy cut it to place at the bottom of the frame along with two of the leaf springs from the #5591 Journal Rectangle Frame. Lastly I stamped the words "Love" and "Friend" from the #5817 Potting Garden Shed stamp set and die cut with the #5132 Tag Stitched Die. I attached the word tags to the birdcage with a safety pin.
I hope you enjoy my cards today and decide to play along in the current blog challenge "Birds of a Feather" for a chance to win a free stamp set.
It's the first of the month which means it's time for a new Guest Designer Challenge here at Art Impressions.
This month it's Anchors Away!
We know so many of you are coming into summer season and will be spending lots of time at the beach, on boats, at the lake etc.
We want to see your nautical cards.
Show us your boats, lighthouses, anchors, docks, beaches, port holes, seagulls, pelicans, lakes, ponds etc.
Before we see what our amazing Guest Designer Diana Sheely made to inspire you,
let's see who won our Say it with Sentiments challenge.
Debbie Hedges!
She will be our Guest Designer in June. We've all admired Debbie's work for many years and can't wait to see what she shares with you.
Debbie, please contact Leah at Feedback@artimpressions.com to claim a free stamp set of your choice and she will give me your email address so that we can begin brainstorming for our June challenge when you will be our Guest Designer!
Now for our Lucky Random Winner of my Exclusive Mouse Freebie from 2021.
Congratulations #6 Terry C.
Please contact me at Renee@artimpressions.com to claim your free stamp. If you already have the mouse, I have others to choose from.
Now let's see what Diana has created to get your nautical gears turning...
Hi. My name is Diana, and I was super excited to find out that I had won the Timber themed Guest Designer Challenge. I have been doing Ai Watercolor for several years, but I still struggle with my self confidence in coming up with my own designs. I do pretty well CASEing someone else's project and tweaking it to make it my own, but designing my own projects is still a stretch for me. After Renee told me the theme for May, I spent quite a bit of time trying to figure out what I wanted to make, then all of a sudden, an idea came to me, and this is what I created.
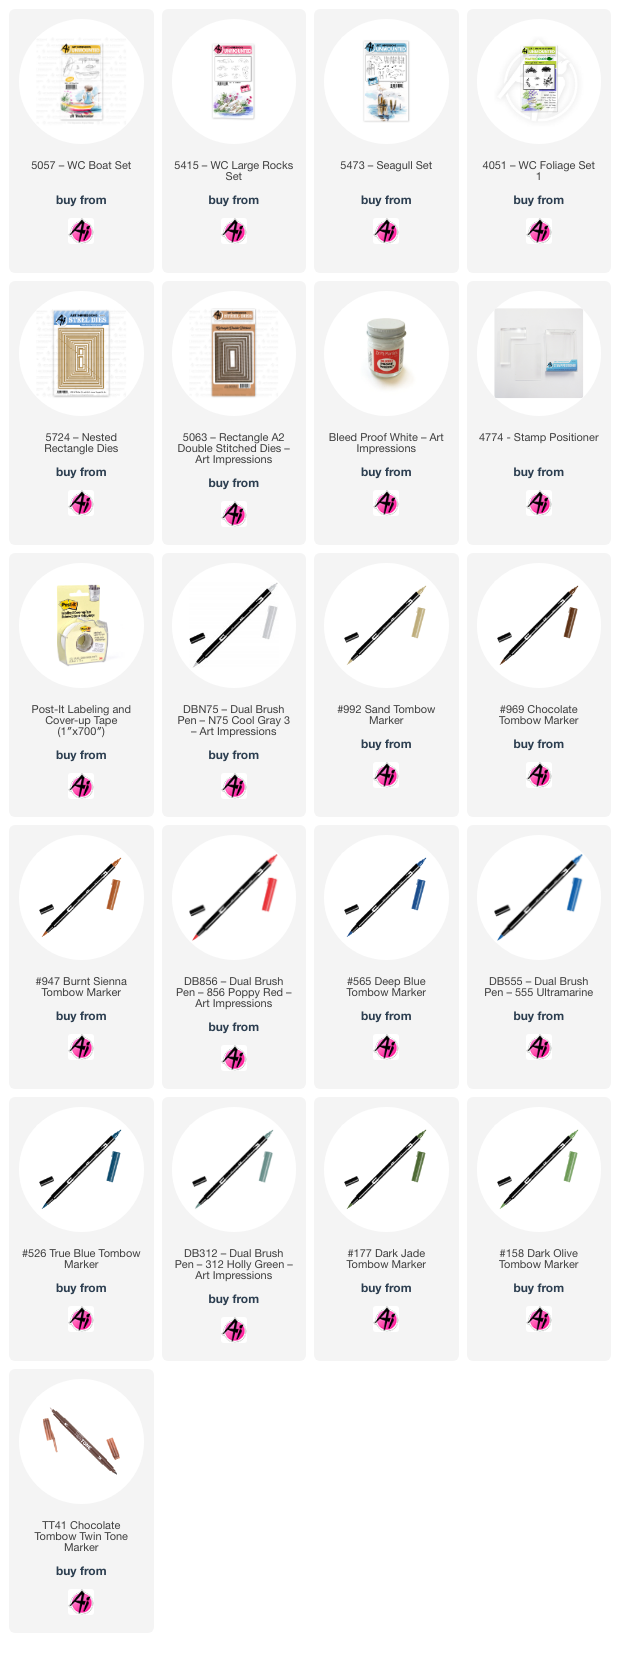
Mask a 4" x 3" rectangle with Post-it tape. (I used the 4th largest nested rectangle die as my template). Use a stamp positioner to stamp the boat (inked in 565 & 969) at an angle in the lower right corner. Ink the dock in 565 & 969 and stamp off once and stamp on the left side so front corner of dock is next to the back corner of the boat. I used a stamp positioner to stamp the Freebie Cat (inked in 565 & 969) on the dock. Use a pencil and ruler to draw the horizon line and also to draw the shore line by the dock and boat (see photo). Pull color out of the lines on the boat, dock, and cat. Use a #4 brush, and color the bottom stripe on the outside of the boat and the top of the hull in a combination of 158 and 312. Add the red stripe with 856. The oars were done in 947, the floor of the boat in a combination of 947 & 969, and the inside of the boat was done in 565. I used the brown twintone to color the oar holders and add a few lines back into the boat. I mixed a combination of 565 and 969 for the dock, making sure the back legs were darker. Again, I added some detail back in with the brown twintone. The cat was painted in several layers of N75, with 856 used for the ears, cheeks, and overalls. His bucket was painted with 312. I used a pencil to darken the eyes, nose, and to add back other details.
The rocks were inked in 969 with 565 on top, and stamped off several times. They were added at the base of the dock and along the bottom of the right side of the card. Color was brought out on the bottom of the rocks, and then more color was added using a combo of 969, 565, and 158. I used 992 for the ground/sand. Once the sand was dry, I added a blue line under the boat for a shadow. The water is a combination of 555 & 565. I started at the horizon line and did horizontal lines across the paper, making sure I had enough water. I made sure the water was darker under the dock for the shadow. Once the water was dry, I stamped the tiny grass in 177 along the shore and bottom of the card. I used my #1 brush to pull the color out of the grass. I used 526 for the sky so there would be a contrast with the water. I used the stamp positioner to stamp the little sailboat on the horizon. I used N75 to ink the sailboat. I colored it using my #1 brush - 565 on the bottom of the boat, and 856 to make the stripes on the sails. The seagulls were inked in 565 and stamped in the sky once it was dry. Lastly, I added some waves to the water using Dr. Ph Martin's Bleed Proof White paint.
Once the Post-it tape was removed, I erased any pencil lines that were still visible. I die cut the painting with the 4th largest of the nested rectangle dies. The mat was die cut using the 2nd largest of the stitched rectangle dies.
Sets used:
5057 WC Boat Set EX5583 Freebie Cat 5415: WC Rocks Set 5473: WC Seagull Set 4051: Foliage Set
Supplies Used:
Tombows: 158, 177, 312, 526, 555, 565, 856, 947, 969, 992, N75, and Brown Twintone
Ai Nested Rectangle Dies Ai Stitched Rectangle Dies Stamp Positioner Post-it Tape Dr. Ph Martin's Bleed Proof White Paint
For as long as I have duplicate stamps I will choose a random winner. These will be for U.S. residents only since these will be mailed by me personally and not Art Impressions.
This month I have the EXW5540 Raccoon Freebie from 2022. You will be automatically entered to win when you upload your project to the challenge.
Good luck everyone!
Here is the fine print:
✻ Please make a new card or handmade crafty creation. ✻You can make any item you wish; this is not limited to cards!
✻ Limit two submissions per person.
✻You MUST use Art Impressions stamps or dies! You may use other companies products but the main focus should be on Ai items.
✻If you win, you will receive one free stamp set of your choice. In return you will create a brief write up explaining how you made your item and email it to me. (Reneé) and you will mail your project to Art Impressions at your expense. (cheapest method possible is fine) International winners may submit photos through email. We will share your creation on Art Impressions social media.
✻Please include your first name and last initial on your submission.
✻We love to comment on your entries, but keep in mind if you use a private group or a platform that you need to sign up for, we probably won't be able to.
✻ The Ai Challenge is open to everyone, international submissions are welcome!
✻ Include a link back to the Ai Blog or grab our button on the top right of our sidebar!
✻ Share the Ai love if you can, by clicking and commenting on your fellow crafters.
✻ Make sure to get your link up by the deadline to enter your creations.
Today we will be using the brand-new stamp set from the Art Impressions Village Series! This set is called the Ai Village Vehicles Set (5889) and includes several little trucks, cars and even an airplane which will coordinate perfectly the new FREEBIES! These new FREEBIES include several different village houses/shops including a schoolhouse, cafe, hotel, candy shop, bakery and pet shop. Here's the fun part ...there are three add-on sets that will coordinate with these FREEBIE stamps. The Village Vehicles (5889) which we will be using today and also the Village Accessories (5890) and the Village Signage (5891).
These FREEBIES will be free with each $30 purchase and the add-on sets can be purchased as a bundle or individually. The bundle set will be at a discounted price!
We are going to use the little vehicles in a unique and different way to create a fun Graduation or even a promotion card!
Let's begin by stamping and coloring in all of the vehicles using the Zig Clean Color Real Brush Pens in the following colors: Blender, Lemon Yellow, Yellow, Orange, Geranium Red, Lt Green, Dk Green, Haze Blue, Aquamarine Blue, Blue, Cool Gray 6, Lt Gray.
We can then use our detail scissors to cut these out leaving a little bit of a white border all the way around.
Next, we can create the background panel by die cutting a circle from some white cardstock which has been cut to 5 1/4" x 5 1/4". We can use the Ai Nested Circle Dies (5726) and center this circle die on the square panel.
Let's then create a pretty sunburst background using a Sunray Background Stencil and some Distress Oxide Inks in Squeezed Lemonade and Abandoned Coral. We will stencil half of the panel and then turn the stencil and complete the other half to create a complete circle sunburst!
Now let's stamp a globe and then color and die cut it using that same circle die set. We will also add some Wink of Stella Clear Glitter Pen to the water on our globe!
For the card base we will use a pretty Arctic 100lb Cardstock. This card will measure 5 1/2" x 5 1/2". We can temporarily position the frame and the globe so that we can add a sentiment from the Ai Graduation Set (5277) to the front of the card that will say "You're really going places!". We can cut the stamp in half so that we can position the sentiment on a curve right above the globe.
Now let's do a quick assembly of the card and pop-up the vehicles in a circle around the globe and sunburst. I also added a few vehicles on the inside of the card along with another sentiment from the Ai Graduation Set (5277) which says, "Look out world!".
For a finishing touch, let's add a pop of color in Sunshine for a bit of dimension and .... don't tell anyone .... to also cover up a little smudge that I had!
Thank you so much for joining me today! Have a fun and crafty day!!!
I've got a card to show you today that fits perfectly with our blog challenge that's going on right now "Birds of a Feather". I used the Birdhouse Cubbies Set along with one of several sentiments that comes along with this set. It also includes the dies! I stamped the images onto cryogen white paper and colored them with Copic markers which are listed below. I thought the Easter S2 paper pack went with these birds perfectly. Art Impressions has such an amazing assortment of gorgeous papers!
Thanks so much for stopping by for a visit today, and until next time - stay crafty!
This weekend I have 2 cards that would be perfect for a child's birthday. My grandson turned one year old last month and I had him on my mind as I created these 2 cards.
I used one stamp set, #5400 Baby Critters and one paper pack, #5873 Mini Birthday for both cards. I challenged myself to use different patterns from the paper pack to layer and add dimension. I had a lot of fun using dies and a paper punch to punch out the circles and add details. For each of the cards I started by stamping all of the images on watercolor paper and then painting the images with the following Tombow markers: 312, 879, N55, N45, N35, 772, 603, 401, 569, 526, 026, 817, 177, 977 and 969. Then the images were die cut using the matching dies from the stamp set and these critters are so cute! When I assembled these cards I used decorative dies from my supplies. On the giraffe card I popped up the bird using dimension dots to give more depth, and I did the same on the tiger card for the pink balloon.
For this tiger card I did the same as the previous card but I added glossy accents to the balloons to give a nice sheen. If you are struggling with layouts for your cards I encourage you to look on the internet for layouts that you can incorporate many different patterns of paper from one paper pack. I know for myself I tend to only use maybe one or two and this was fun creating with a lot of different designs. Al
Thank you for taking the time to checkout my creations and as always, please ask me if you have any questions. I hope everyone is having a great weekend and enjoying the spring weather!
Hi everyone! Are you a golfer or know someone who its? I love golf. As it happens, my city will be hosting the Wells Fargo Tournament in a few weeks. I get to go for a day and I can't wait! I am celebrating by making a card in anticipation of a great time watching golf. The images I used for this is from 4902 Par-Tee Golfers Set. I couldn't resist putting the name of the golf club on the cart in honor of the tournament. Adding special touches like this are one of the things that I think make card making special!
To make this card, I stamped the golf cart with the man, the hole with the flag, and the ball on a tee and colored them with Copic Markers. Then I sketched and colored the stone path. All it needed to suggest the golf course were some sprigs of grass made from a stamp in 4051 - Foliage Set.
The panel is 4 1/2". The mat is 4 3/4" and I the card base is 5" square. Once I had the layers in place and attached to the base, I heat embossed and cut out the sentiment on matching cardstock. Once it was attached, the card was complete!
Thanks for stopping by today. I truly hope my card gives you some ideas of your own. Please visit the store to see all the things you need for your card, journal, and tag making projects. Have a GREAT Saturday!
Tasha here sharing a new masculine card created with the fun 5406 - Mr. Set. This stamp set includes several hats and accessory items to customize your card or project, but this handyman outfit is so cute for a birthday card or Father's Day card.
For the card, I stamped the main image, hammer, tool belt, and hat before using the included dies to cut the images out. To create the cap, I stamped the hat with antlers and just cut the antlers off. My husband loves to wear hats and this guy totally reminds me of him when he is about to tackle a home project.
The greeting "Nailed It!" was also included in the set and I embossed it directly on to the wooden floor. The white color pops against the dark brown. I love embossing white lettering on projects.
Lastly, I created a background with brick pattern paper and used markers for the floor. I also attached layers of black paper, brown paper, and bright green paper to coordinate with the colors used on the man's outfit. I think this card turned out great and look forward to making more cards with the 5406 - Mr. Set.
Hope you enjoyed today's card and are having a wonderful day!
Now let's see what Lynn has created to help inspire you.
She's our Featured Artist for this challenge and she has a beautiful
card to share.
Watch video tutorial here!!!
Today's feature card was inspired by the current Ai Blog Challenge called "Birds of a Feather" which is to incorporate a bird or birds on your card or project!
I thought it would be fun to create a scene where the Ai Floral Truck Set (5511) would look like a little pop-up floral shop. So, let's begin by stamping the images from this set, as well as a few birds from the Ai Birds and Bugs Set (5561), and a pretty topiary from the Ai Front Porch Garden Set (5486). All of the coloring today will be done using the Zig Clean Color Real Brush Pens in the following colors: Blender, Yellow, Bright Yellow, Lt Pink, Peach Pink, Lilac, Lt Violet, Deep Red Grape, Deep Vermillion, Deep Red, Lt Gray, Gray, Cool Gray 6, Beige, Mid Brown, Haze Blue, Lt Blue, Cobalt Blue, Persian Green, Blue Gray, Dk Agate, Lt Green, Green.
To ground the scene, we will be stamping a pretty brick walk. Once the brick walk is stamped and colored, we can add a pretty sky by ink blending some orange and yellow inks!
Next, we can assemble the card, popping up some of the items for added interest and dimension. Don't forget to add those adorable little birds and bees! To layer up the card we will use some pretty polka dot paper from the Ai Easter S2 Paper Pack (5892).
We can also add some baker's twine and tie a bow at the top of the card! And as you probably already know, I have been trying to complete my cards by adding a sentiment and an interesting element to the inside of the card. For this card, I added a sentiment from the Ai Mrs. Set (5405) which says, "Wishing you every Bloomin' Thing!" and another cute flowerpot as well as a little bee!
Please check out the entire Front Porch Series for lots of little elements that can be incorporated into your scene cards and also the Rides Series which includes this floral truck as well as a Birthday Buggy, Christmas Truck, Spooky Wagon and some sweet add-ons!
Thank you so much for joining me today! Have a fun and crafty day!!!
Thank you Lynn for this amazing tutorial and gorgeous card.
I'm sure everyone will be inspired by your art.
Enter your crafty project below. The challenge isn't limited to cards.
✻ Please make a new card or handmade crafty creation. You can make any item you wish; this is not limited to cards!
✻ Limit two submissions per person. You will receive extra votes if you use Art Impressions stamps!
✻Please include your first name and last initial on your submission.
✻We love to comment on your entries, but keep in mind if you use a private group or a platform that you need to sign up for, we probably won't be able to.
✻ The Ai Challenge is open to everyone, international submissions are welcome!
✻ Include a link back to the Ai Blog or grab our button on the top right of our sidebar!
✻ Share the Ai love if you can, by clicking and commenting on your fellow crafters.
✻ Make sure to get your link up by the deadline to enter your creations.